Quilling - papermaking skill. Workshops for Beginners Step by Step (165+ Photos)
")
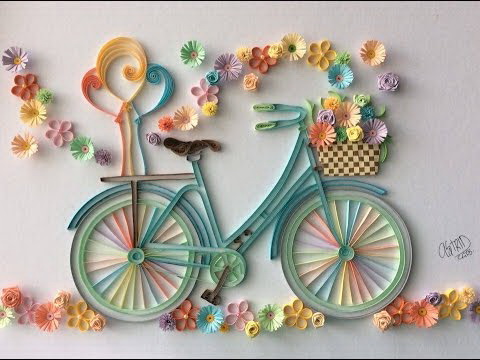
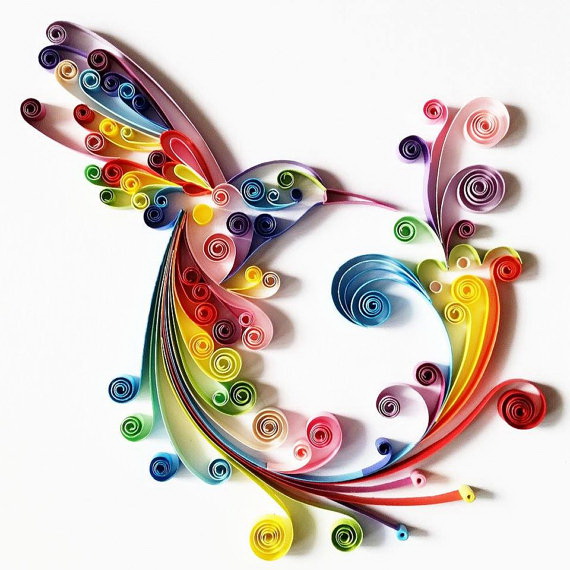
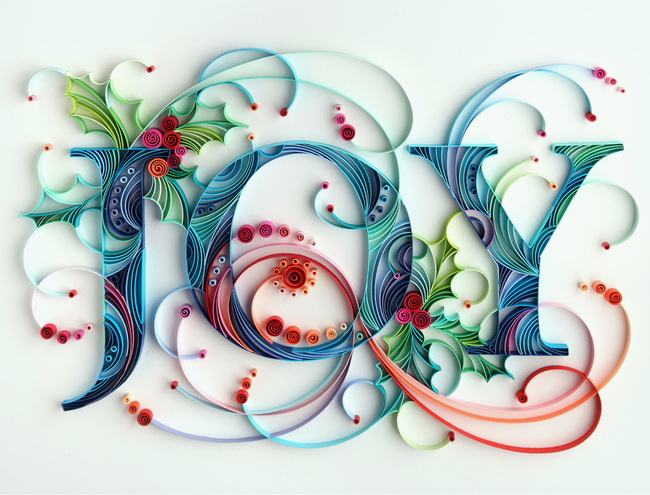
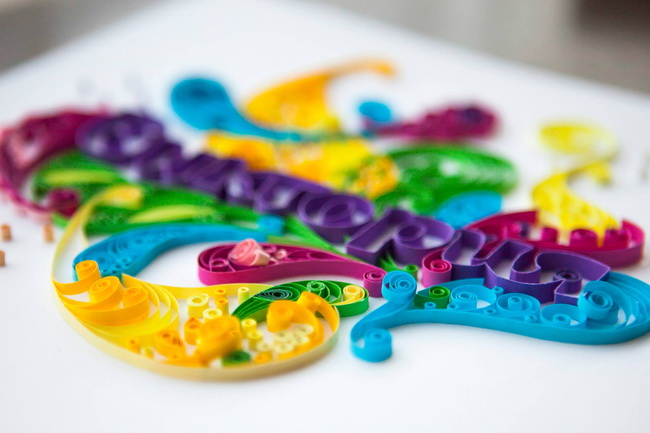
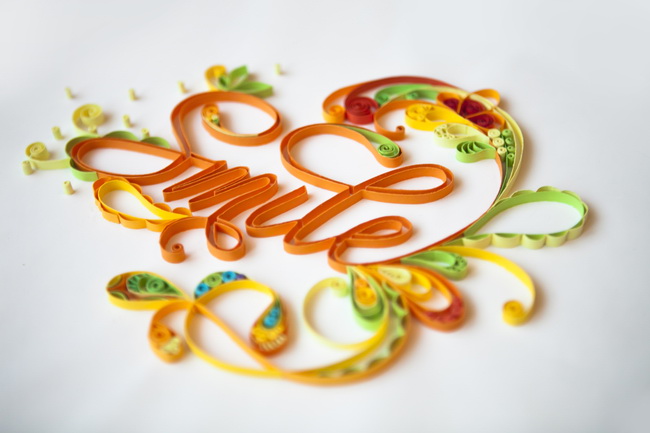
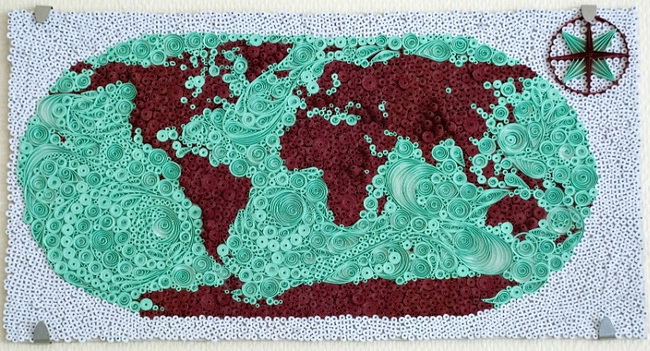
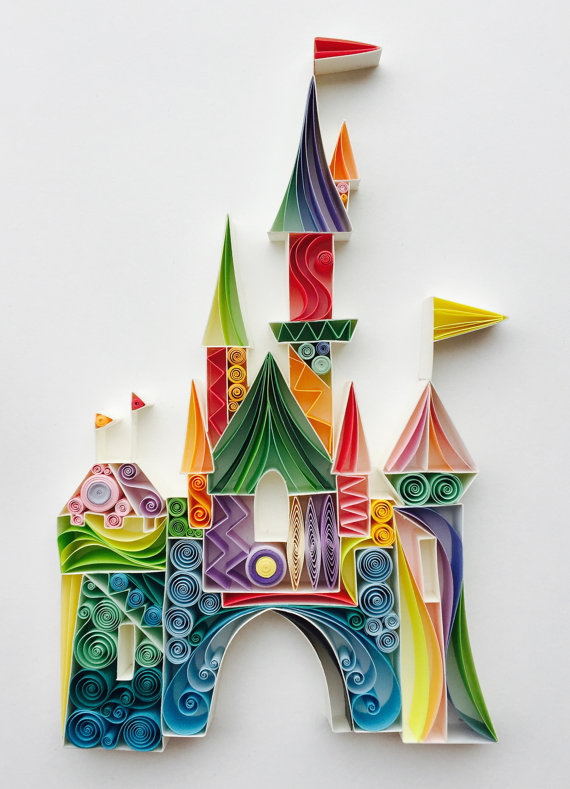
Quilling - the word is not familiar to anyone. And this means it is the manufacture of figures from paper twisted into spirals. Is it really that simple and easy to do? A variety of options will surprise you.
Content:
.Next, I will tell you how to make beautiful things out of ordinary paper. This kind of activity will help you to brighten up long winter evenings or to make a beautiful thing with your own hands and give it to your beloved (s). And maybe after my lessons, he will become a hobby for you and will even bring a small income.
But in order to understand what it is, to find out who thought it up, let's dive into the history of quilling.
A bit of history
This art form was coined by monks in Europe in the Middle Ages. When they cut off the edges of books with gilding and wound them on the ends of the feathers of birds. Thus it turned out something like a golden thumbnail.
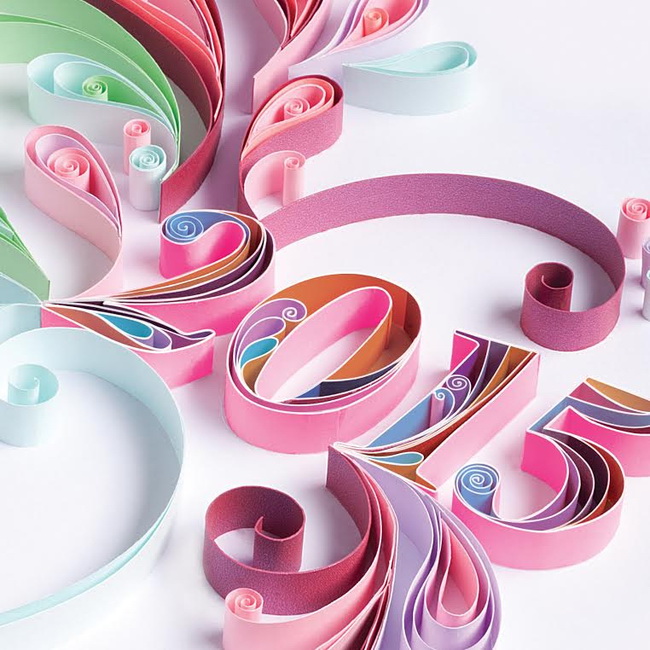
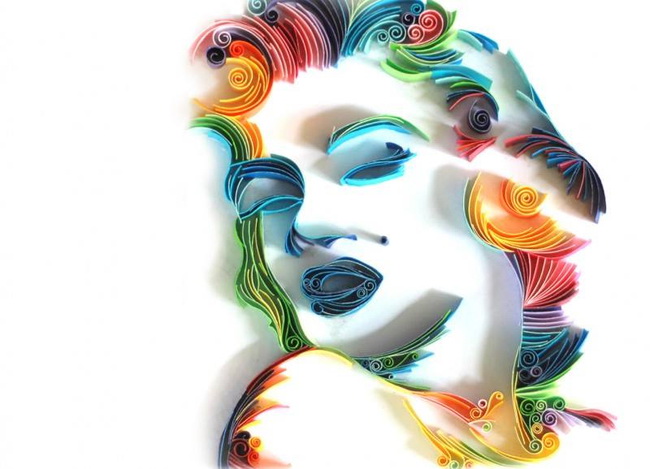
Making figures out of paper twisted into spirals
Hence the name quilling. From the English word "quill", which translates as "bird feather." At the very beginning, they were engaged in poor churches, especially in the 19th century, quilling was a favorite occupation of noble ladies.
In the twentieth century, he was forgotten. And at the end of the last century, quilling began to return to people's homes as a hobby.
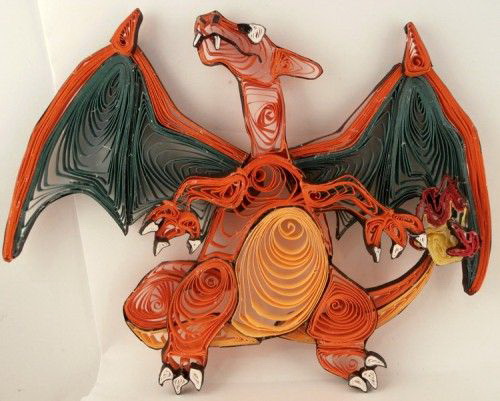
As a result of his walking around the world, began to form their own schools in each country. And every nation brought something to its own in this kind of art. For example, Eastern schools differ from European ones in the complexity of patterns, which allows Eastern people to create masterpieces of art.
The art form was coined by monks in Europe in the middle ages.
Therefore, few of us know the details of this art form. I will introduce you to the basics of this type of art, give advice, give examples and try to give you all my knowledge. Let's start with the basics.
But before you begin to engage in this kind of creativity you need to prepare. That is, to purchase the necessary tools for the job.
return to menu ↑List of required tools
Below I have given a list of required tools, if we want to create all beauty from paper.
- Long and narrow colored strips paper.
- Glue.
- Small scissors.
- Core for the rolls of rolls.
- Tweezers.
- Officer line. If not, then the pattern of paper coated grid and radii.
You can not spend on the purchase of sets for quilling. And make the necessary tools from home appliances.
This beauty is not costly
Now, knowing and keeping next to us the tools that we need, we can move on to learning the basics of quilling.
return to menu ↑Quilling basics for beginners
Production of paper products from a drawing begins. In this kind of art, drawing is a scheme according to which in the future an unusual craft will be made that can bring a bit of brightness and unforgettableness to your interior. To begin with, we will look at how simple schemes are drawn and which of them make magic crafts using the example of making snowflakes.

A wonderful gift with your own hands
We will need:
- Pencil.
- Color paper.
- Scissors.
Now take the A4 paper and fold the sheet so that it is a right triangle. Cut off unnecessary excess part and fold three times. Then we draw patterns on it and cut them out.
When we have mastered the initial and simple technique of making crafts, which we have discussed above, we turn to more complex ones. Let's learn how to make rolls. He is the main element in the technique of quilling.
Appetizing work of art
We will need:
- Color paper.
- Pencil.
- PVA glue.
- Scissors.
Roll Bar
At the very beginning, it is necessary to outline with a pencil the future composition on the blank for a greeting card or the place where this product will be located at the end. The next thing we need to do is roll. To do this, we need to take a thin and long strip of paper and wind it onto a specially prepared rod.
After this, we have to let the roll bloom. The end of the roll must be carefully glued to the spiral, which turned out. Now you can give any kind of roll, be it a drop, a heart or a month.
Decorate any home
Sold a special paper for quilling. Use it better.
And so we got to the main elements of quilling.
return to menu ↑Main elements
Now let's look at what parts are creations in quilling. Any work begins with tight spiral. This is the first element in quilling when preparing a product.
Above, when we did roll, in fact we used this element. But then we did not know its true name. Now we know that.
Beautiful heart
- If you are right handed, you need to hold the strip with your left hand, and the rod with the right.
- If the strip is double-sided, then the back part of it should face the rod.
- The rod must be rotated clockwise.
Now we have learned how to create various kinds of spirals. The “curl” figure is created using the same technology. But at the end of the work, the tip of the paper tape does not stick and hangs freely in the air.
In this technique, you can perform any name.
Well, we have considered simple forms of quilling. Now it's time to move on to more difficult ones. Such forms are obtained from two or more folded together.
return to menu ↑Complex forms in quilling
The complex element "horns" is created from two "free spirals" twisted in different directions.
For him, take a long strip of paper and breaks in half. The right side is wound in one direction, the left - in the opposite direction. Such an element can be attached to a fun greeting card.
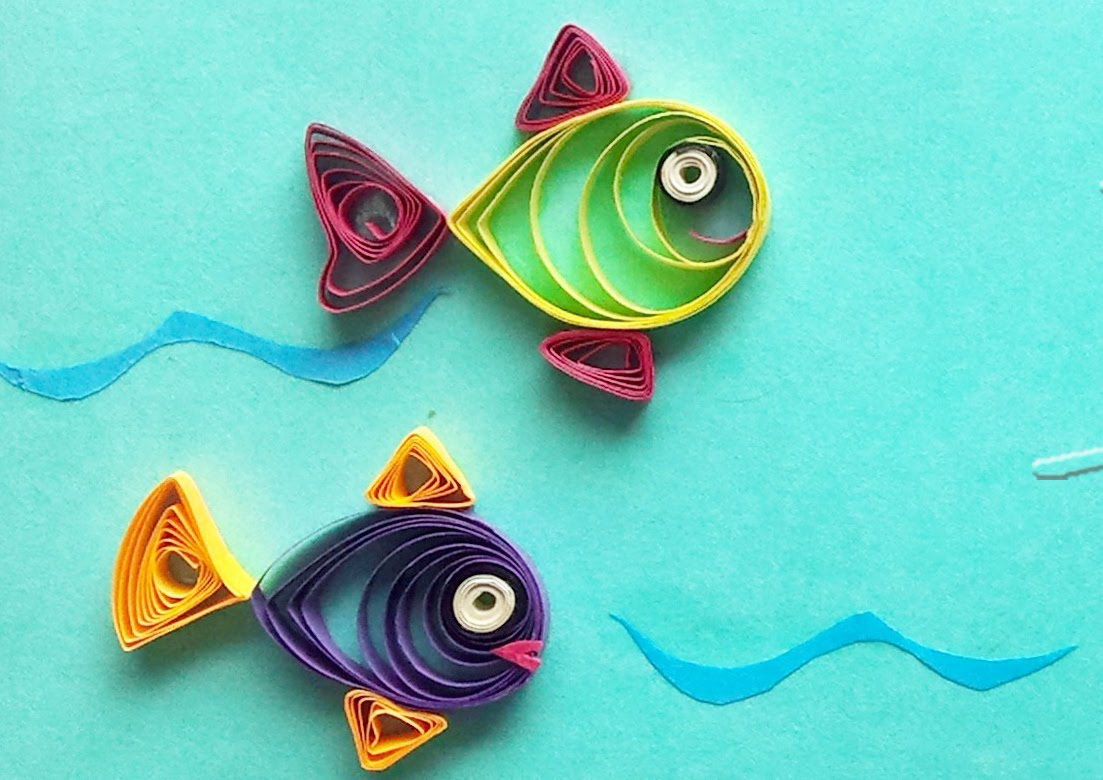
Underwater theme - decorate the house near the sea
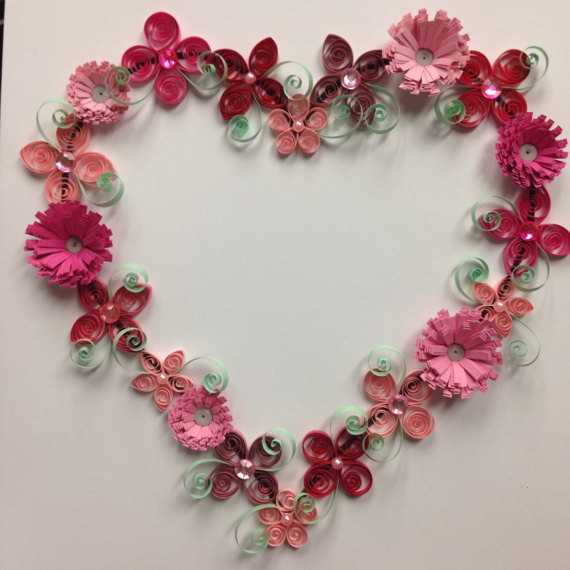
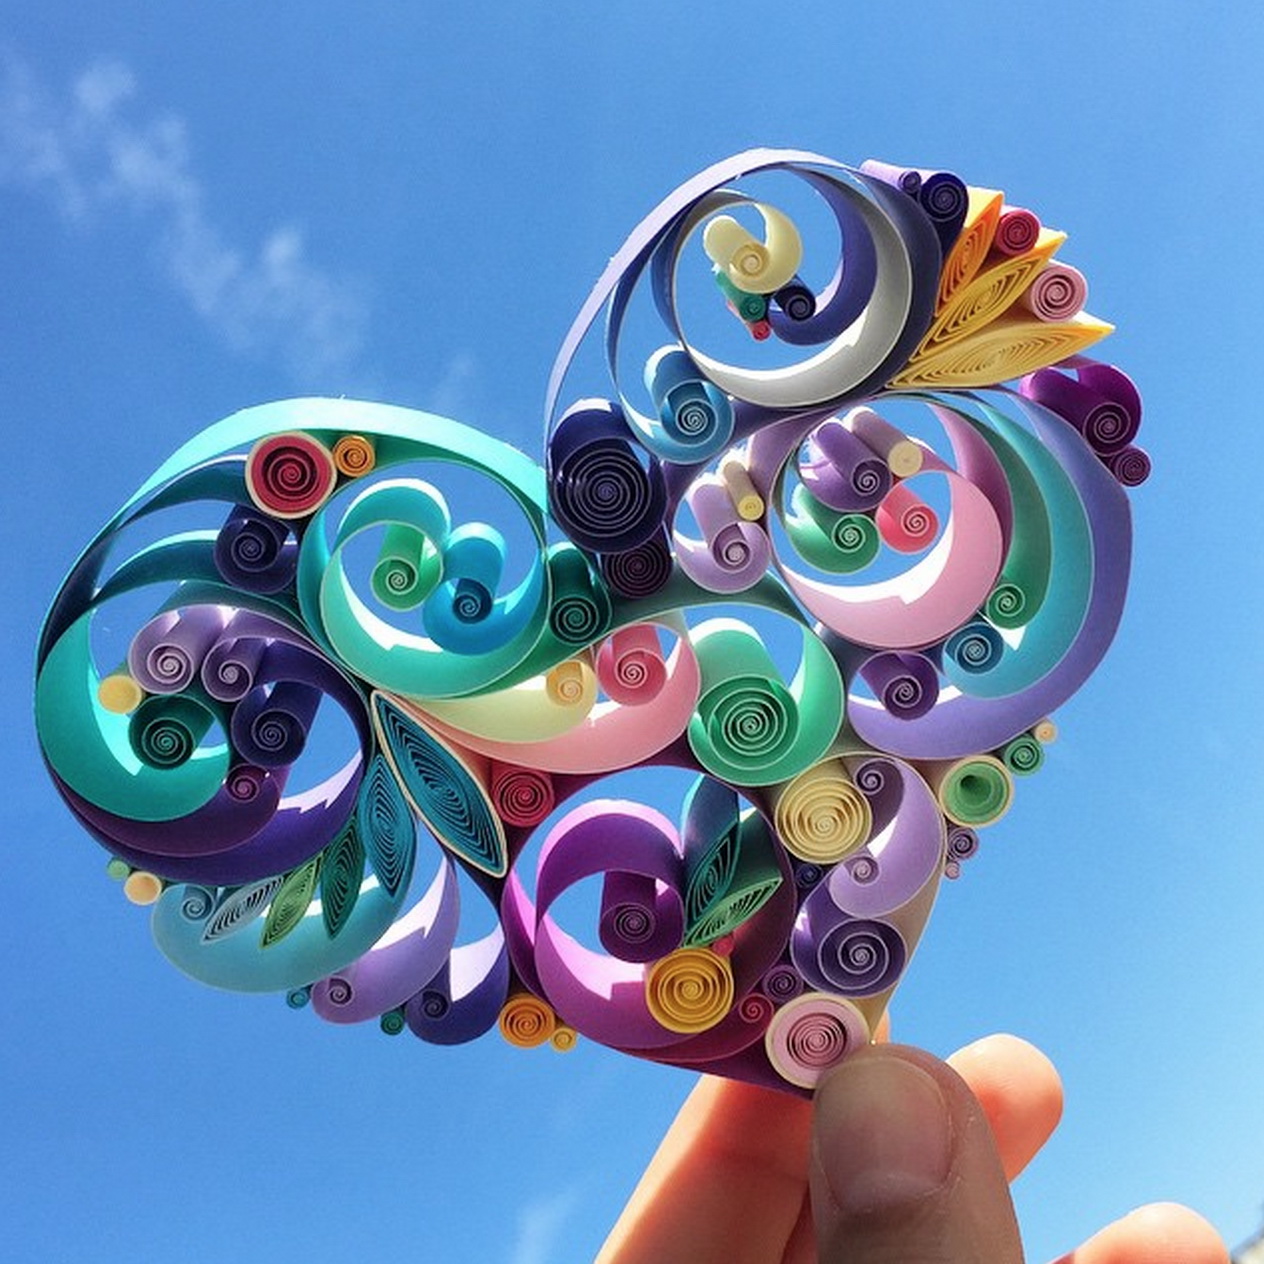
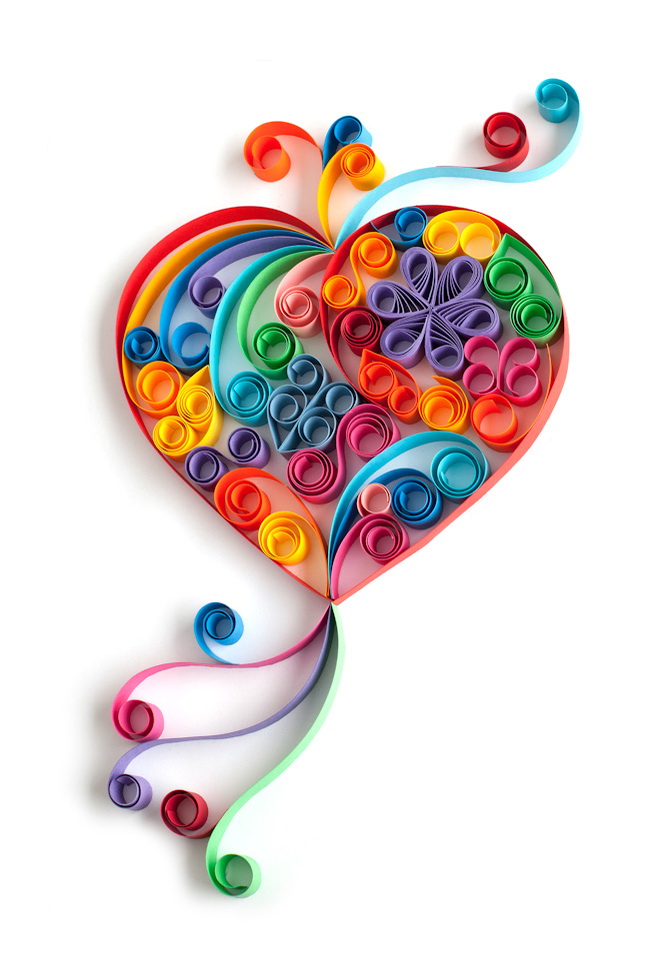
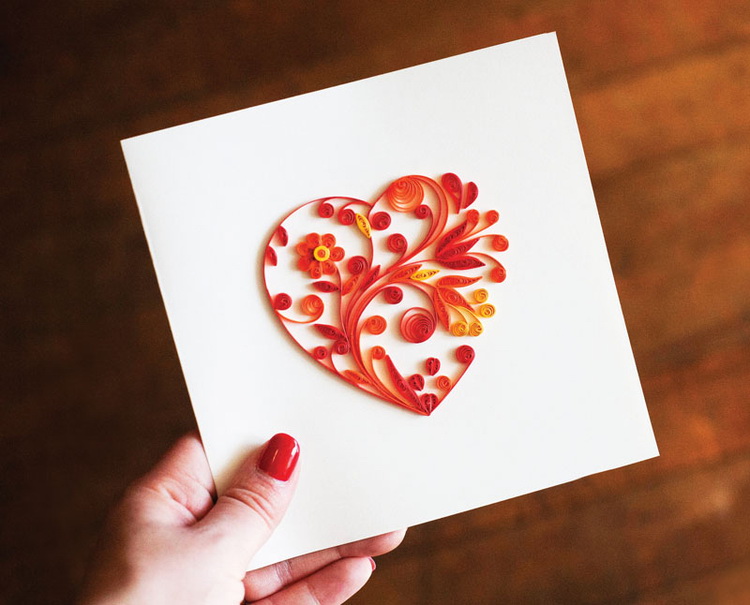
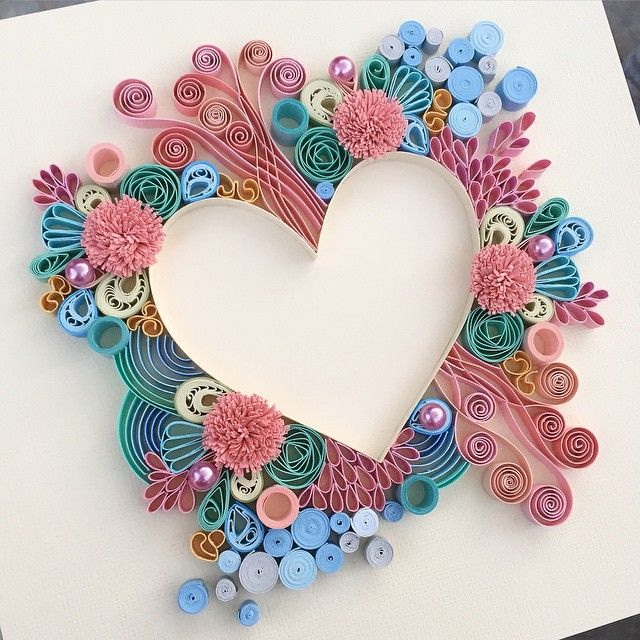
The next figure will be the "heart".
It is done in the same way as the "horns". Only the directions in which spirals wind in change. And the junction is clamped with your fingers. This type of product is ideal for decorating a gift for your girlfriend or spouse.
The next in complexity will be the “crescent”.
It is made from a simple form of "eyes" only opposite corners are bent up. It turns out something like the letter "C". For the form, which in psychology denotes a leader, namely, for the triangle the “free spiral” is taken. Then it is compressed in three parts with fingers and held for some time.
The next element is obtained from the shape of a triangle.
For this it is necessary to bend two opposite sides to the center. And we get "legs". For the manufacture of the form "square" I take the "free spiral". Then squeeze it in four parts, so as to get a square.
Suitable for decorating a child
So we got acquainted with the basic forms of products in quilling. And now we know what tools we need for this kind of creativity. And we have a certain base, which will allow us to proceed to the creation of more complex products.
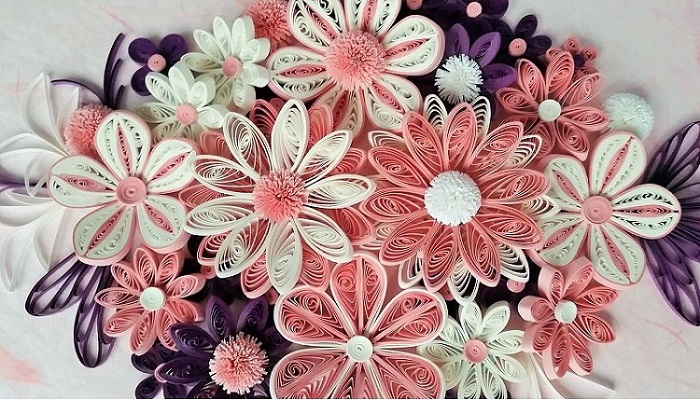
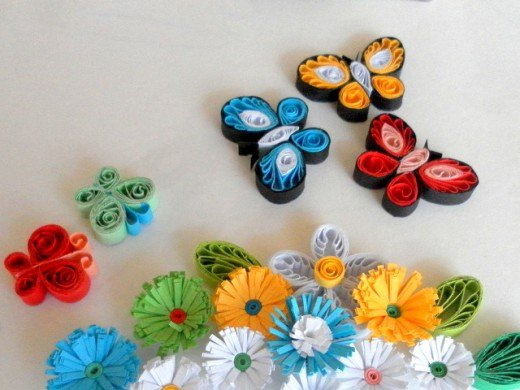
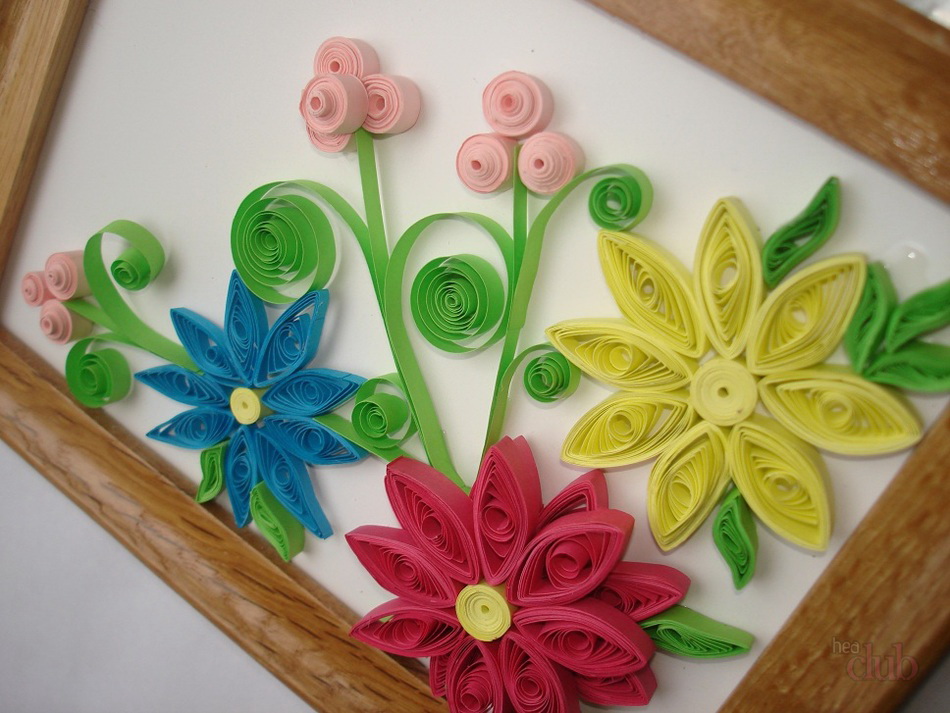
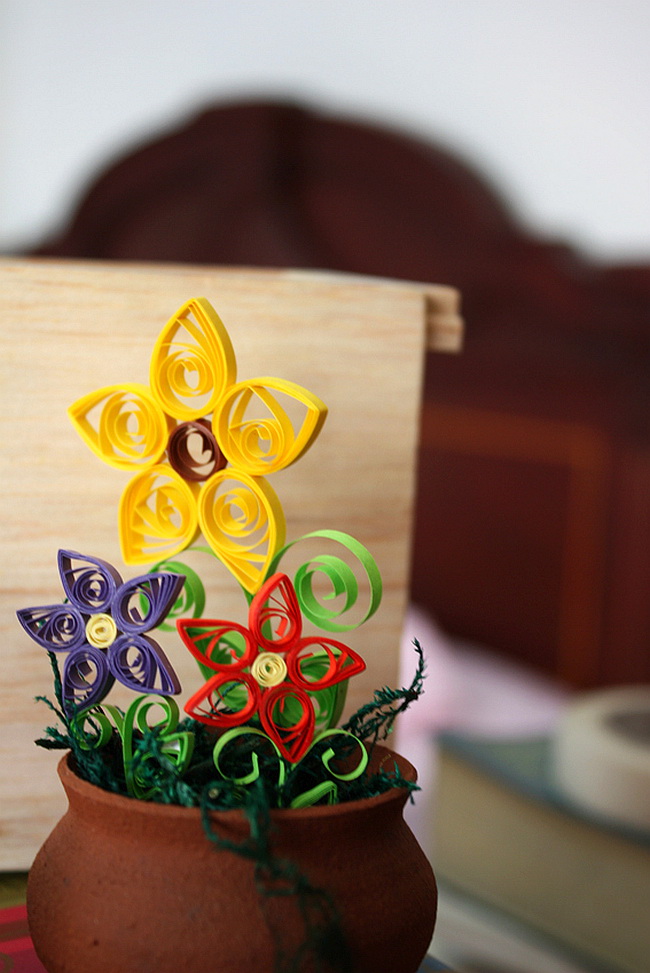
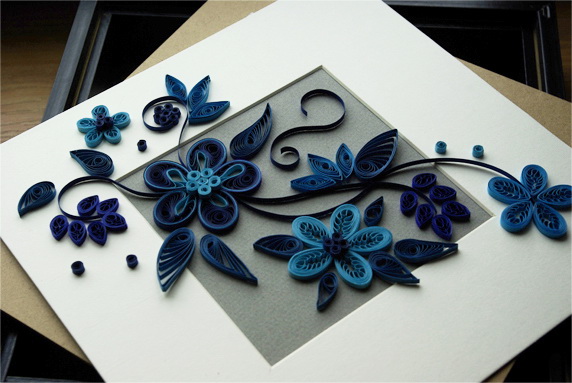
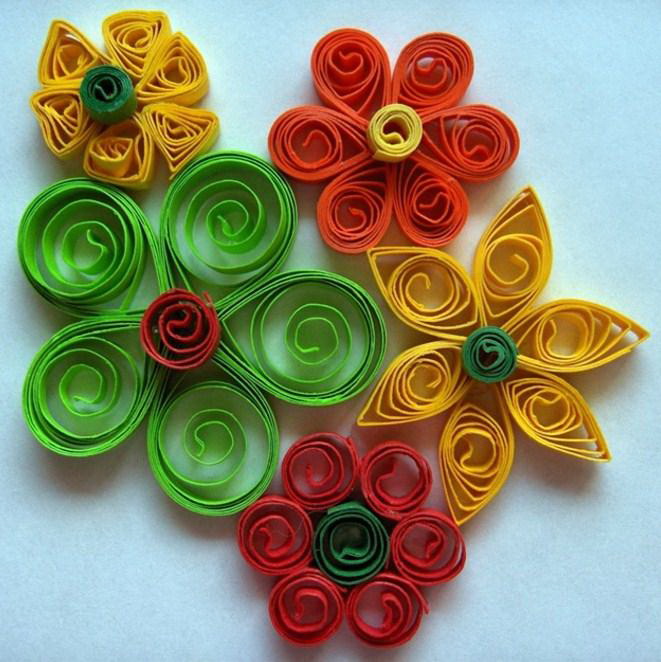
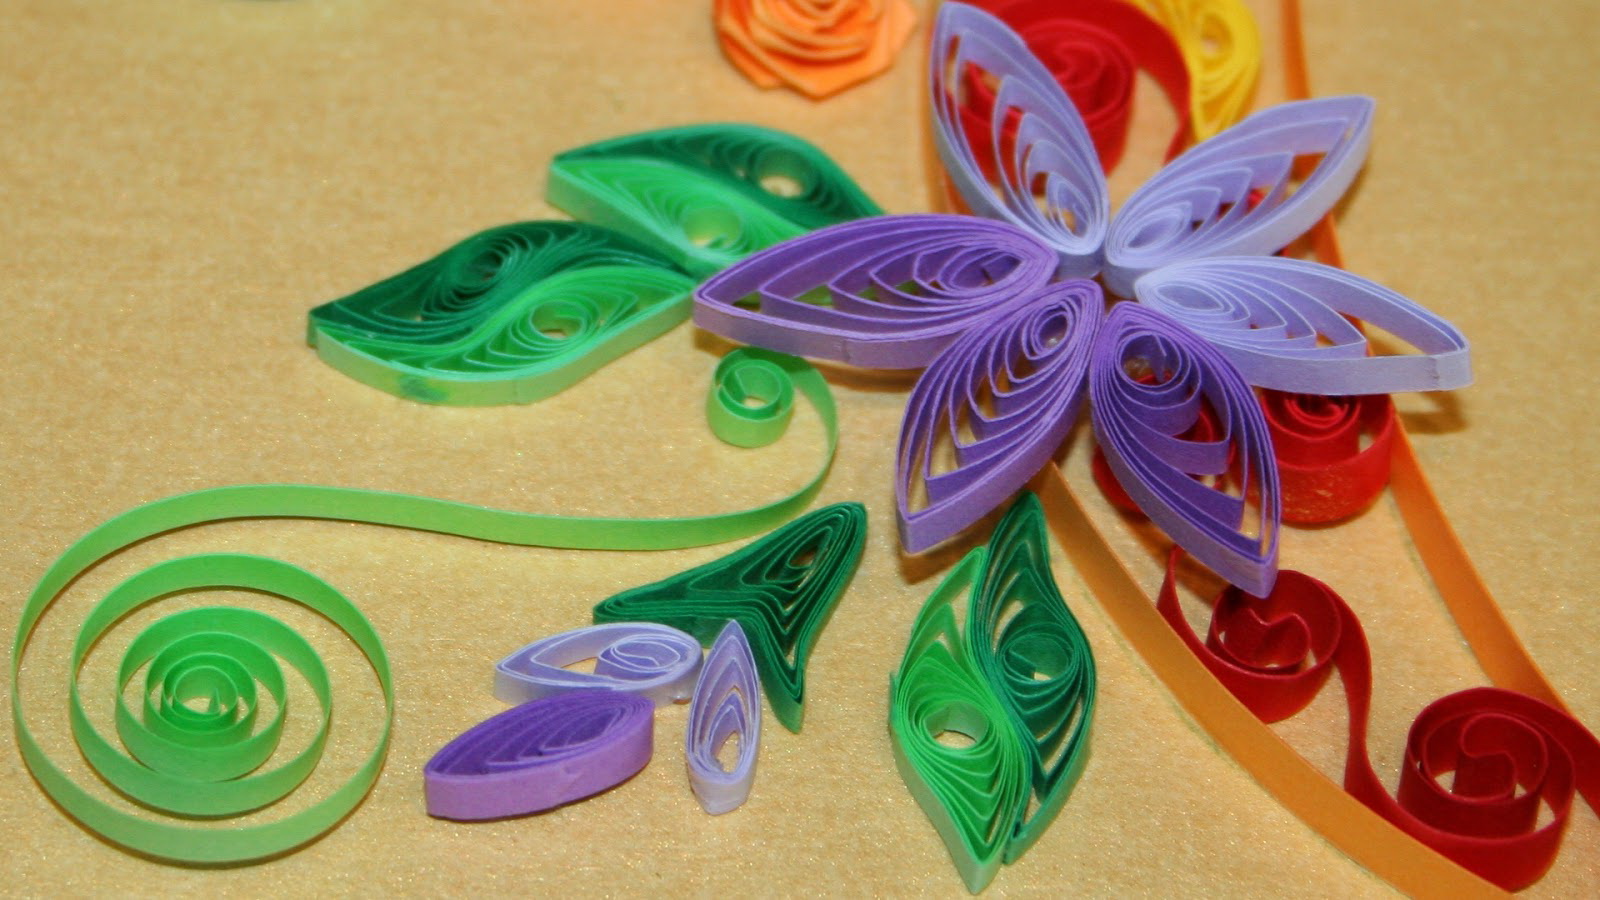
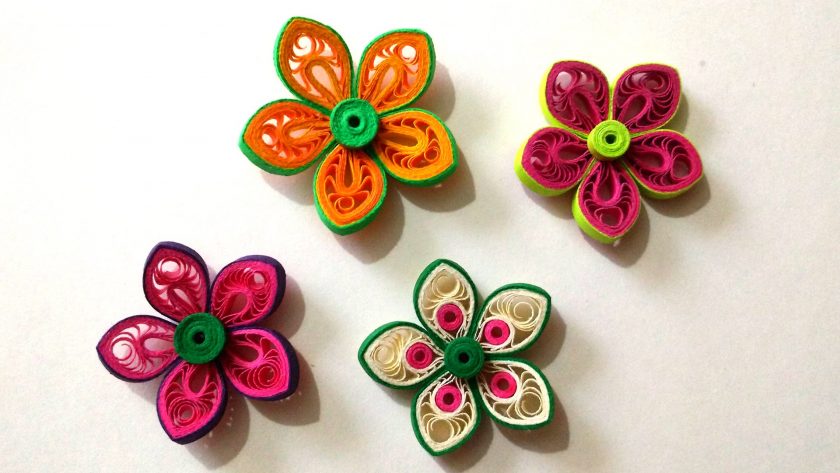
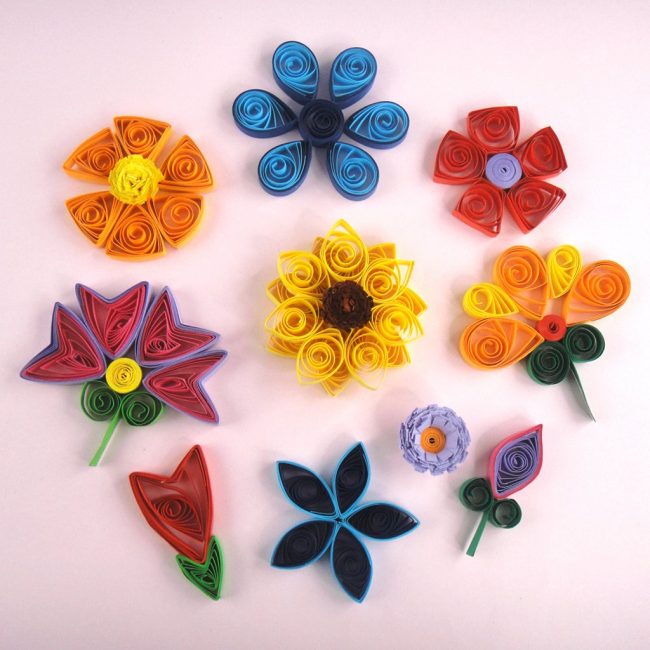
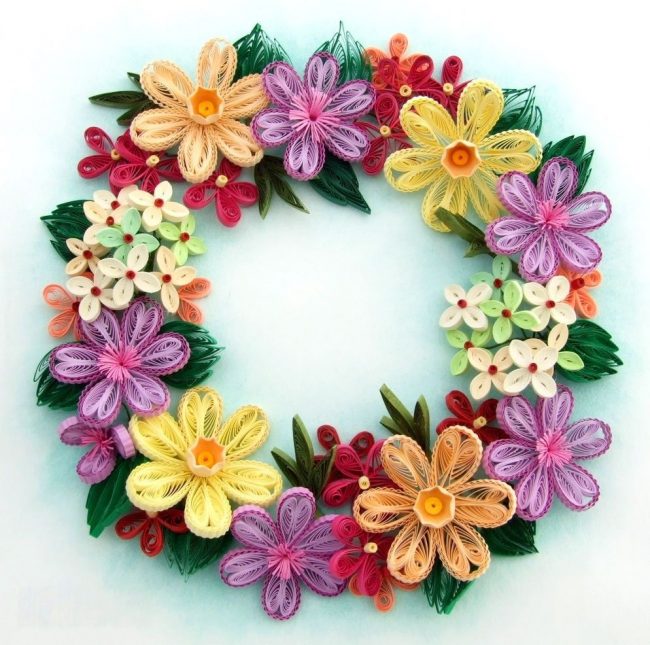
return to menu ↑Quilling flowers
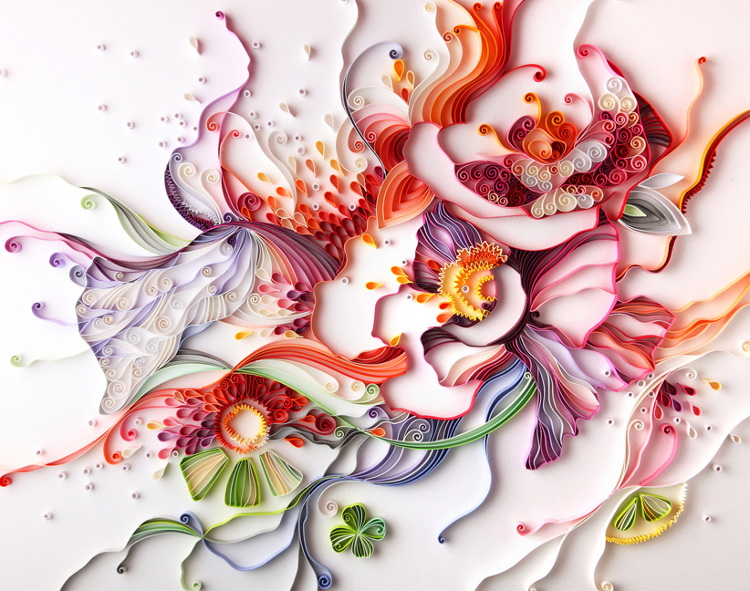
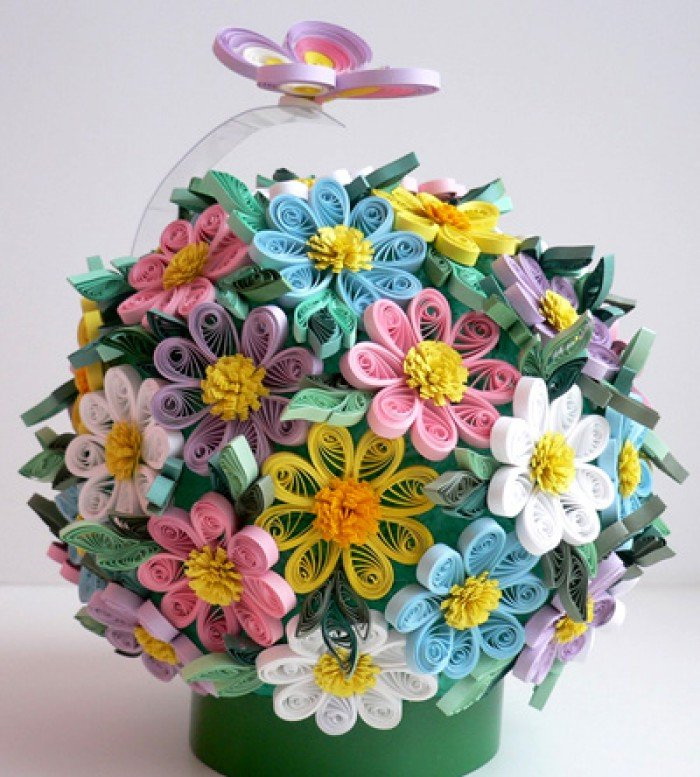
Such flowers will serve the beginning master of quilling as a kind of transition from simple to complex. In fact, this is not the most complex product, but it contains many simple elements that complicate the manufacture of the product. Thus, the novice creator gets invaluable experience and beauty in his own home-made house.
As you can see the core of the flower is created from the "free spiral". Further, the heart of the flower is first glued to the postcard or the surface that you intend to decorate. Around this figure, I glue the “drops” that I have already made.
")
")
")
")
"Drops" - a kind of petals. They can do one color, and you can different colors.
The more different colors in the product, the more beautiful and brighter it will look. The main thing - do not overdo it with color.
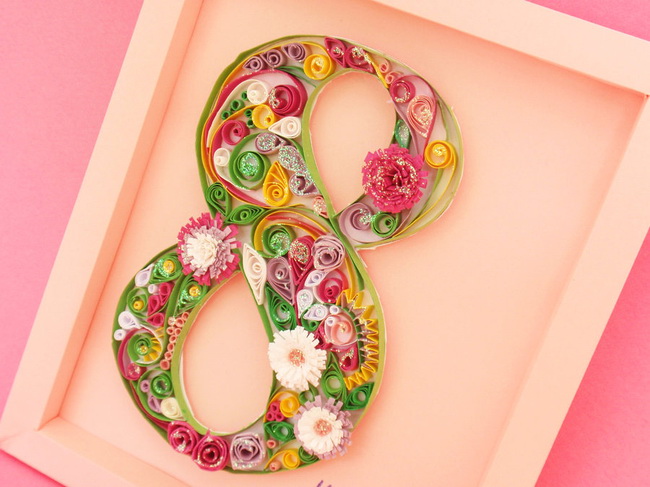
You can also decorate the card with a shape of "heart" or "eye". It will be a very nice gift on the eighth of March for your beloved.
So we learned how to make more complex products. Now let's go back to the snowflakes. Only this time I will complicate the task.
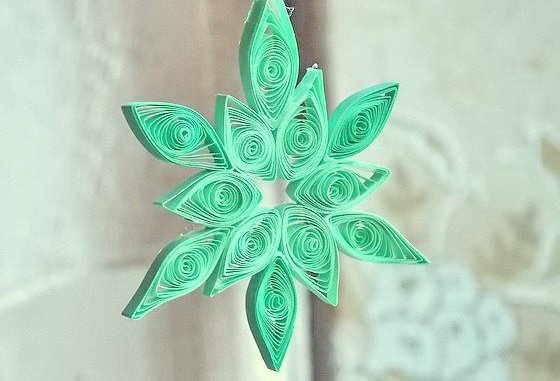
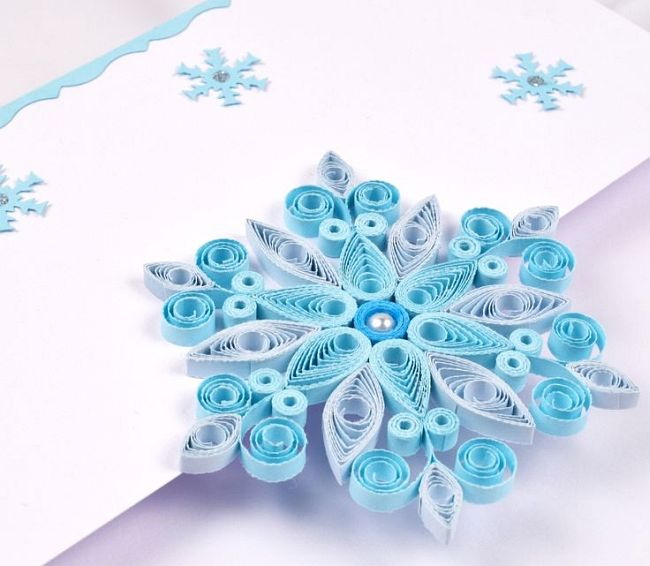
return to menu ↑Quilling - Snowflake
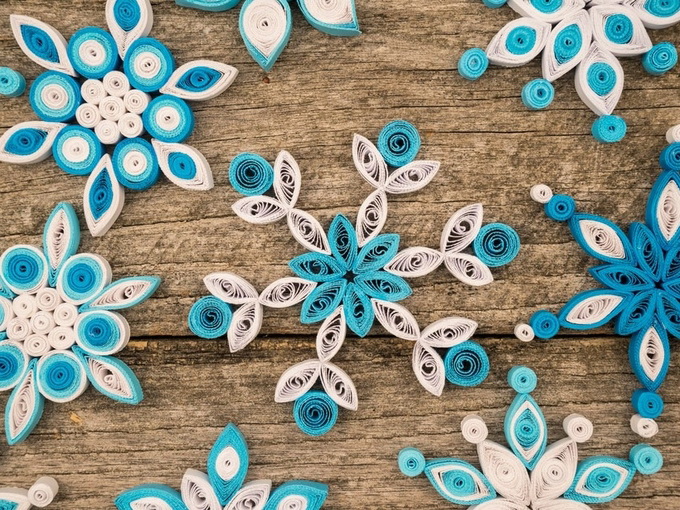
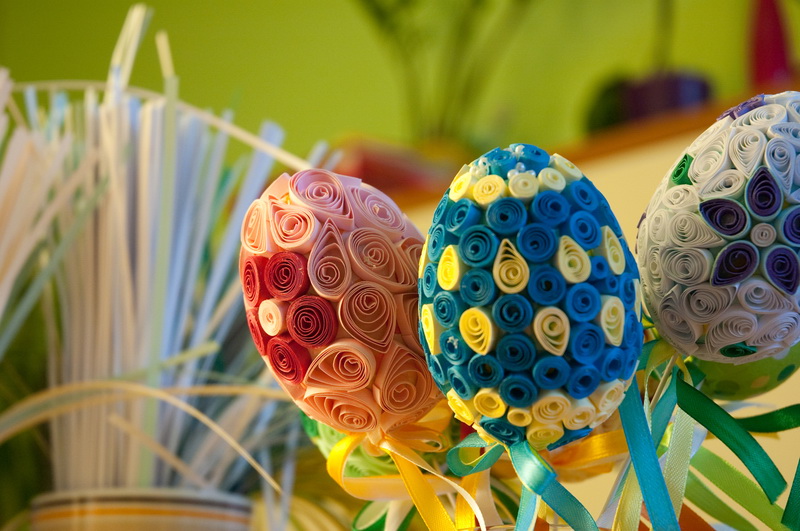
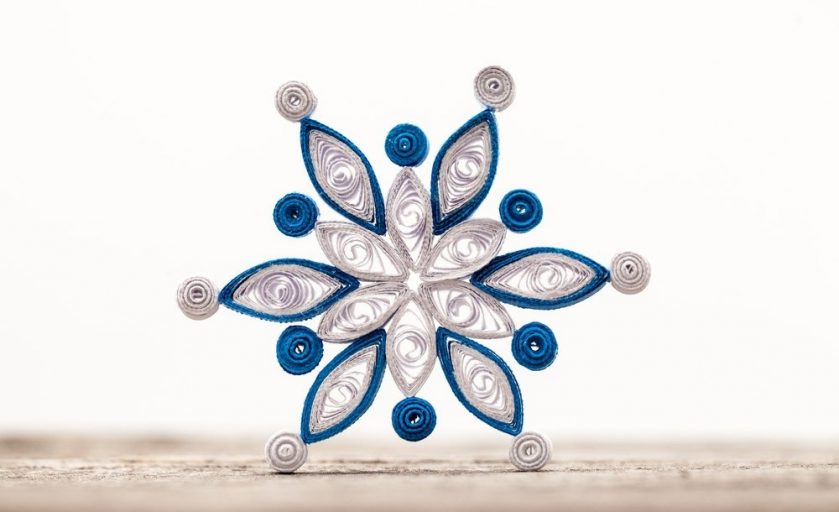
Here we are back to the topic of making snowflakes. This time we will make a quilling snowflake. It differs from the simple more complex form and patterns. To your taste and color, such snowflakes can be either multi-colored or white, or with an admixture of blue hue.
For making such New Year snowflakes, we need:
- Quilling paper.
- Pins.
- Stencil.
- Glue.
- Kernel.
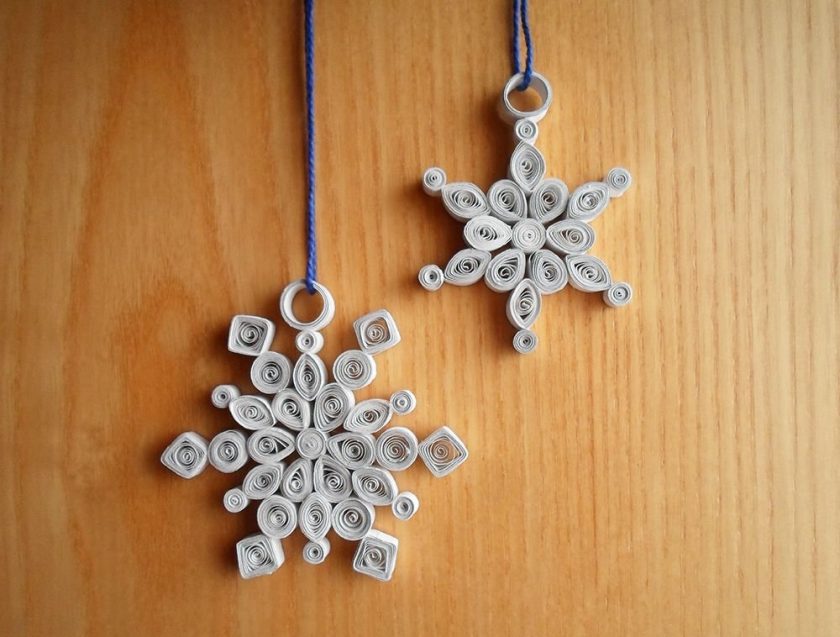
Christmas decoration
At the very beginning it is necessary to draw a template according to which they will be made. It is necessary to divide the paper strips in half. There should be three. Then I twist the first spiral. Then I insert it into the hole of the stencil. It is necessary to make the rest of the spirals the same size.Therefore, I find out that the hole is one centimeter, which means the other four spirals will be the same size.
For beginners, it is advisable to use pins to attach the spirals to the layout. And then they can be glued together.
")
")
")
")
The next model I do is the “eye”. Then around one helix I spread several "eyes". And then glued. Then I make a tight spiral. The principle of its creation, I told above, so I will not repeat. And stick it to the tops of snowflakes. This will be the final element. The result can be seen in the figure above.
When snowflake ready, you can hang it on Christmas tree or attach on window. Such products will always give you warmth and joy. And making such things with your own hands will give you confidence in your abilities and a feeling of rising strength and mood.
More difficult option snowflakes
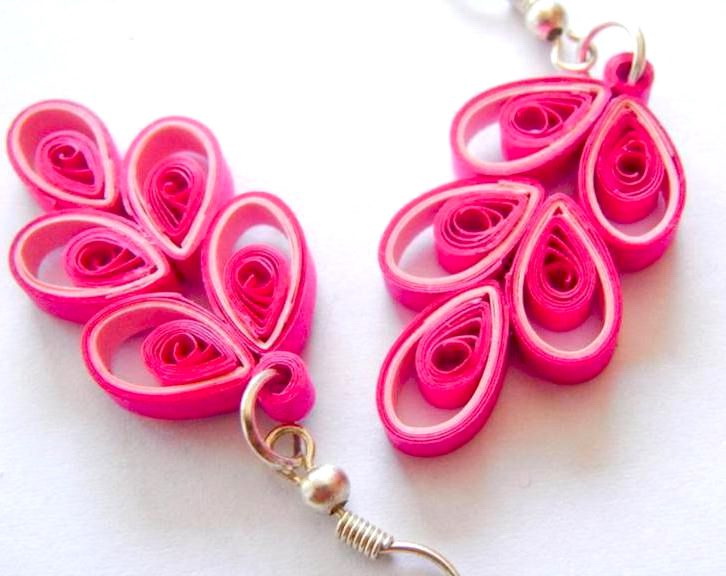
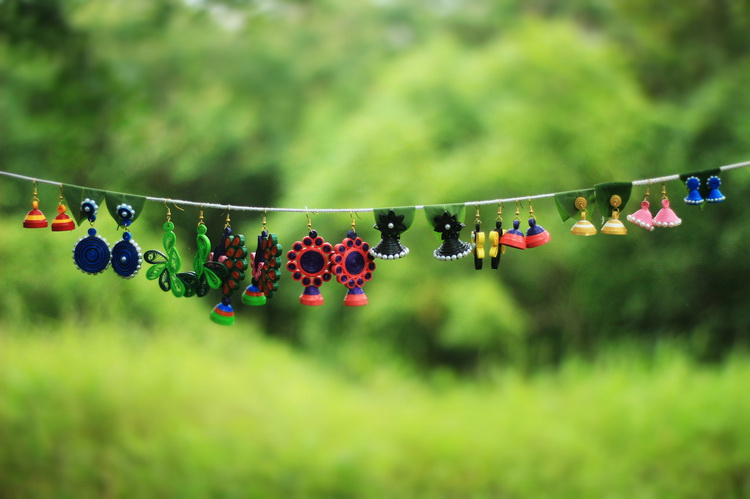
Now we have learned how to make complex snowflakes. The next step will be the manufacture of decorative jewelry in the form of charming ladies' earrings. They are perfect for a birthday present for your girlfriend.
return to menu ↑Making women's earrings
To create such a beloved by our women, jewelry, we need:
- Color paper. I will have blue and white colors.
- Scissors.
- Quilling rod.
- Quilling board.
- PVA glue.
- Pencil.
At the very beginning, in order for such costume jewelry to turn out to be symmetrical, I will have to imagine what the earrings will look like and draw a diagram on paper. This scheme will serve as a template for gluing various parts.
Please your loved one
- I cut six strips one centimeter wide out of blue paper and glue them together.
- From white paper, three strips and glued to the end of the resulting tape of blue stripes. And I complement it with glued together three strips of blue paper. So I do it twice to make two long ribbons.
- Then, with the help of a rod, I turn them into a “tight spiral” shape. We dismantled the creation of this form at the very beginning.
- I make the same tapes again, just cut the strips in two. That is, instead of six strips, I cut four of the blue paper, three of the white paper, and leave and glue them together, adding two strips and blue paper at the end.
- With the help of the rod, I also turn this tape into a "tight spiral". Only now it turned out to be smaller than the first. And create another such spiral.
A nice gift for Valentine's Day
Do not rush, this technique does not like when in a hurry.
- And the third time I deal with paper exactly the same as the first two times, only the number of strips of the first blue ribbons is reduced to two.
- Again, I turn the created tape into a "tight spiral". As for the first time, I will need two such spirals. You probably already guessed why I needed pair forms of quilling. Of course, because ladies' earrings should be two pieces! Now I spread the prepared forms on the template already created and glue them together.
- Lastly, I cut a few more strips of blue paper, glue them together and twist them with a rod. But now I’m turning the form not a “tight spiral”, but into a “free spiral” and clamping it along the edges with my fingers and stretching it slightly to form an “eye” shape.
- I make four kinds of such shapes. Two for each earring and paste according to the template.
- The final stage will be threading the ring from the fastener through the holes in the shape of "eyes".The figure below shows how I have got an excellent beauty.

Like any woman
So we learned how to create complex and beautiful ladies' jewelry. Let's now try to make an unusual flower quilling.
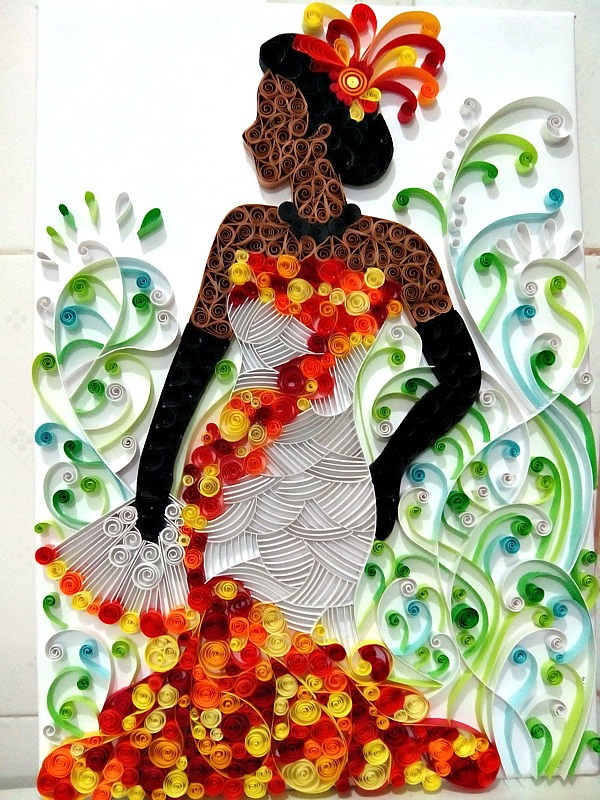
return to menu ↑Making an unusual flower
Now we come to more serious things. I will tell you and show you how to make a volumetric quilling flower. To do this, you need to purchase or get already prepared tools, namely:
- White A4 paper.
- Scissors usual and figured.
- Yellow mascara and red paint.
- Sponge, knife, pencil.
- Glue, pipette, quilling rod.
Flower from hearts
- I take a sheet of white paper and divide it into strips of three centimeters wide. Then I cut them and glue one after the other strips in length. The result is one long tape.
- Now we need to paint it. Pipette paint on the sponge. Apply yellow mascara on one half of the sponge and red paint on the other half.
- Then we paint our prepared long white paper ribbon with a sponge. And after the paint dries on paper, we cut a pattern with curly scissors. What you should get can be seen in the picture.
- Now go to the creation of petals for our flower. They must be cut so that both the petals and the corners sticking out between them. At the same time, it is necessary to leave four millimeters at the edge uncut, so that the tape does not tear. As shown in the picture below.
- Then I make a heart for a flower. For this, I twist a strip of paper for quilling into a tight spiral. The diameter of the roll must match the diameter of the pencil.
If the diameter is smaller, then you can safely add another tape.
More complex volumetric hack
- The next step is to create flower glue will be coated with dyed tape on the application side.
- Then I glue the petals of the flower with the core, as shown in the figure.
- After the flower is twisted, it is necessary to glue its bottom with PVA glue to ensure that it will not crumble in the future.
- Now I remove a flower from a rod and use my fingers to straighten its edges. The result was such a miracle.
- Of course, at your discretion - you can straighten the edges, but you can not. I straightened them in order to insert a “pistil” there, and thereby make the flower look more like a real one.
- I cut off a part of a sharpened pencil, grease the cut part with glue and insert it into the center of the flower. That's what we do!

Bright composition
Any of these products can decorate cards on the first school day of the year, to please the child with its beauty and singularity.
Prior to this, we considered the technique of quilling for adults. But you can attract children to this needlework. Thus, they will develop the breadth and originality of thinking.
return to menu ↑Quilling for children
According to psychologists and children's pediatricians, modern children now have poorly developed motor skills in their hands and fingers. For them, it is difficult to properly and firmly hold a pen or pencil in your hand.
Therefore, it is difficult for them to learn standard skills and simple self-service in life. Quilling for children contributes to the development of motility of this type. At the same time, he raises the level of logical thinking.
Easy to make a child
The development of fine motor skills contributes to increased attention and memory in the child. All this will be extremely necessary for him in the future life and the quilling technique can help a lot with this.
It also helps to cultivate in the child diligence, accuracy, aesthetics of taste. We must begin, of course, with simple things.
return to menu ↑Master class for children - ladybug
To create a ladybug we need the following materials:
- Cardboard sheet.
- Color paper.
- Winding rod.
- PVA glue.
- Scissors.
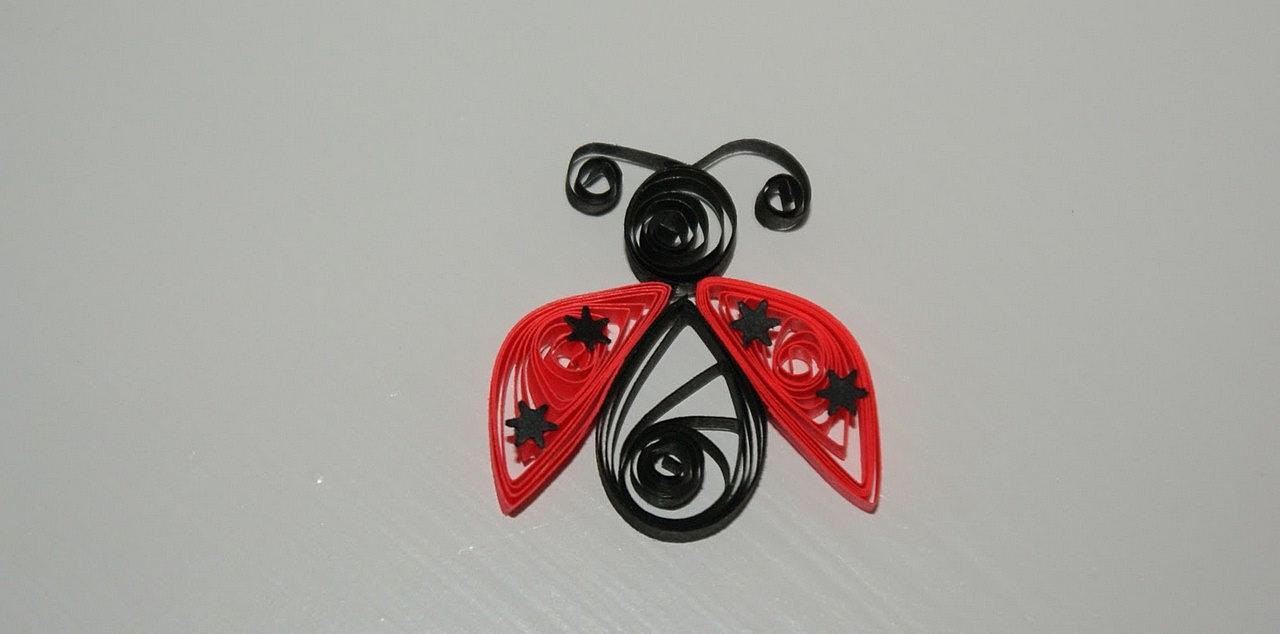
ladybug
- At the very beginning, I cut a ladybird's body out of cardboard - a semicircular oval. Then from the sheet of red colored paper I make an oval in the shape of the body and cut the lower part as shown in the figure.
- Now I prepare the bottom of the light yellow sheet and glue on the cardboard. Then I take and cut a long black strip and glue in the center of the cardboard.
- When the oval of the body for the “ladybug” is ready, you can proceed to the “paper twisting”. From the "free spirals" will be black dots on the body of a ladybug. Then I paste these created forms onto cardboard.
")
")
")
")
")
")
")
")
")
")
")
")
")
")
")
")
")
")
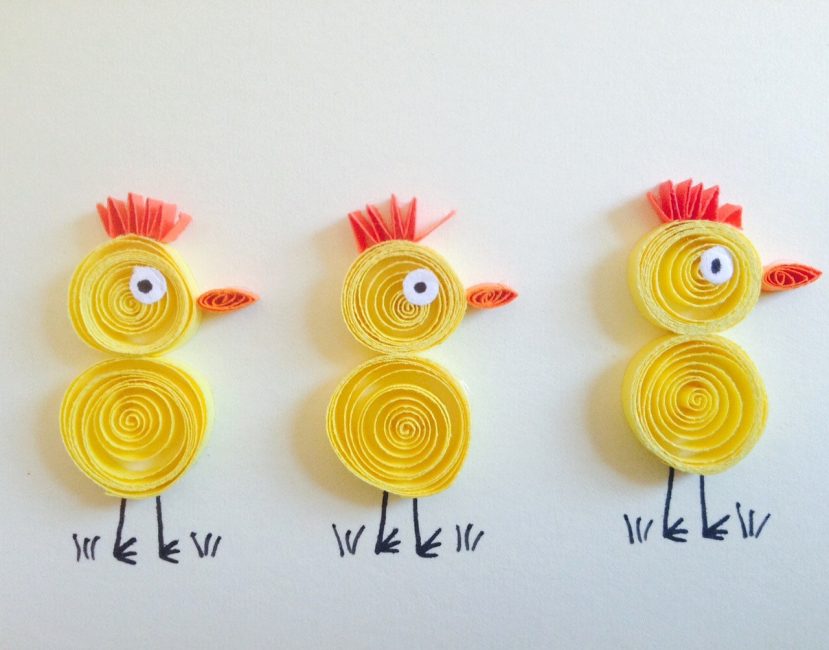
A six-year-old child can make such a simple hand-made article. After making simple shapes, you can move on to more complex ones.
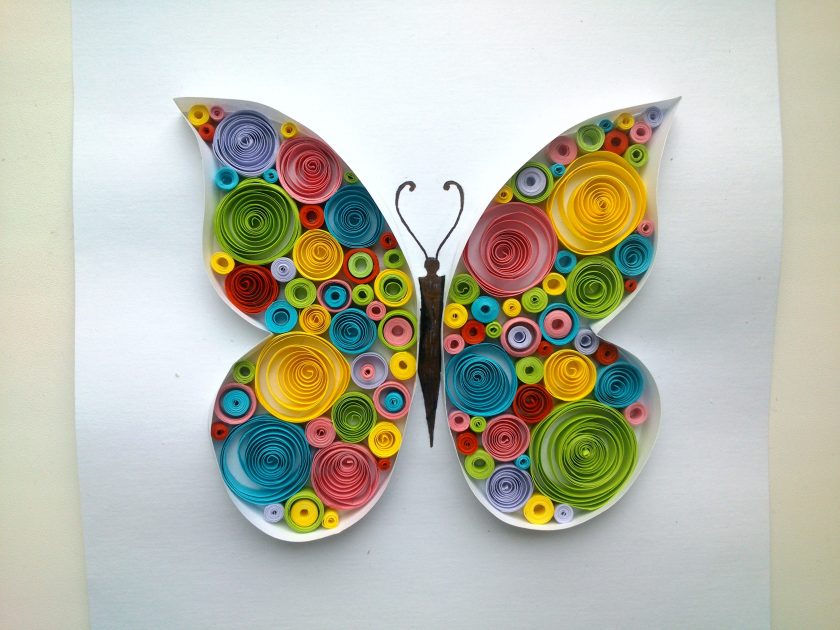
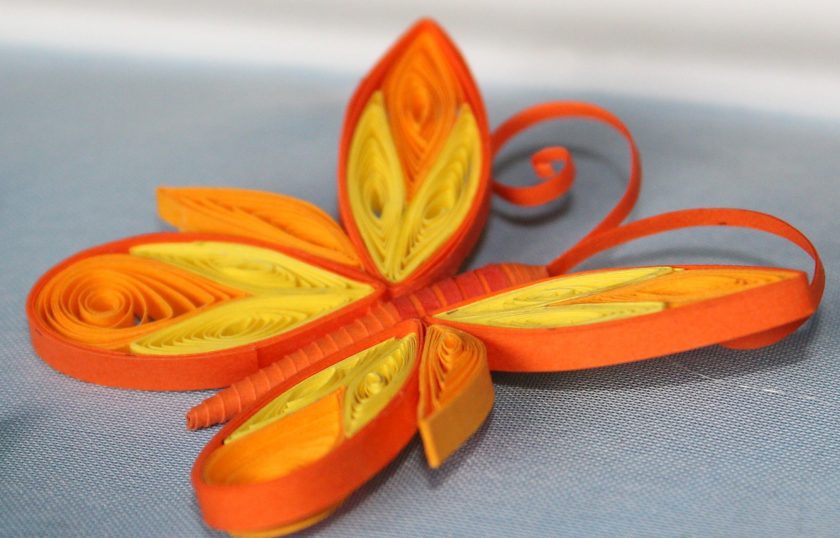
return to menu ↑Butterfly
To create a butterfly, we need the following materials:
- Color paper.
- Sewing needles.
- Scissors.
- PVA glue.
- Quilling board.
Now let's start creating.
- Let's make wings for a butterfly. For this, I will cut three strips of long strips of paper, but not identical in size. And of course I will make them from sheets of different colors.
- Then I glue the strips together. And since I cut them of different lengths, I start with a short one and end it with a long one.
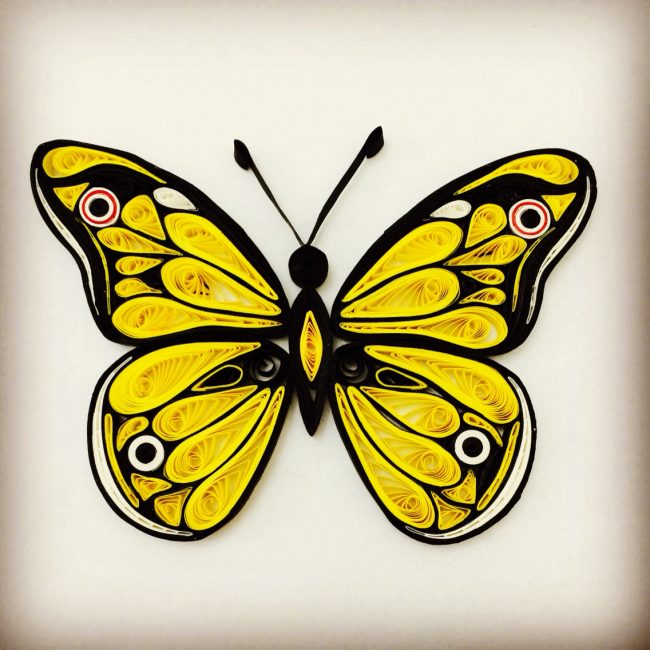
Create a decoration with your own hands
- Then I gently twist them. It is necessary that the shortest strip remains inside. And I stick the remaining free tip from the outside.
- I insert the resulting spirals into the holes of the quilling board, where they unwind freely and take the desired shape.
- Then I press the center of the spiral to one side and stick all the bands to the same side. I create the body from two spirals. I turn one helix into an “eye” shape, and leave the other in the “free helix” shape. The “eye” will serve as the body, and the “free spiral” the head of the butterfly.
- Now I glue one end of the shape of an “eye” with the shape of a “free spiral”, and then I glue the wings to the resulting torso, the creation of which we have disassembled a little higher.
It can decorate the interior of the living room or children's room.
Now, in order to make her truly indistinguishable from the real one, I need to attach her antennae.
To do this, I take two strips of paper and create a curl shape out of them. And stick to the butterfly's head. Here is such a beautiful butterfly.
It can decorate the interior of the living room or children's room. Such figures are suitable even for interior decoration in kindergartens and assembly halls of schools for matinees.
It will be interesting to you:
Simple and voluminous DIY Paper Snowflakes: 75+ Photos with Step-by-Step Instructions
return to menu ↑
Quilling in kindergartens
In Soviet times, a lot was devoted to the development of children at preschool age. In the nineties, such topics began to decline. Now many kindergartens have resumed their work, becoming, of course, private.
But, if you are the head of the kindergarten, or maybe you just want your child to learn this needlework, you can take quilling classes with the kids. It will be interesting for children and will develop their thinking processes before entering school at the proper level. With this technique, they will learn to think quickly and abstractly.
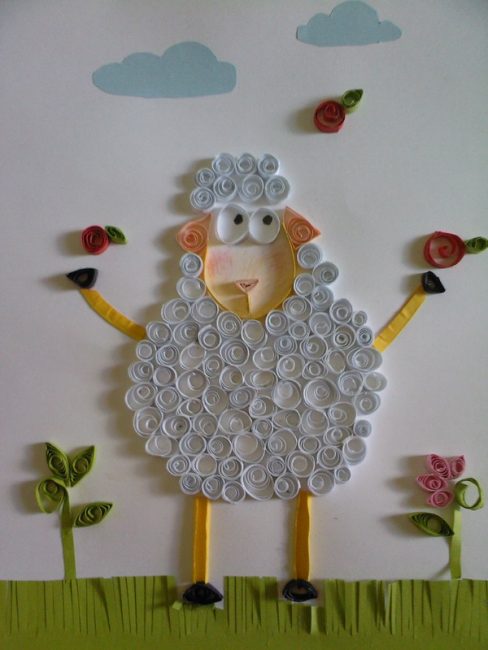
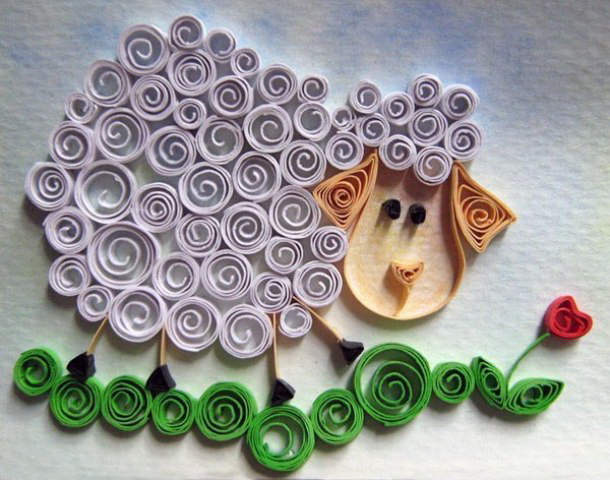
Lamb baby handles
The program of work with children in kindergartens consists of severalups:
- Children need to be taught to cut and create simple shapes, at the same time, talking about where they came from and how this kind of needlework came about.
- Children need to be taught to create the simplest form of a “free spiral” at the beginning and help to glue it on the basis of various applications such as “ladybug”, “fruit tree”.
- Then you need to master the form of "drop". To teach how to apply this form in such applications as rain, flowers.
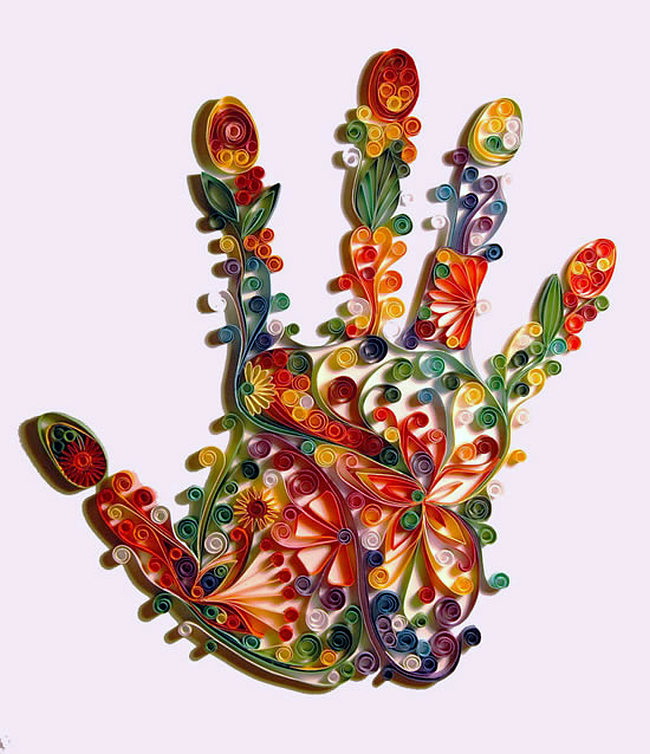
- The next type of training will be the transition from simple to complex forms. That is, now the child must be taught to create the shape of a "triangle" and "eye." His final work in the form of the exam should be making a simple palm.
- Now you need to fix all the material covered. And practice on the manufacture of compositions based on the studied forms.
As you can see, the stages of mastering quilling for children are no different from adult education. Training in this kind of needlework in a child, besides all the described qualities, forms perseverance..

Develop your imagination
After the development of simple and some complex forms of the baby, it is necessary to teach him how to create the “curl” form. To fix the study you need to ask him to create an application of frost patterns using this form. Now you need to master the manufacture of the form "arrow".
After mastering this form, hold a small exam for making flower applications with this type of form.
And finally, you need to consolidate the creation of all forms from simple to complex and proceed to the manufacture of more voluminous compositions. For example, butterflies on flowers.
Now we have disassembled all kinds of stages of this needlework, read a master class on some types of crafts. And they even found out that you can teach your children such useful needlework. It will develop their thinking, increase the speed of movement motility, develop perseverance and develop other qualities that are useful in life.

Will fit into any interior
Finally, some tips that I did not have time to tell you in this article.
return to menu ↑Some tips missed earlier
- The density of the quilling paper should be in the range of 120-160 g per square meter. Since it is precisely this density that creates durability of handicrafts and will keep their shape qualitatively.
- The length of the strips should be 30 centimeters. It depends on the pomp and volume of the product. If you can, you need to try to find ready-made quilling strips.
- The width of the paper strips should also adhere to the specified dimensions, namely: 3-5 millimeters.
- It is necessary to diversify the color range. That products did not look dull and identical. To do this, the paper is sold in the paper for quilling the most different colors and patterns.
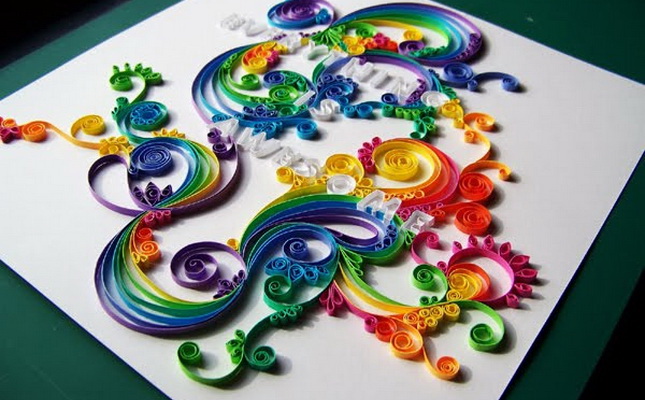
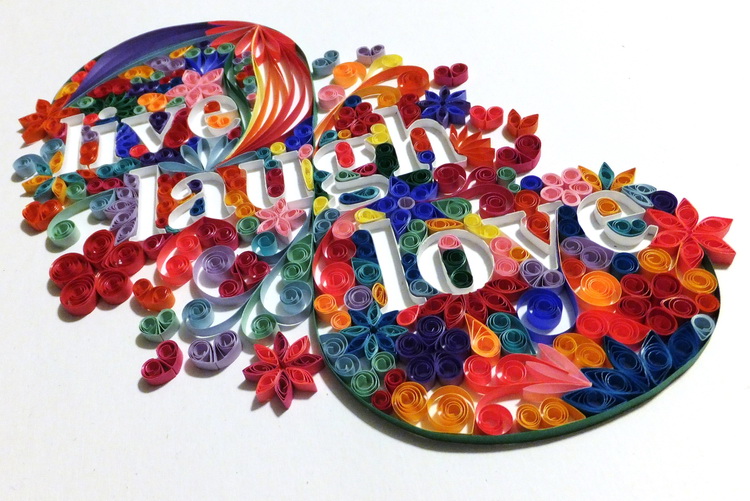
In this technique, you can make any picture
Quilling
Beginner Lessons