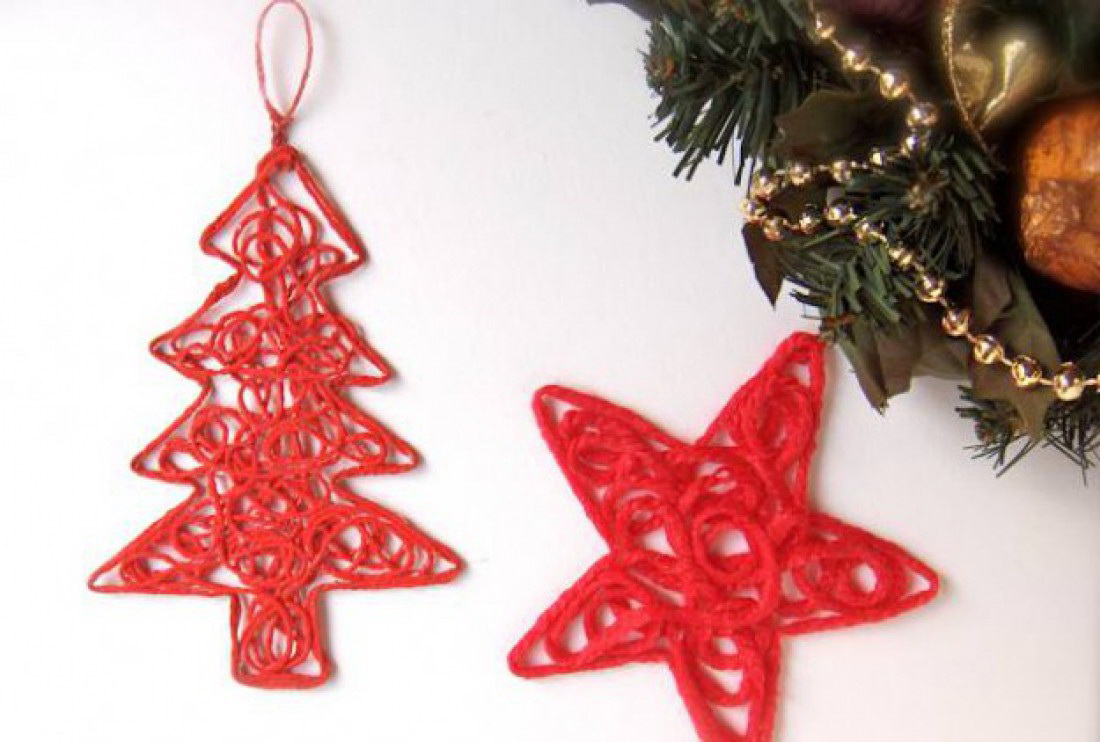
Crafts for the New Year 2019 do-it-yourself (120+ Photos) - Surprise loved ones with your imagination (+ Reviews)
 - Surprise loved ones with your imagination (+ Reviews)")
Realize your imagination, make crafts for the New Year 2019, spending a minimum of time, as well as real money. Today we will tell you how to make a snowman from a sock, Santa Claus, a tree of pasta and much more. Detailed workshops will help you do everything quickly and correctly.
Content of this article:
The advantages of handmade products
For some, any homemade handicraft is a memory from the past, when in kindergarten or school teachers were forced to make knick-knacks. They were rated for, but their parents often do this work for their children, which is why, when they grow up, they do not know how to make jewelery with their own hands.
Crafts for the New Year do it yourself
In fact, hand-made is very popular in many developed countries. Decorating a house handicrafts can not only demonstrate their skills, but also show love for loved ones. In addition, handmade Christmas crafts have other advantages:
- Originality. You have noticed how in many stores on the eve of the New Year the same toys are sold, which differ only in price. Coming to visit friends, relatives, one can observe “classics”: some rains, figurines, calendars and other purchased attributes. Compared to them, handmade products look original, attracting the views of all the guests.
- Efficiency. Most handicrafts can be made from scrap materials, and if you have to buy some, as a rule, they are not expensive.
- Care. If you do not be lazy and take the time to make New Year's crafts, then your family will appreciate them. If you carry the finished work to decorate the workplace or give the child to school, others will appreciate your work.
Cost-effective and self-made personality
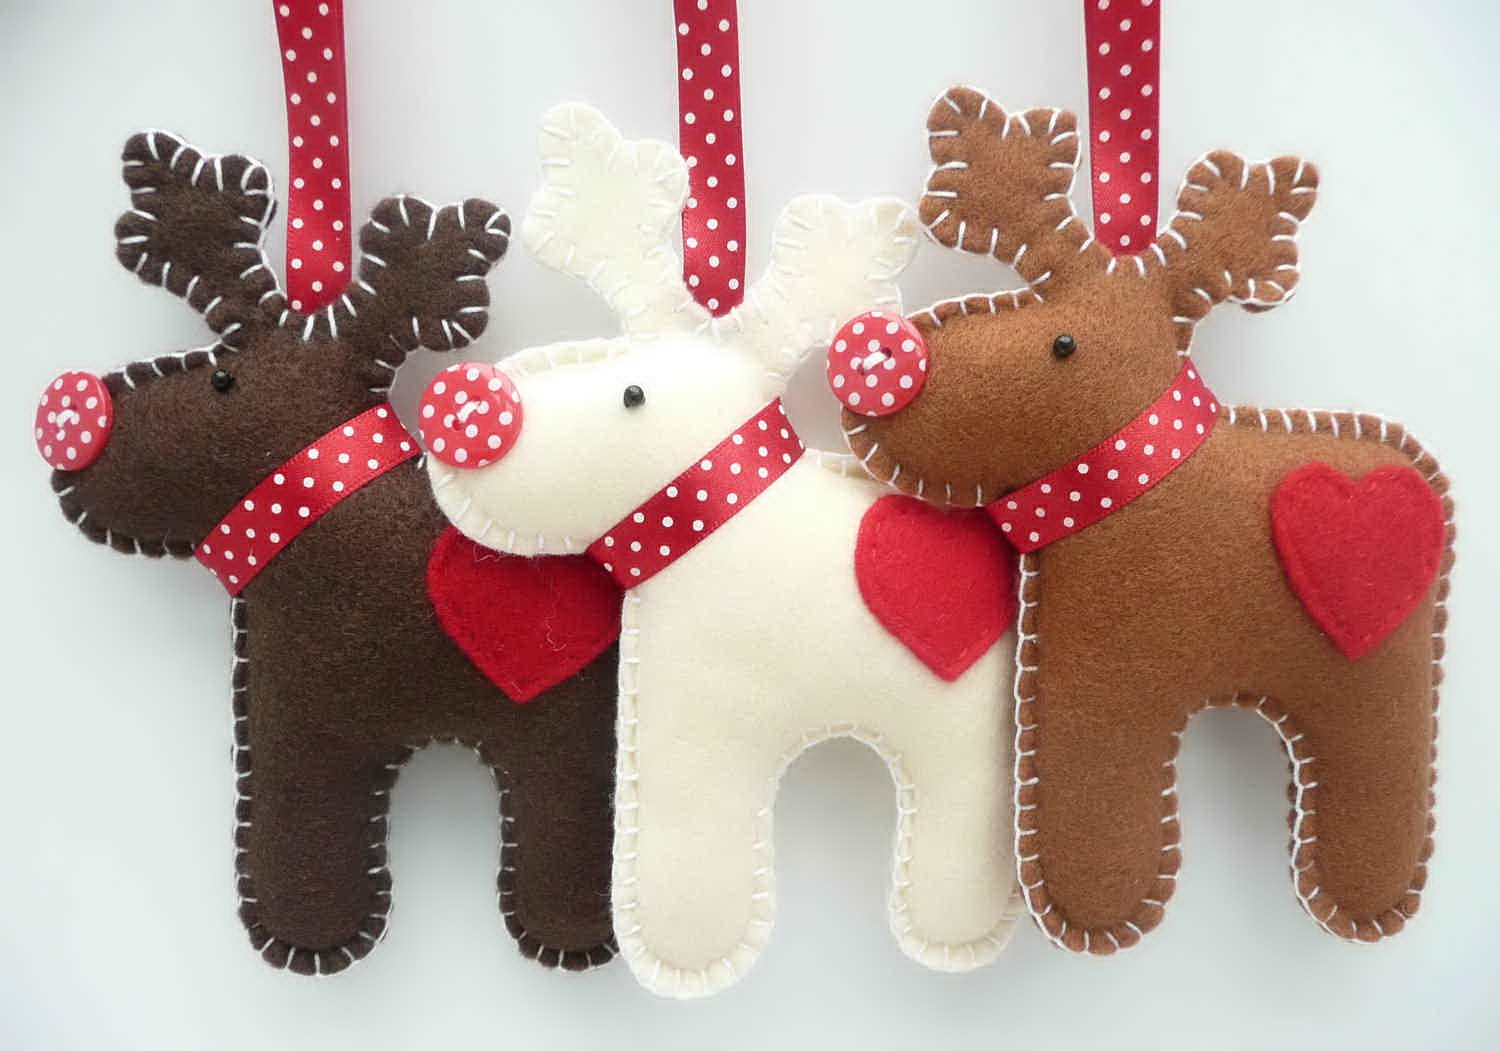
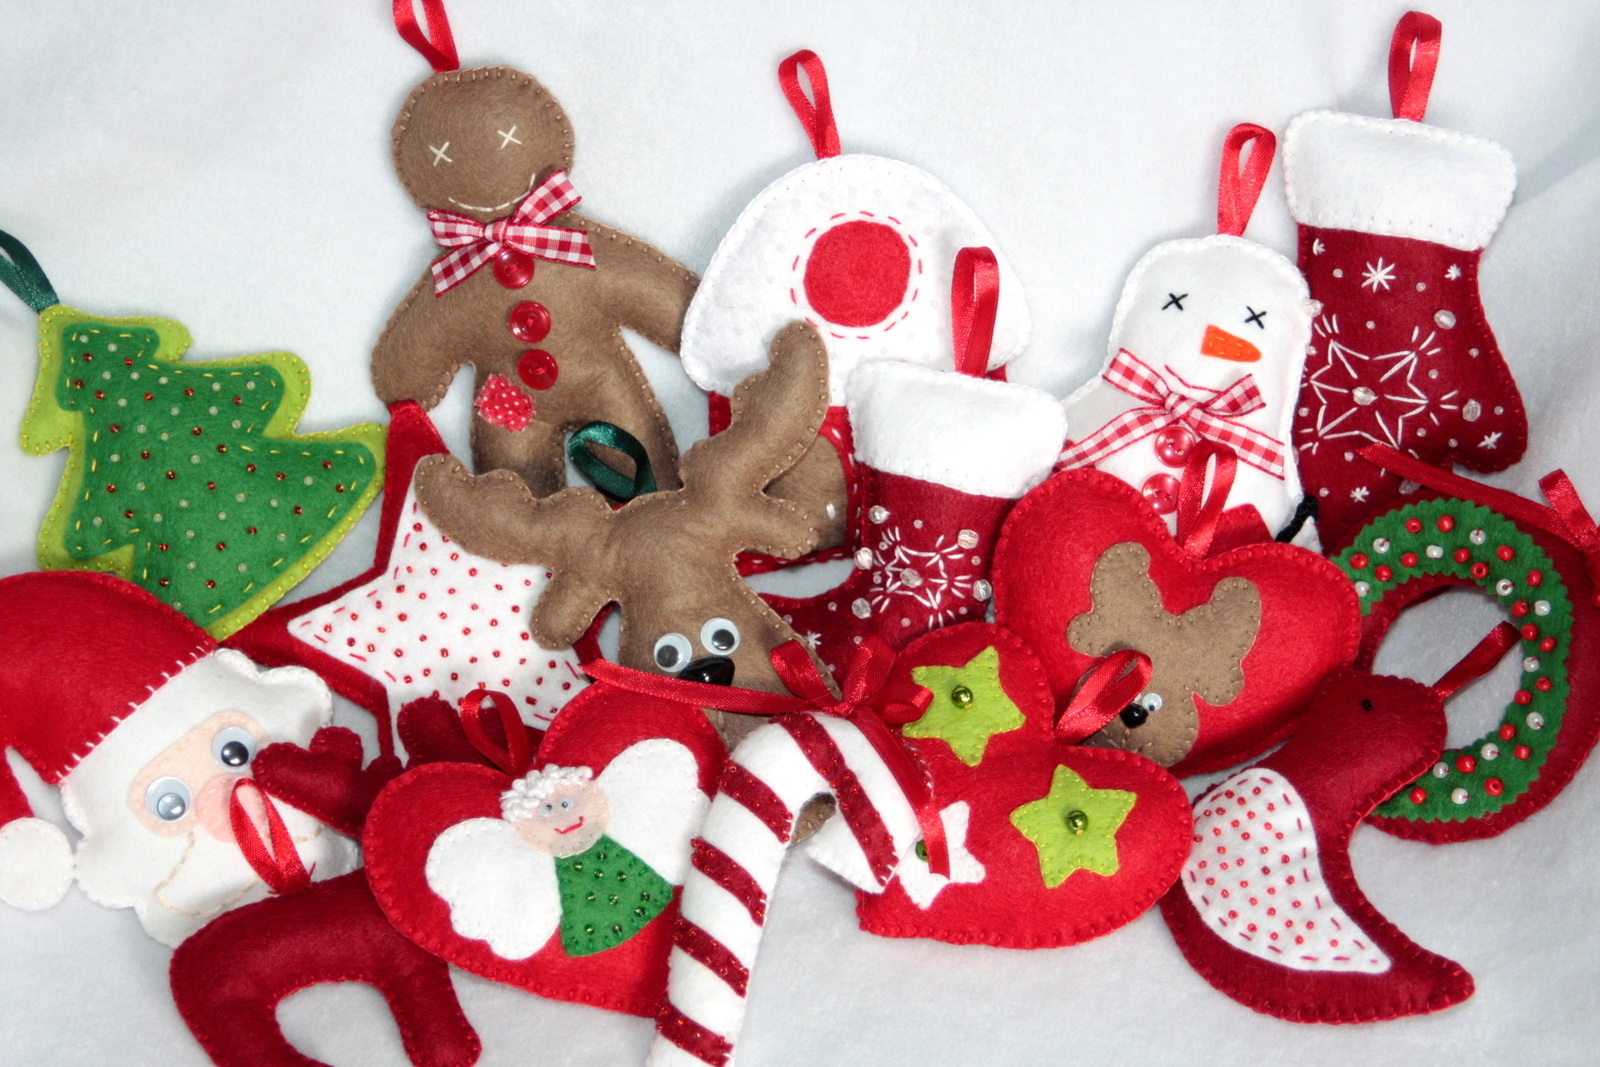
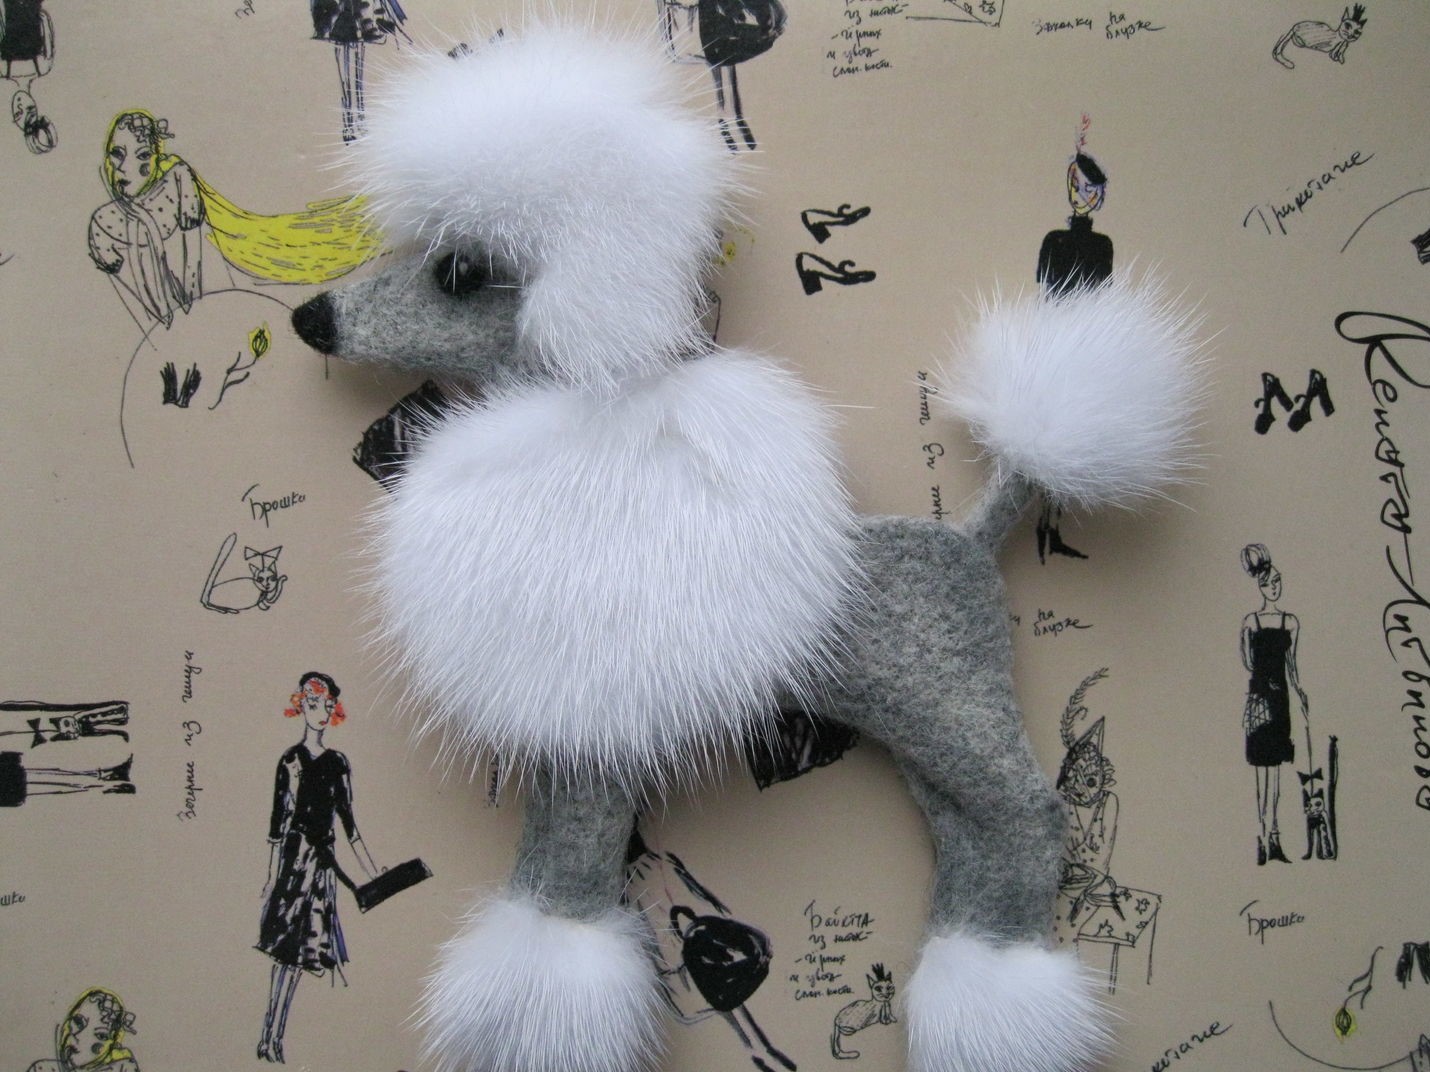
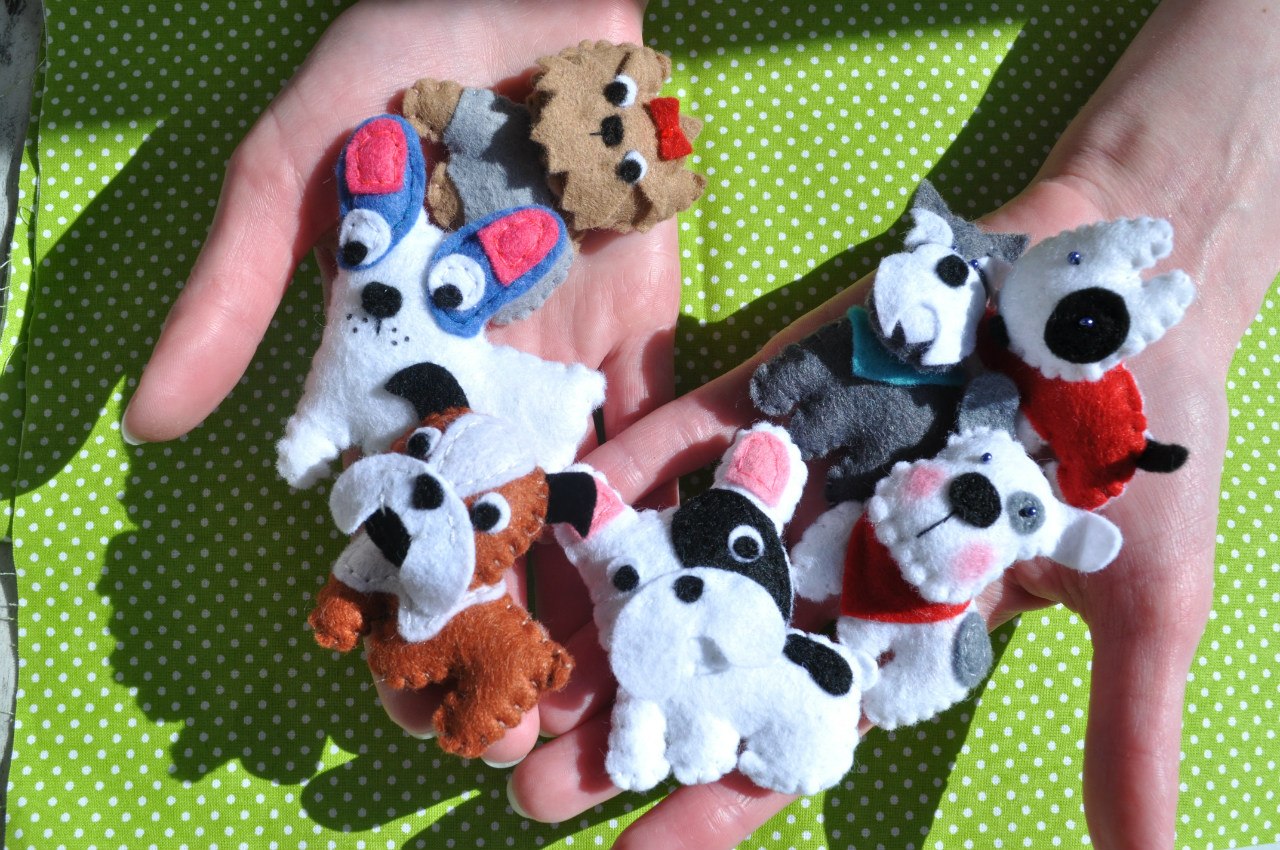
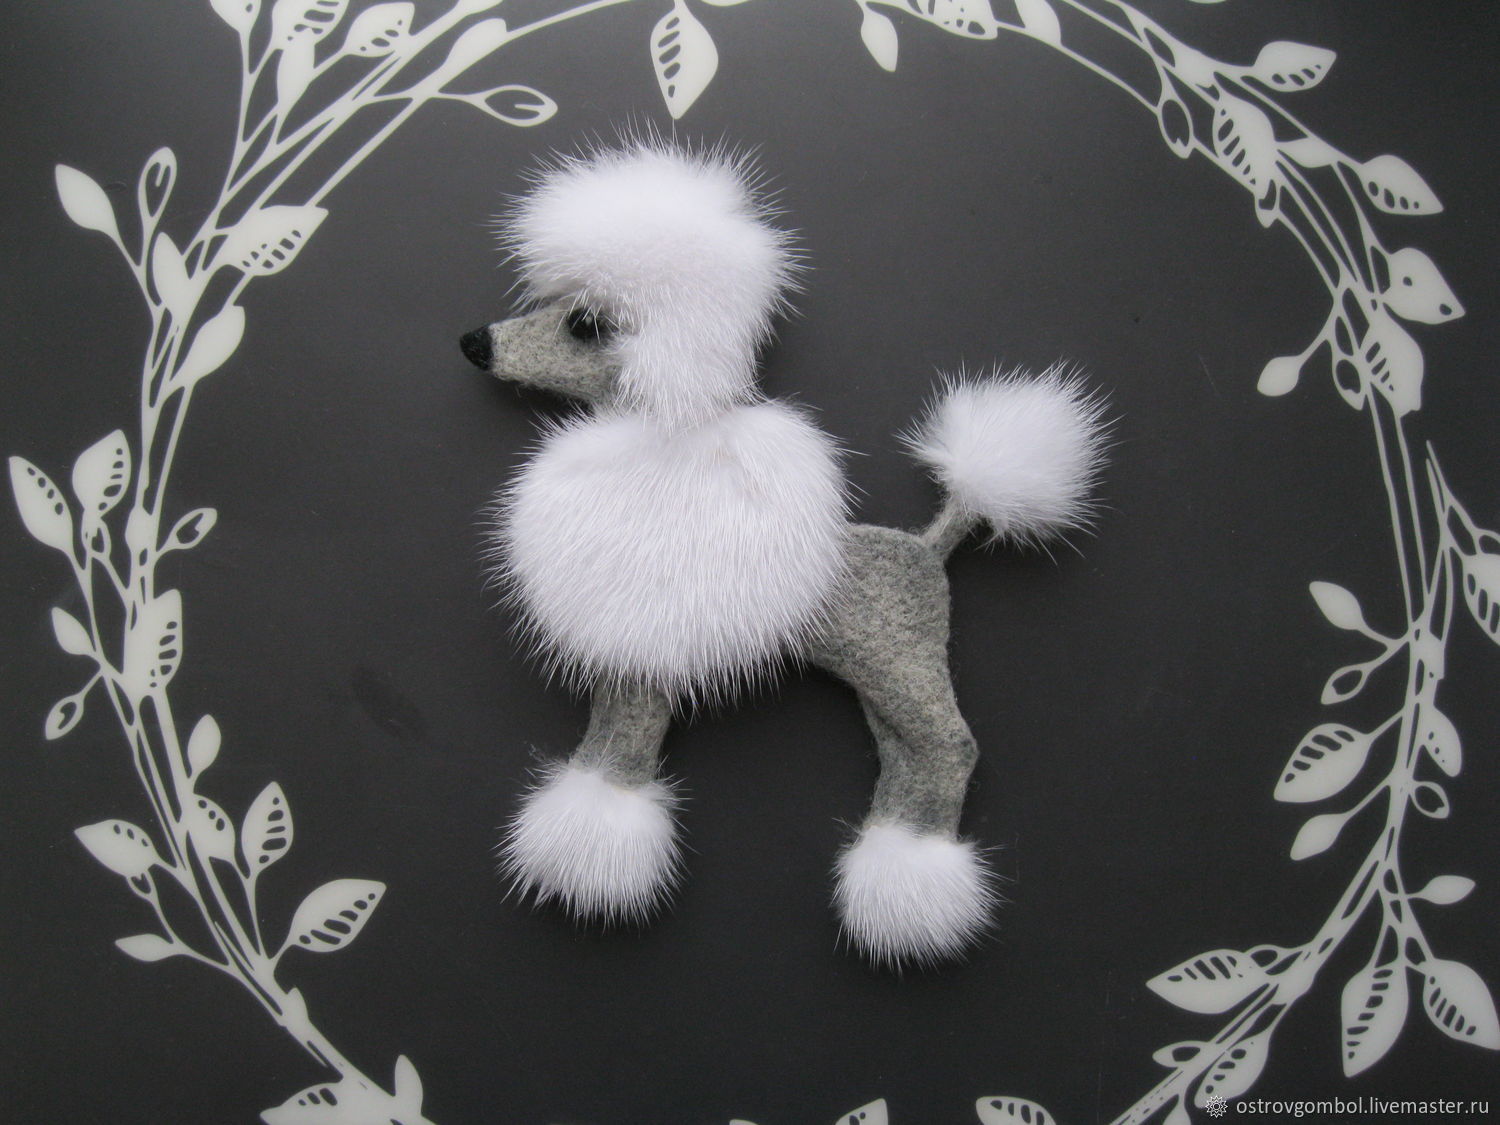
It will be interesting to you:REVIEW: 175+ Photos of felt crafts for the New Year Do-it-yourself Dogs: Patterns and Patterns for beginners
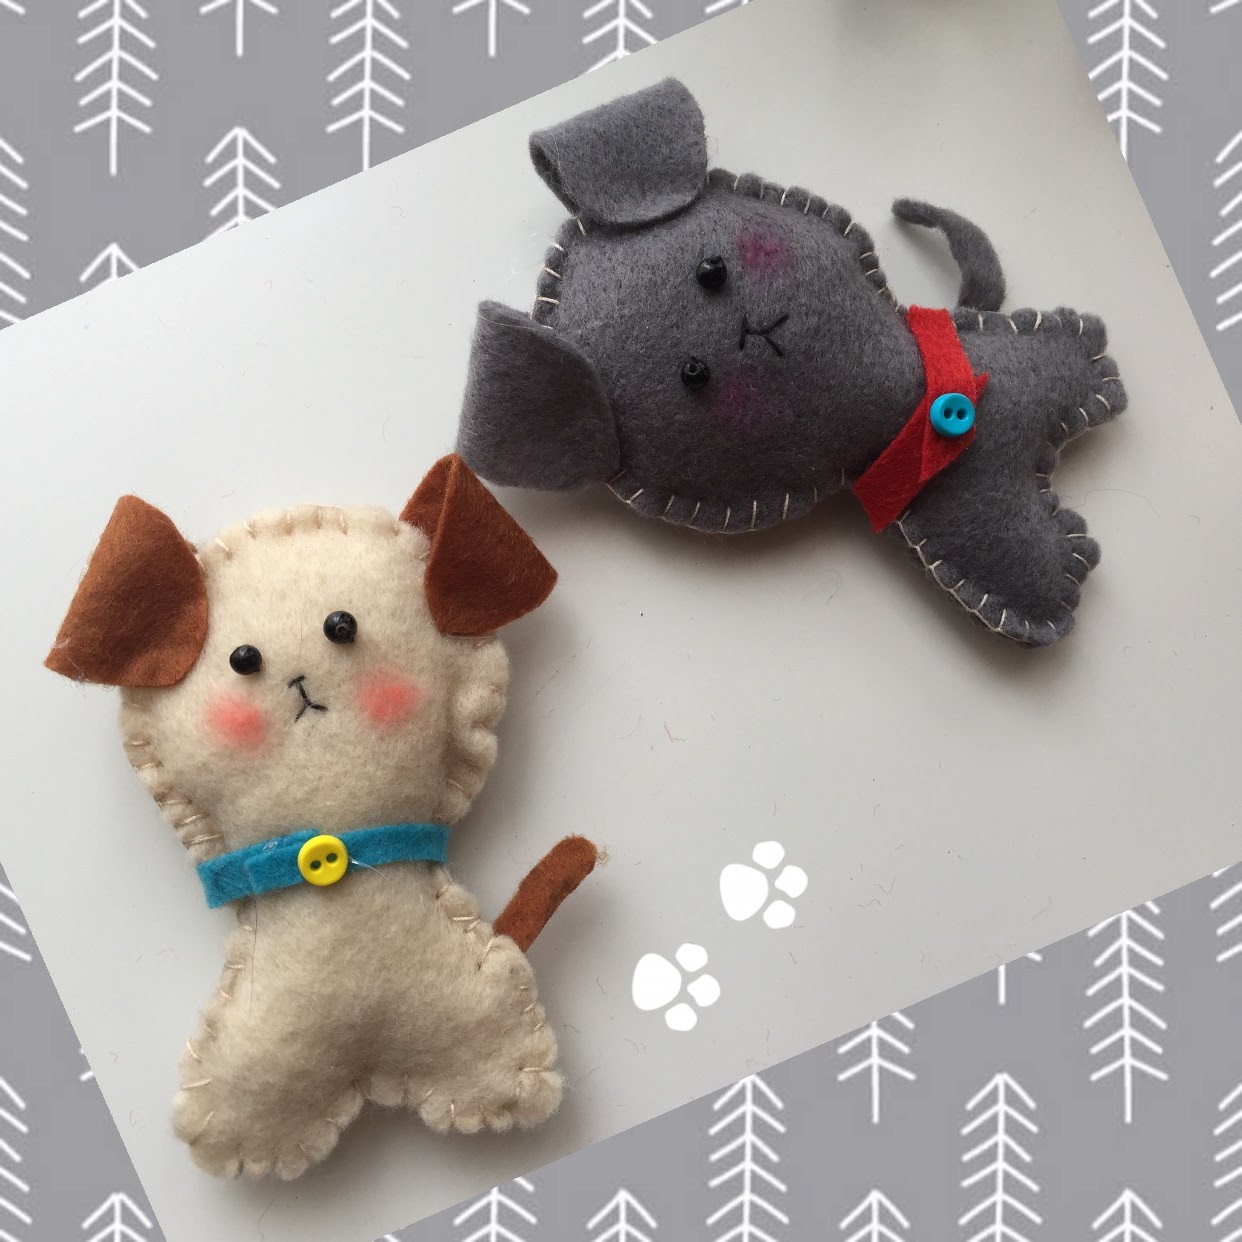
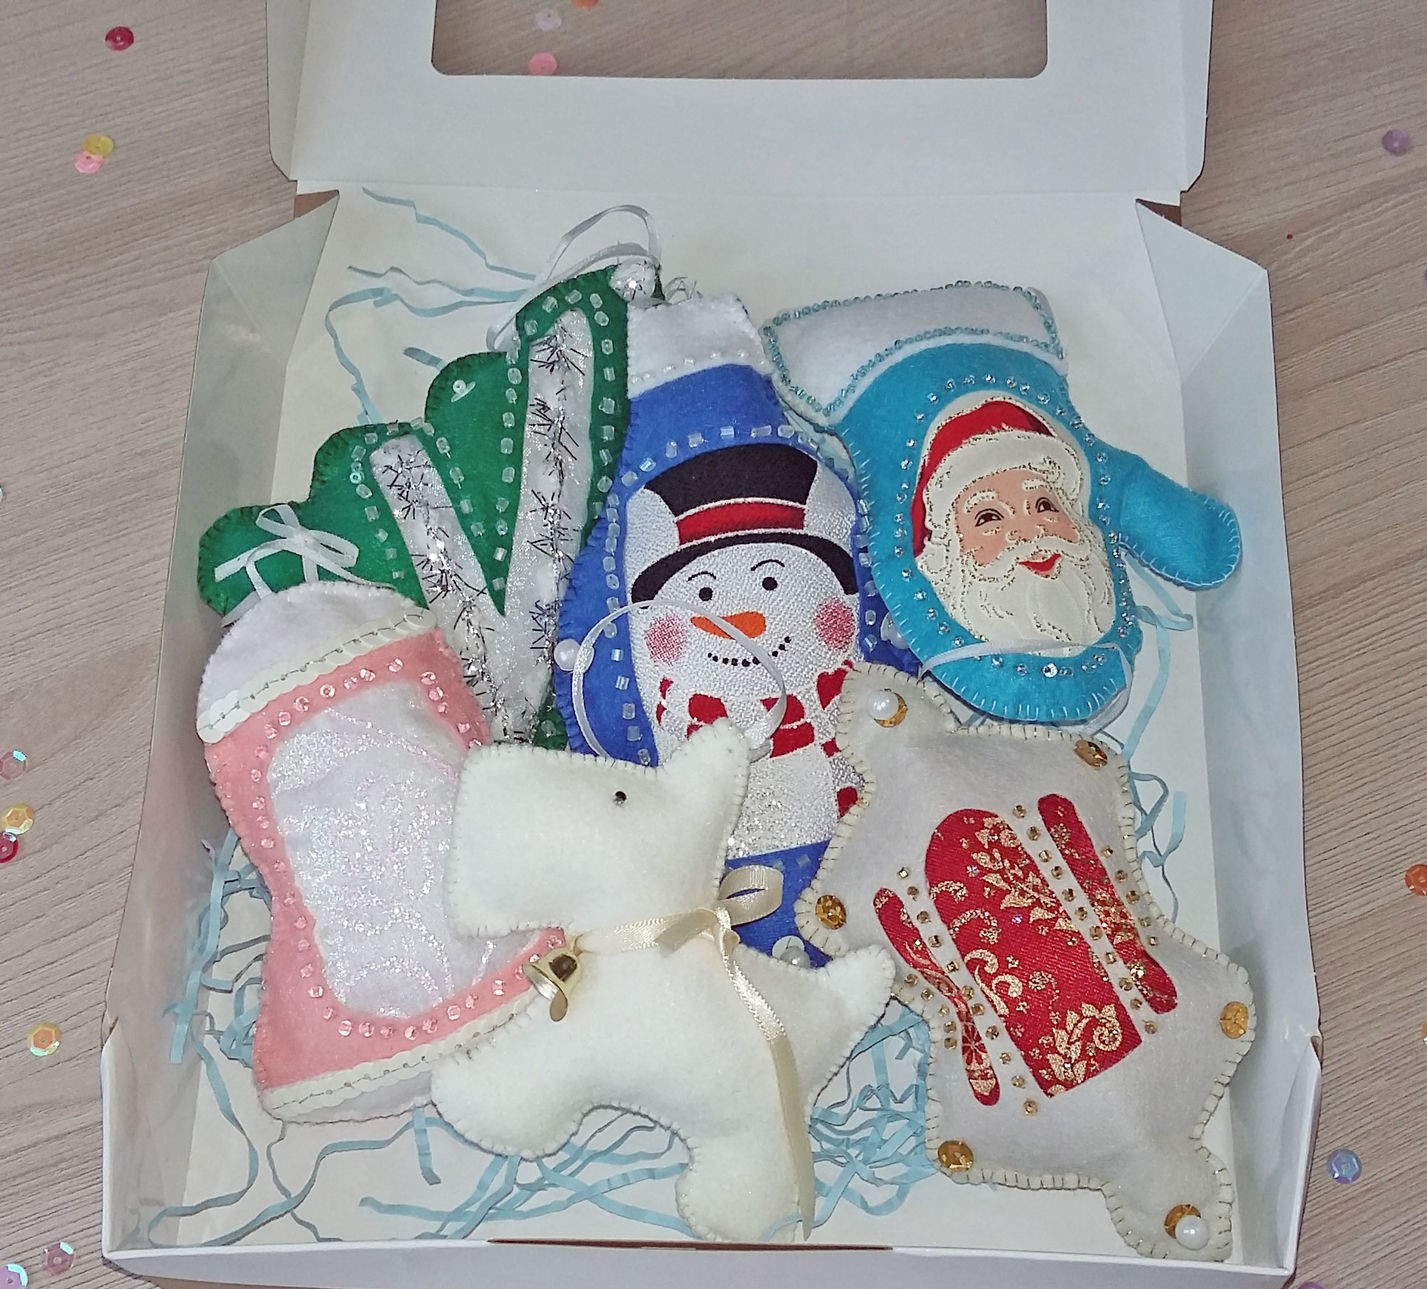
return to menu ↑ return to menu ↑Felt Decoration
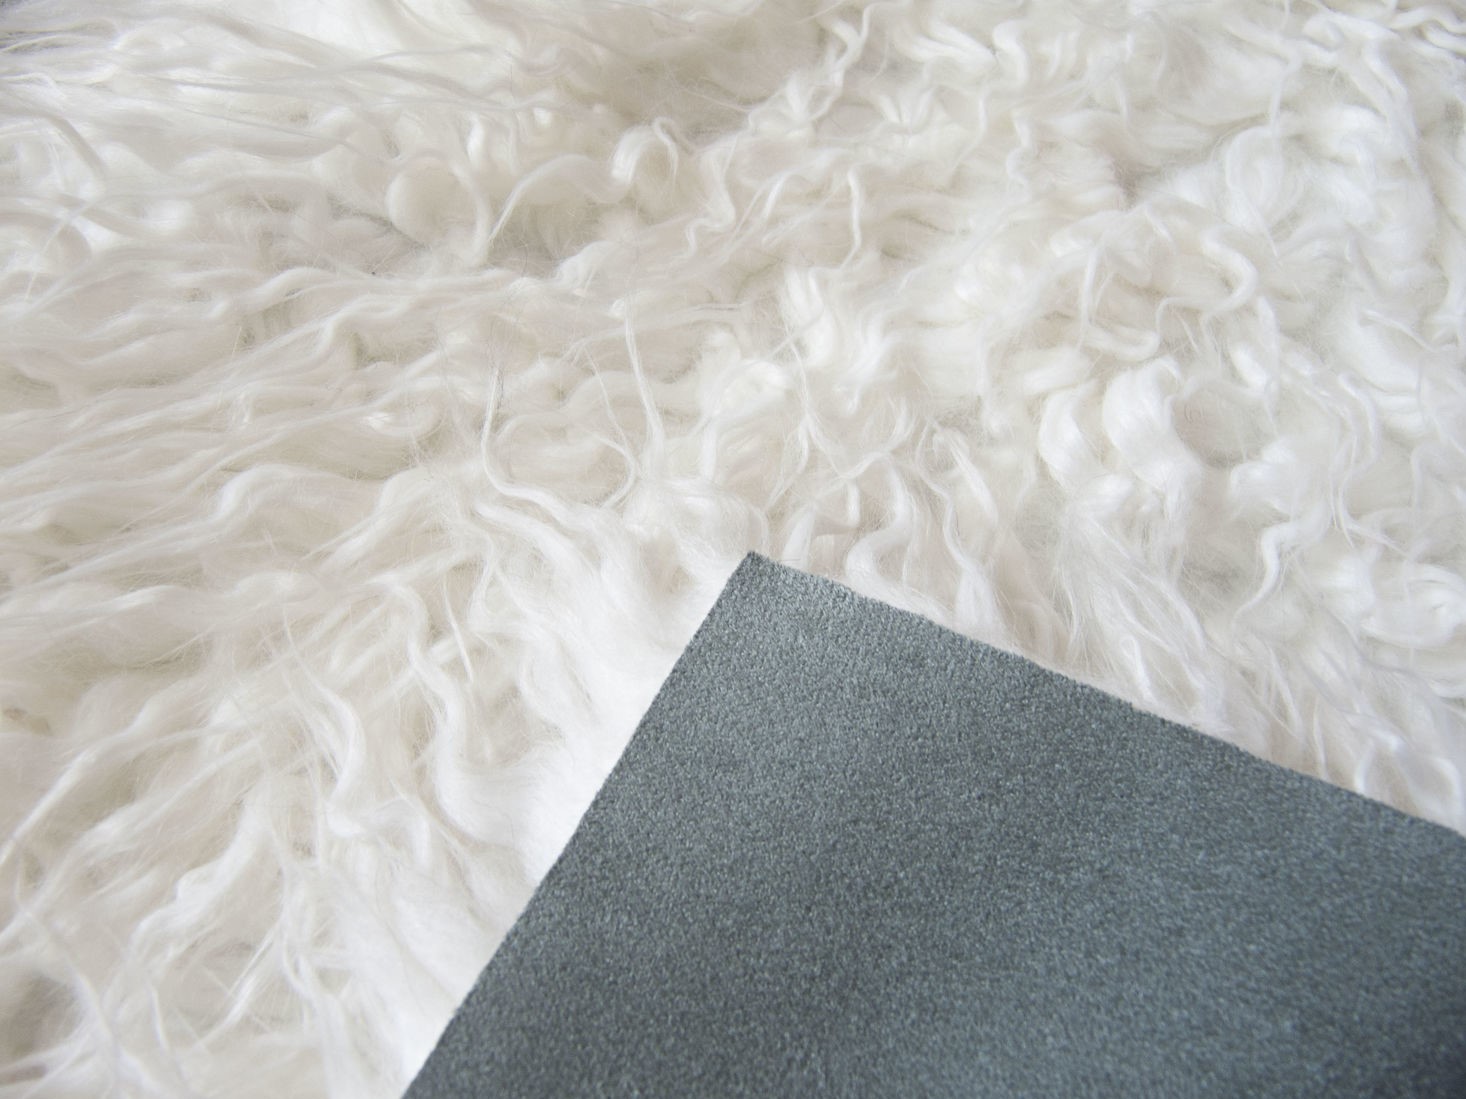
To make a dog with your own hands so that it looks solid, you can with the help of faux fur. Do not rush to refuse, saying that you definitely do not have such material, and you are not going to buy it. In fact, unnecessary fur can be found in almost any home, at least a pair of old boots that are a pity to throw, go old grandfather's jacket, most likely, there will definitely be.
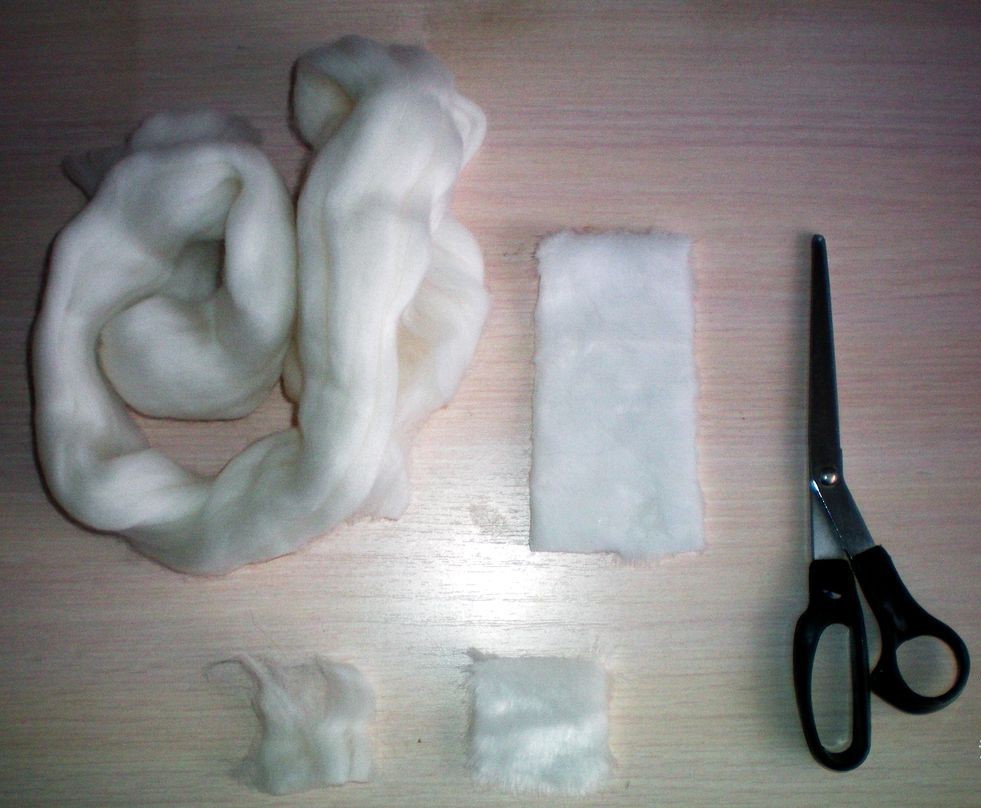
Use white faux fur for crafts
It is necessary to prepare such materials:
- faux fur;
Faux fur for future crafts
- felt;
Gray felt for the main part of crafts
- Buttons for mouth, nose and peephole;

Choosing eyes and nose for dogs
- Super glue.
Components can be obtained from old things. Buttons are available in the household for everyone, so suitable ones are easy to find. Finding felt is more difficult, and in itself this material is expensive.. Therefore, it can be replaced by other means, for example, a viscose napkin used for cleaning. It is cheap, and the feel is very similar to felt.
You can replace the felt with a viscose napkin
Production takes place in several stages:

Cut a template from the felt
We get the finished crafts with their own hands
Of course, doing such work is not easy, especially without special sewing skills. Therefore, first it is better to carefully study the stages, honestly evaluate your strength and, if necessary, practice on the draft version of the product. The result exactly justifies the effort, because the souvenirs with the symbol of the year are always in trend.
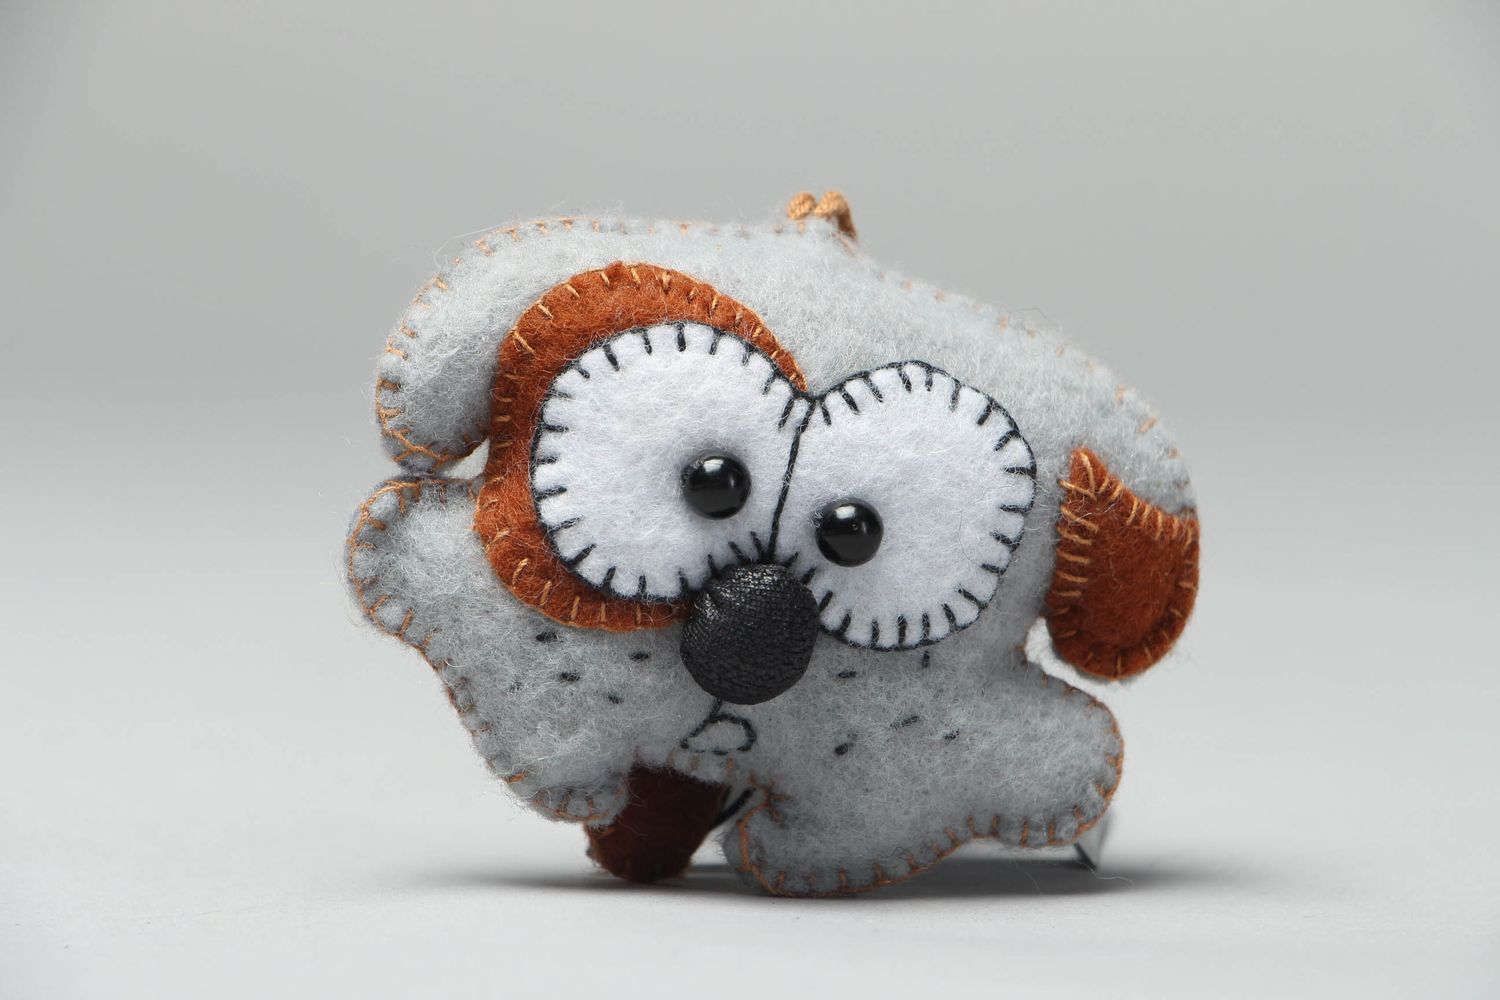
Learn all the steps to make a felt toy.
It will be interesting to you:REVIEW: Decorating windows for the New 2018: 170+ Photo Ideas to use
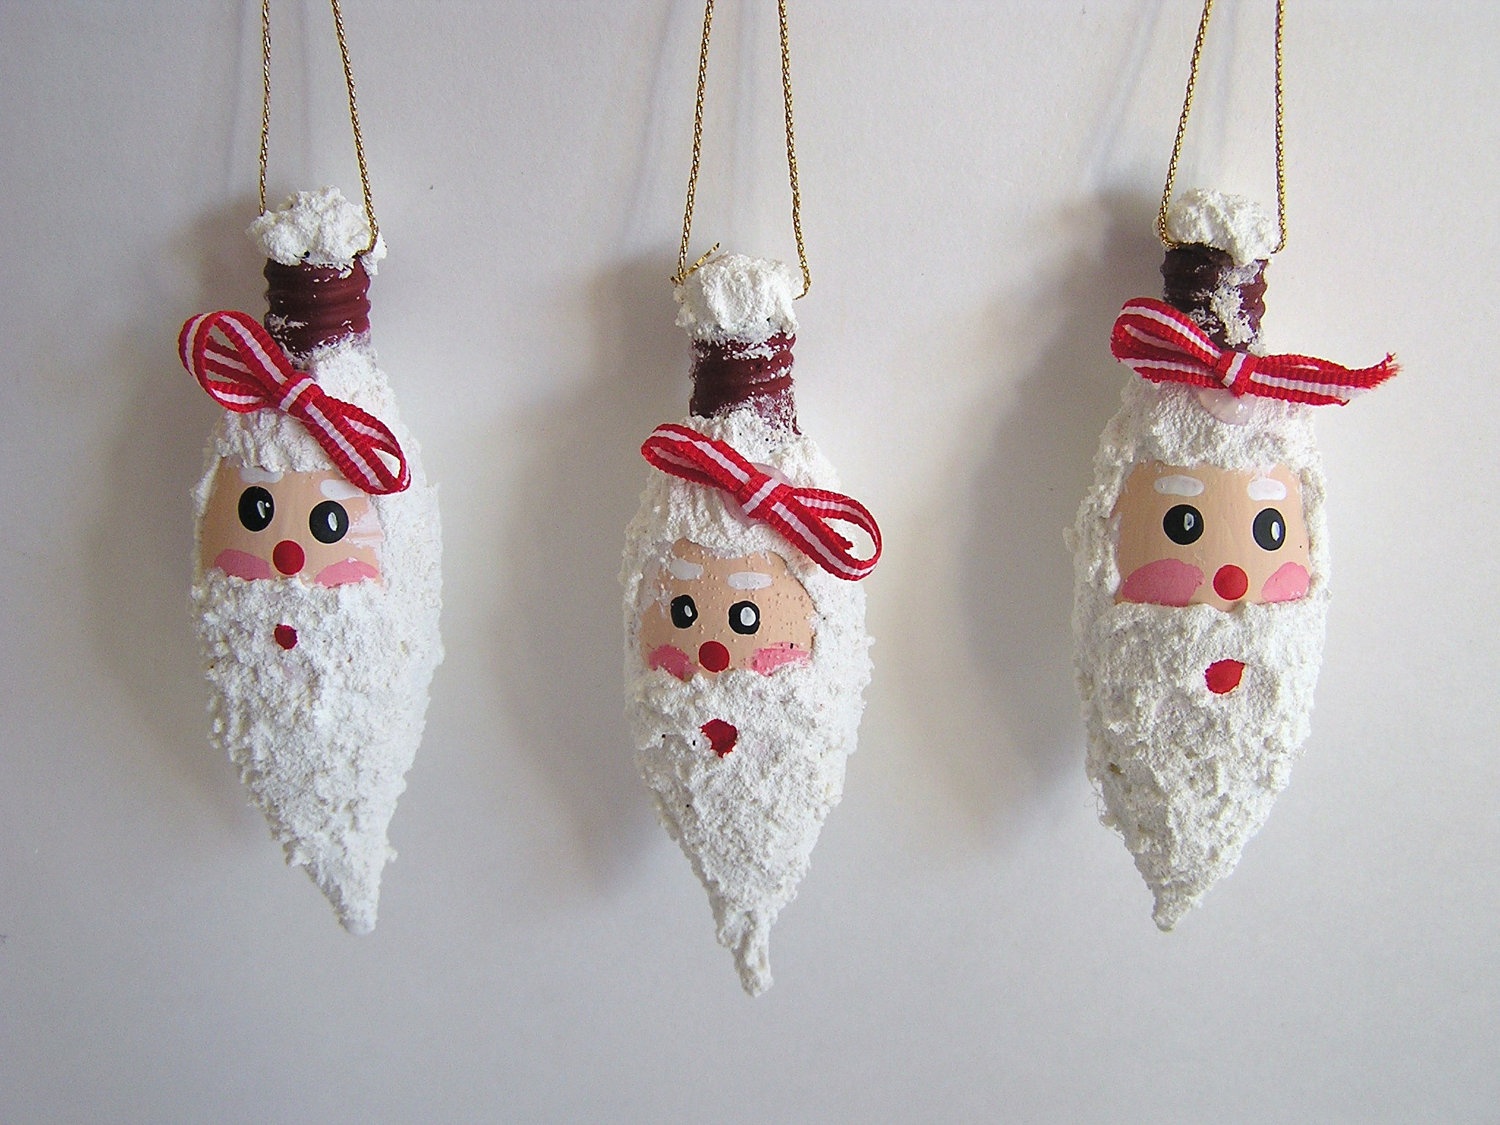
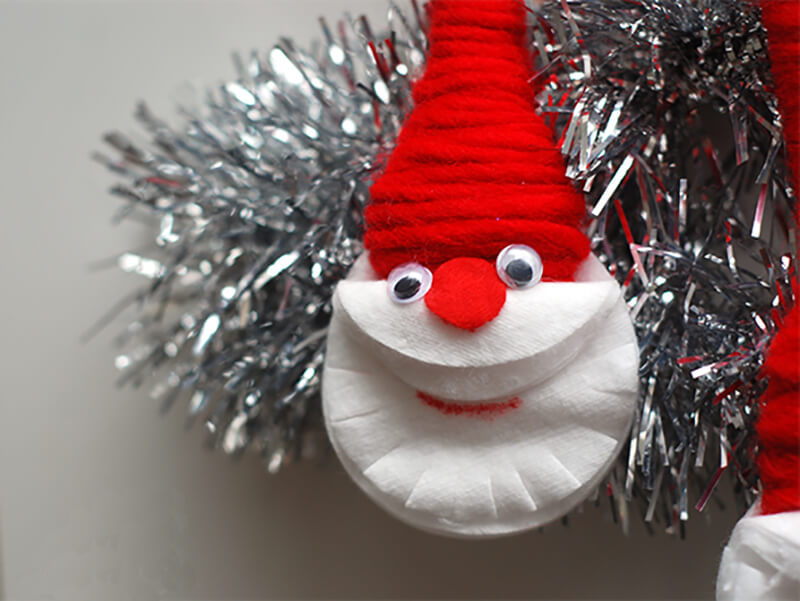
return to menu ↑ return to menu ↑Santa Claus from a spoon and sponge
Such a simple idea of making Santa Claus is one of the simplest, but at the same time original. If you do everything right, you can be sure that no one will guess which materials you used. You can do this work with your child, and the process goes through several stages:
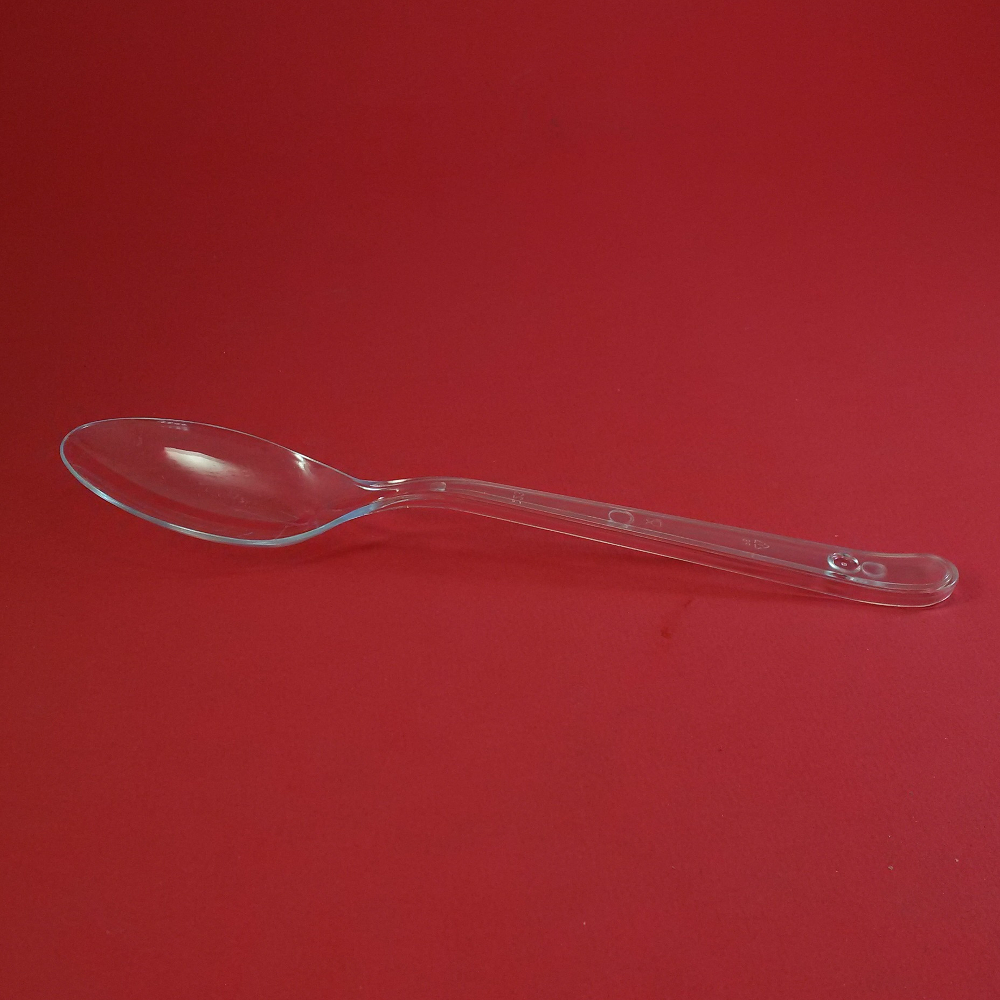
It will take a plastic spoon
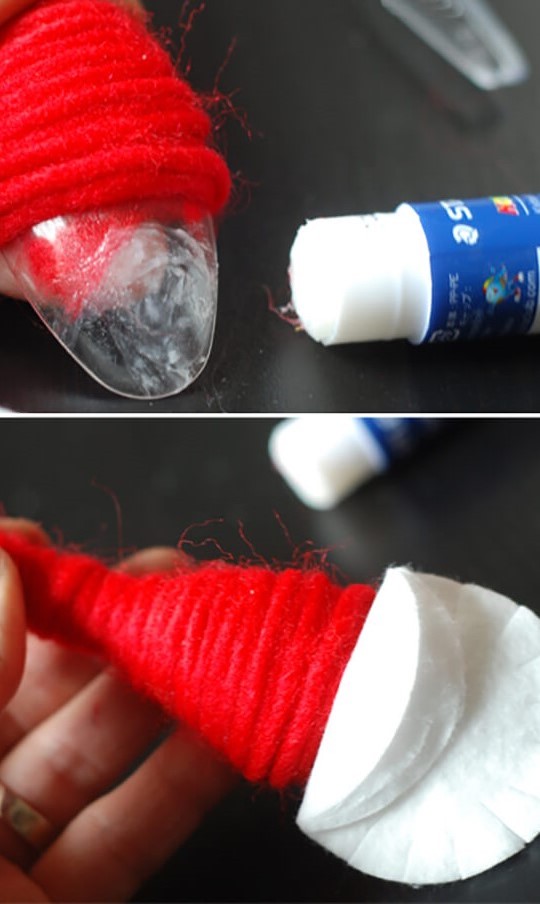
Wrap the red thread on the spoon
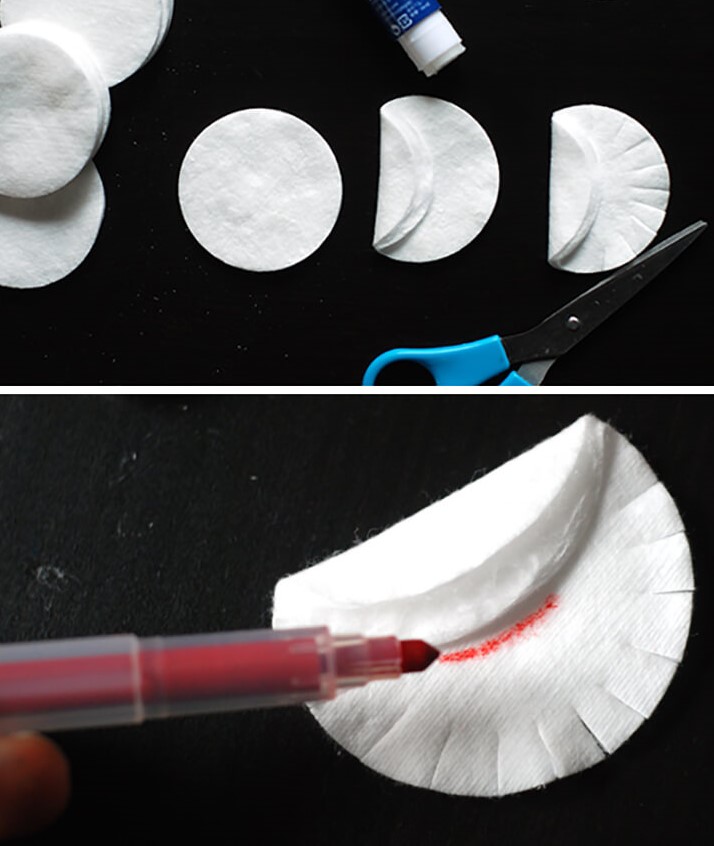
Draw a smile to the future of Santa Claus

Santa Claus with his own hands
It will be interesting to you:OVERVIEW: Decoupage bottles for the New Year (170+ Photos). DIY jewelry. New ideas and workshops
return to menu ↑ return to menu ↑Salt dough toys
For some, it's amazing that you can make New Year's doughs crafts. In fact, this material is often used for making souvenirs, working with it is similar to modeling with clay or clay. So, for the preparation of the test will need:
- 6 tablespoons of flour;
- 12 tablespoons of salt;
- 3 teaspoons of water.
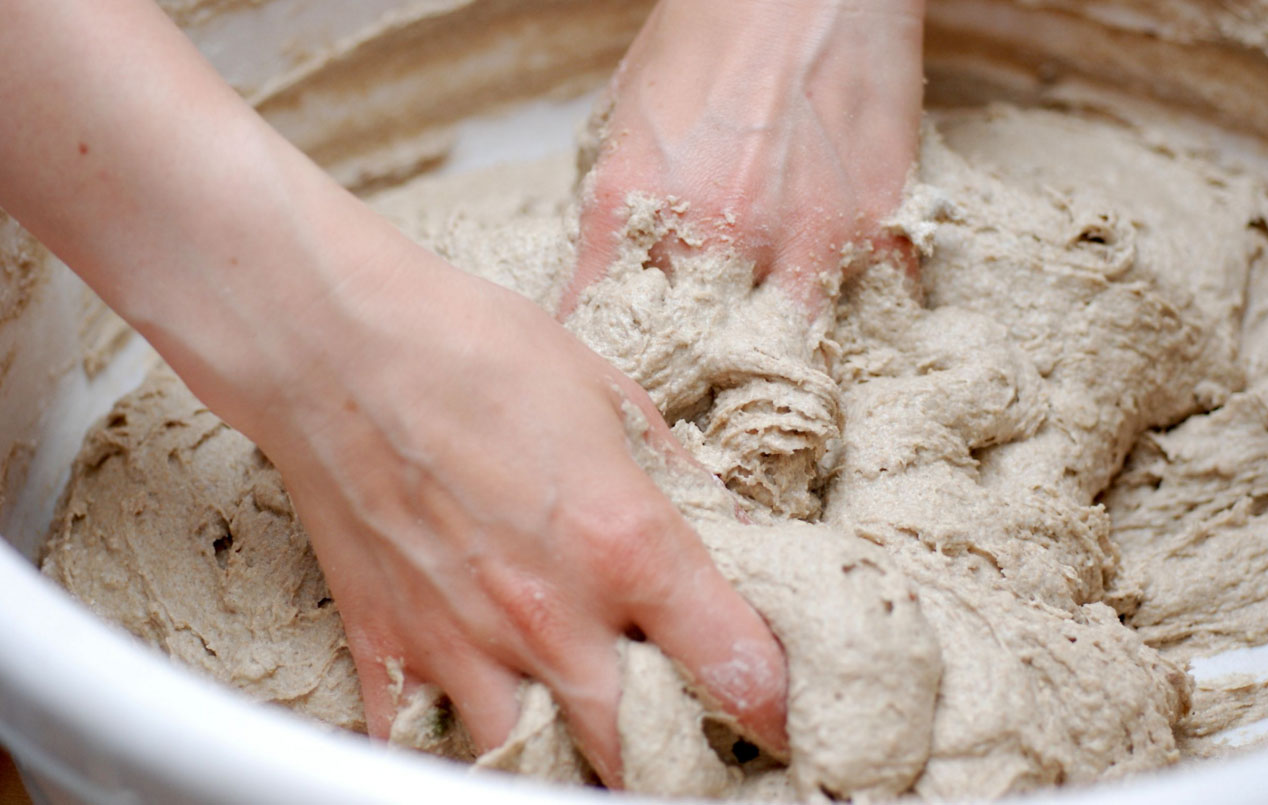
We combine all the ingredients
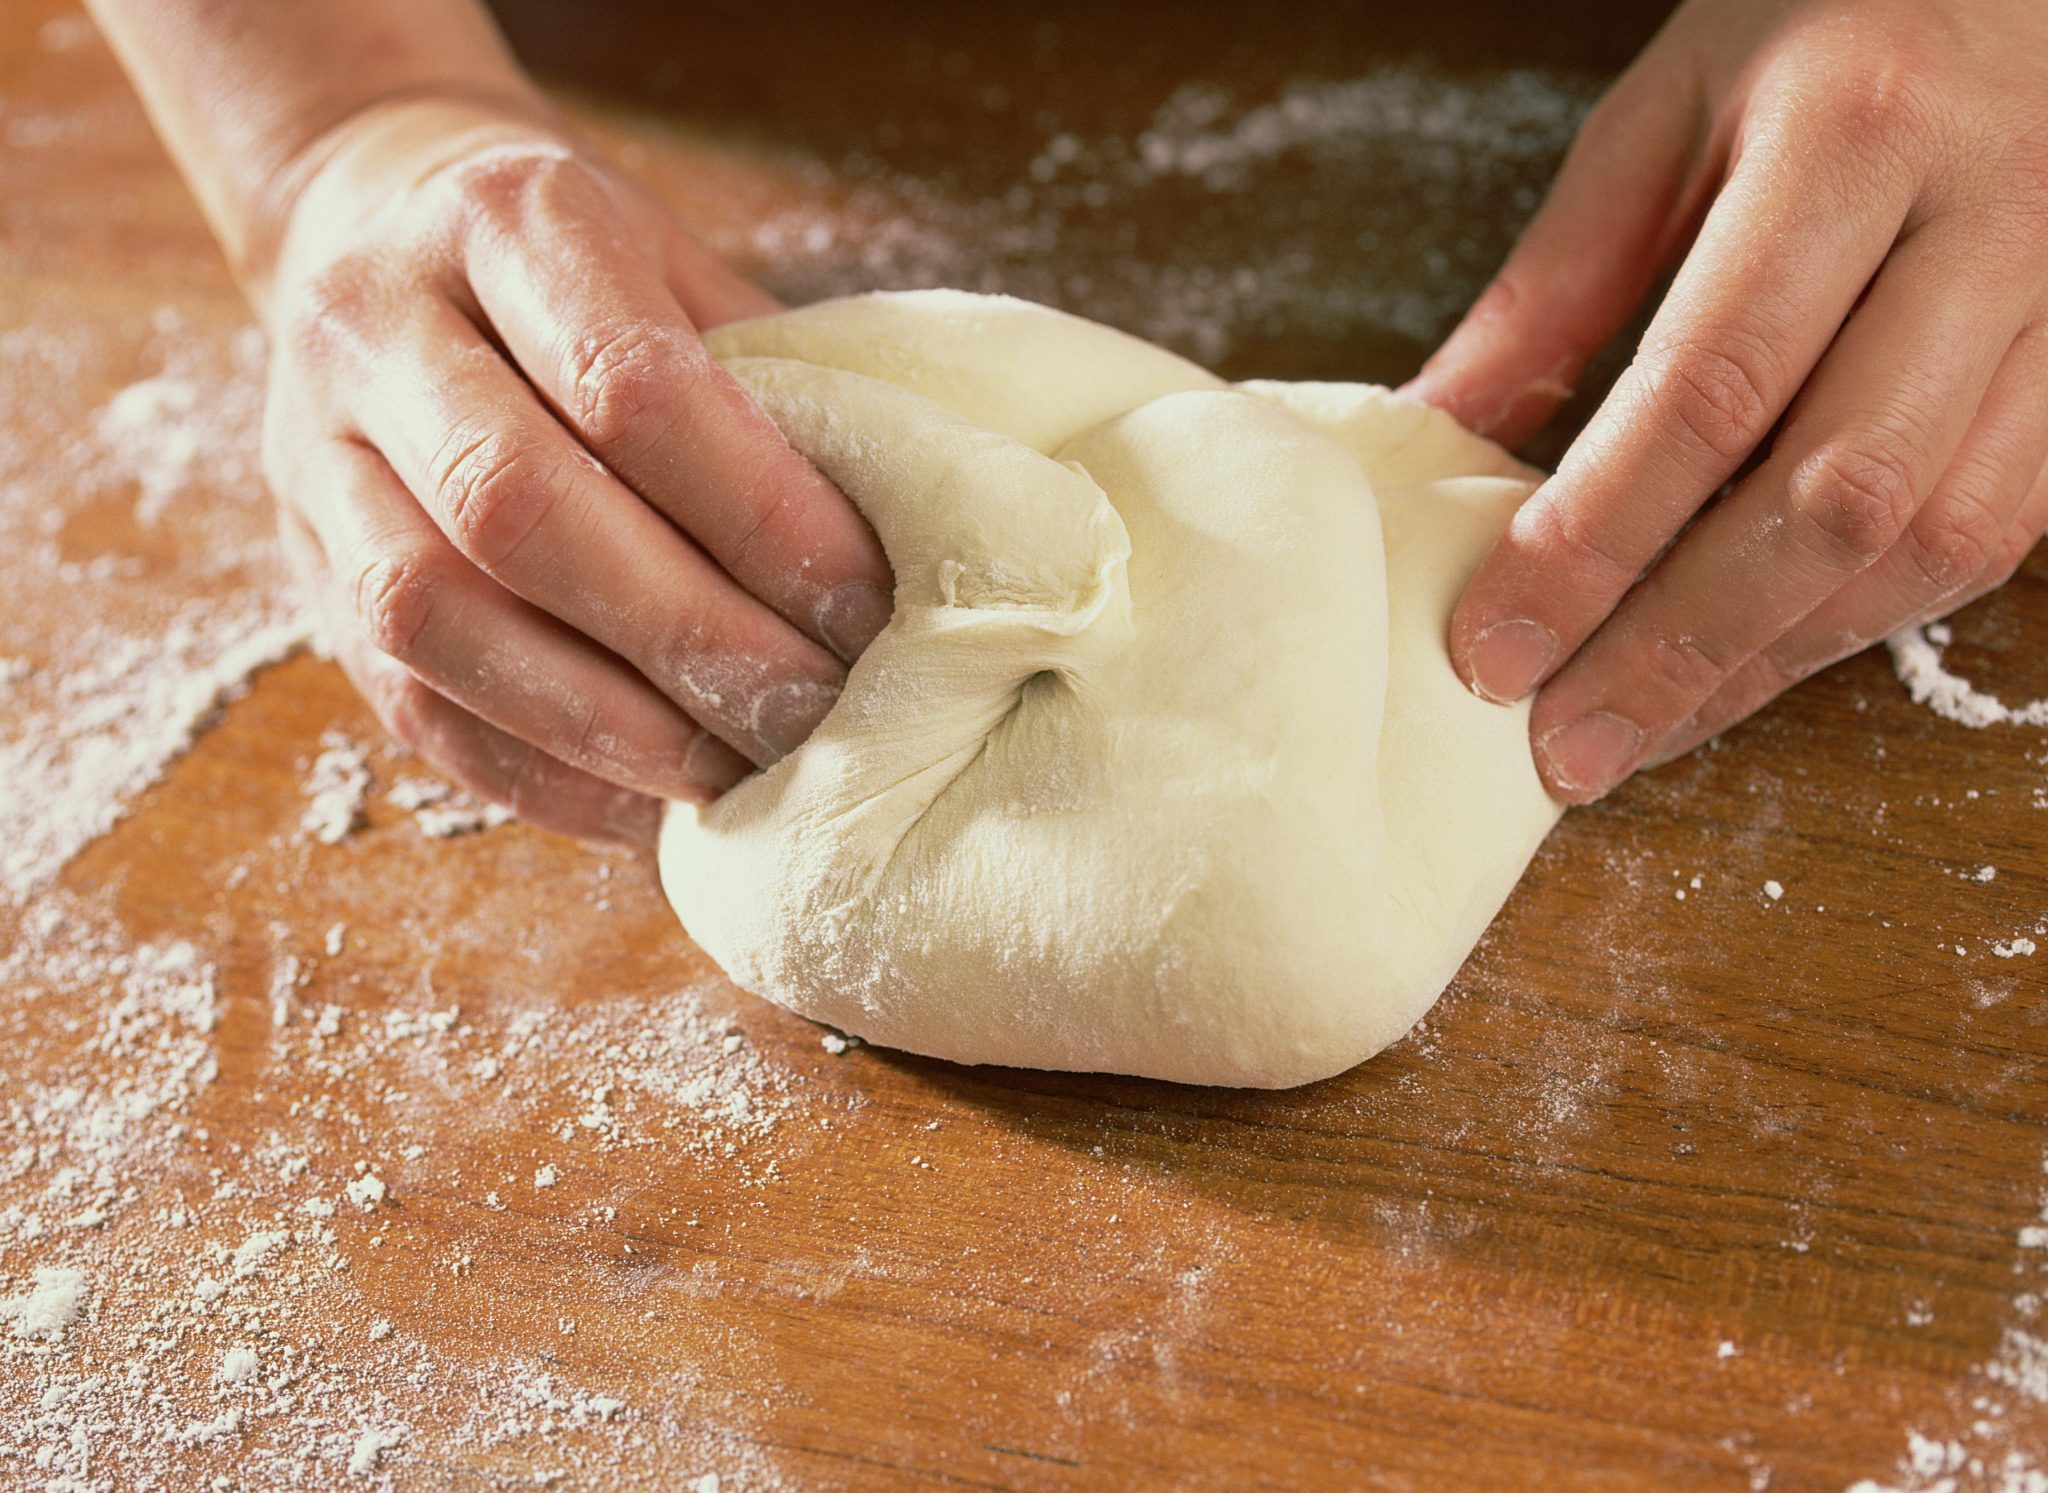
Knead until smooth and soft mass
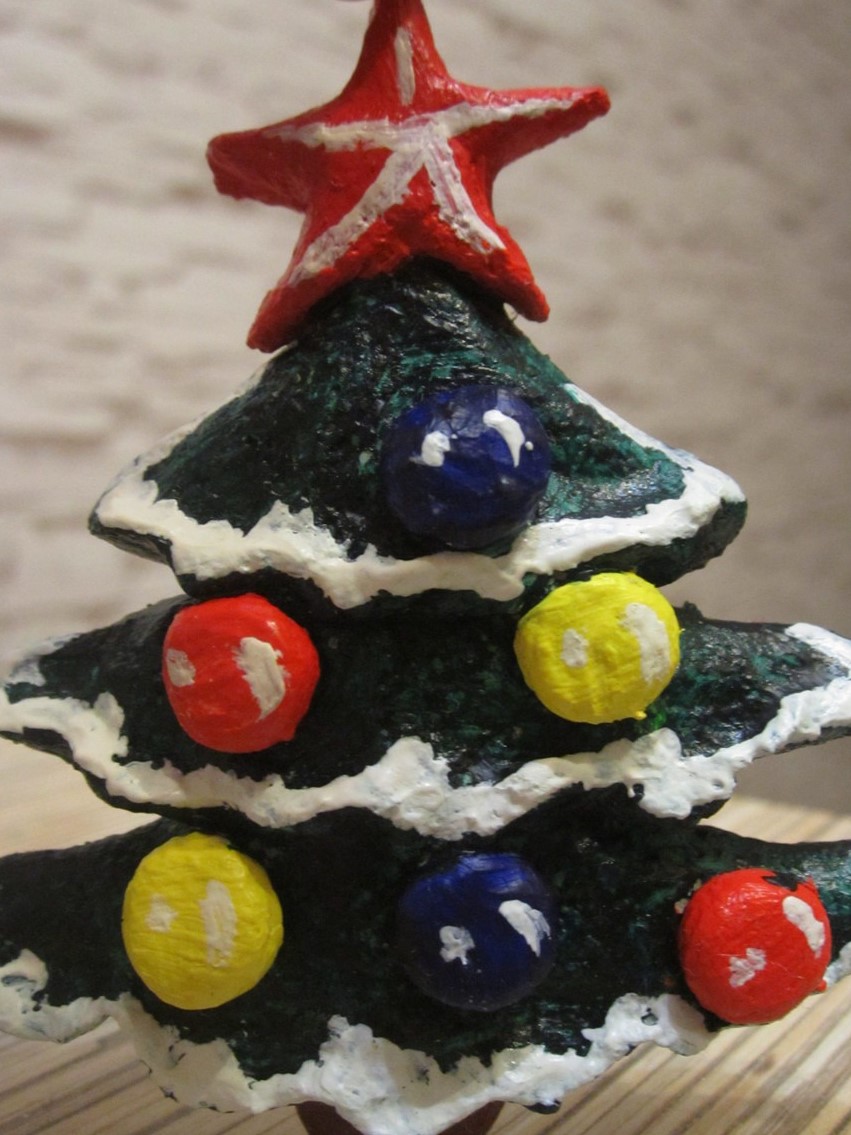
Roll out the dough until its thickness is 4-5 mm. After this, we select a suitable recess for it. On the eve of the New Year holidays in many stores they sell molds in the form of Christmas trees, snowmen, toys and other thematic figures. By purchasing at least one of them, each next holiday you can make crafts from salt dough.

Extrude the figures using the molds.
Most needlewomen especially love to make a Christmas tree figurine, choosing the right shape. After using it, a figure is squeezed out of the dough, it should be left for a day in order for it to dry properly.

Herringbone from colored salt dough
After waiting a day, you can begin to decorate the product with paints, it is best to choose thick, for example, gouache. If the souvenir made from salt dough has the shape of a Christmas tree, then a green background is applied first as a base, and then bright colors are used to make patterns.
The product dries quickly, so that in half an hour it can be carried to school, put on the window sill as a decoration or even arranged on a festive table.
Spray the Christmas tree with your child
It will be interesting to you:REVIEW: 180+ Photo ideas: How beautiful and Original to decorate the office with your own hands for the new 2019 year
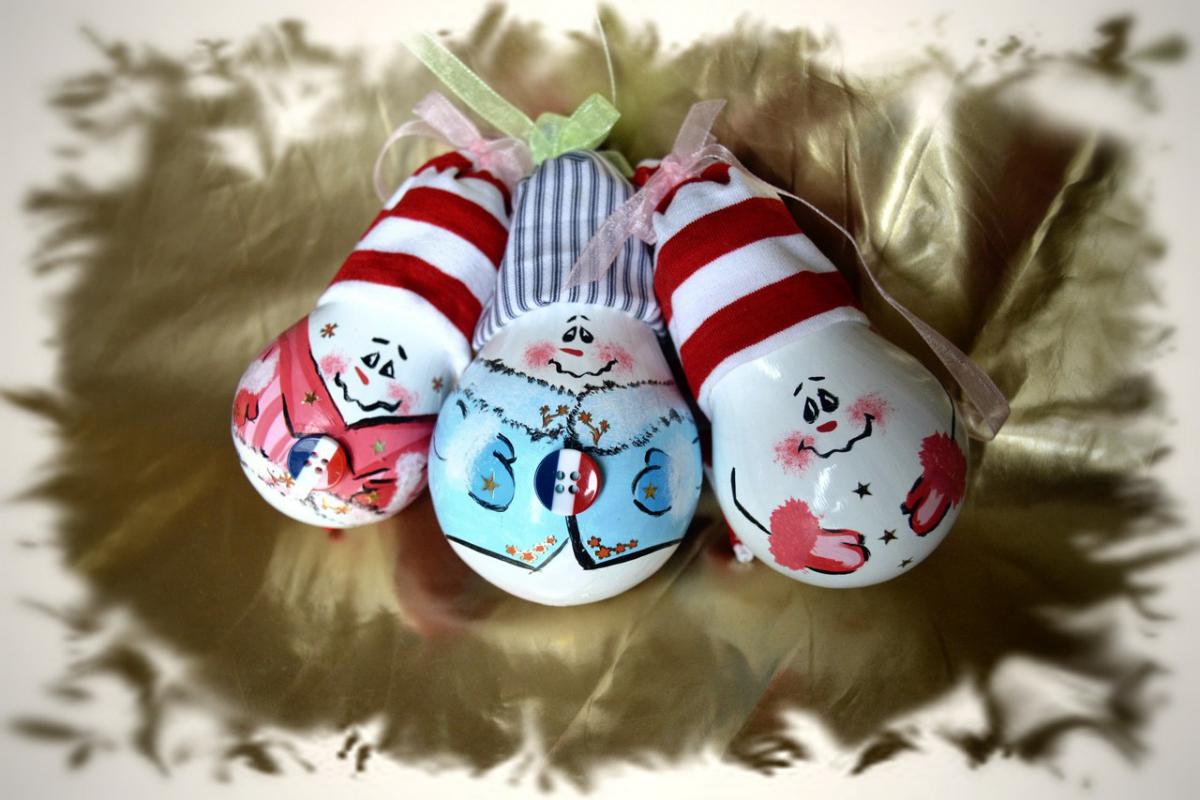
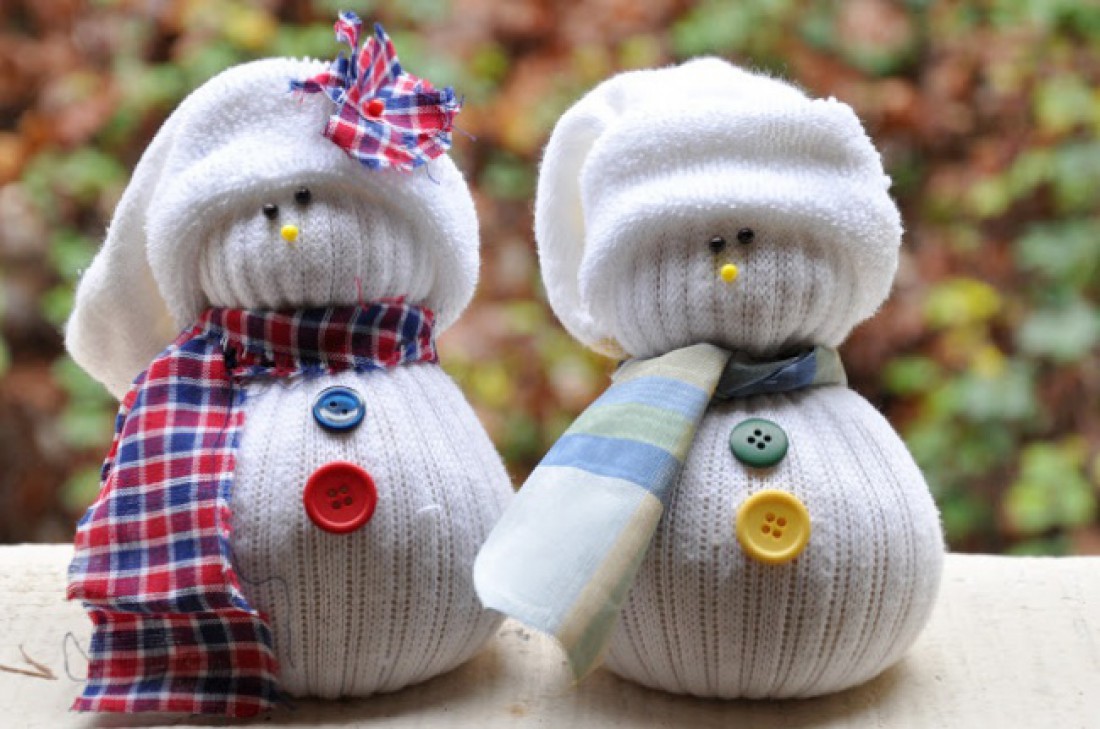
return to menu ↑ return to menu ↑Sock snowman
Another original idea of a festive souvenir with your own hands. If you perform all the processes carefully, no one will guess that this is not a purchased knickknack. For this we need:
- white sock;
- Super glue;
- rice;
- Buttons, threads, needles for a decor.
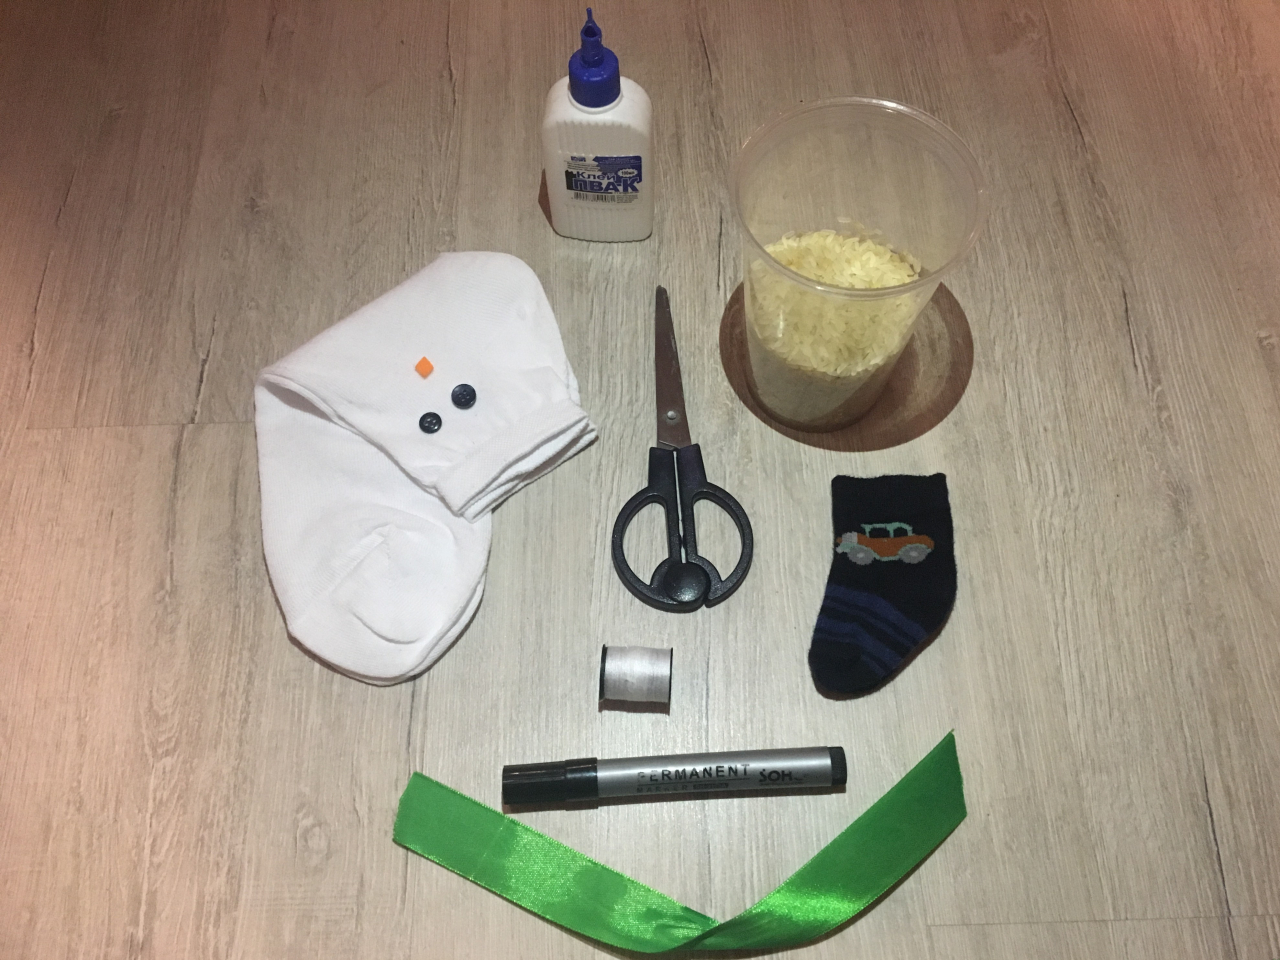
Prepare all the list
To begin with, we prepare a sock: we cut it into two parts so that one of them has a top, a heel and a few centimeters of the foot. It is important that the sock was clean, snow-white, because if you take the old, well-worn, then the snowman will turn out to be appropriate. We fasten the end of the sock along which the cutting line passes, separating a small amount of fabric from above.
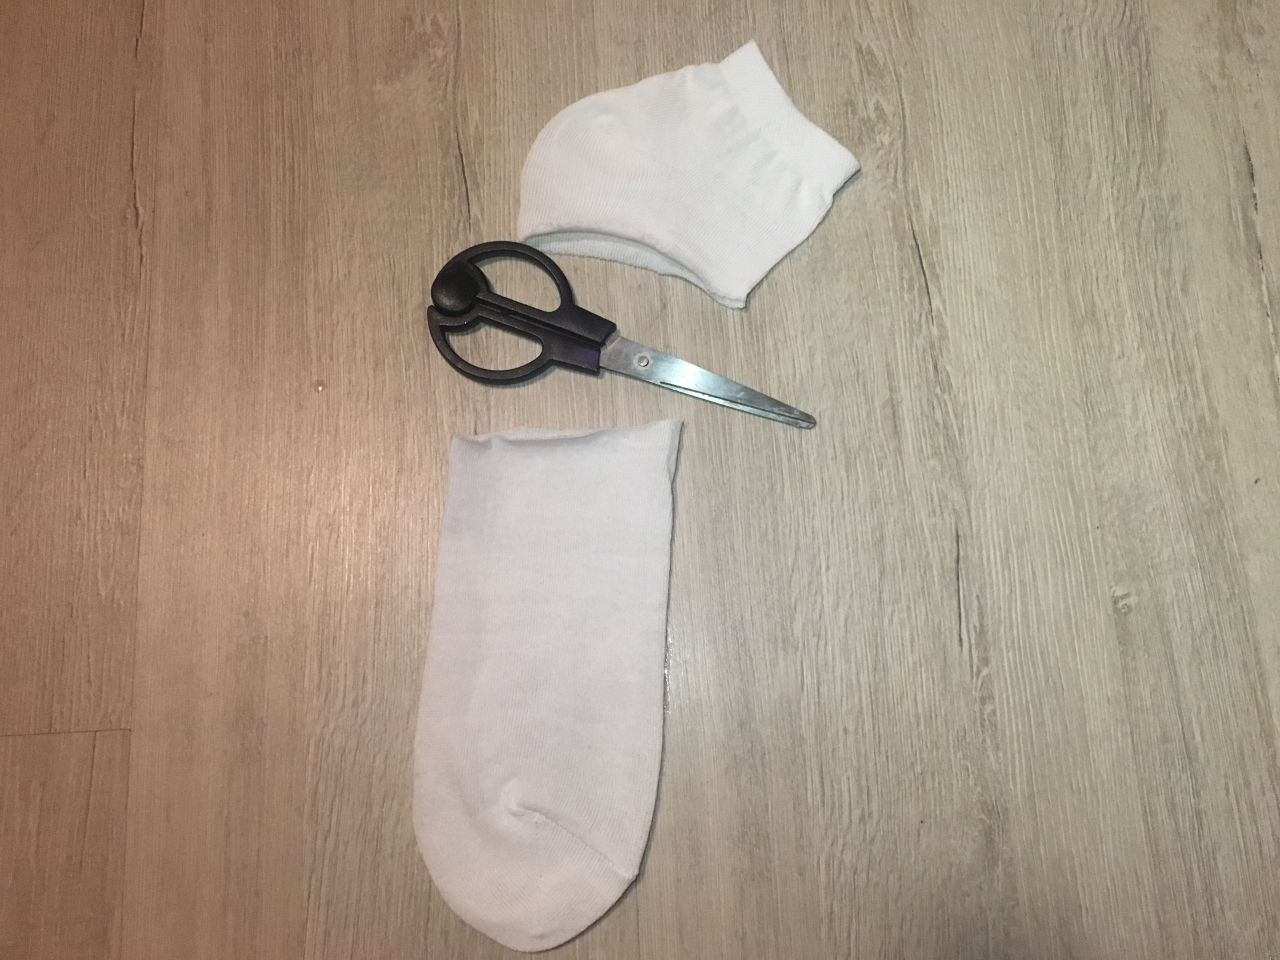
Cut the sock as shown in the photo.
After that, fill the snowman with rice, it is advisable to choose round so that the grains do not stick out. You can use any cereal, but rice is best evenly distributed and it is easy to give the desired shape to the product.
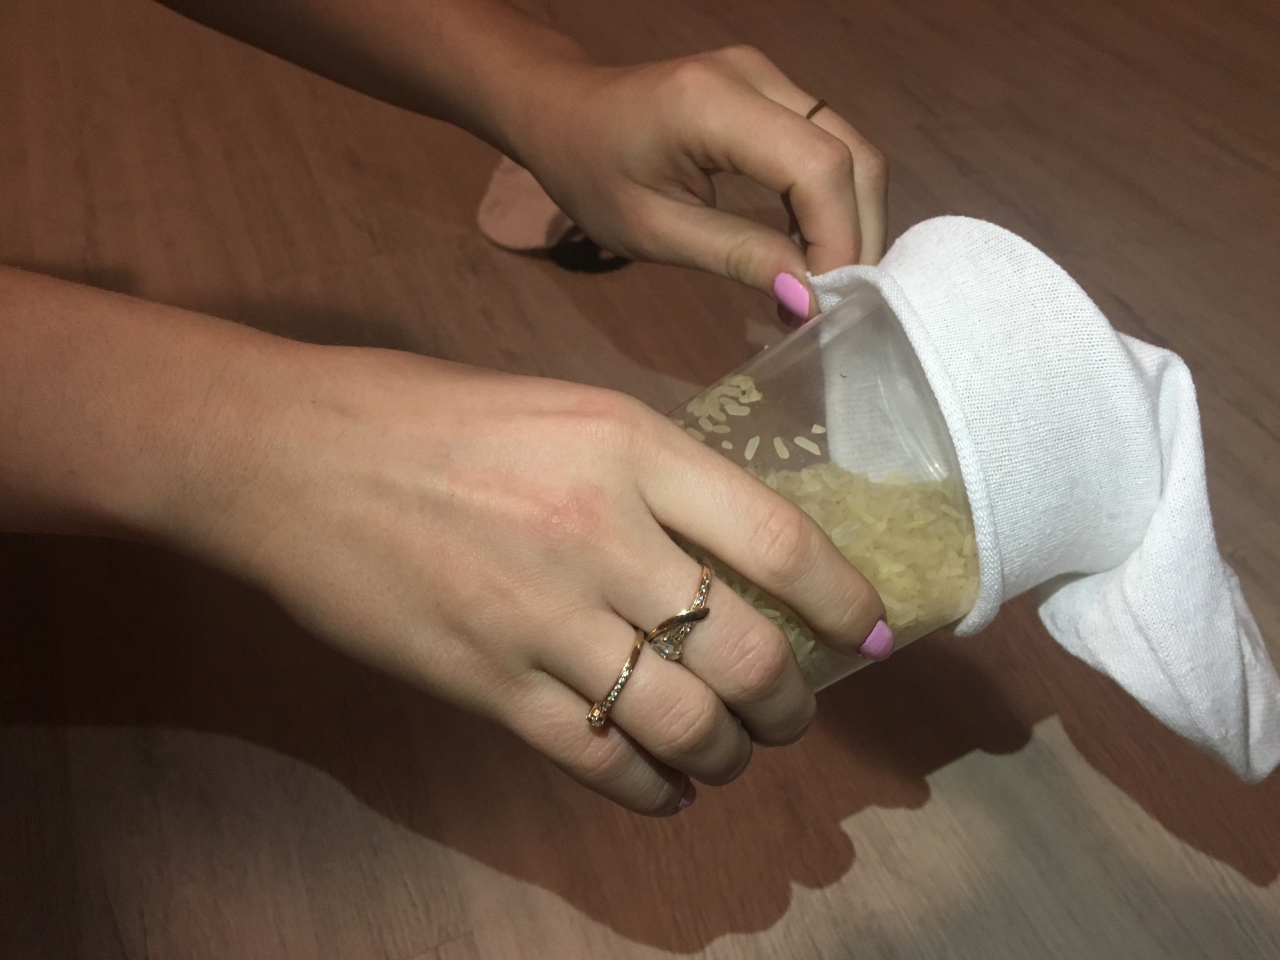
Fill the sock with rice
We put the snowman on the table, divide it into two parts with his hand, squeezing the sock in the middle, fasten this place. Then we form the head, also linking the top.
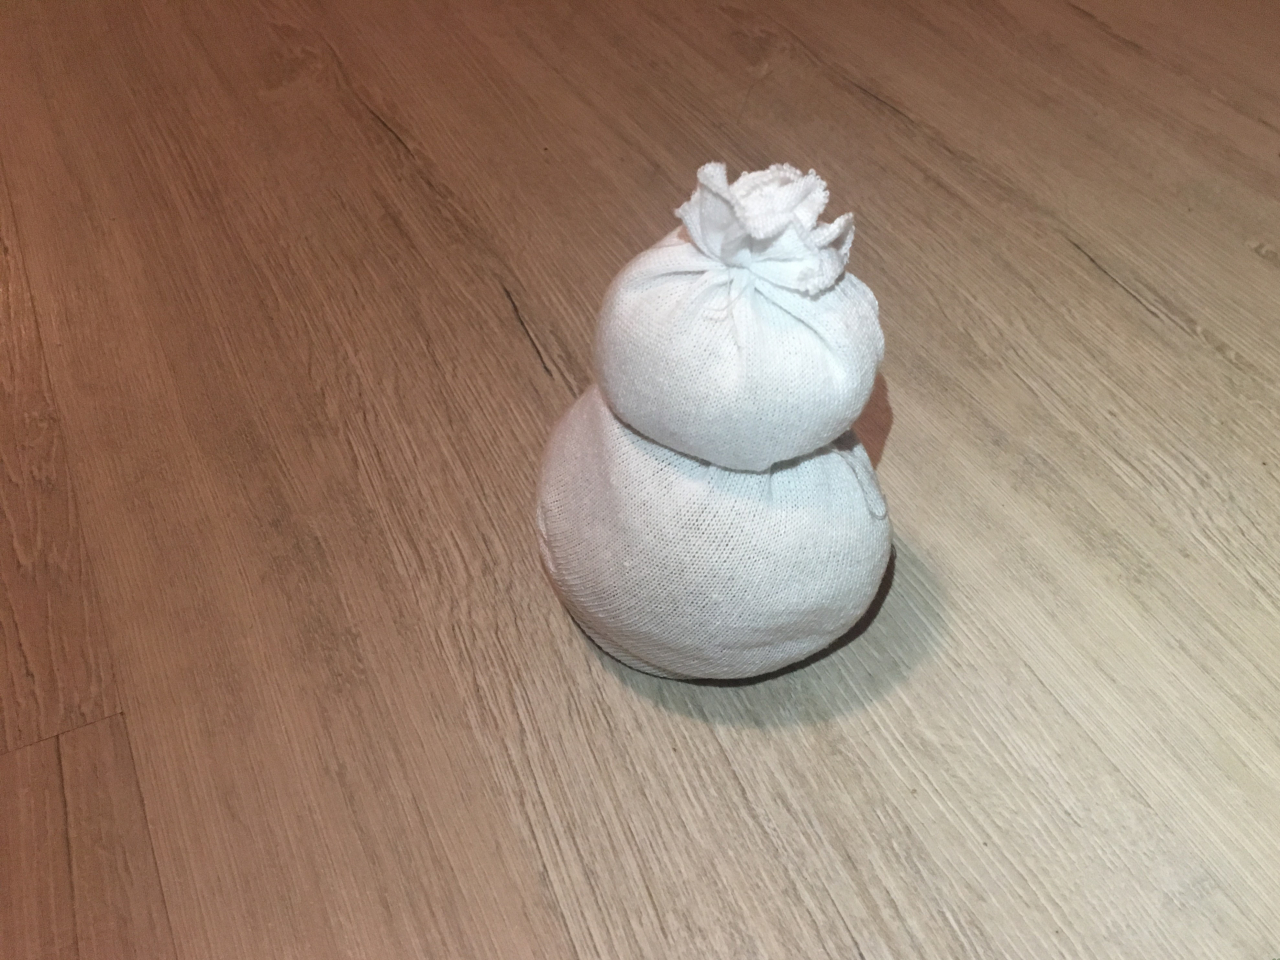
We form the body and head of a snowman
Go to the decor: sewing buttons, make eyes, nose and mouth, you can also make the legs and everything that is enough imagination. Taking a small piece of fabric, you can make a scarf, thus hiding the tied thread. The remaining piece of the sock can also be applied by making a hat out of it, then the knitted tail on top will also hide.

Making eyes, nose and mouth
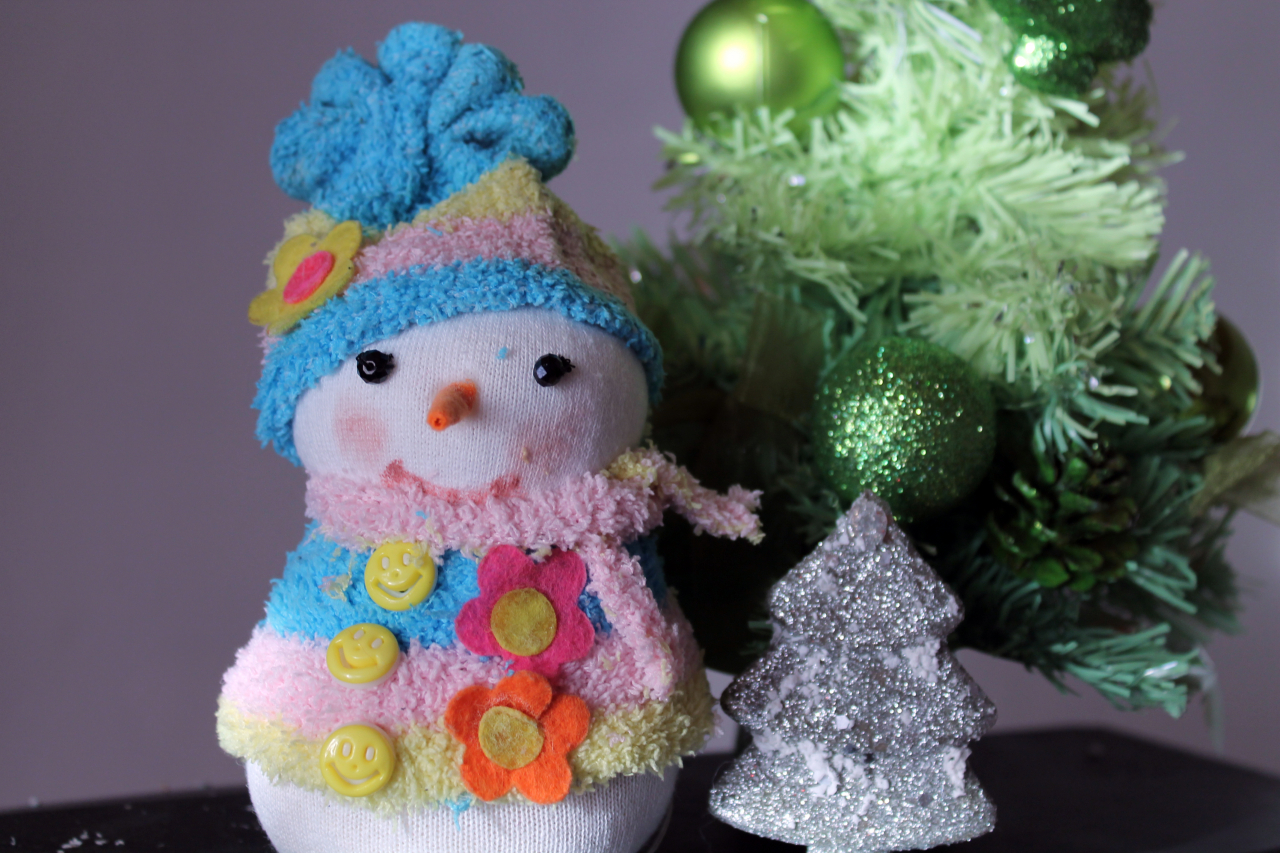
New decor for the New Year is ready
It will be interesting to you:REVIEW: How to make a DIY tree for the New Year with your own hands? We decorate the house before the holiday (185+ Photos)
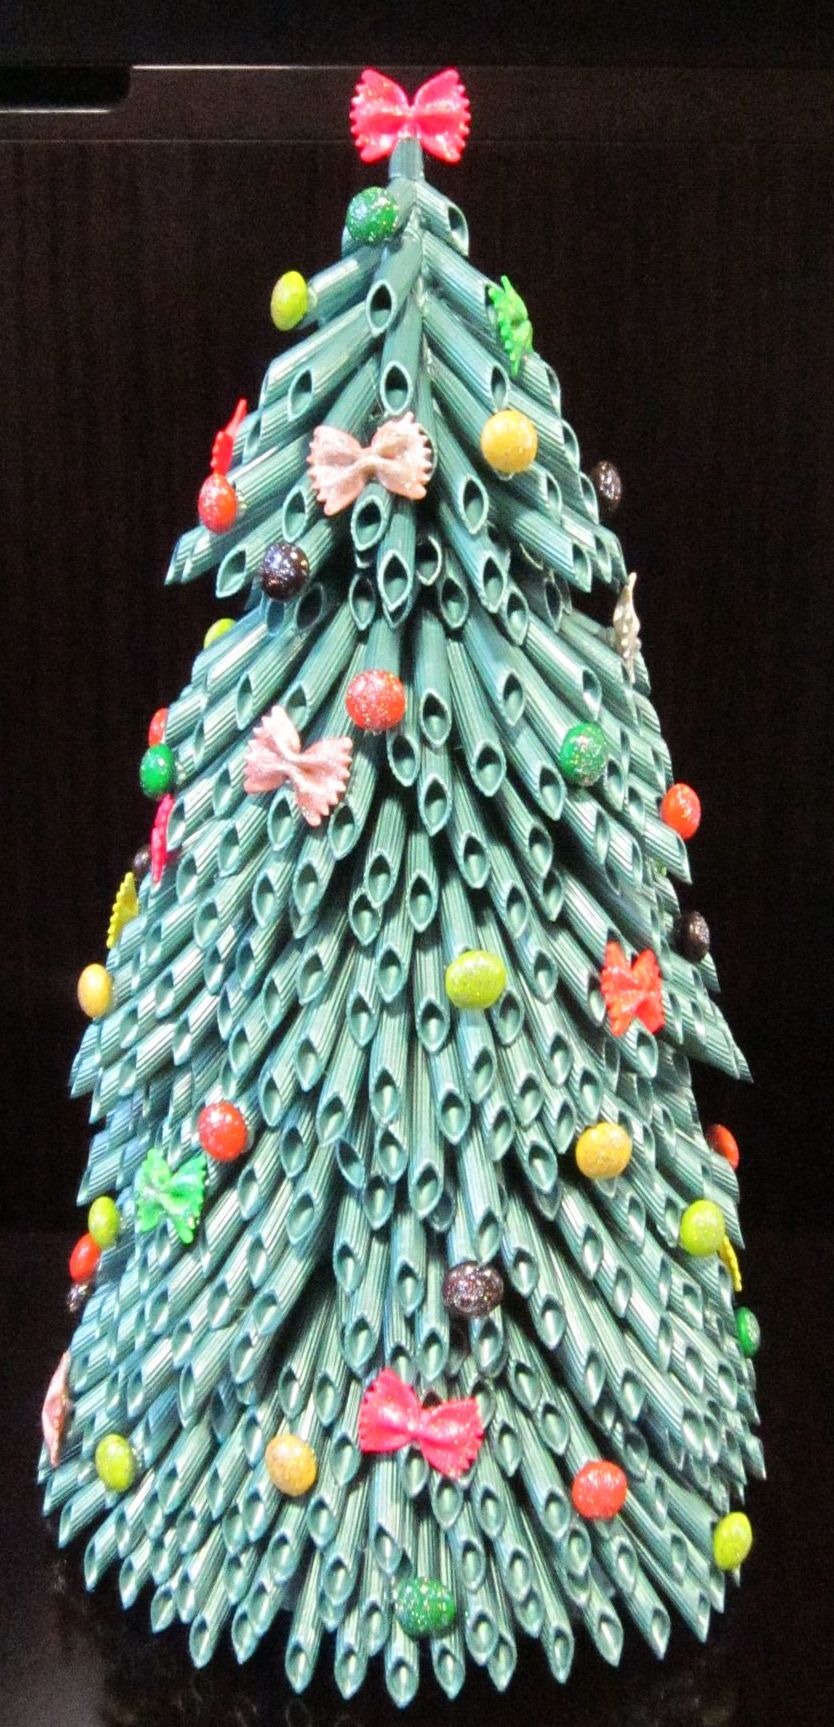
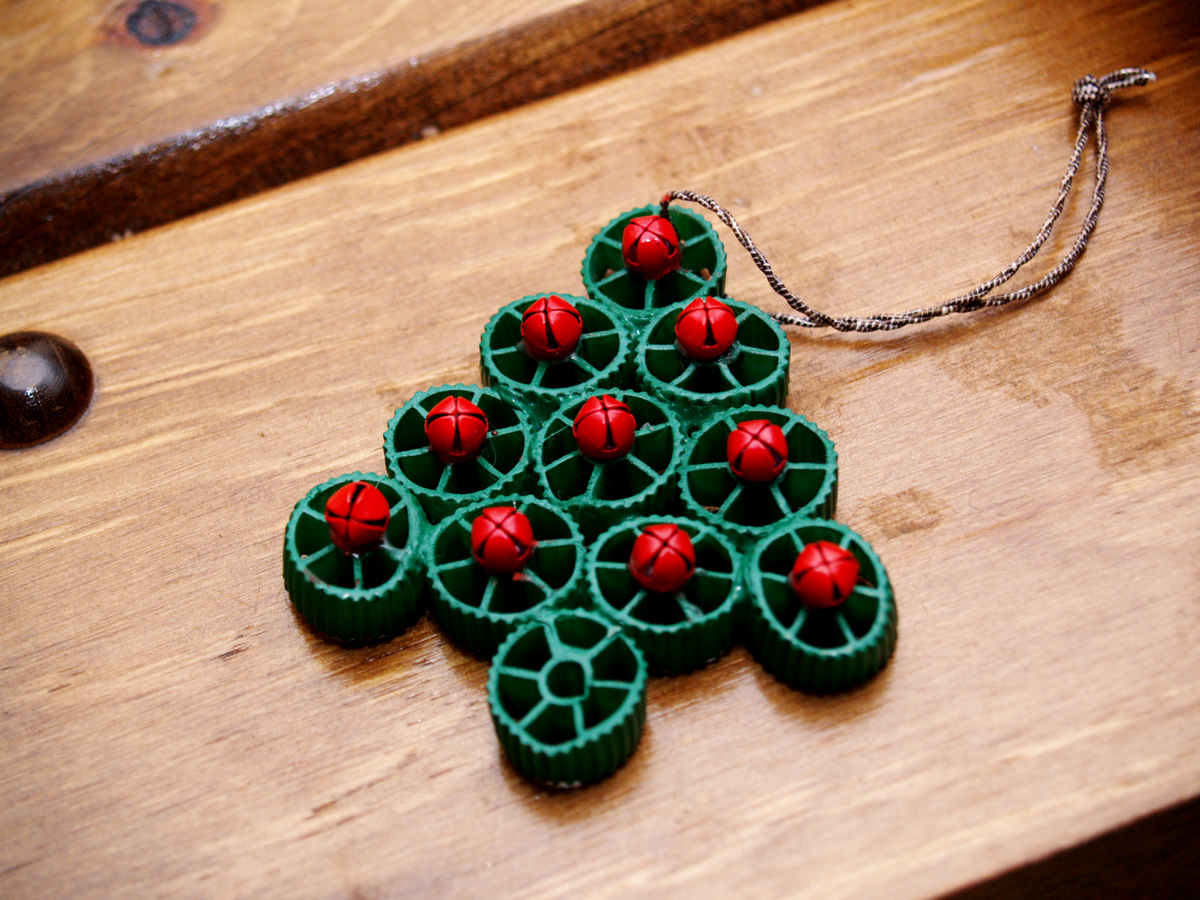
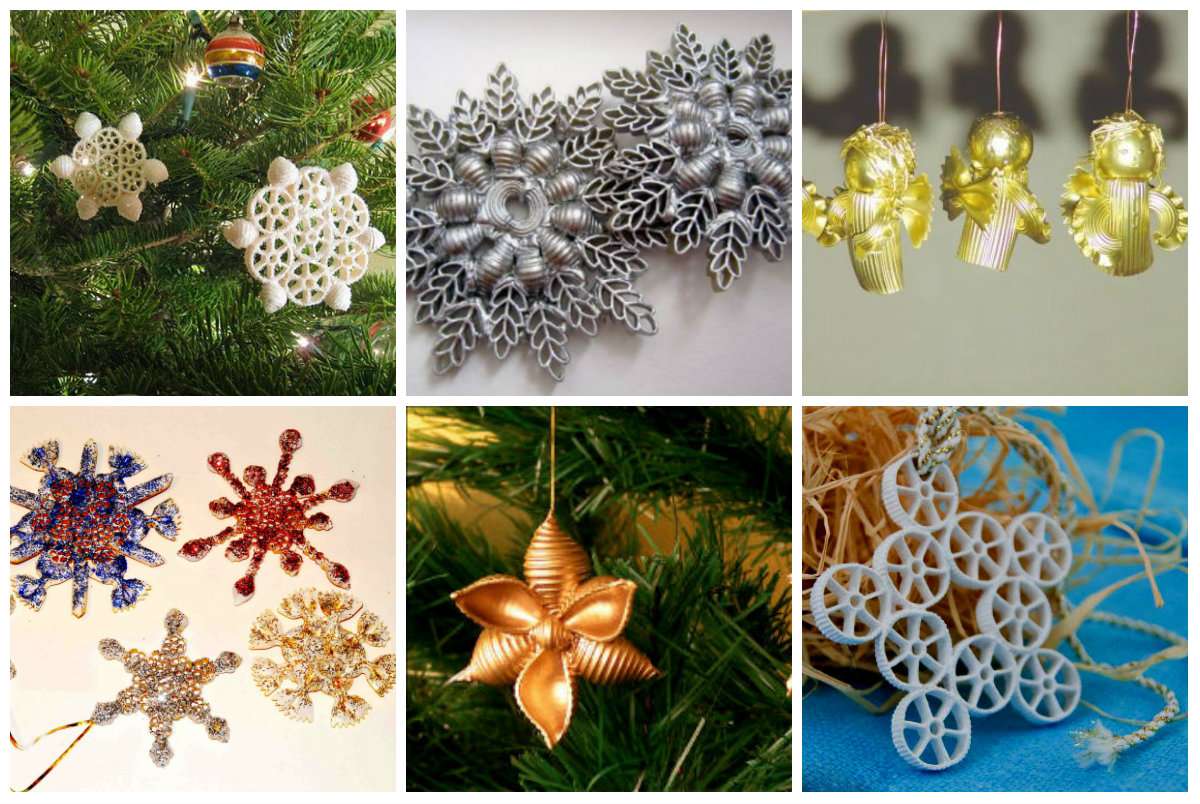
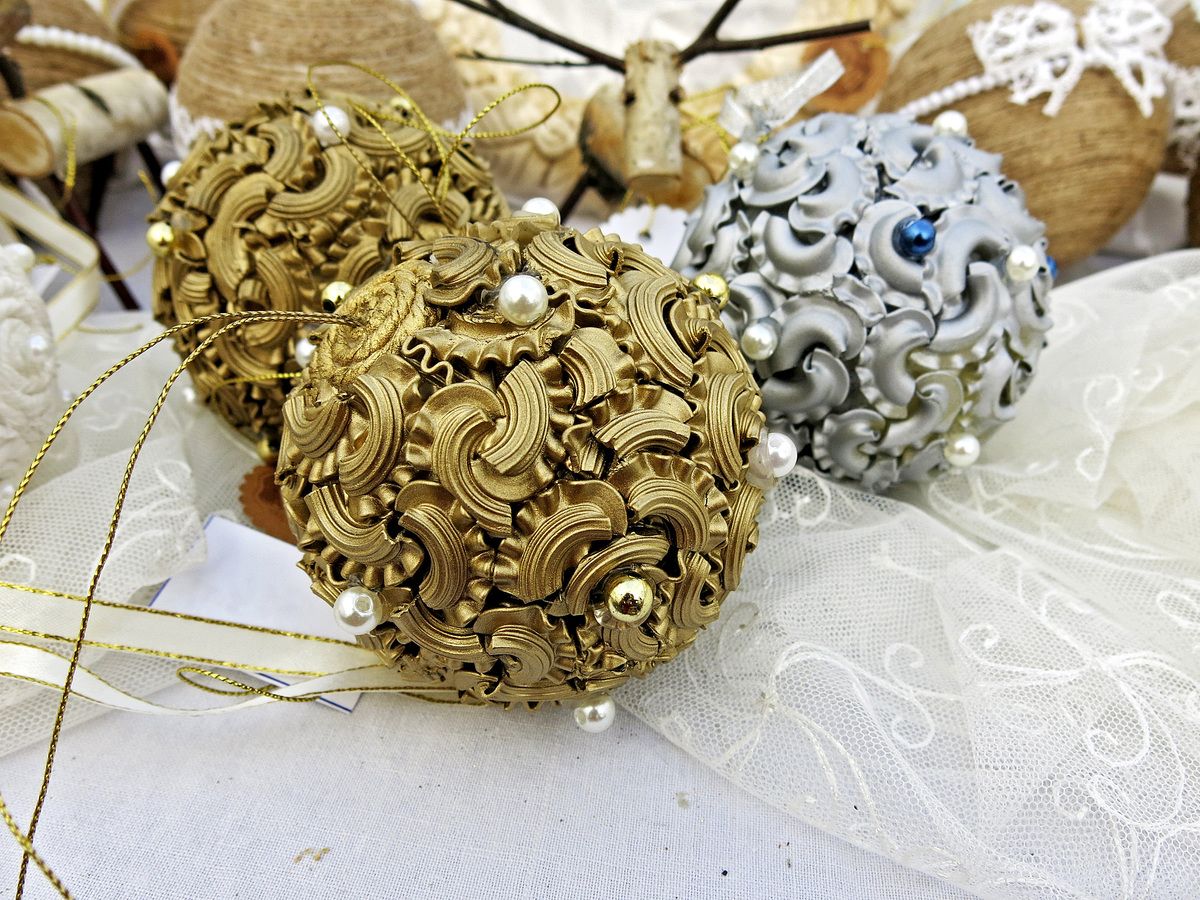
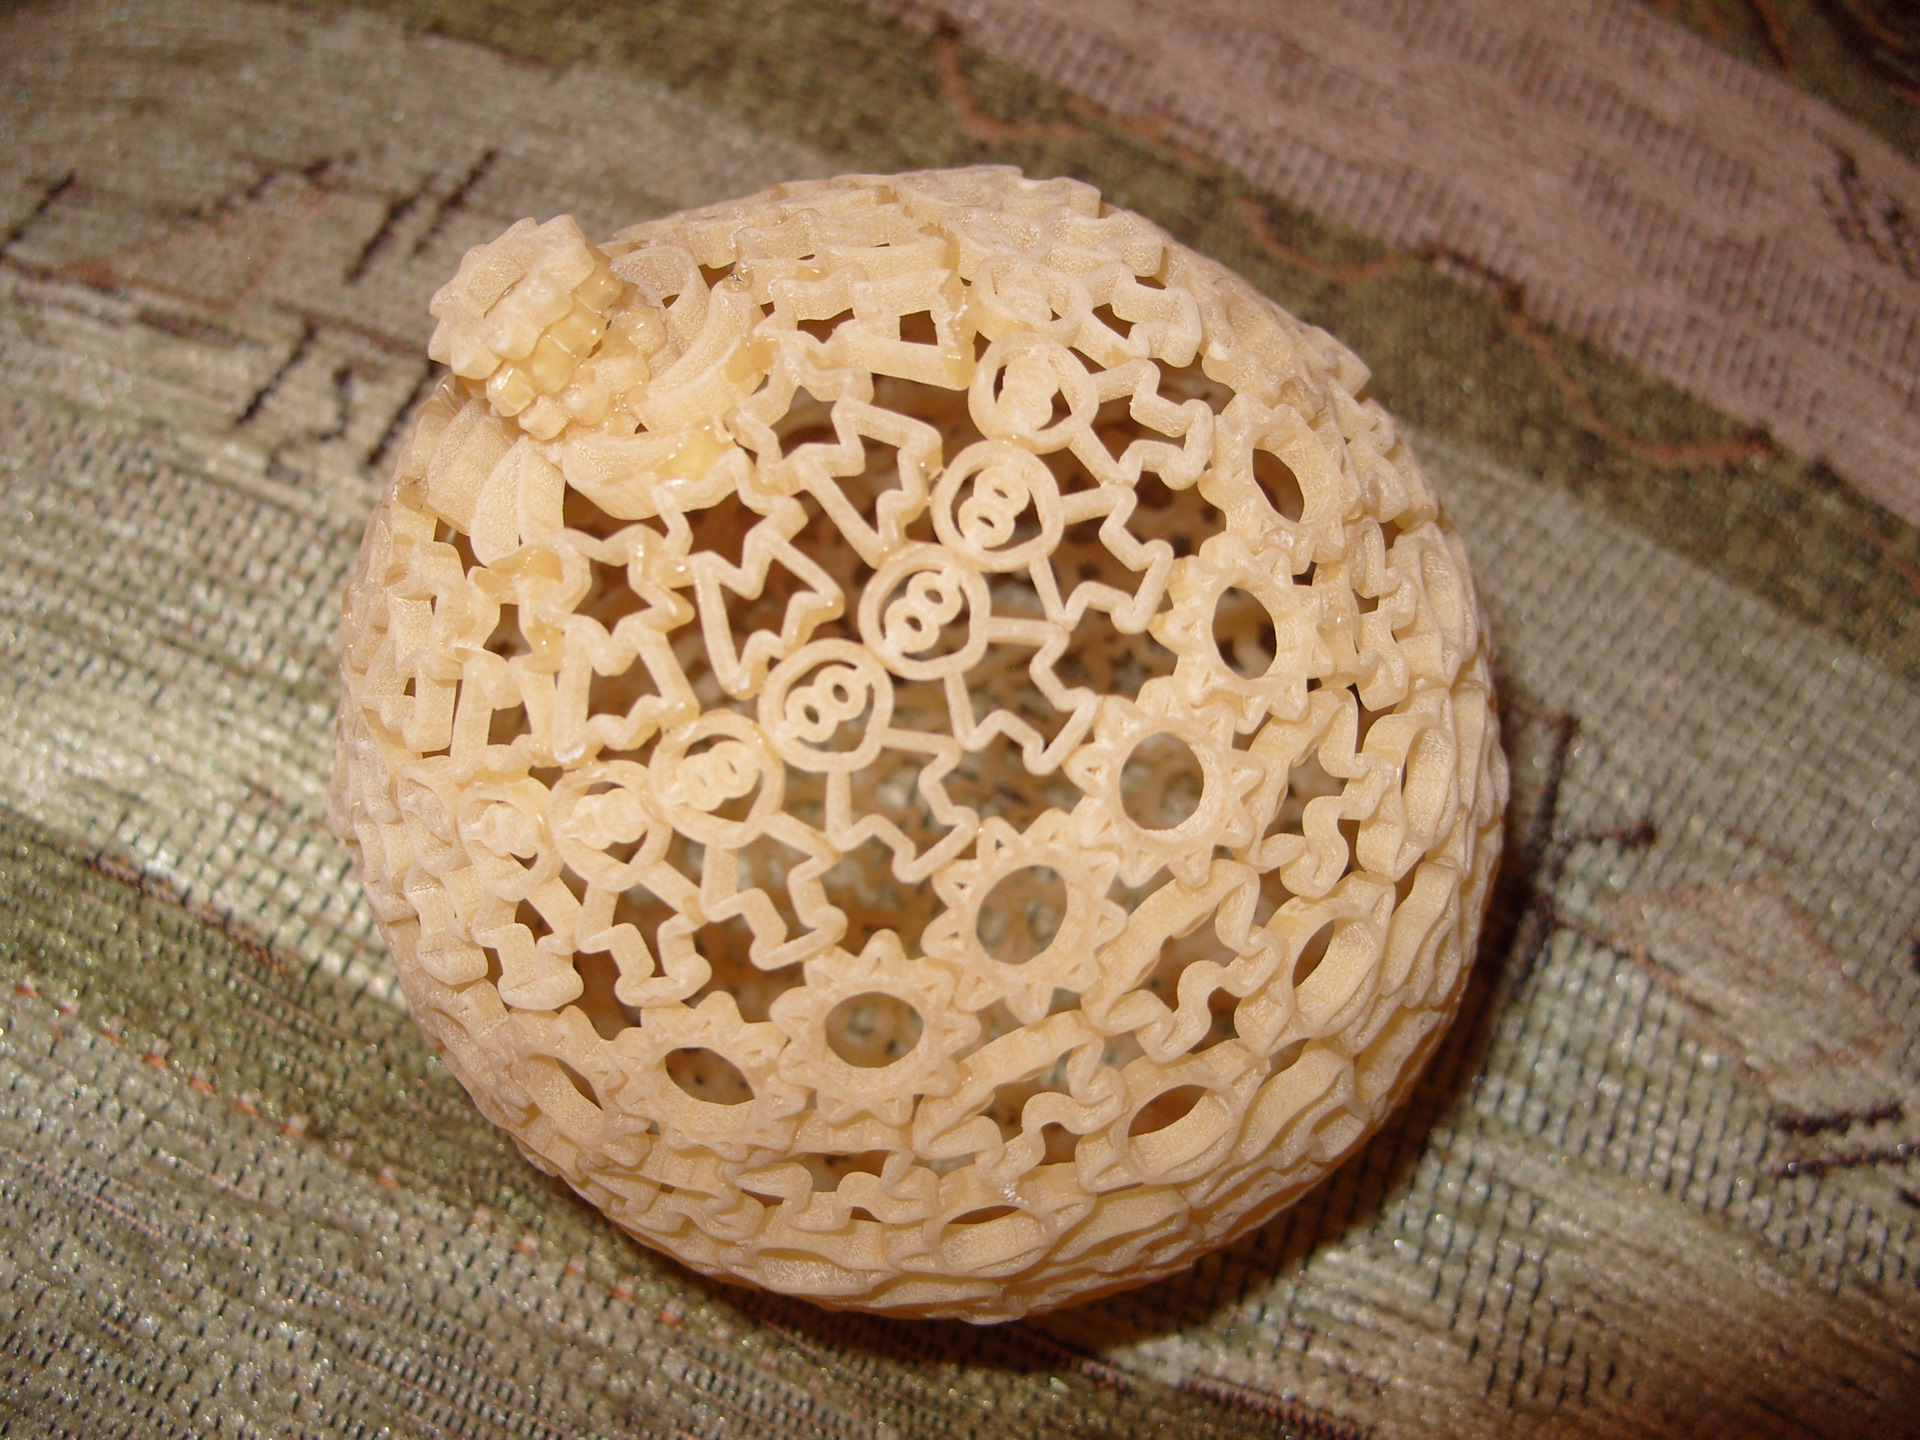
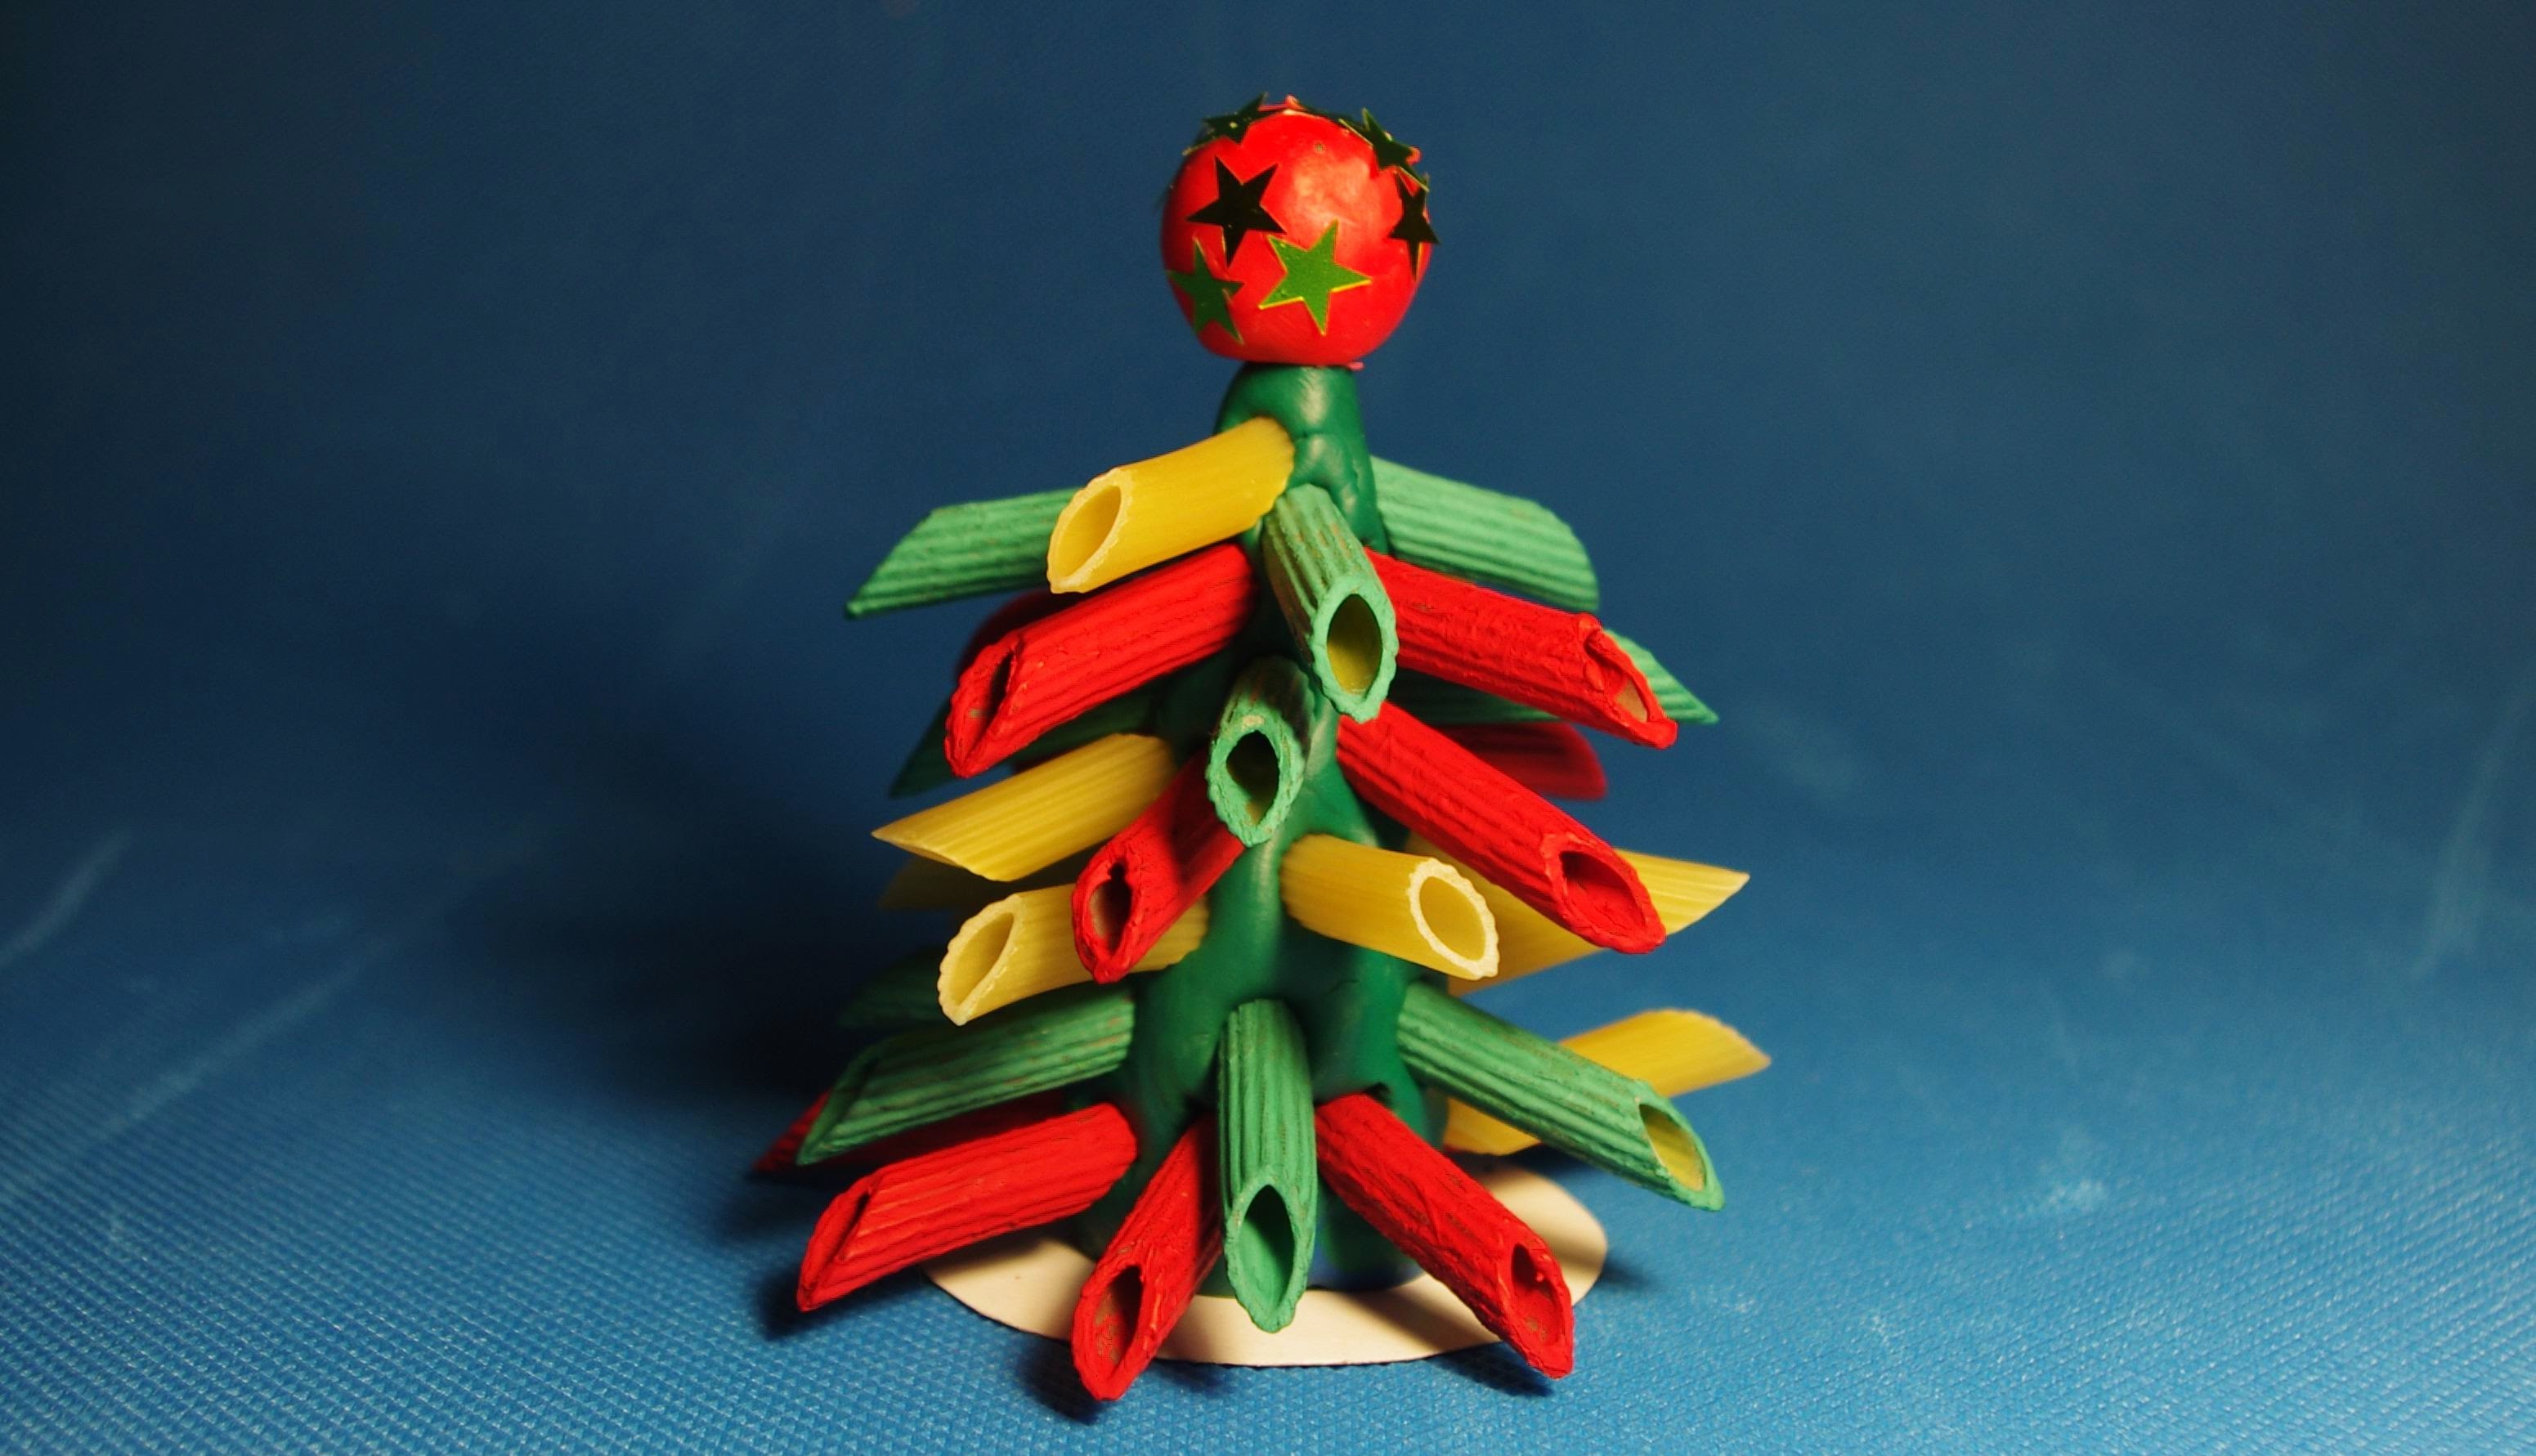
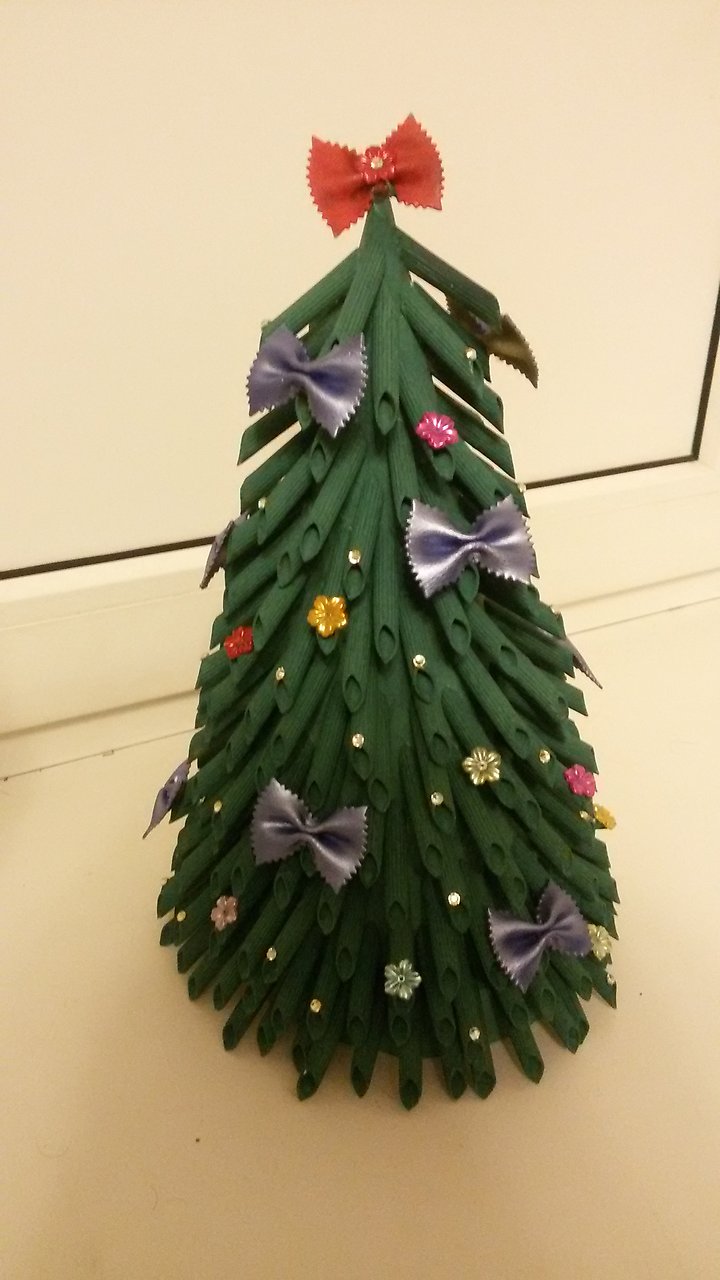
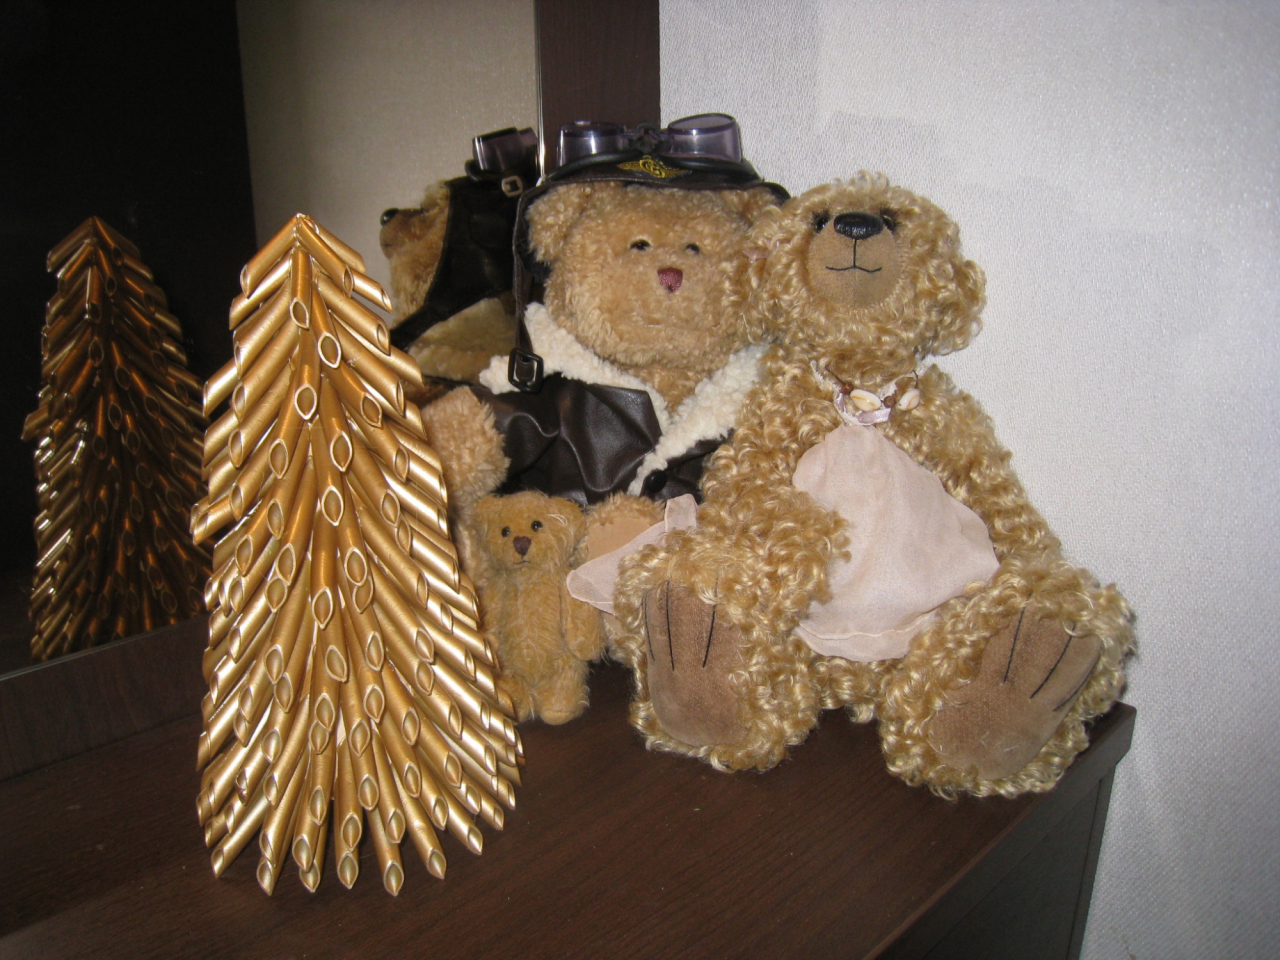
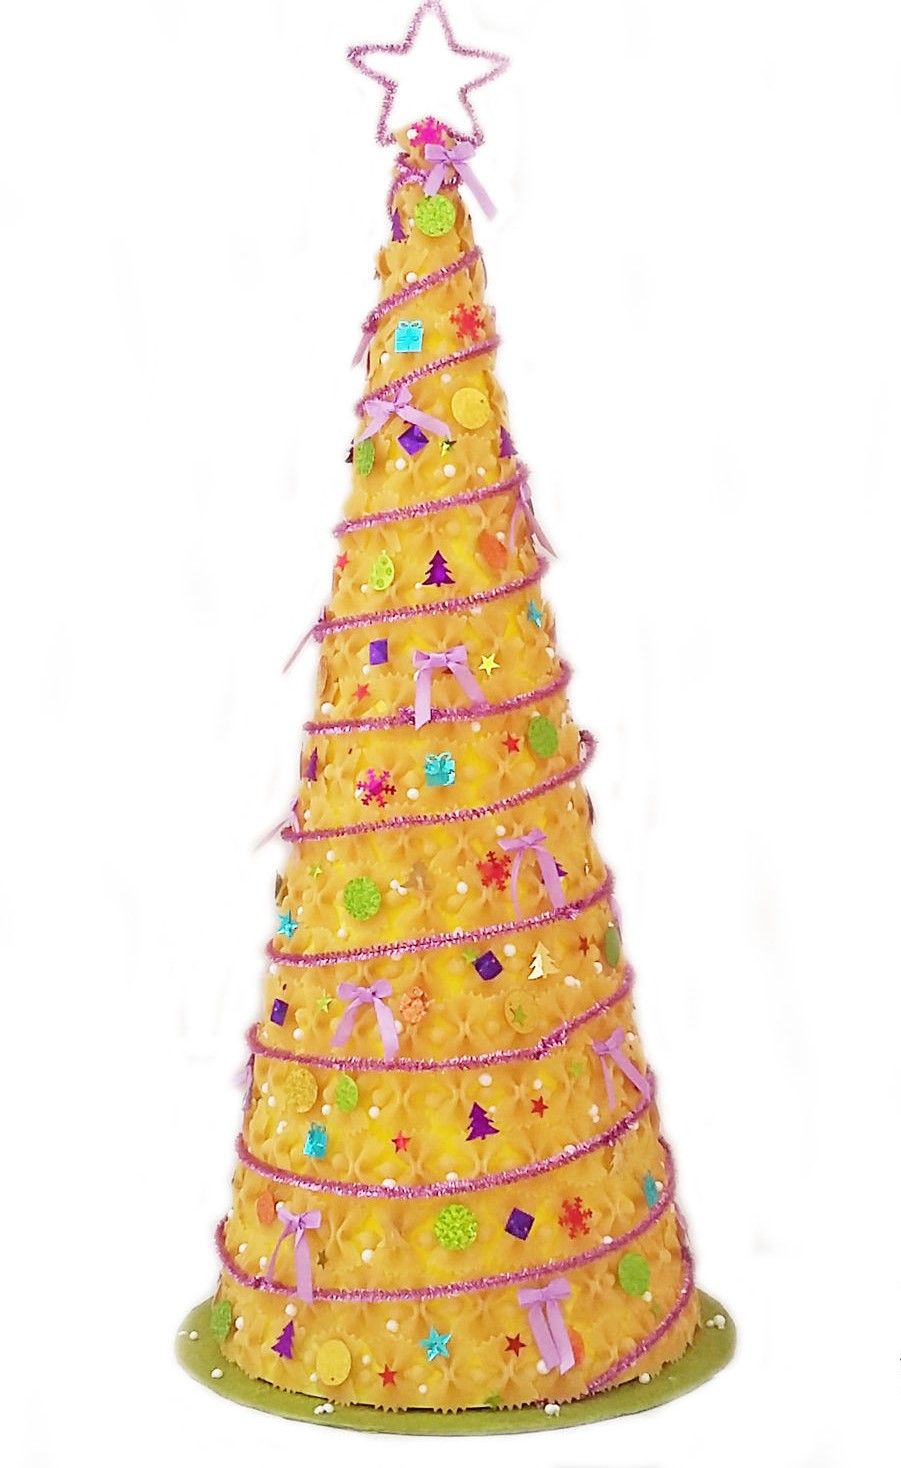
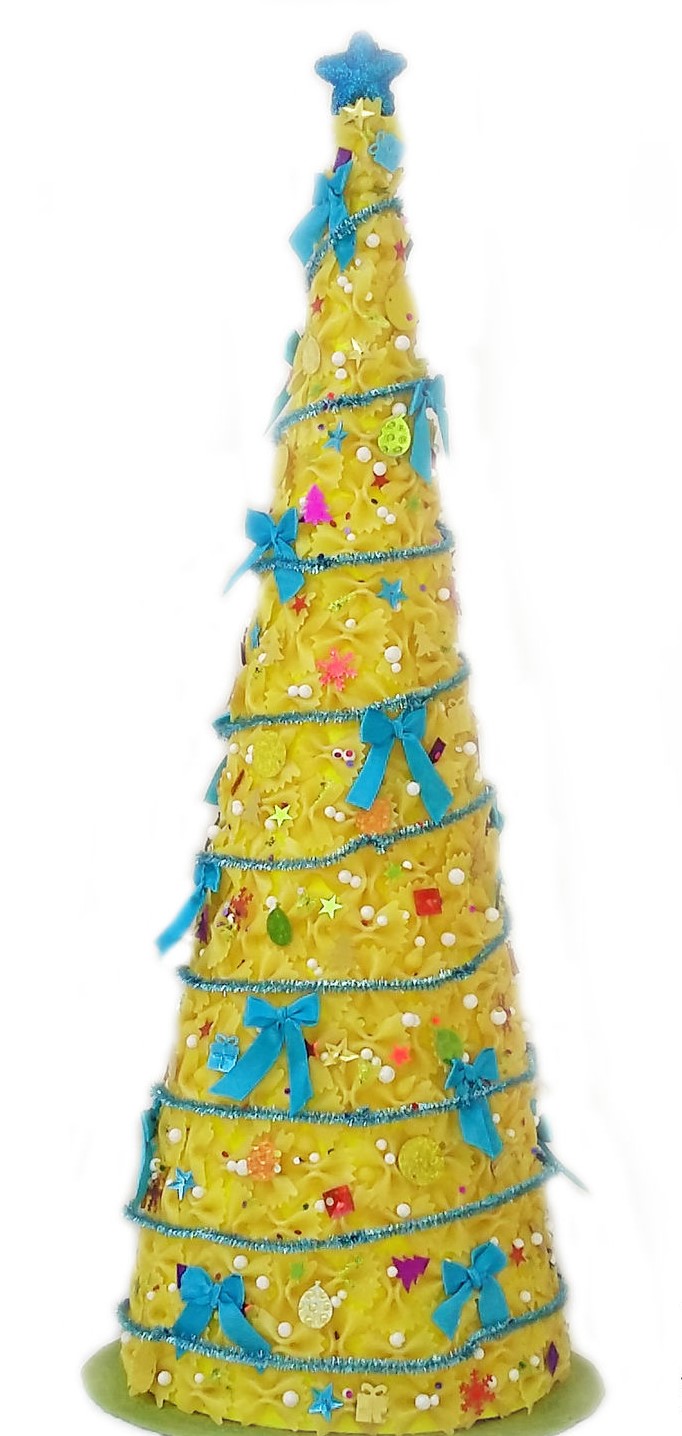
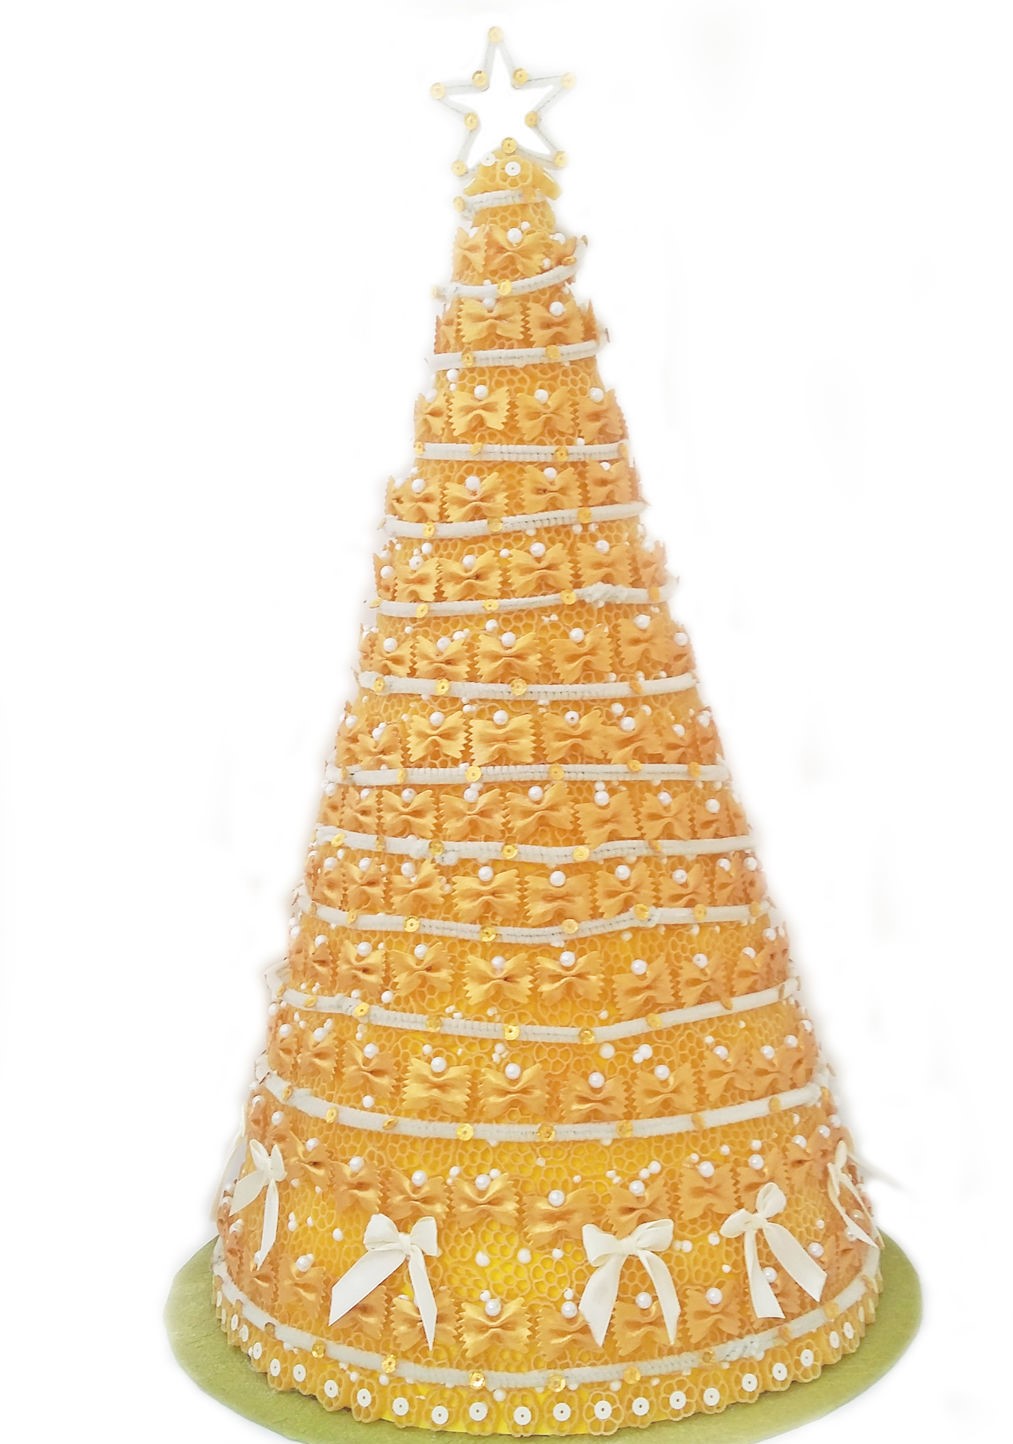
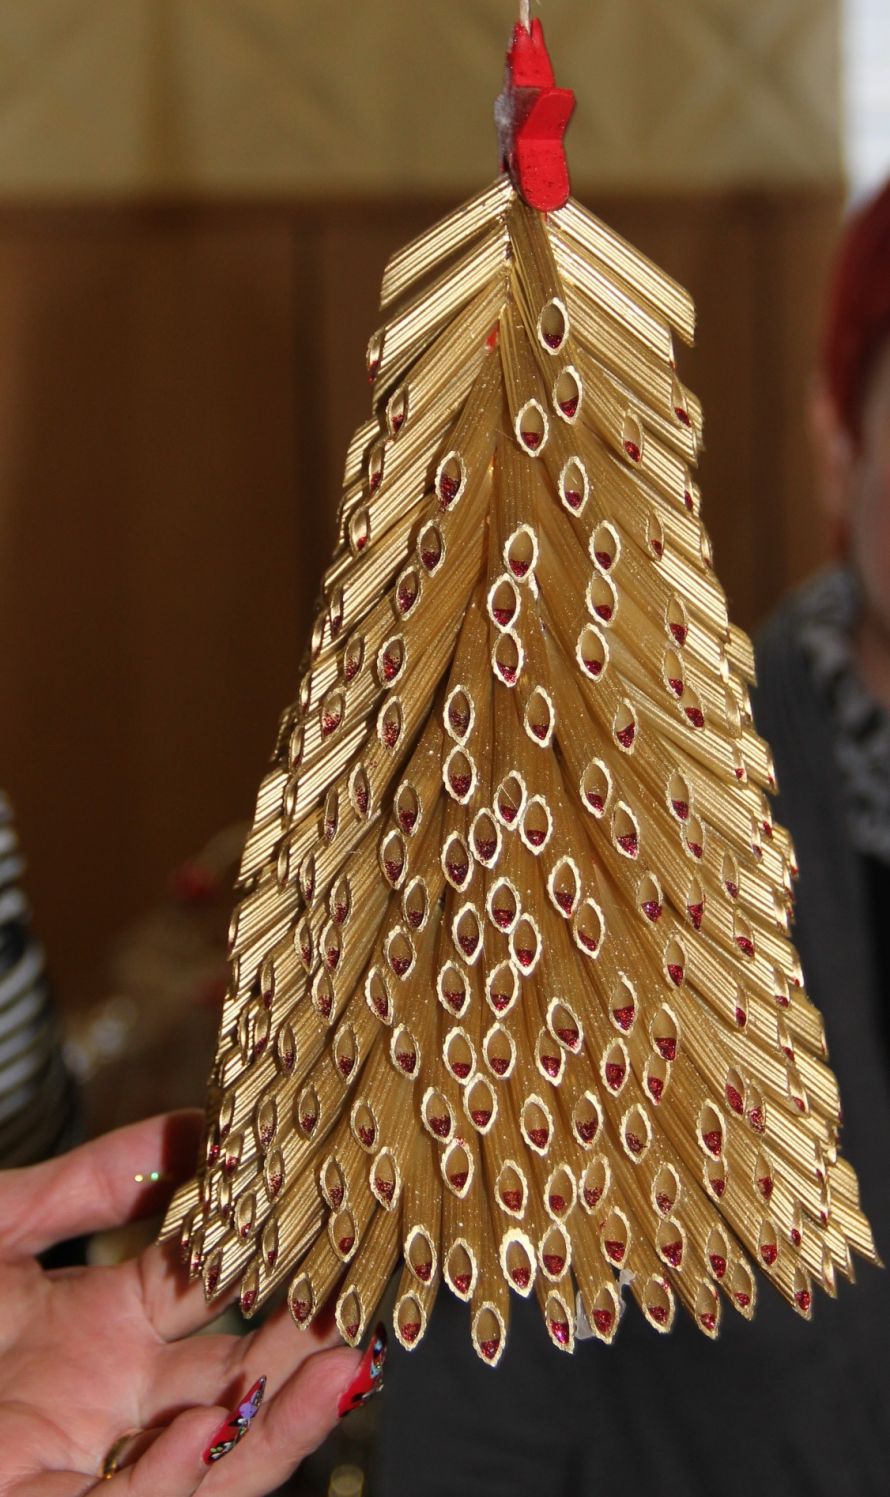
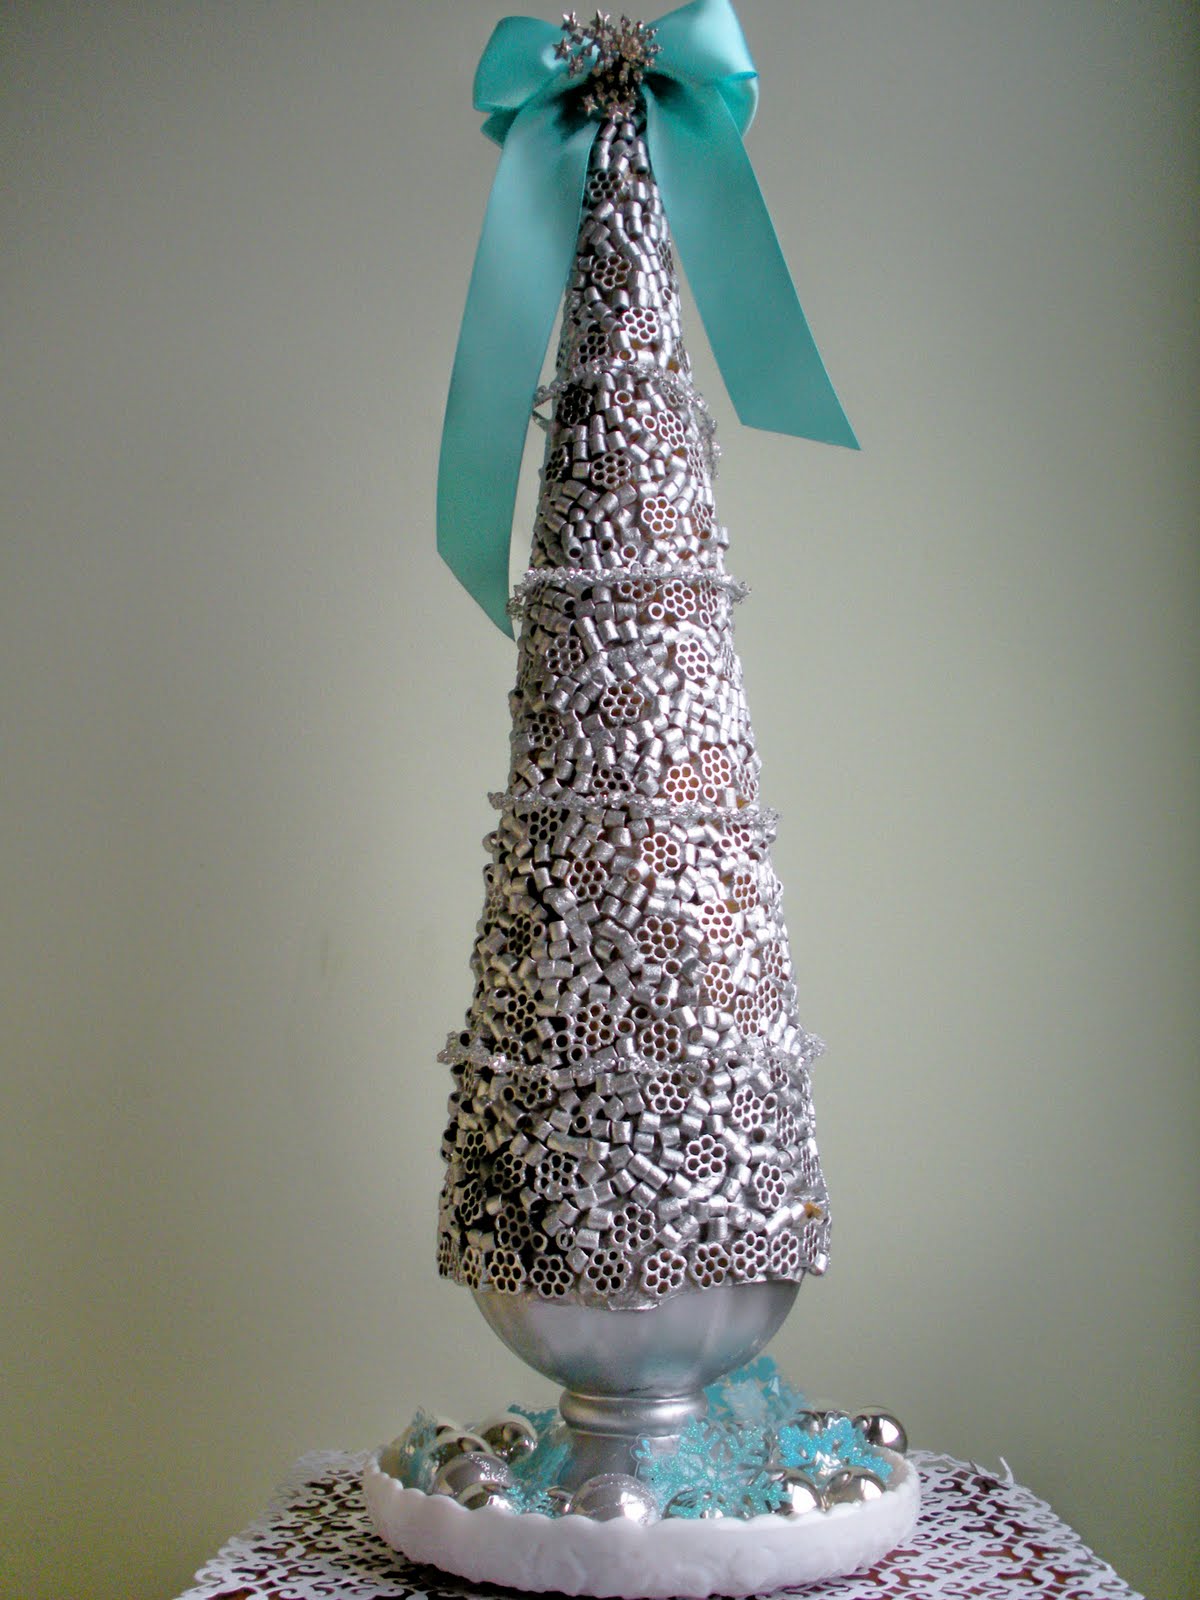
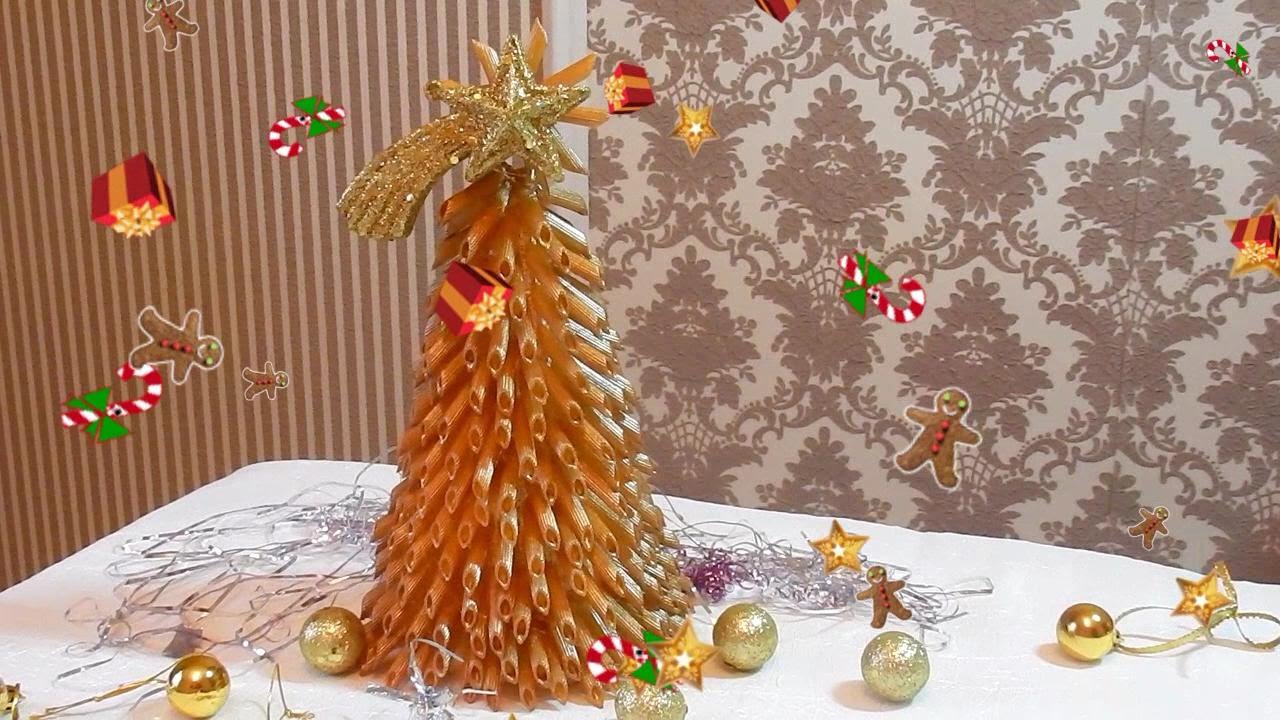
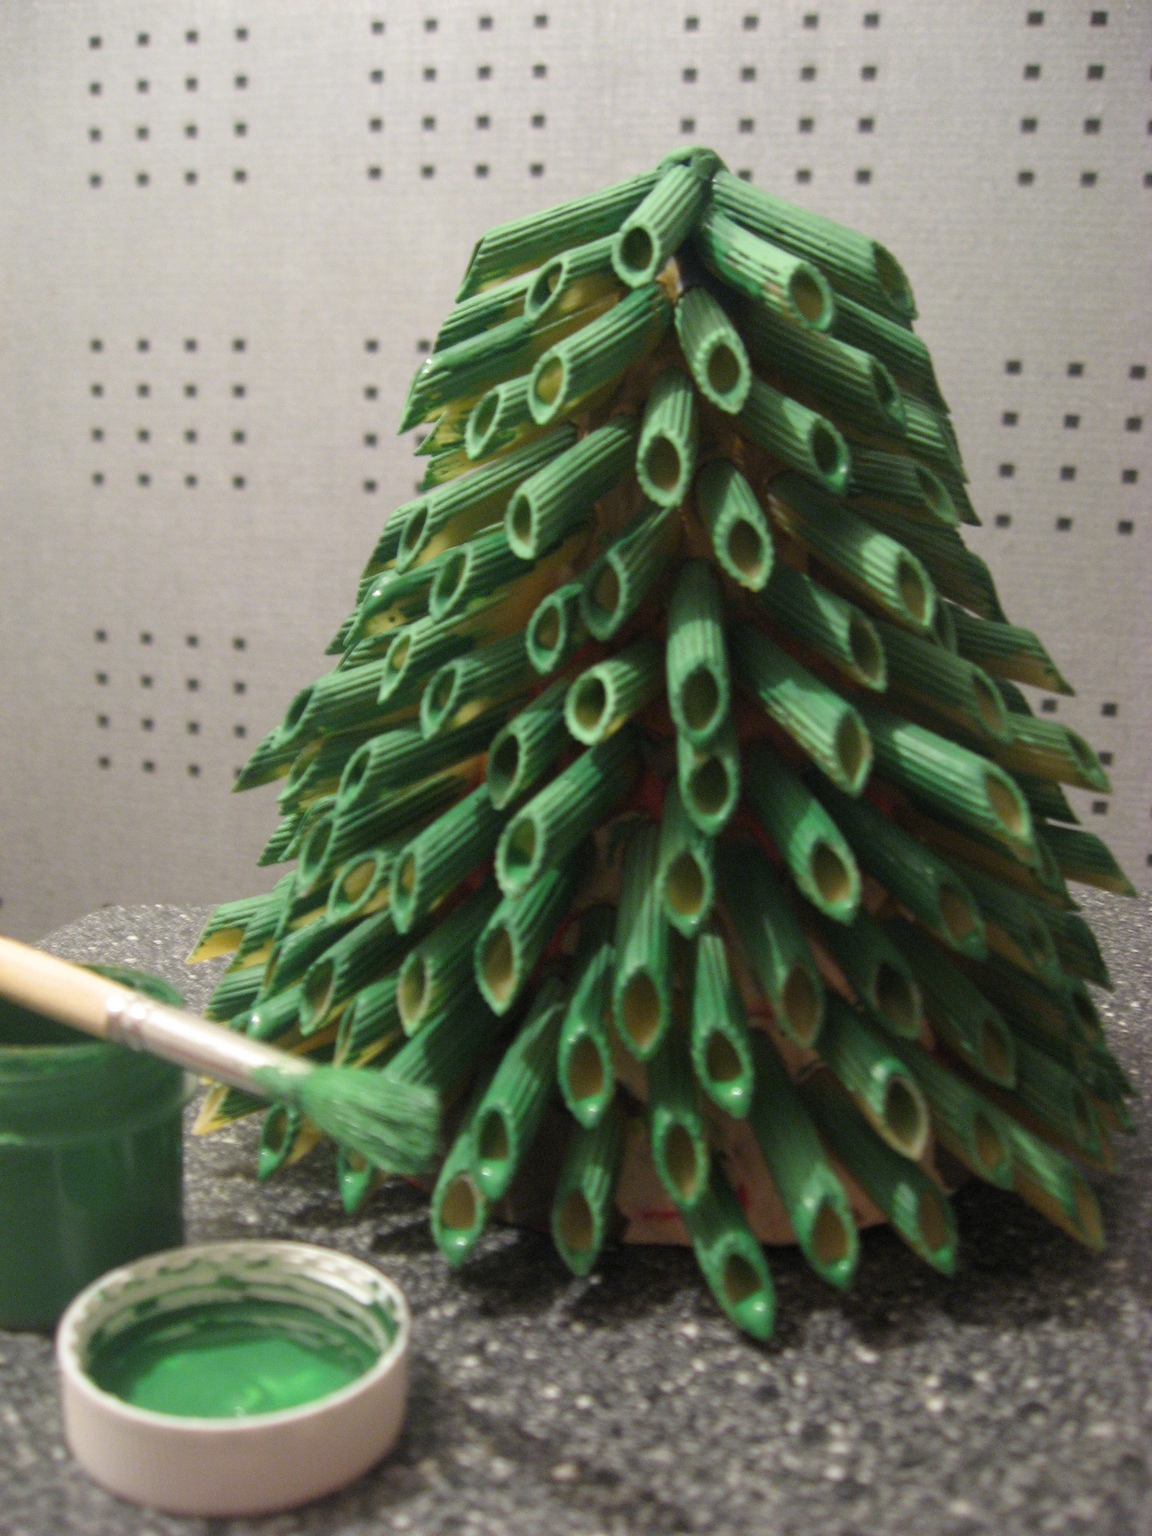
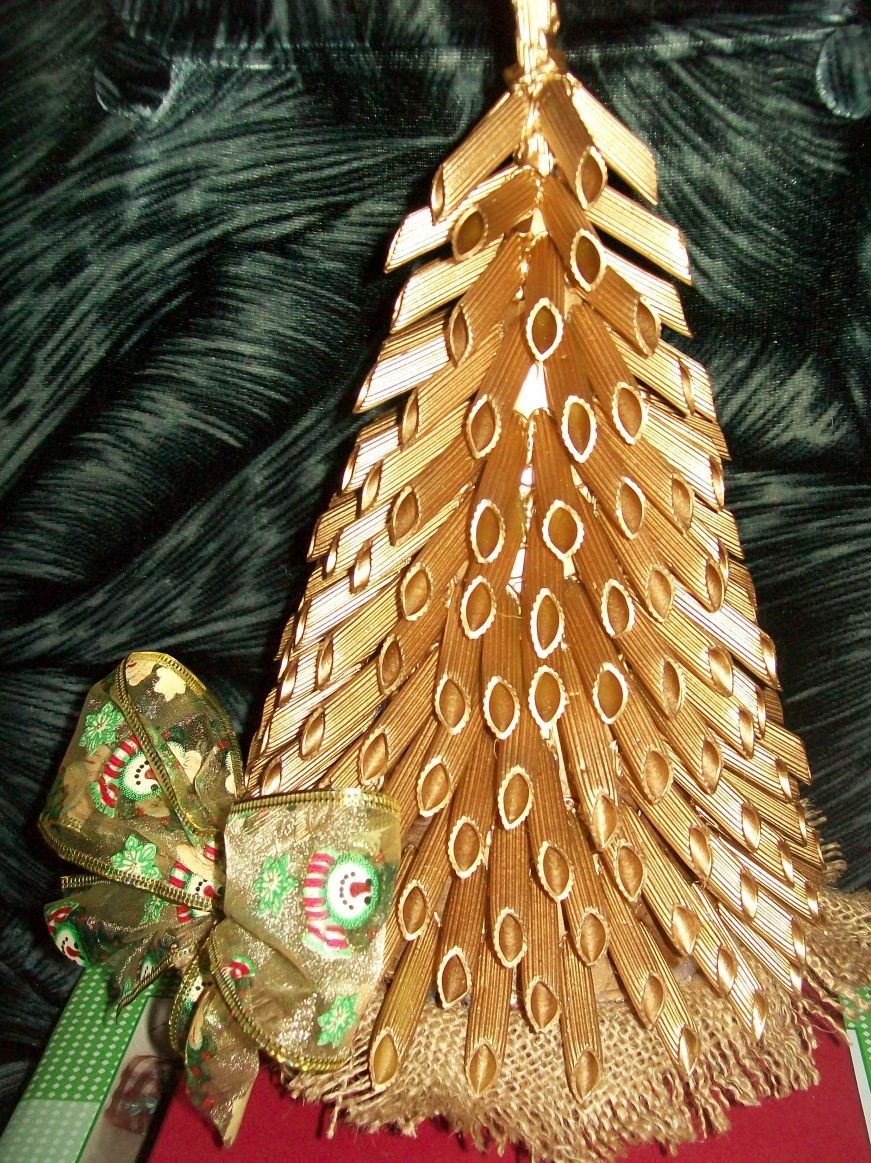
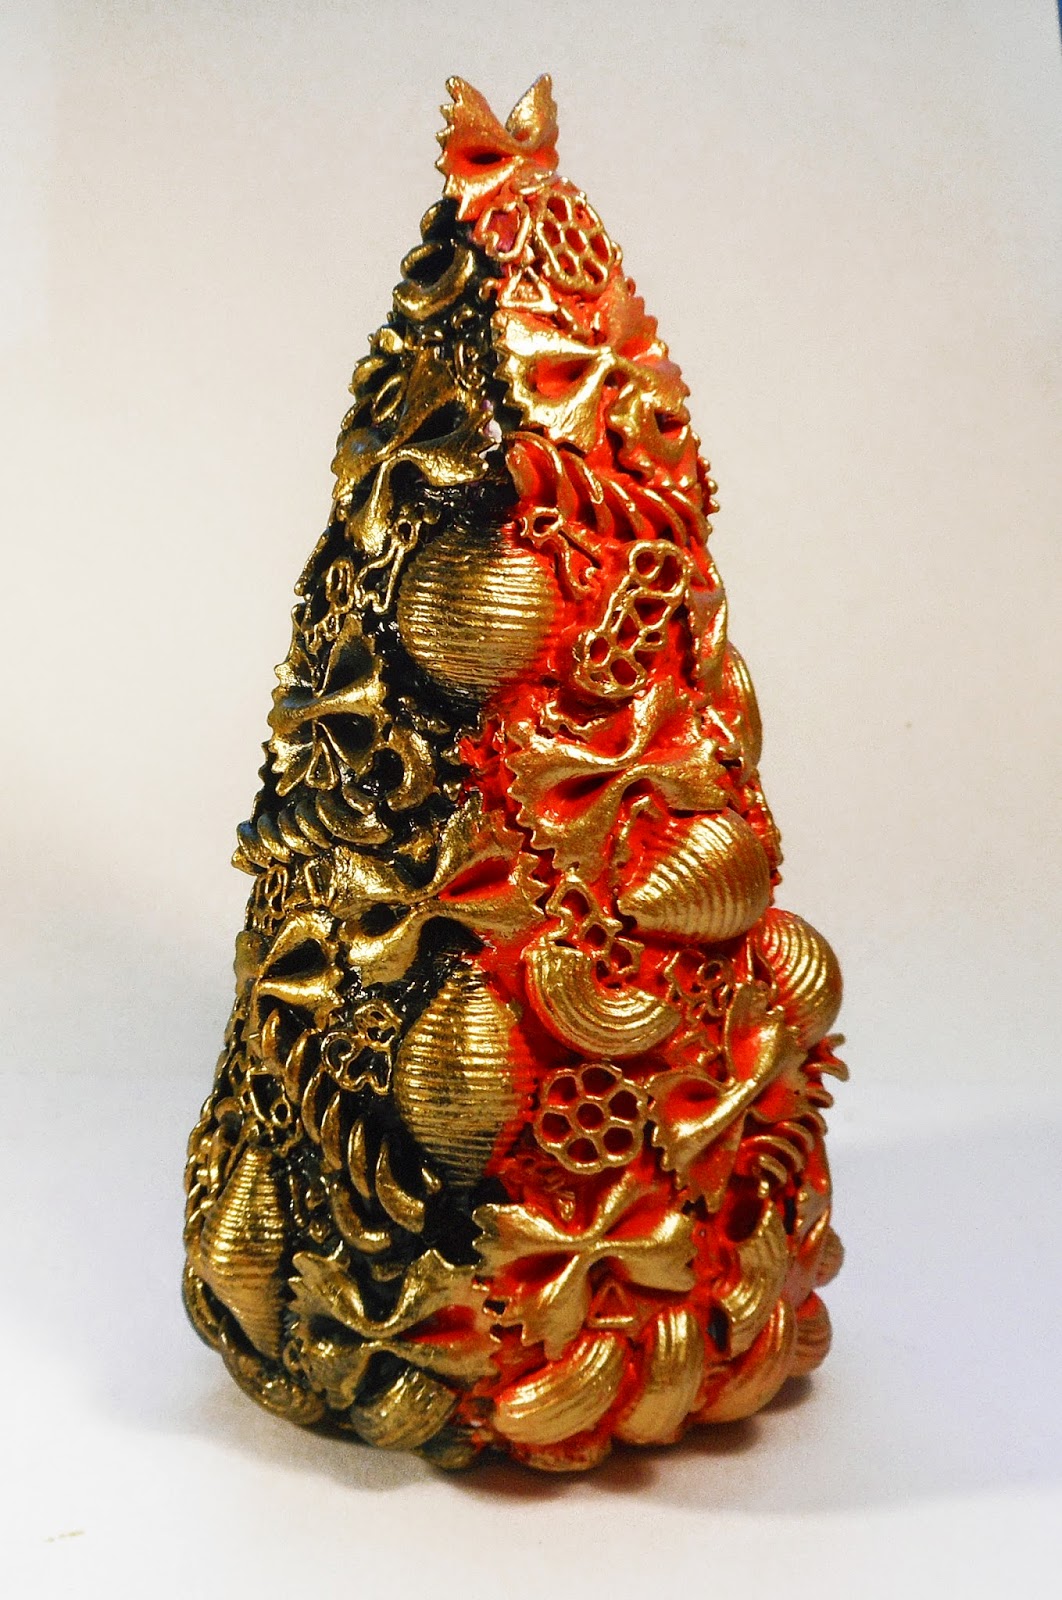
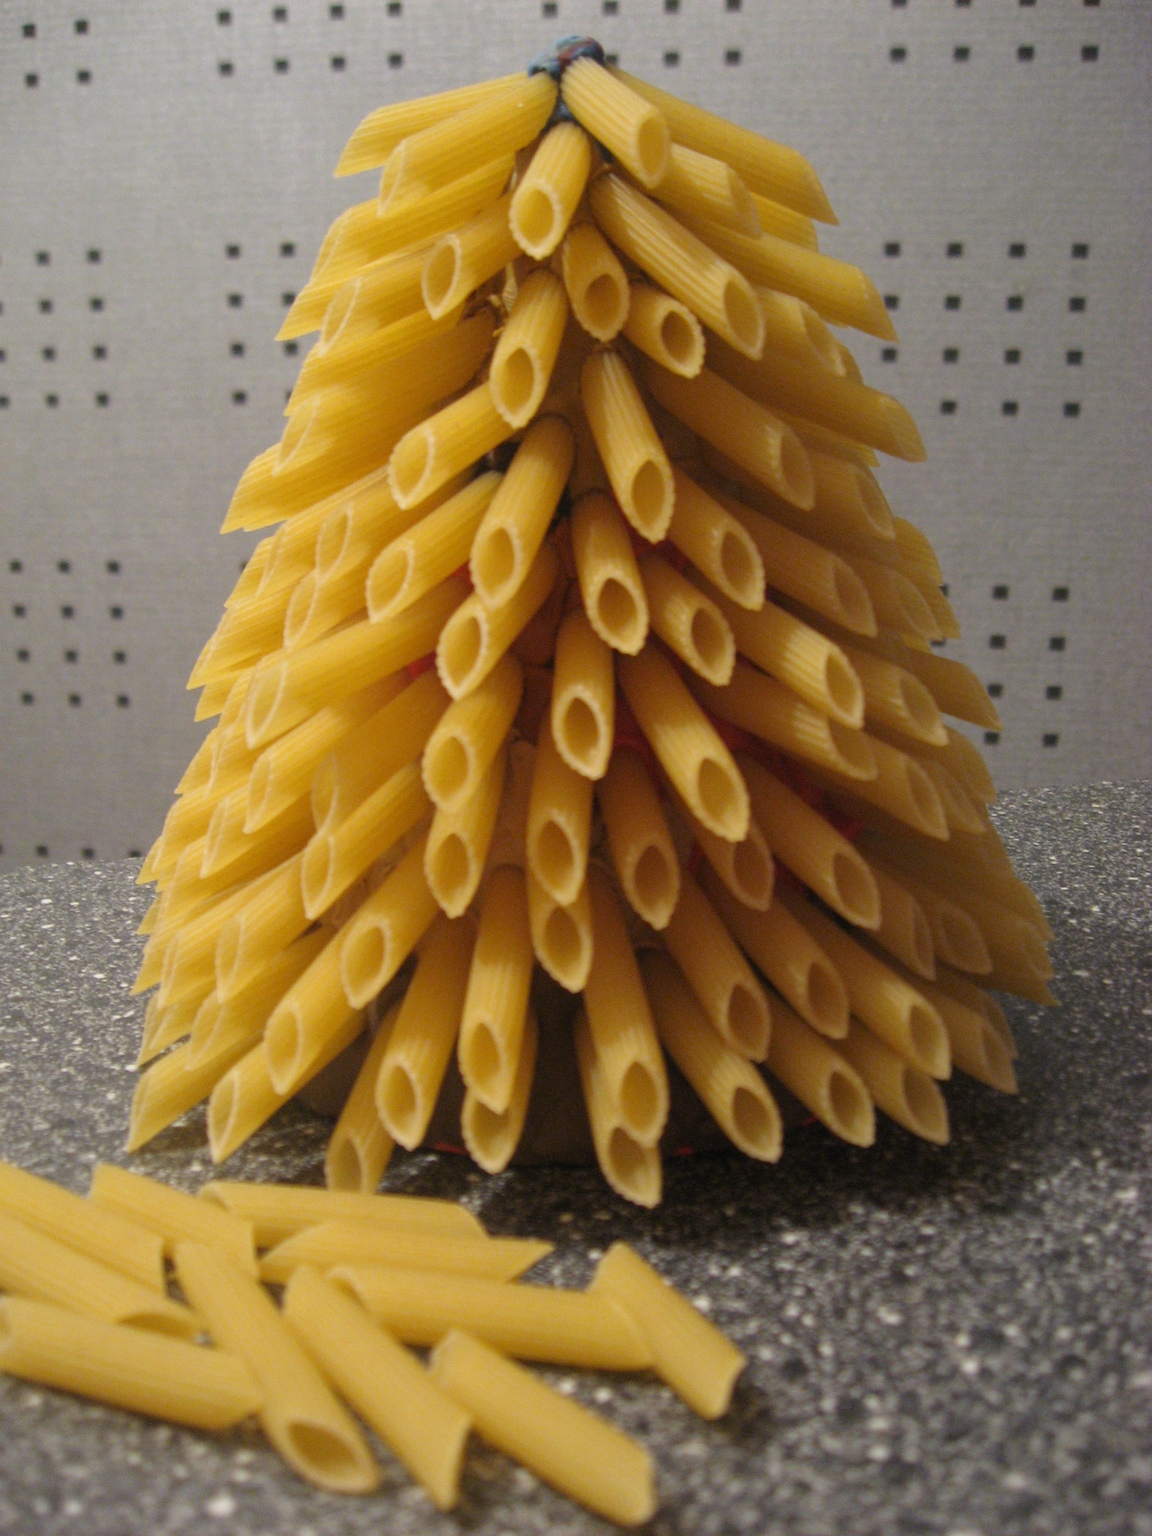
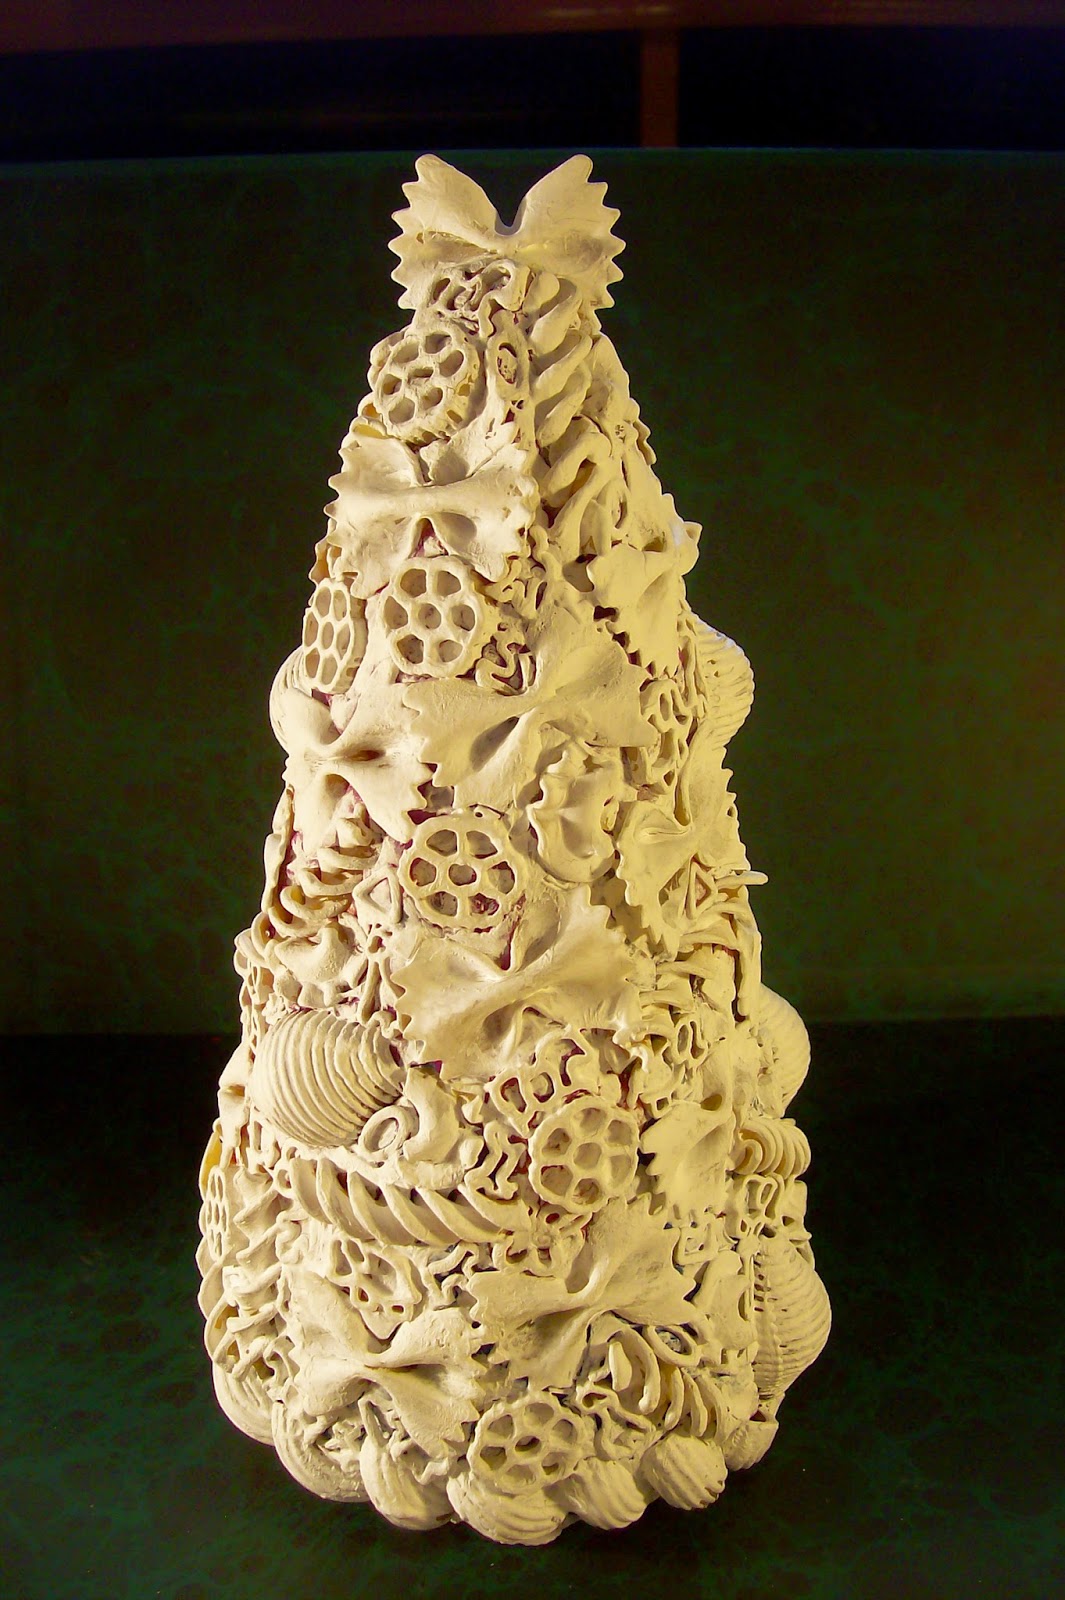
return to menu ↑ return to menu ↑Christmas tree of pasta
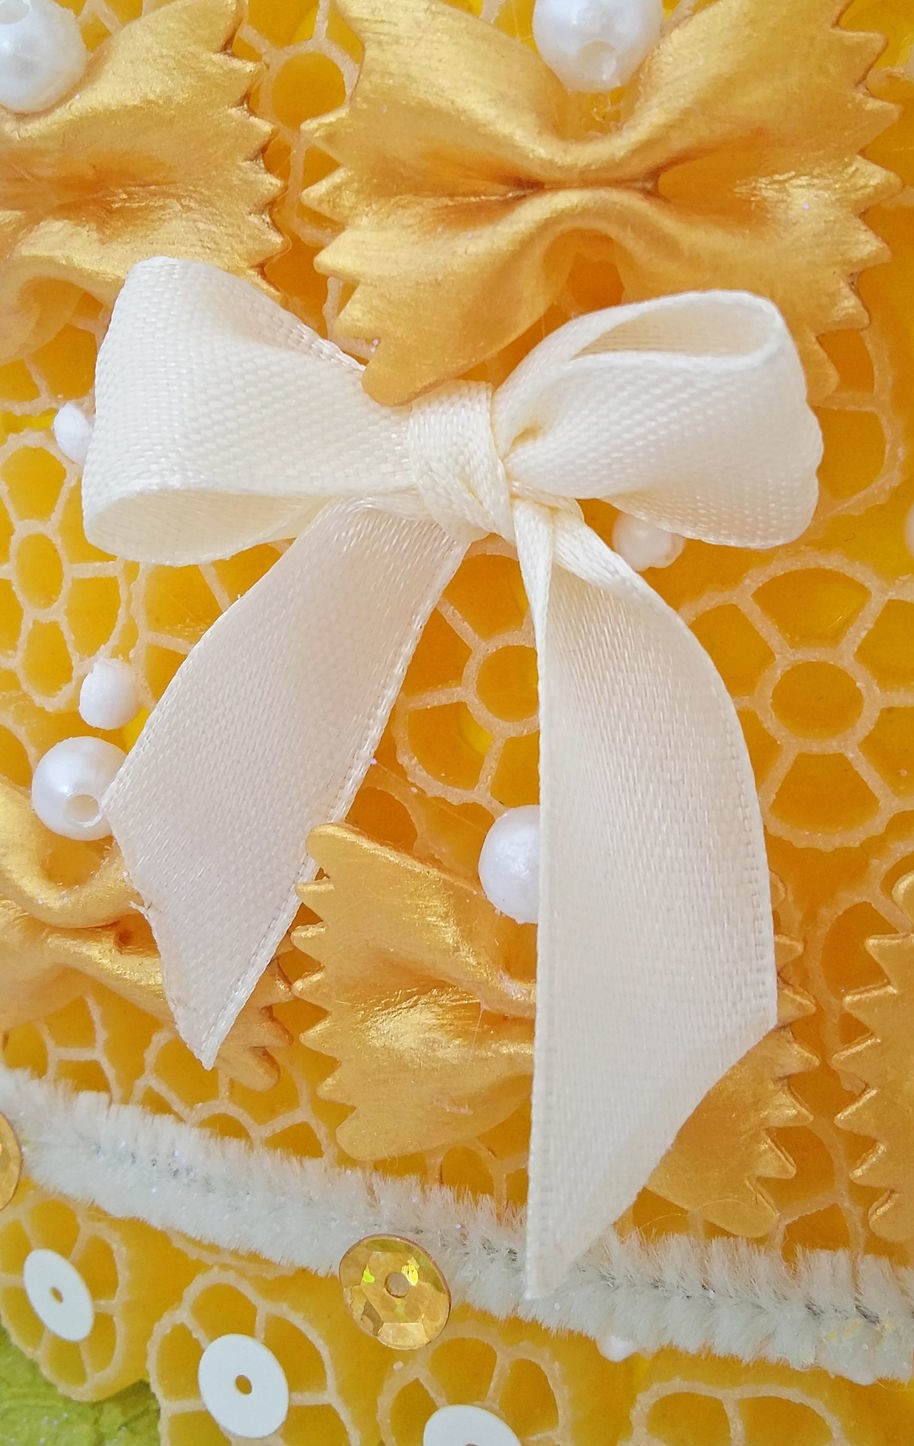
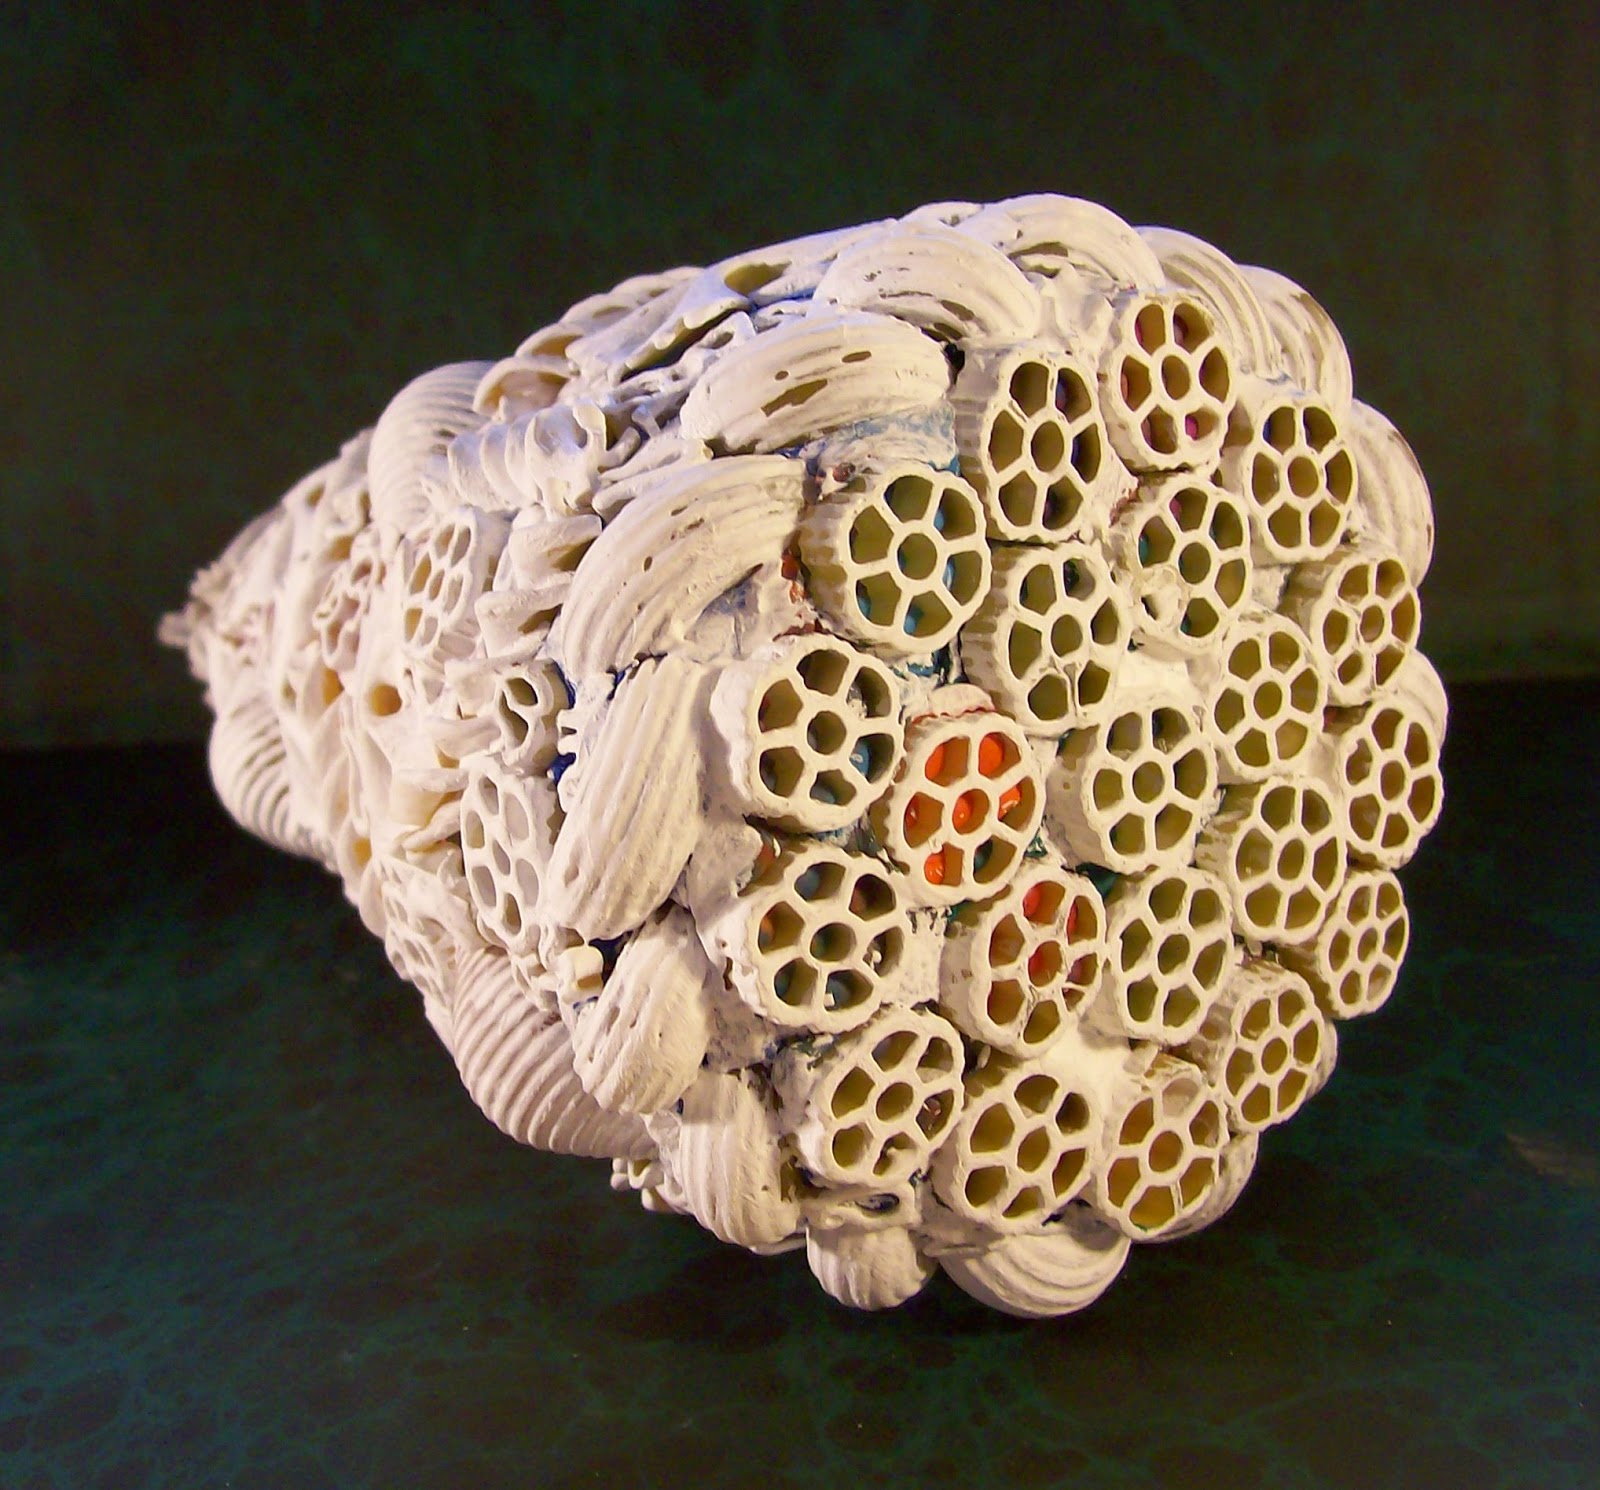
Some crafts can be made from the available products. Pasta come in different shapes and some of them can be used for manual work, the bows look original. No matter what type of product will be used, even the cheapest ones will look beautiful, the main thing is to decorate the trinket correctly.

Prepare the necessary materials for crafts
As a basis, you can use a regular cardboard, rolled into a cone shape, then fastened with a stapler or superglue. If you have a plastic glass at home, you can also use it by removing the leg from it. PAfter selecting the base, proceed to gluing the pasta, clinging them as close as possible to each other.
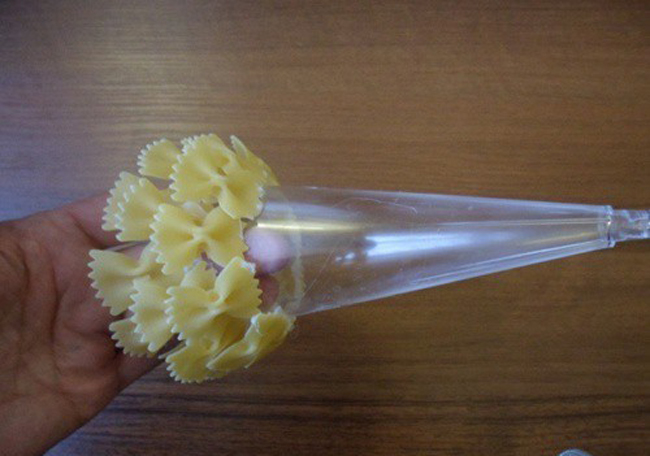
We place the pasta tightly to each other
It is necessary to place bow pasta in a checkerboard pattern in order to avoid gaps.
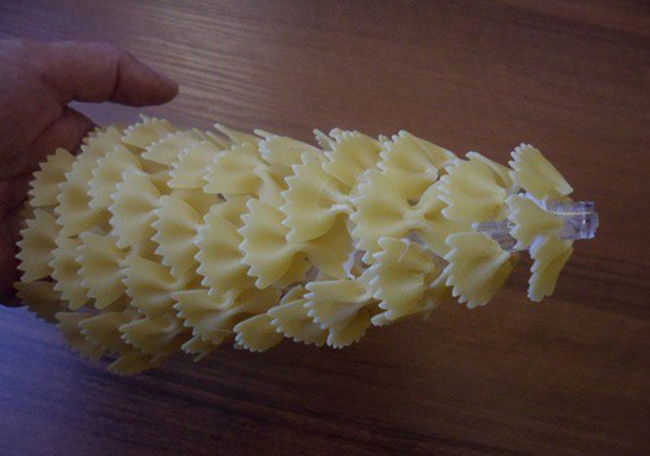
Paste the whole cone with pasta
Then install the Christmas tree on a stand, which can serve as a small candlestick or a spool of thread, preferably in black or brown.

The bottom of the glass will serve as a stand.
After that, paint the Christmas tree in green.
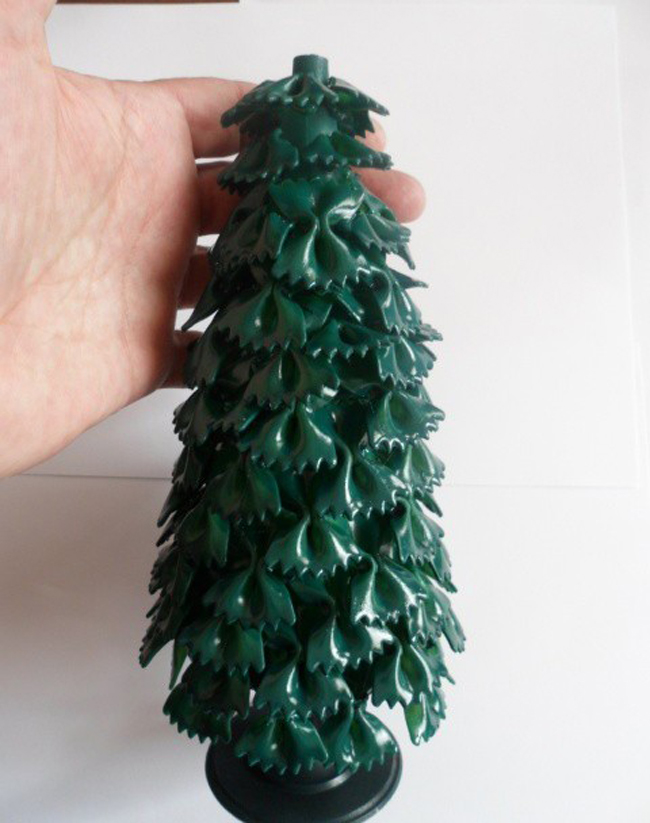
Paints herringbone in green
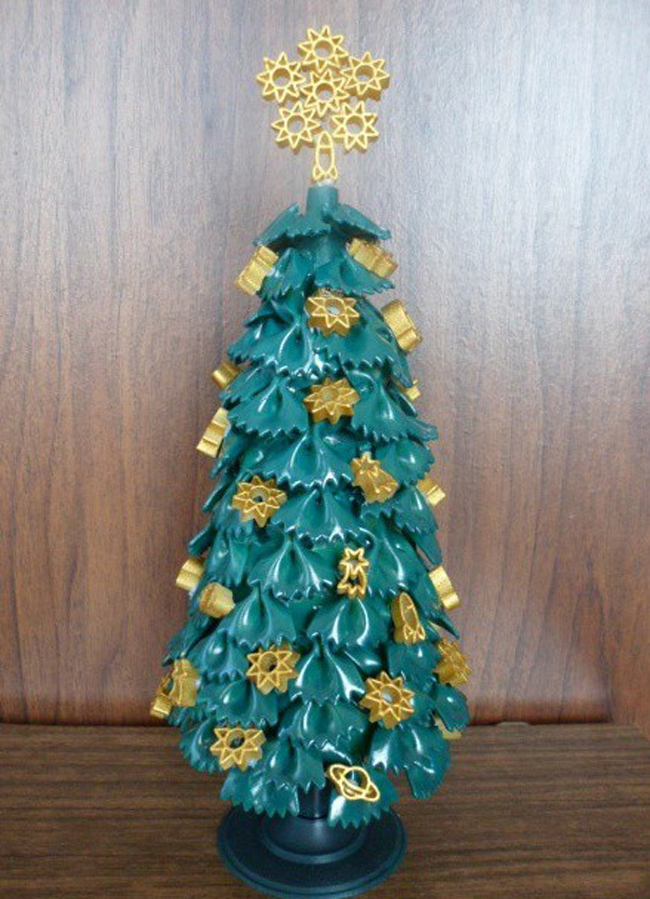
To make such an article look festive, you can decorate it, for example, with tinsel from the rain. If you have pasta of a different shape, they can also be used by painting it in a different color, preferably gold or silver.

Pasta of other shapes, colored gold
If the Christmas tree is made of pasta bows, pasta wheels will look original on it.
We get a smart Christmas tree with our own hands
It will be interesting to you:OVERVIEW: How stylish and beautiful to decorate the Christmas tree for the New 2018? What kind of toys you need to get? (175+ Photos)
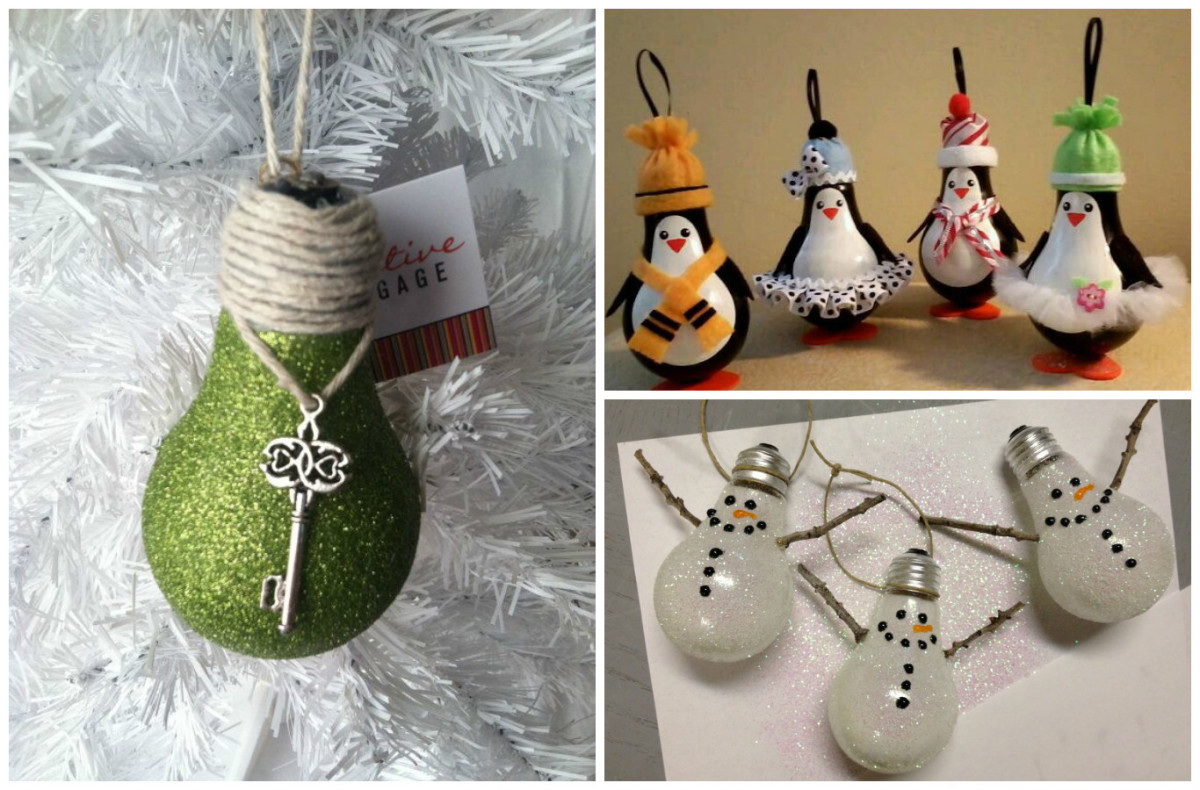
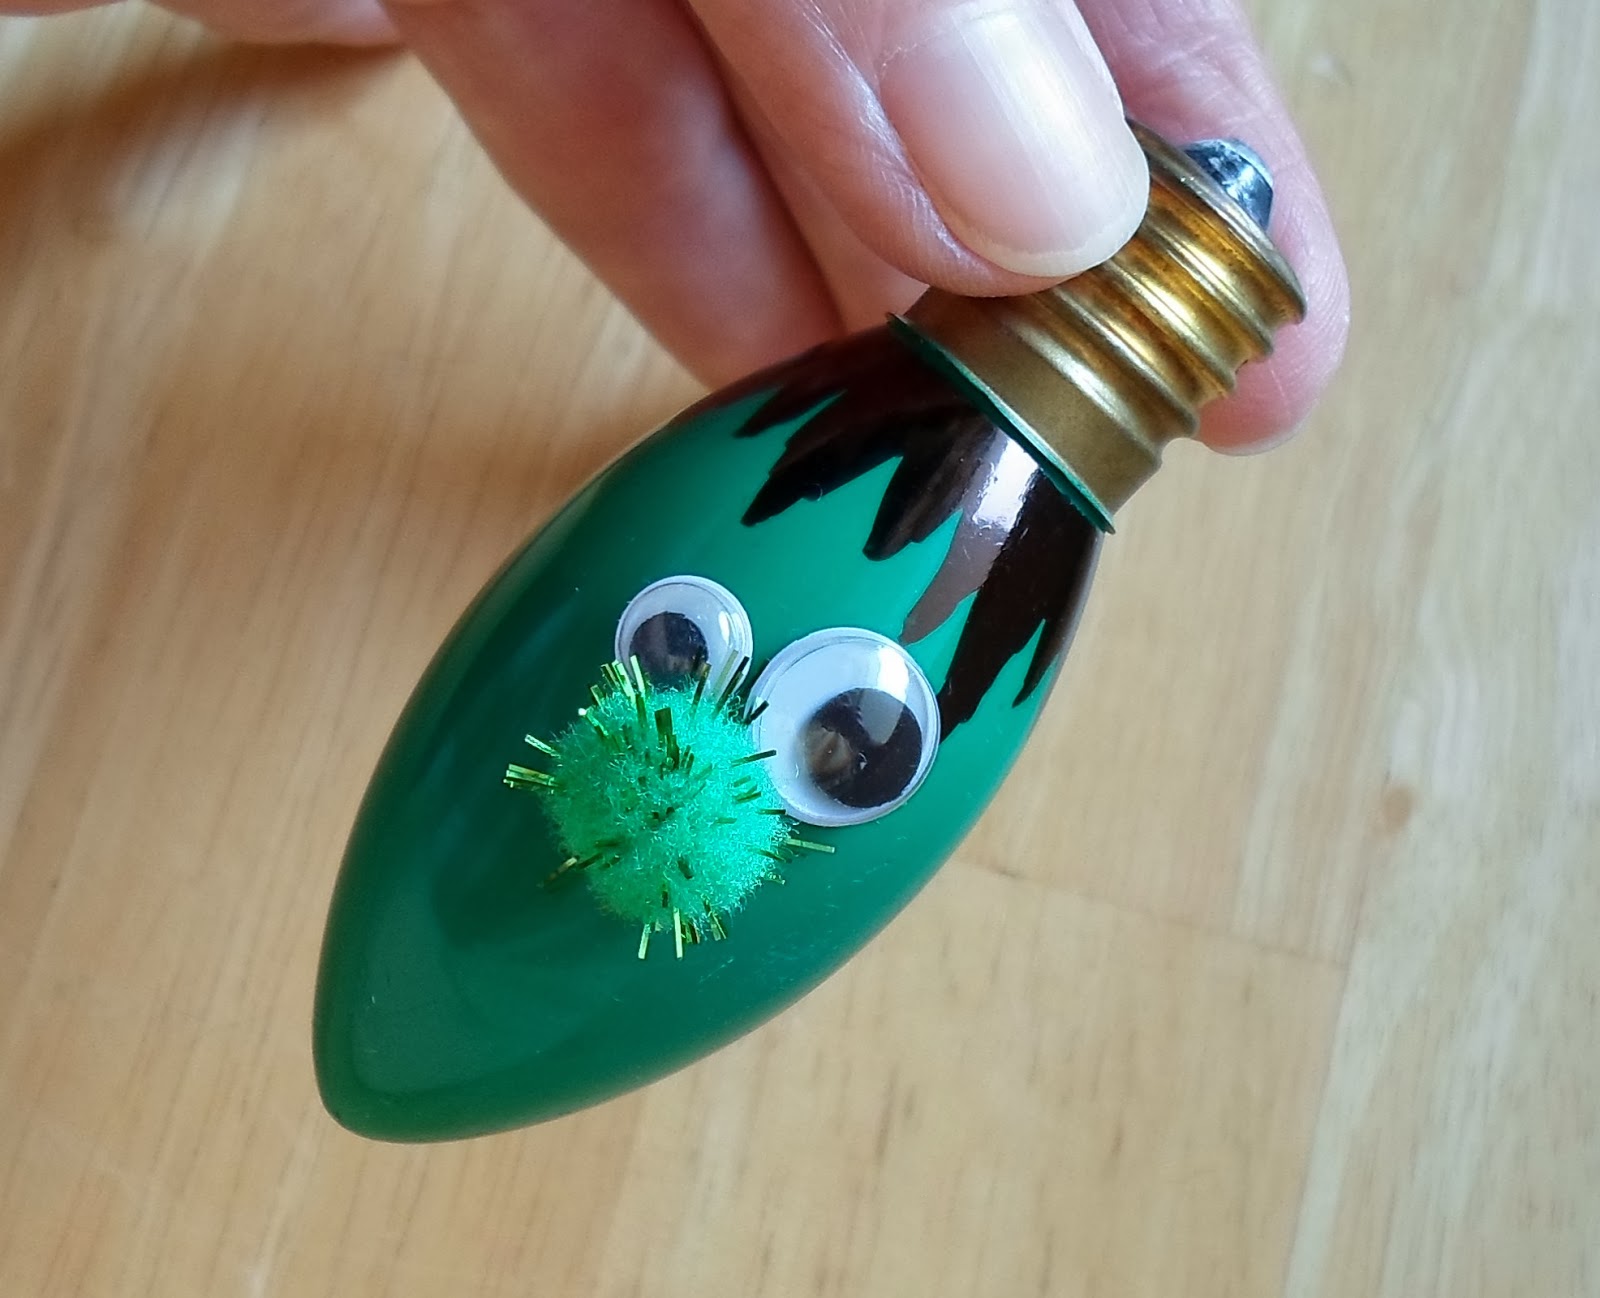
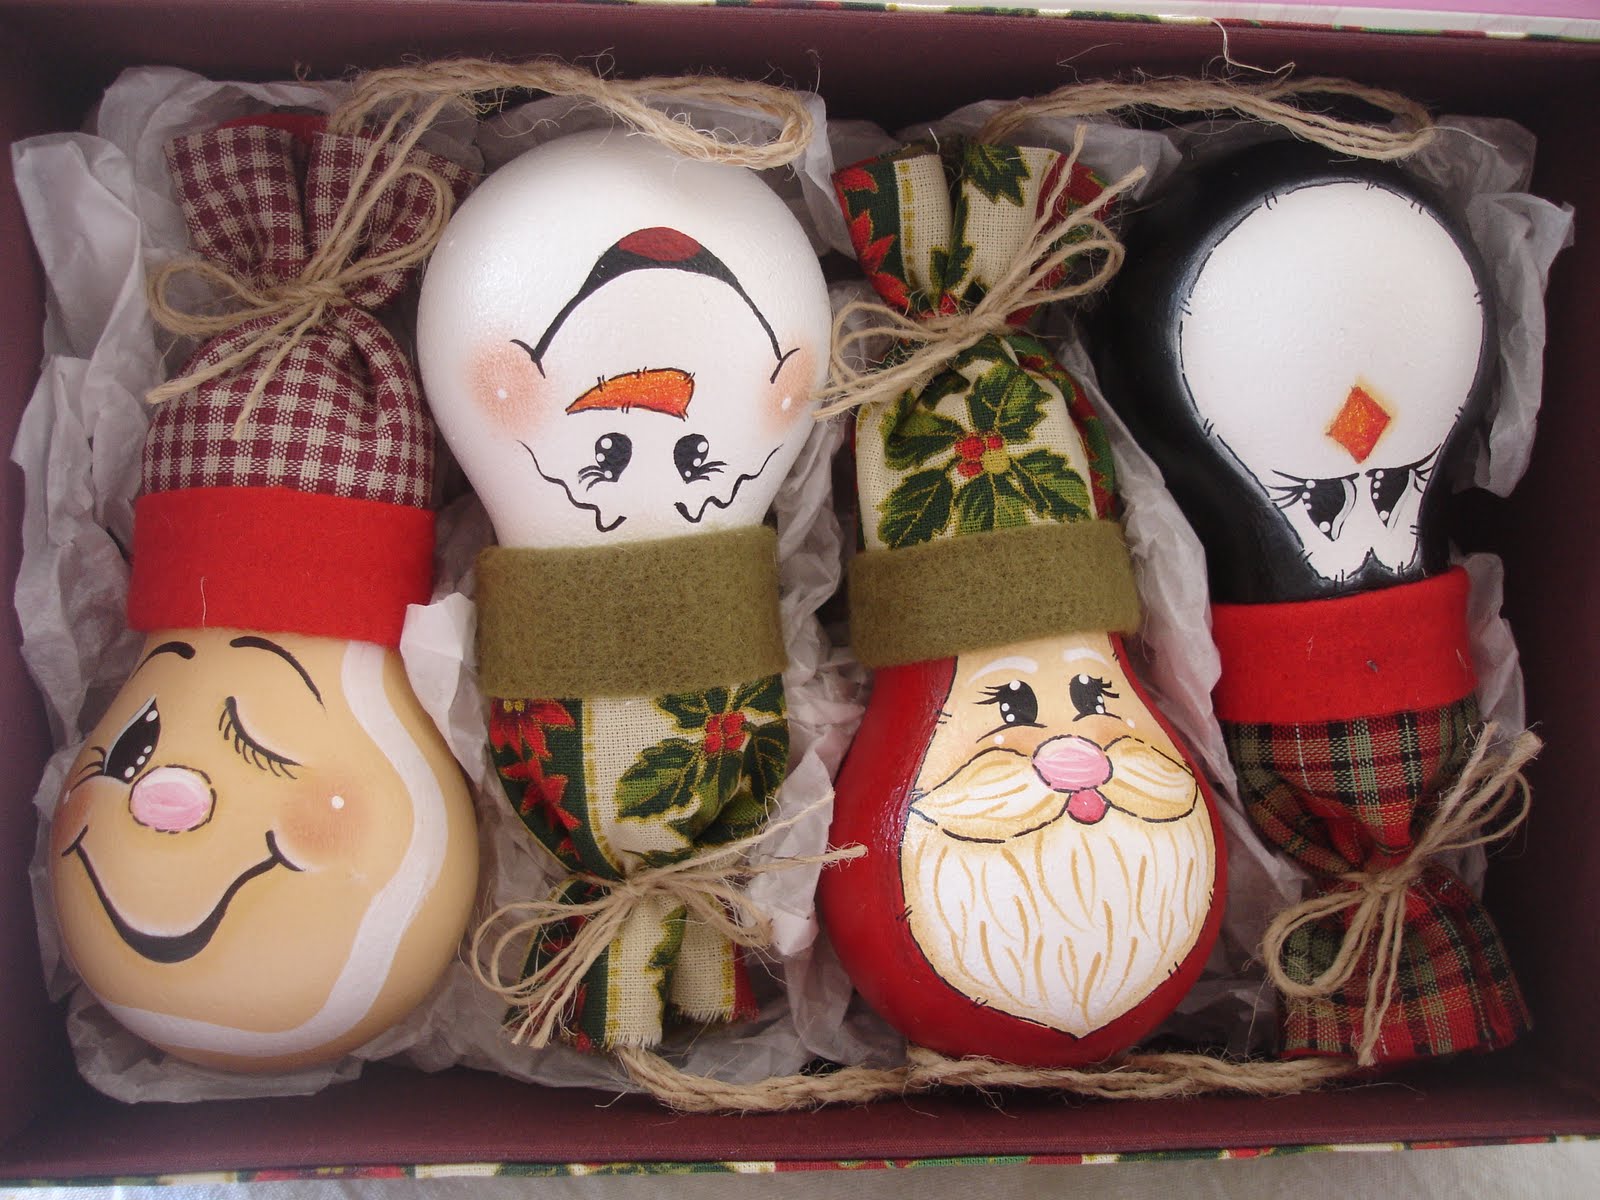
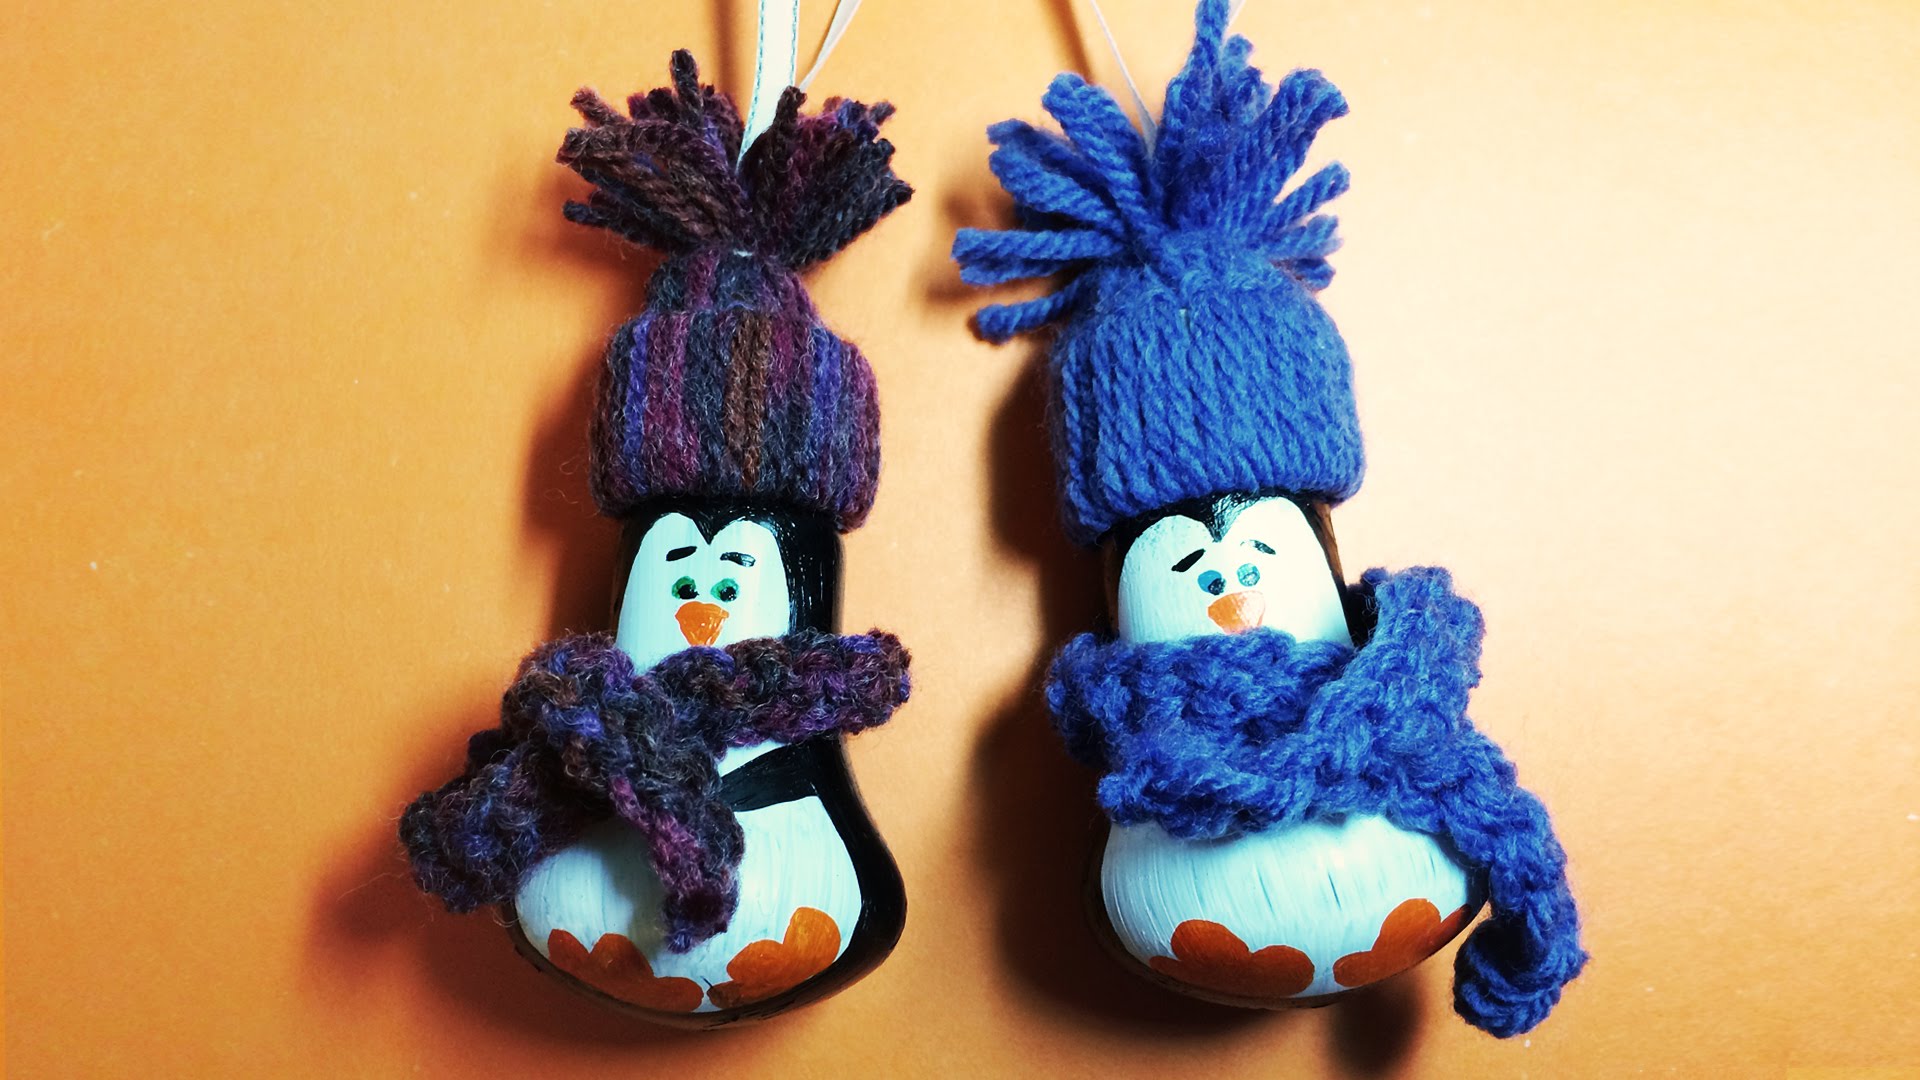
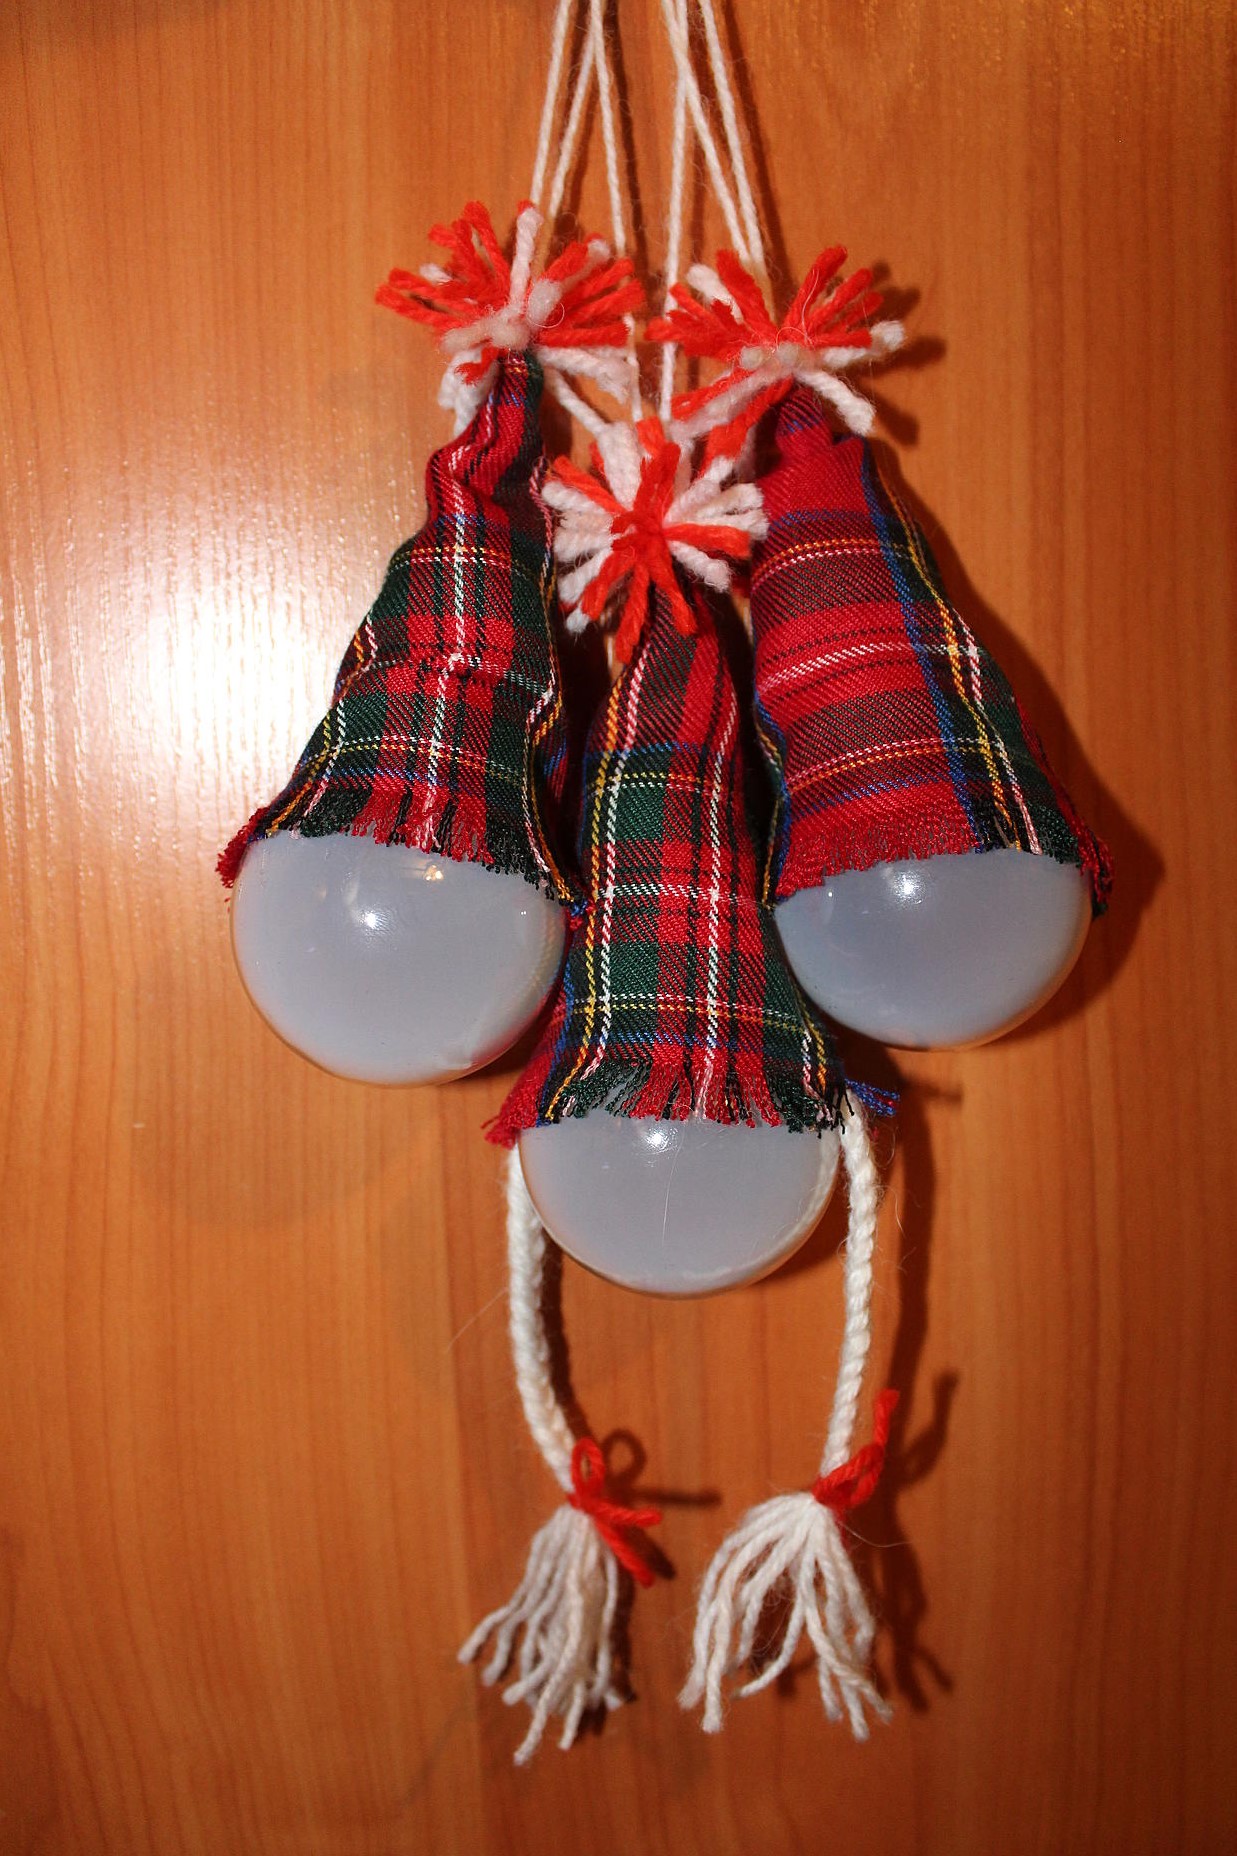
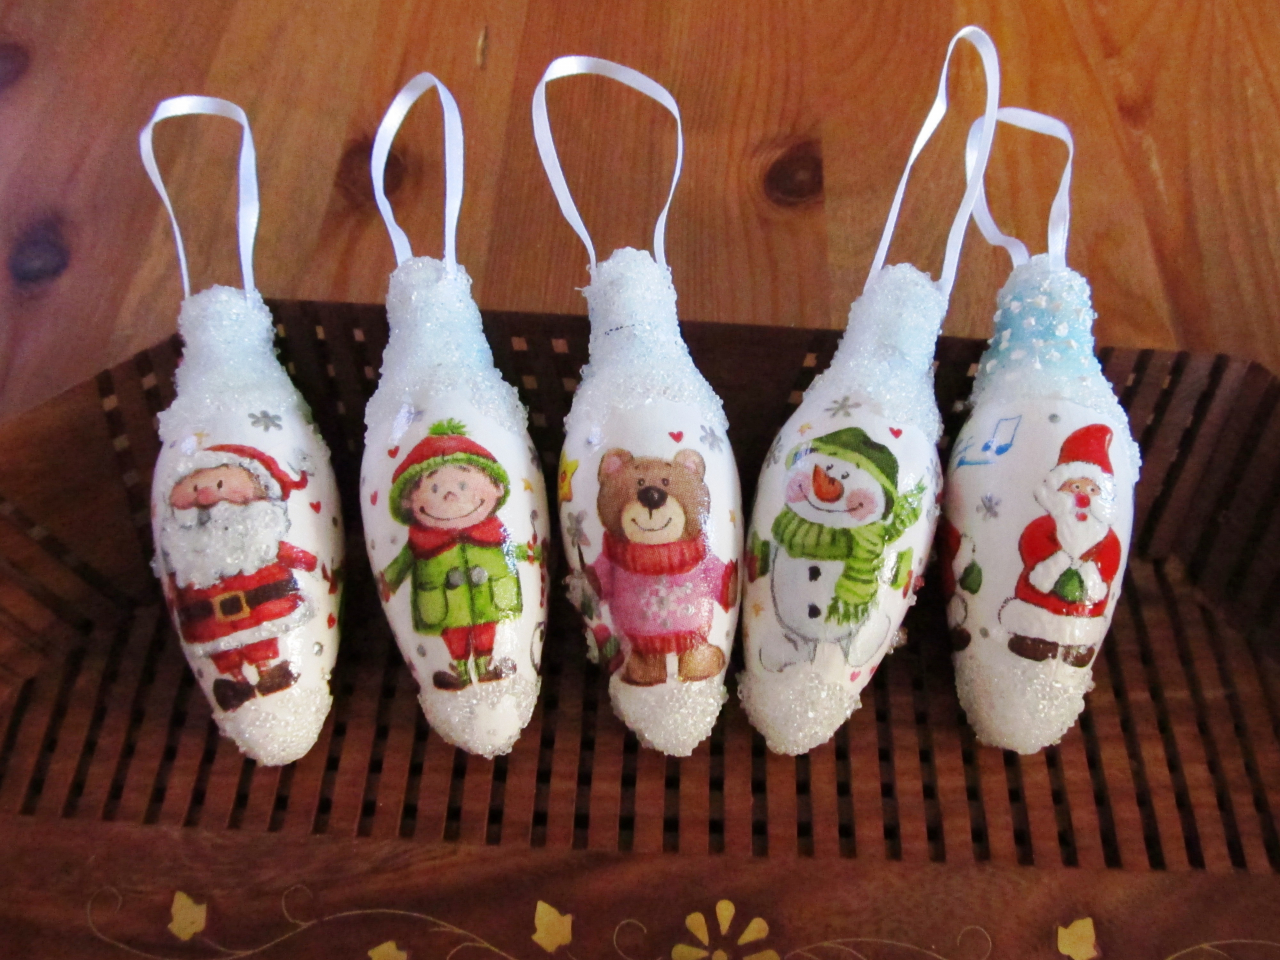
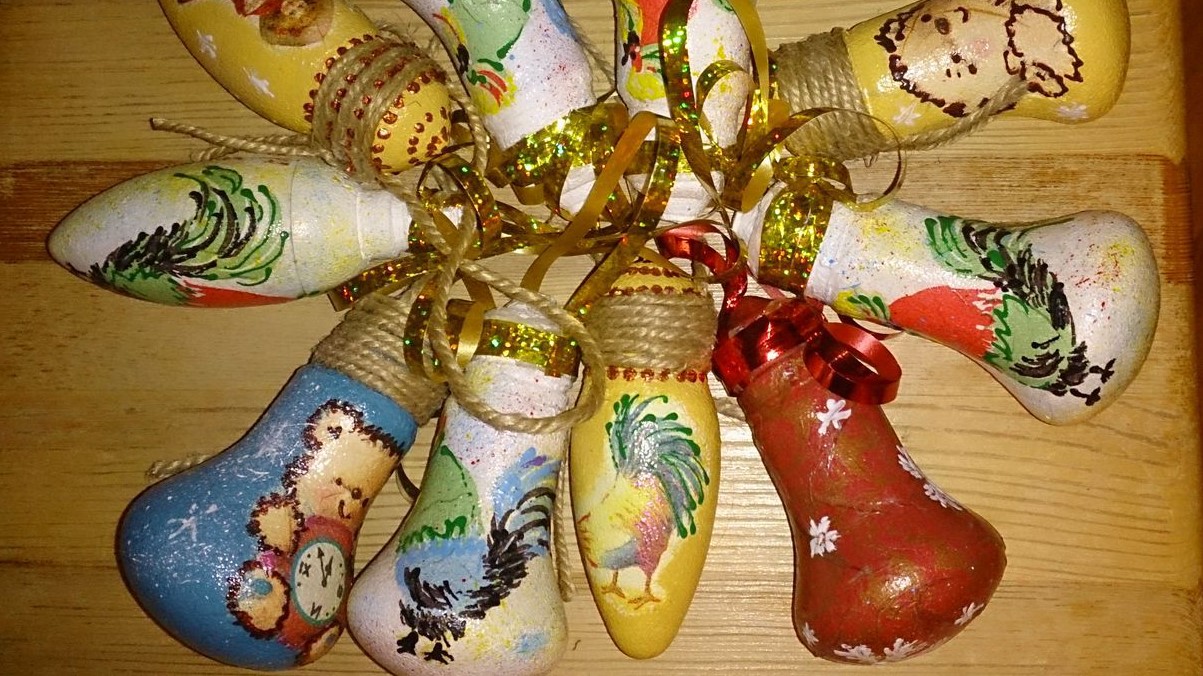
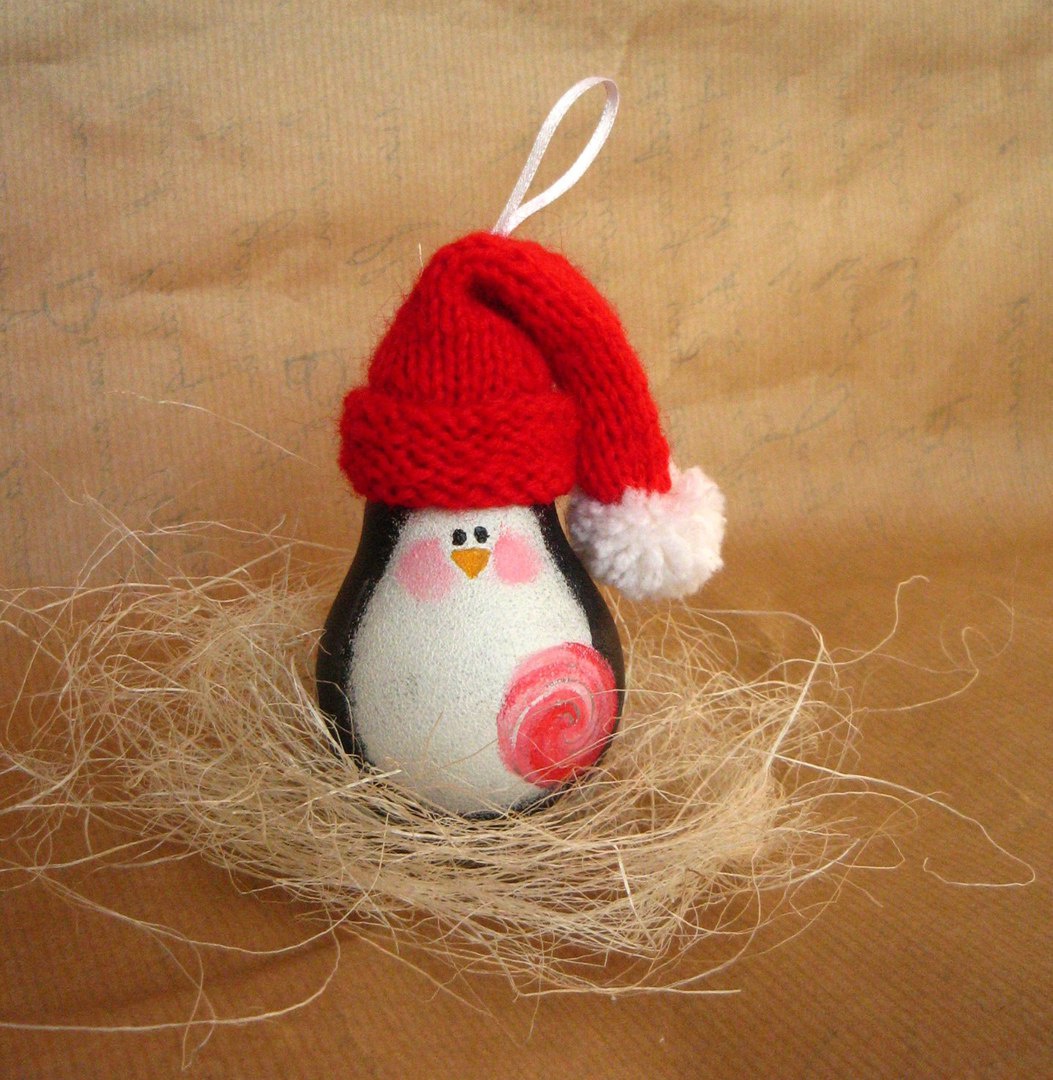
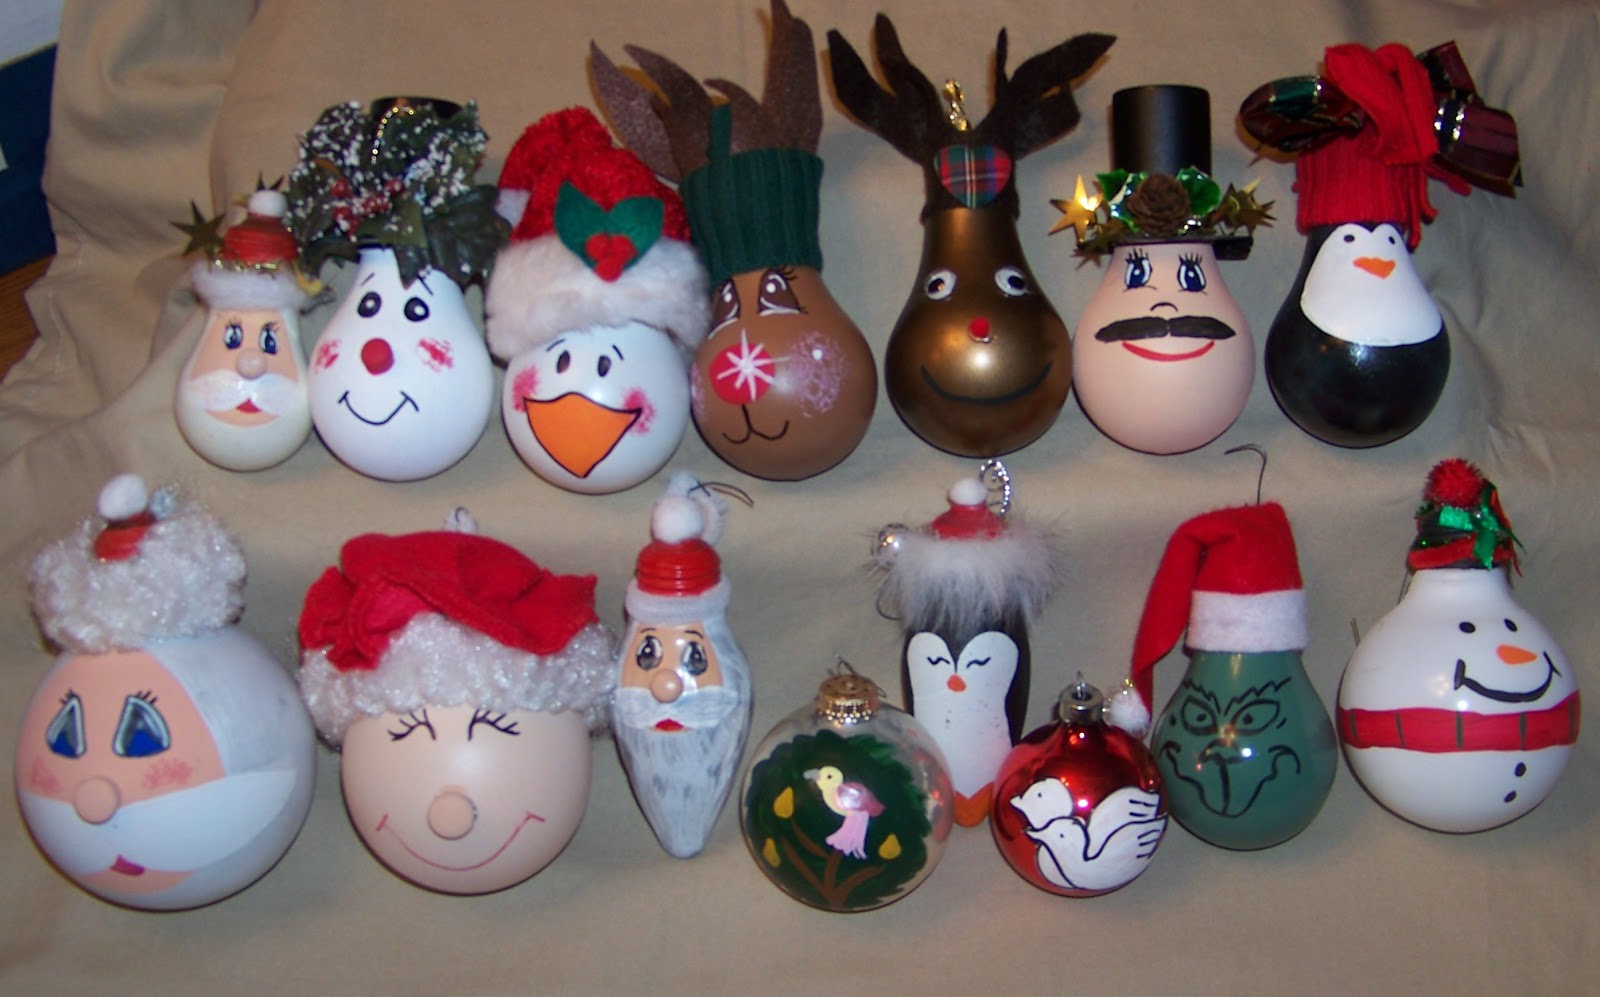
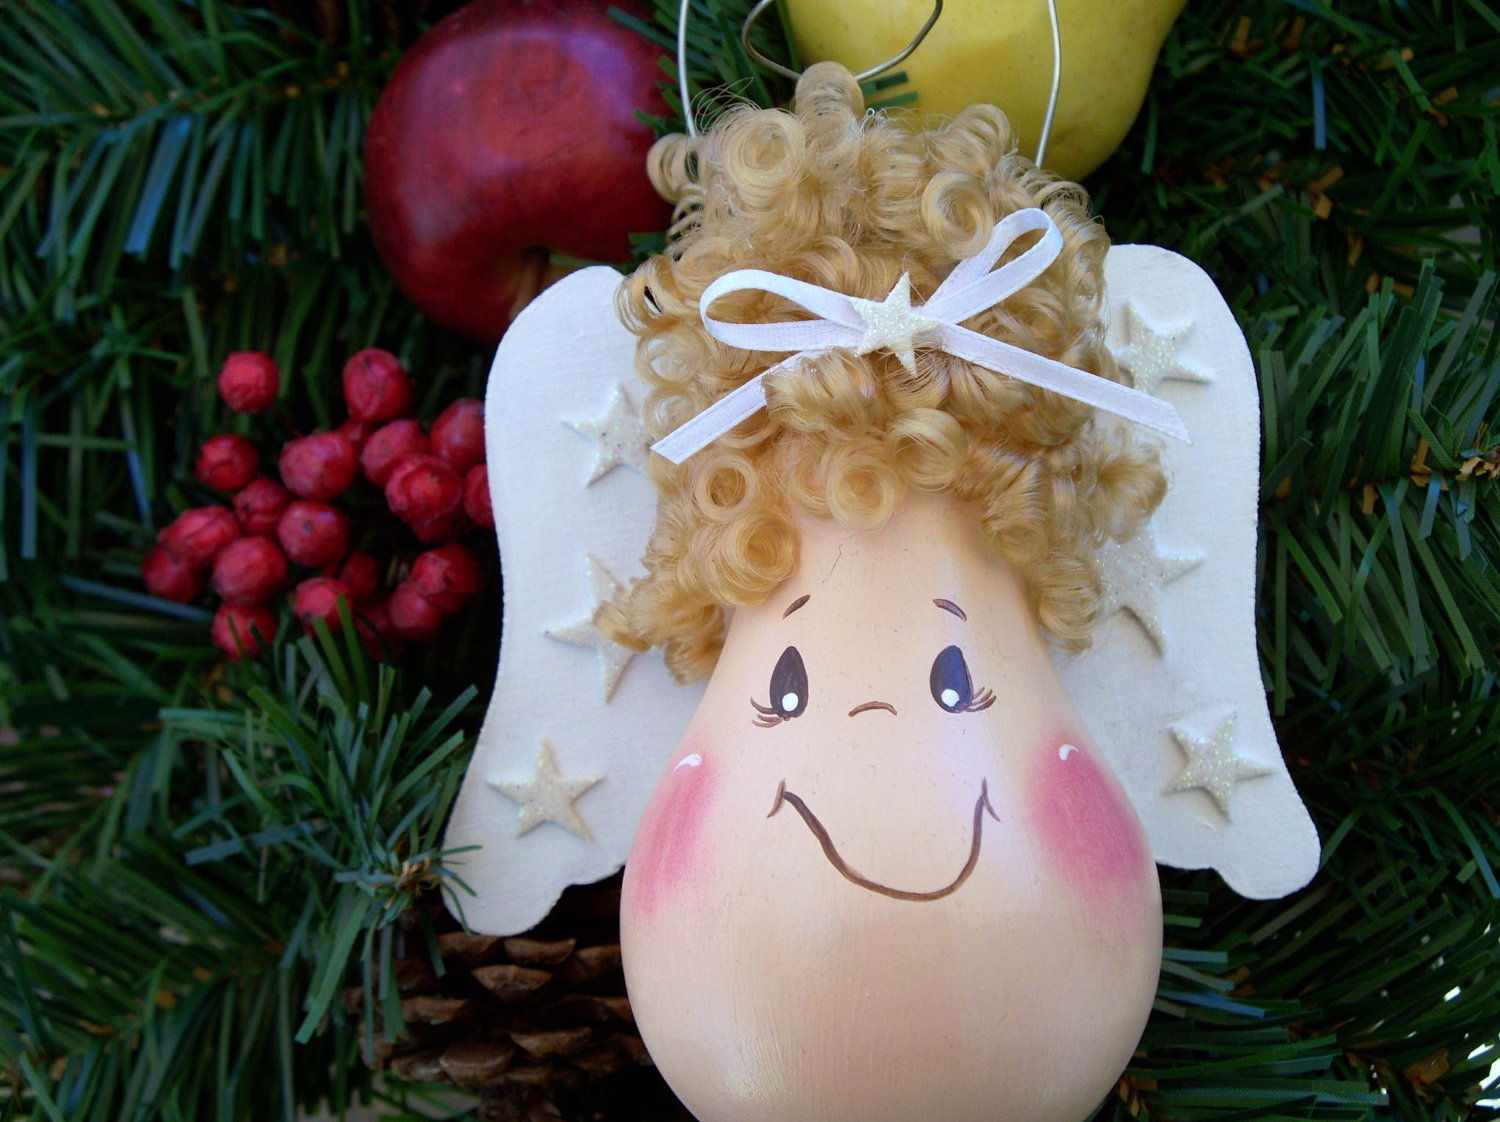
return to menu ↑ return to menu ↑Crafts from light bulbs
If during the whole year the burned out bulbs are not thrown away, but collected, then by December they can accumulate a sufficient amount. All of them can be used to create original crafts that can be used to decorate the room, as well as hang on the Christmas tree.
DIY decor for the Christmas tree
The easiest way to use light bulbs is to imagine what they look like in form. Many of those who have already successfully applied this idea say that it is easiest to make a snowman or a penguin from a bulb, because the contours of the lamp resemble the contours of these Christmas characters. To finish the decoration, you need to take the paint and just decorate it with the right colors.
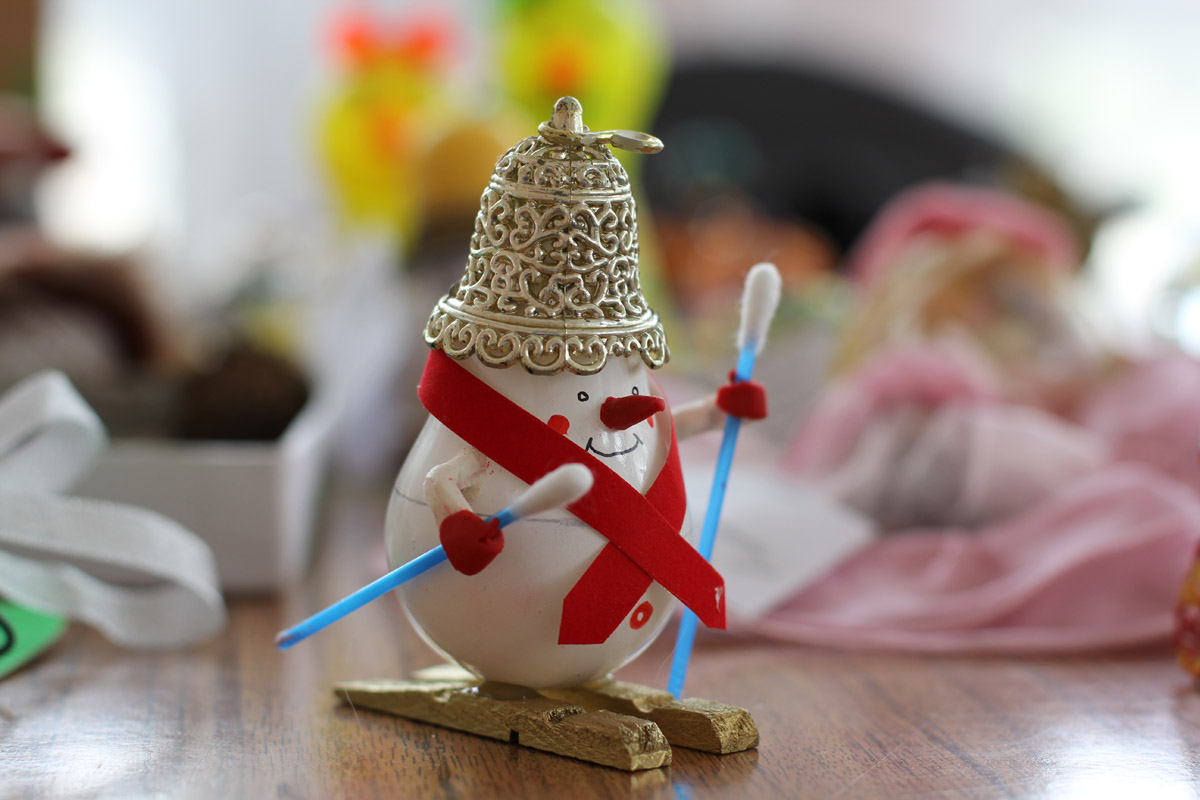
Snowball from a conventional light bulb
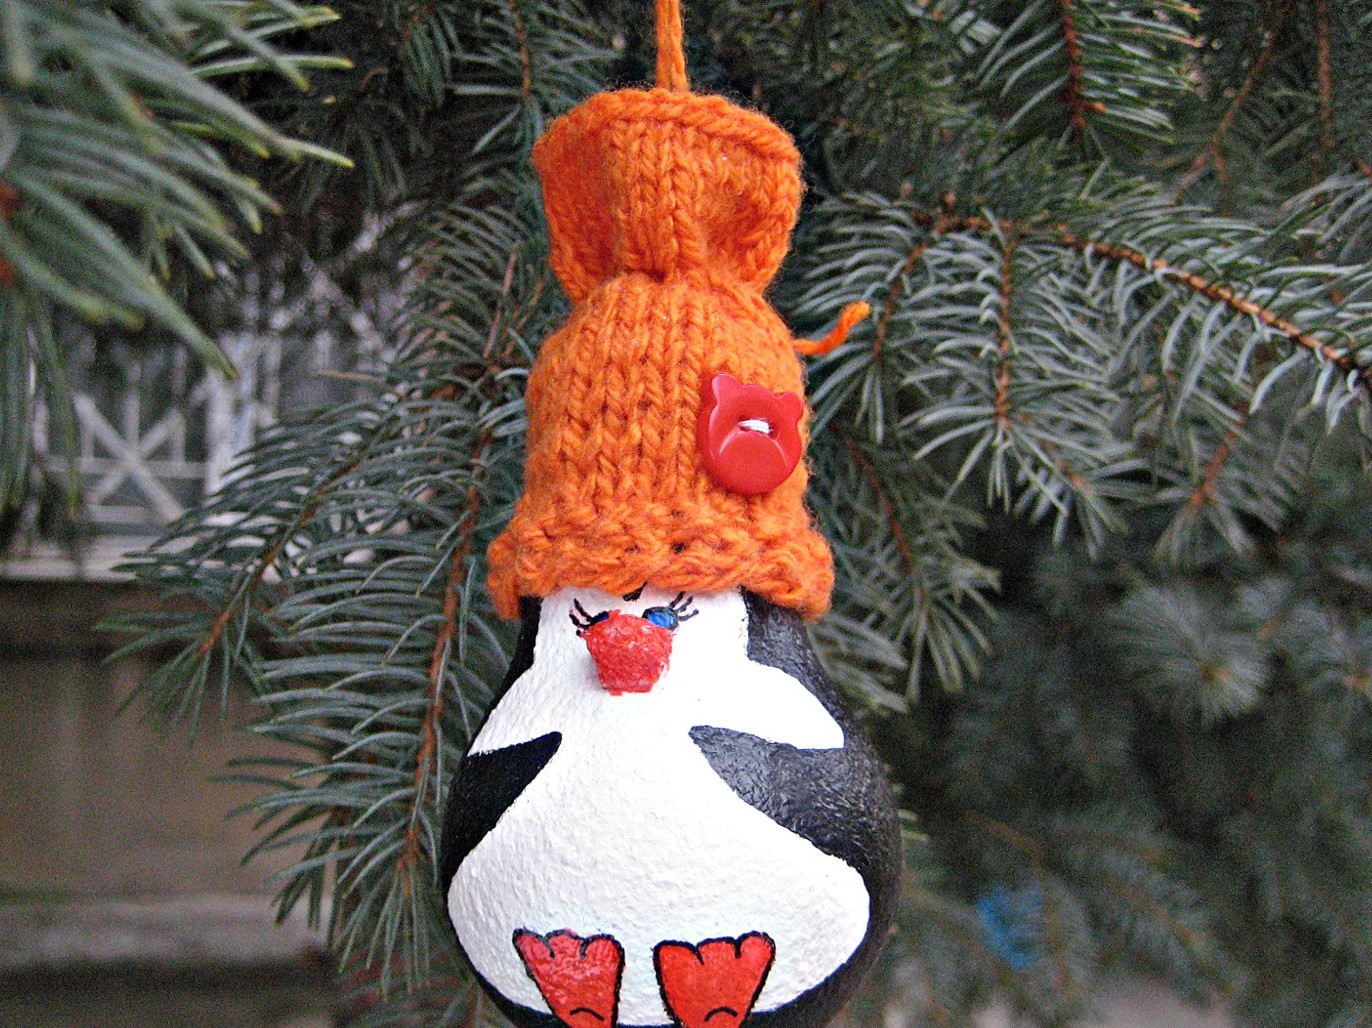
A wonderful penguin from a light bulb on a Christmas tree
Also look bright light bulbs, which are decorated with sparkles. They can be strung on a thread, making the original garland, and you can hang it on the Christmas tree. In this way, you can arrange and small lamps, which have a simple oblong shape.
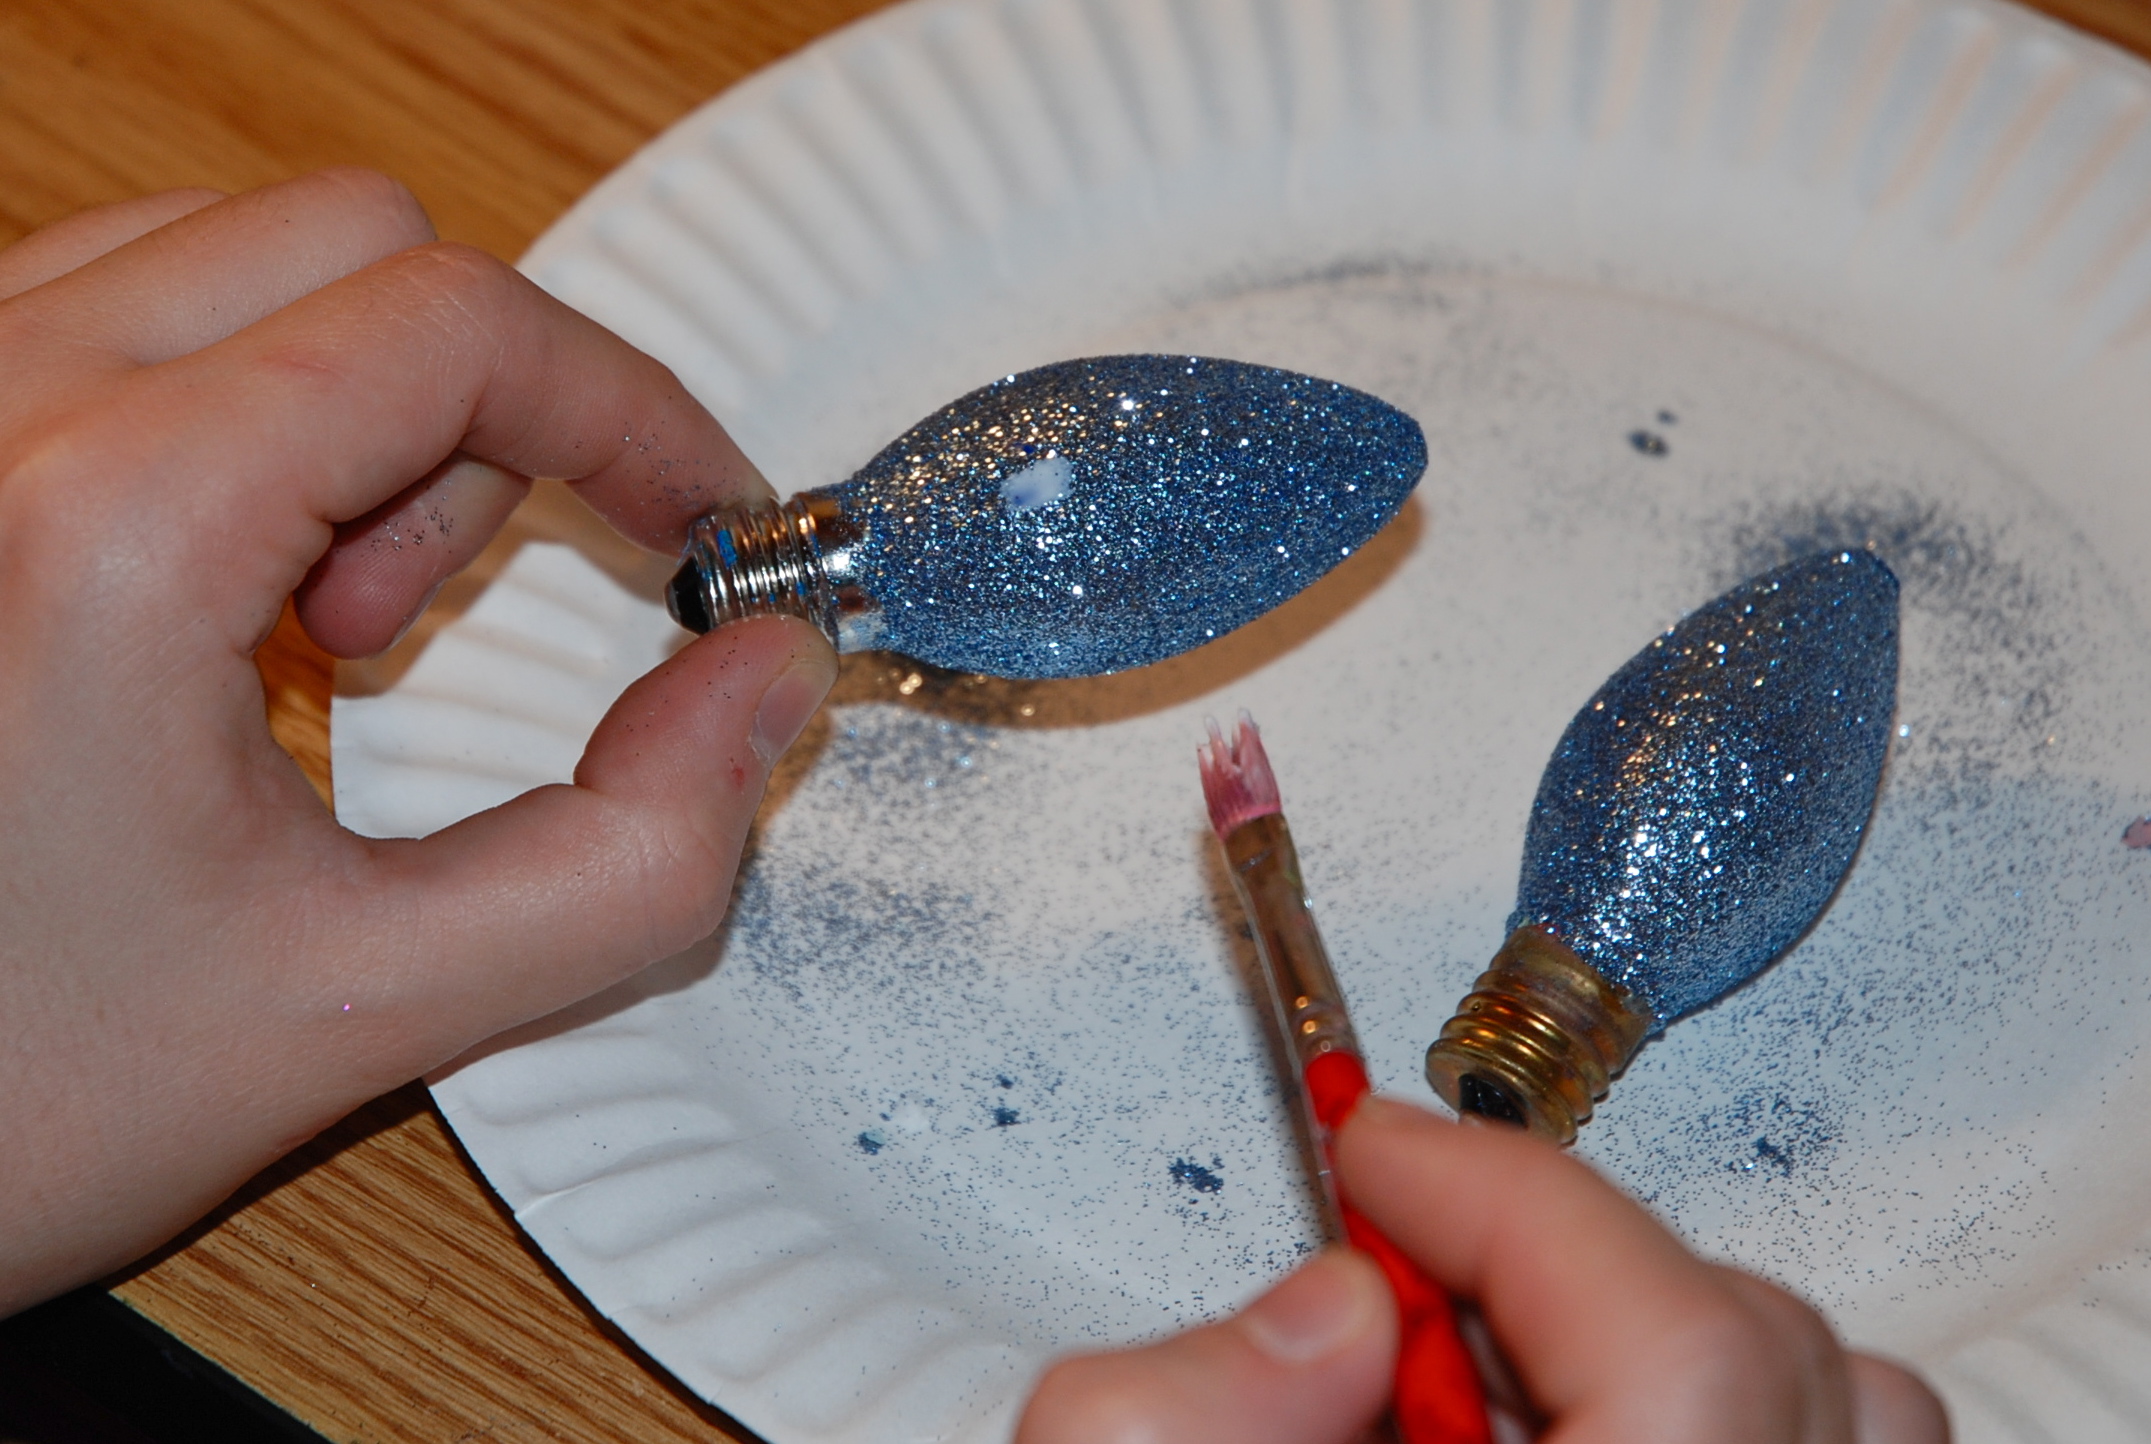
Old light with new shine

Individual shiny snowflake elements
Another simple way to design unnecessary light bulbs is an article with threads. To do this, take the colored threads, smear the lamp with glue, wind them around in a circle, alternating different colors. You can use it as a wide thread, for example, wool, then the work will take less time, and you can thin, acrylic, then the craft will look brighter and more colorful.
return to menu ↑VIDEO: Beautiful snowman do it yourself
Crafts for the New Year
Making a cute snowman


. Step-by-step master classes (animals, dolls, Christmas toys)")
. Beauty lessons do it yourself (190+ Photos)")
I would never have believed that pasta can be made on the Christmas tree. Thanks to a detailed master class, I was able to surprise my loved ones with toys on the Christmas tree. Moreover, I have never seen such a thing from my friends. A good article for those who really want to add flavor to their decor and do not know how to do it.