How to make a flower from a ribbon Doing your own hands (90+ Photos): Simple Master Classes for Creating a Beautiful Bud
: Simple Master Classes for Creating a Beautiful Bud")
Ribbon flower is a beautiful decor that can be easily made by hand. It can be used not only to decorate a gift, but also as a gift in general. Everyone can learn, the main thing is a little patience and time.
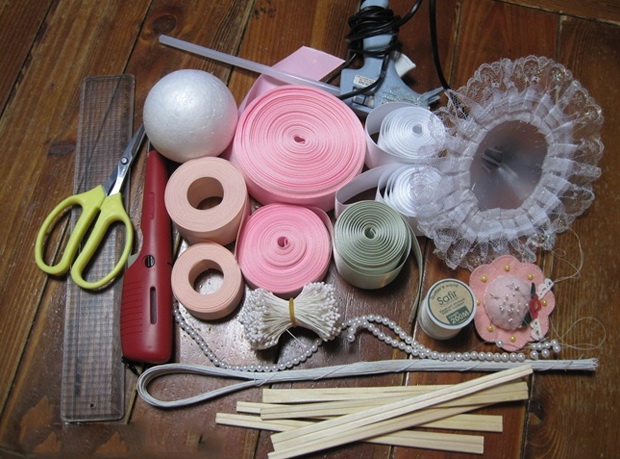
Before you make a flower yourself, prepare all the necessary materials for the work and follow the suggested master classes: the result will delight you with its elegance and versatility.
Content:
Bud making from satin
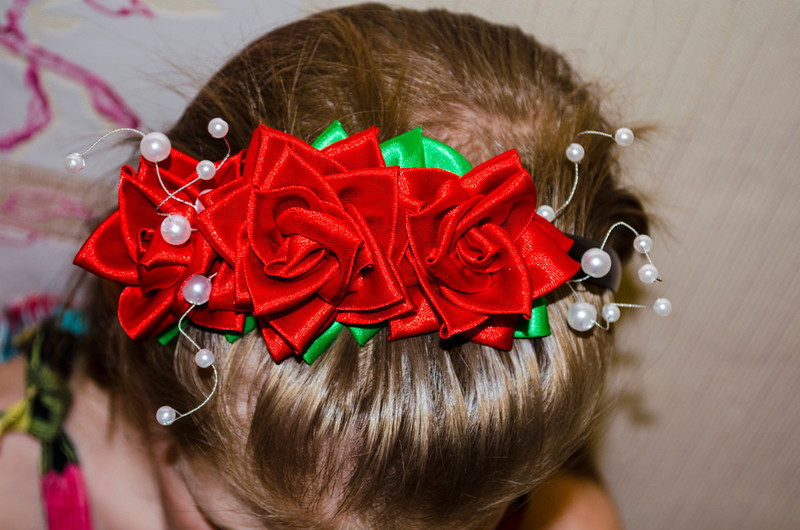
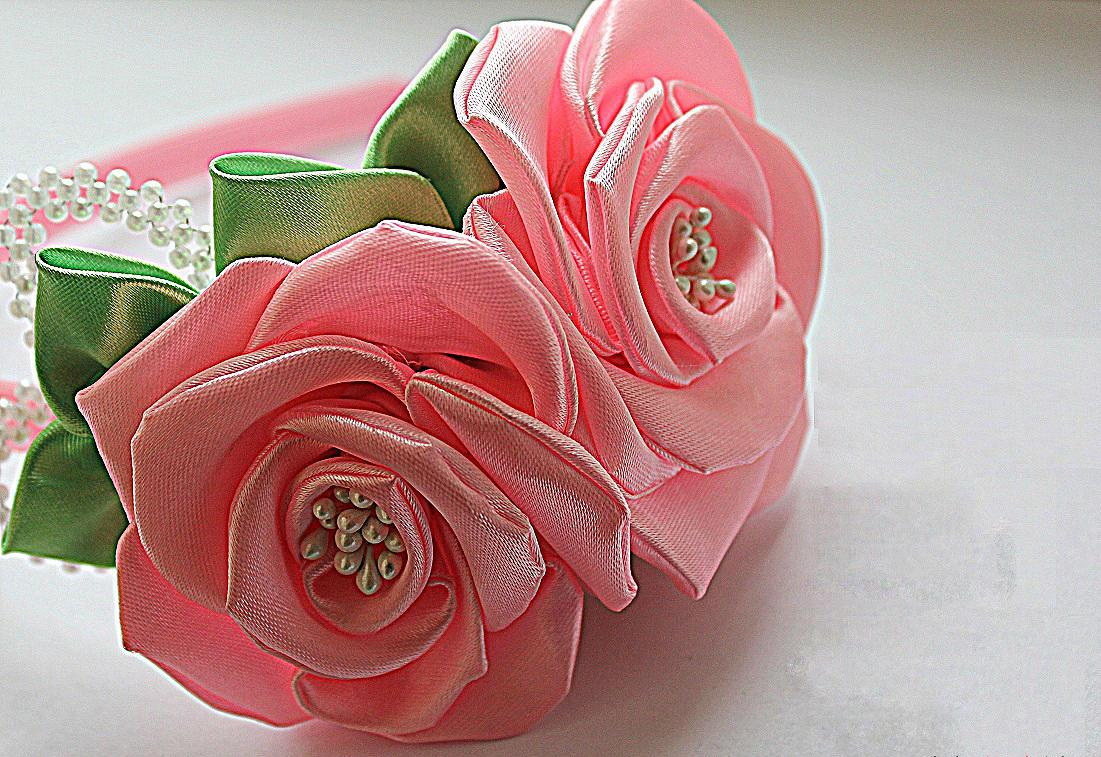
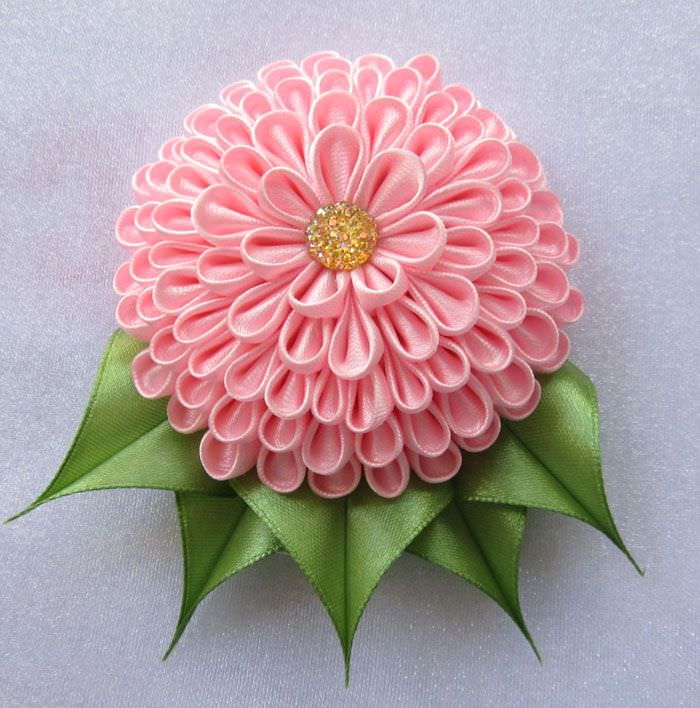
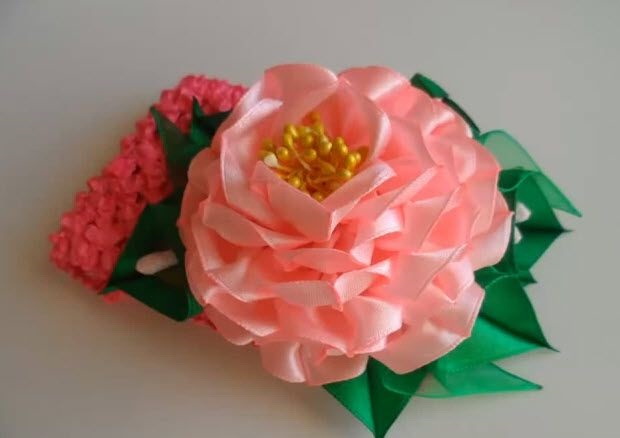
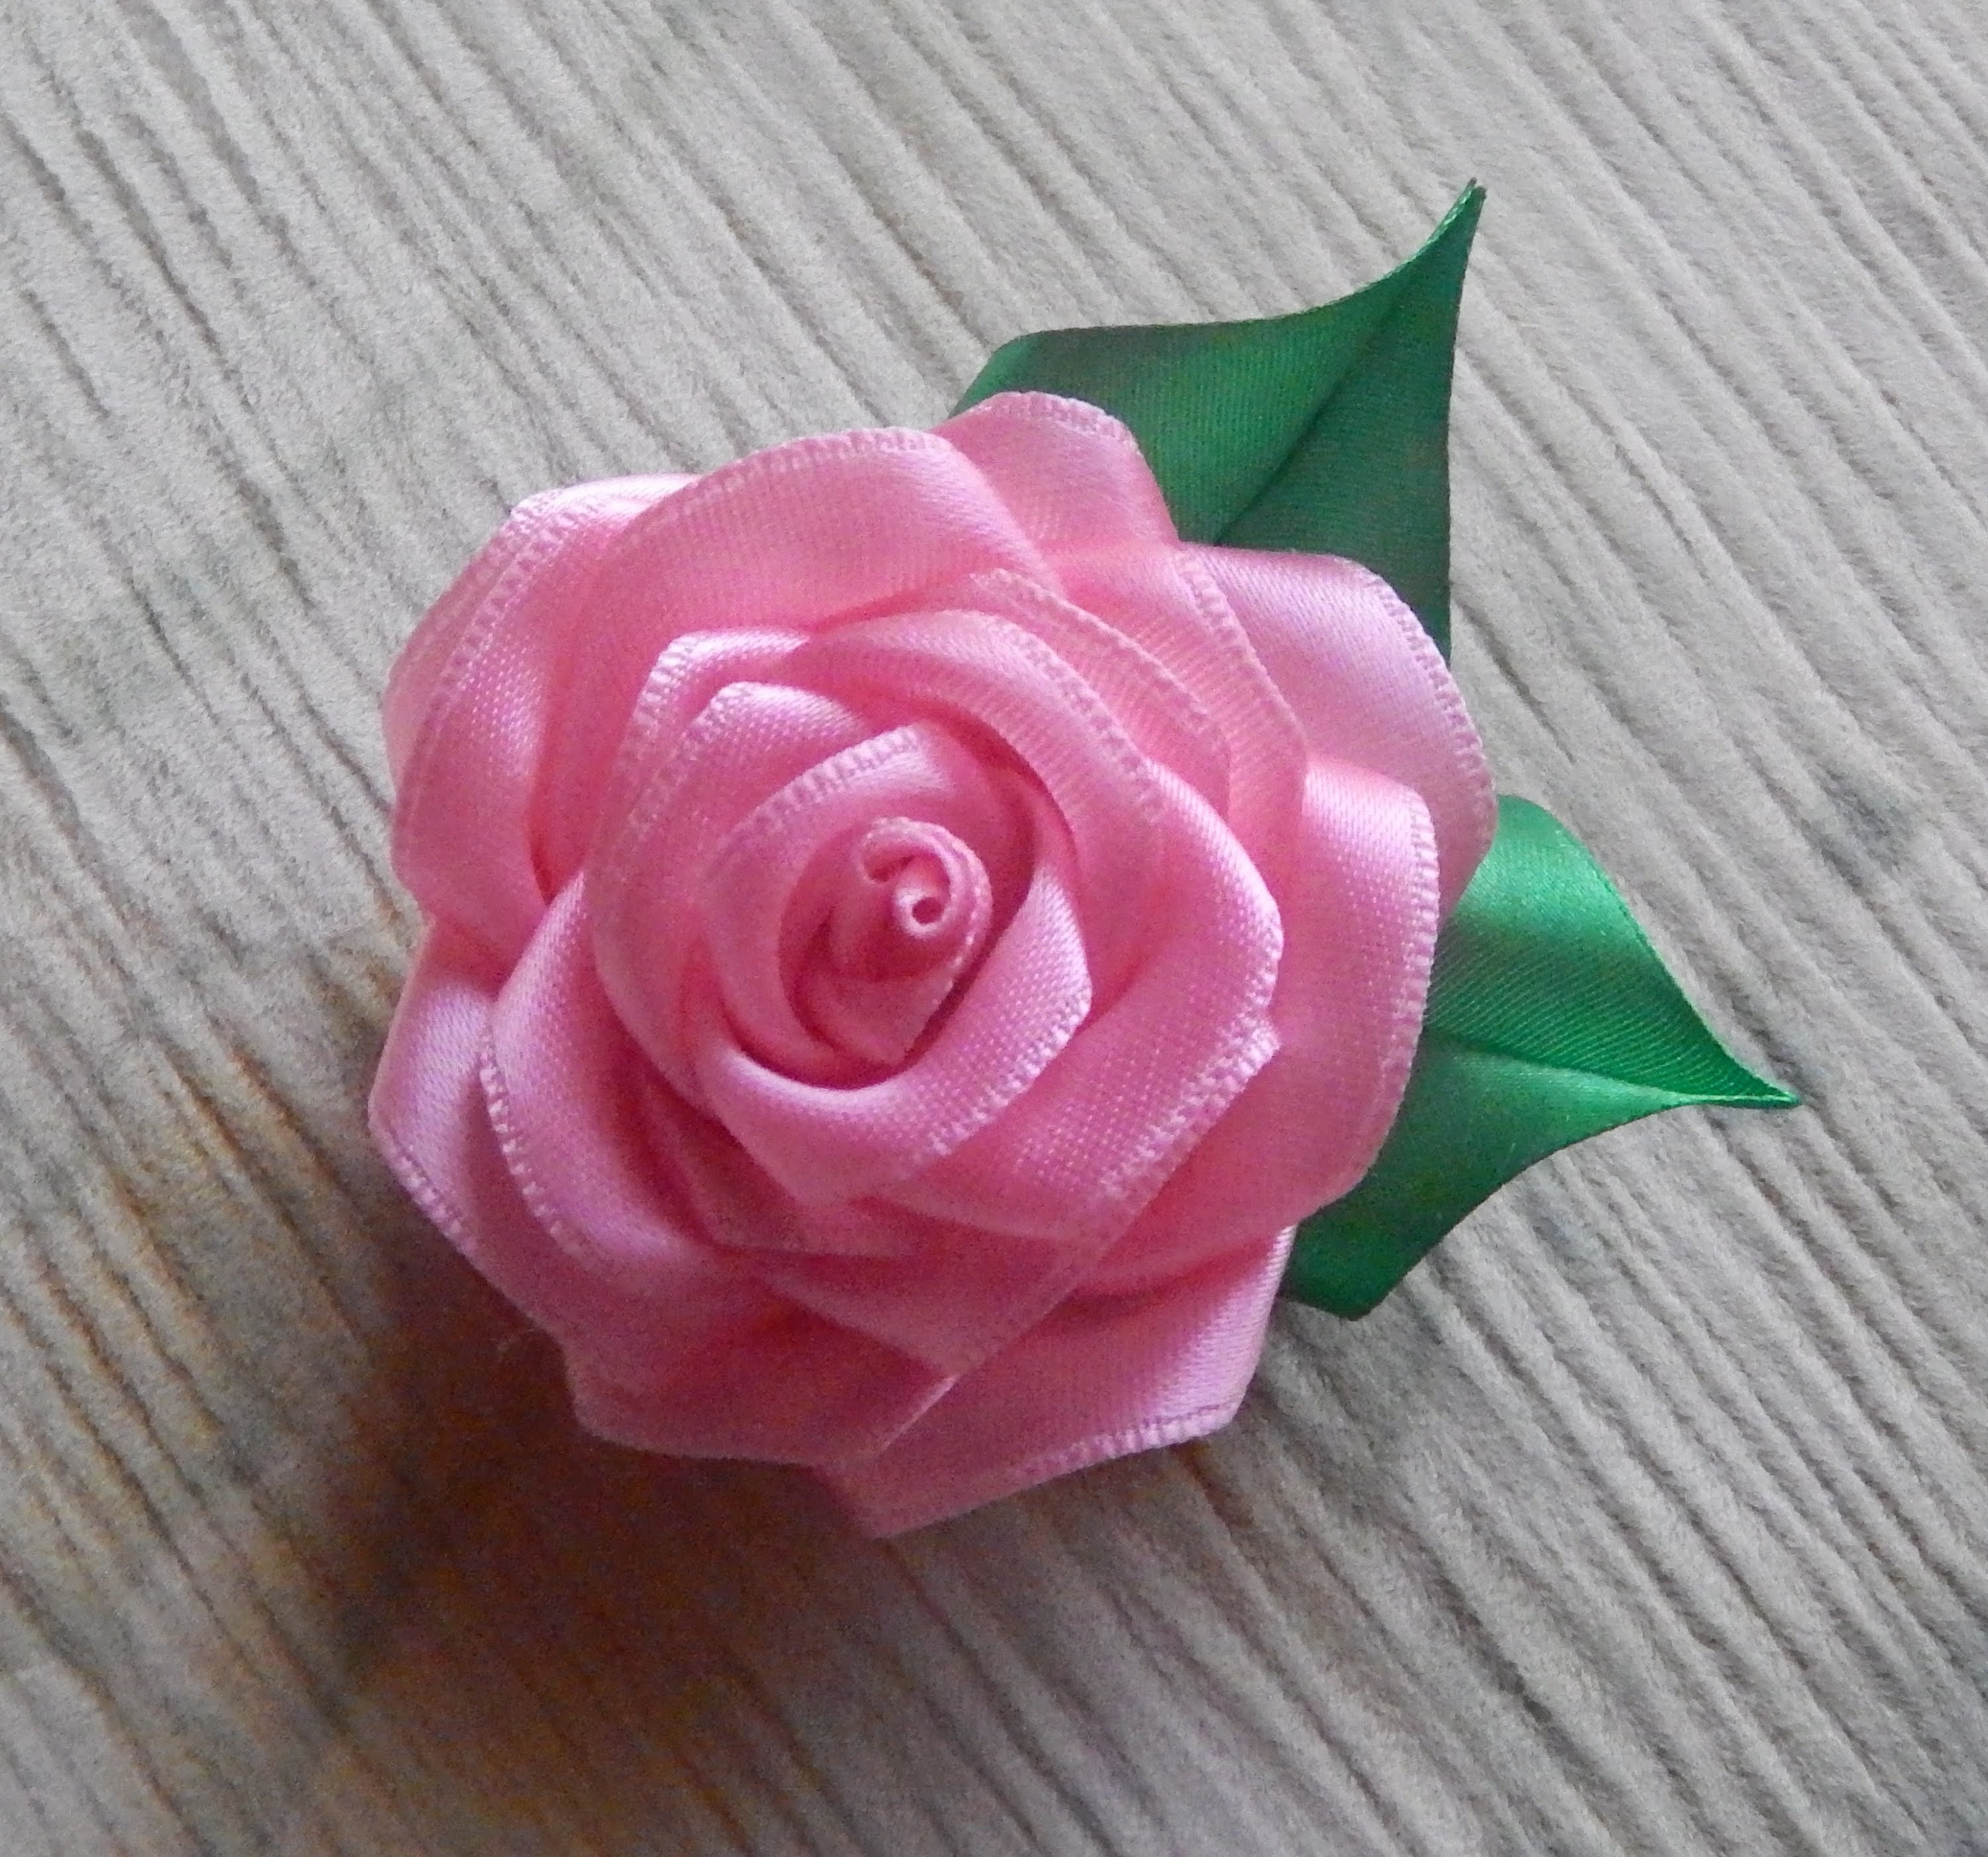
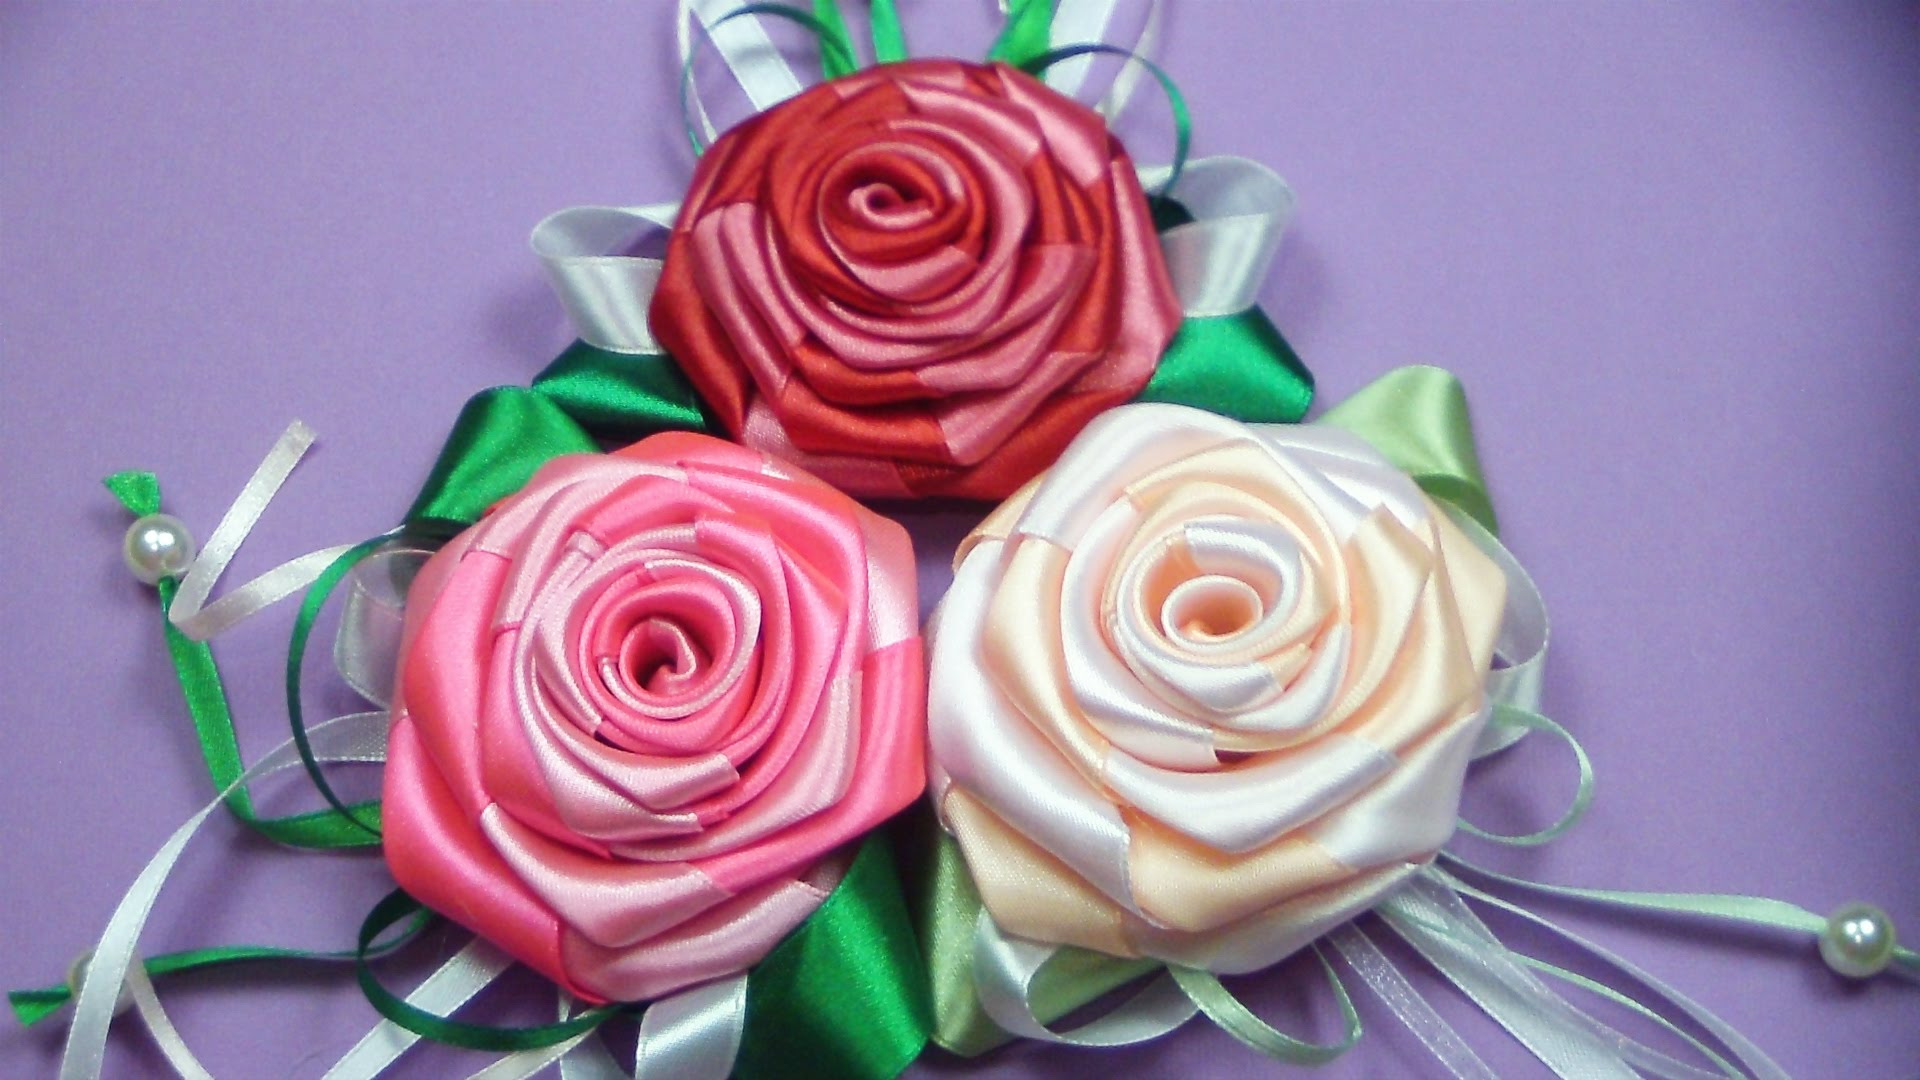
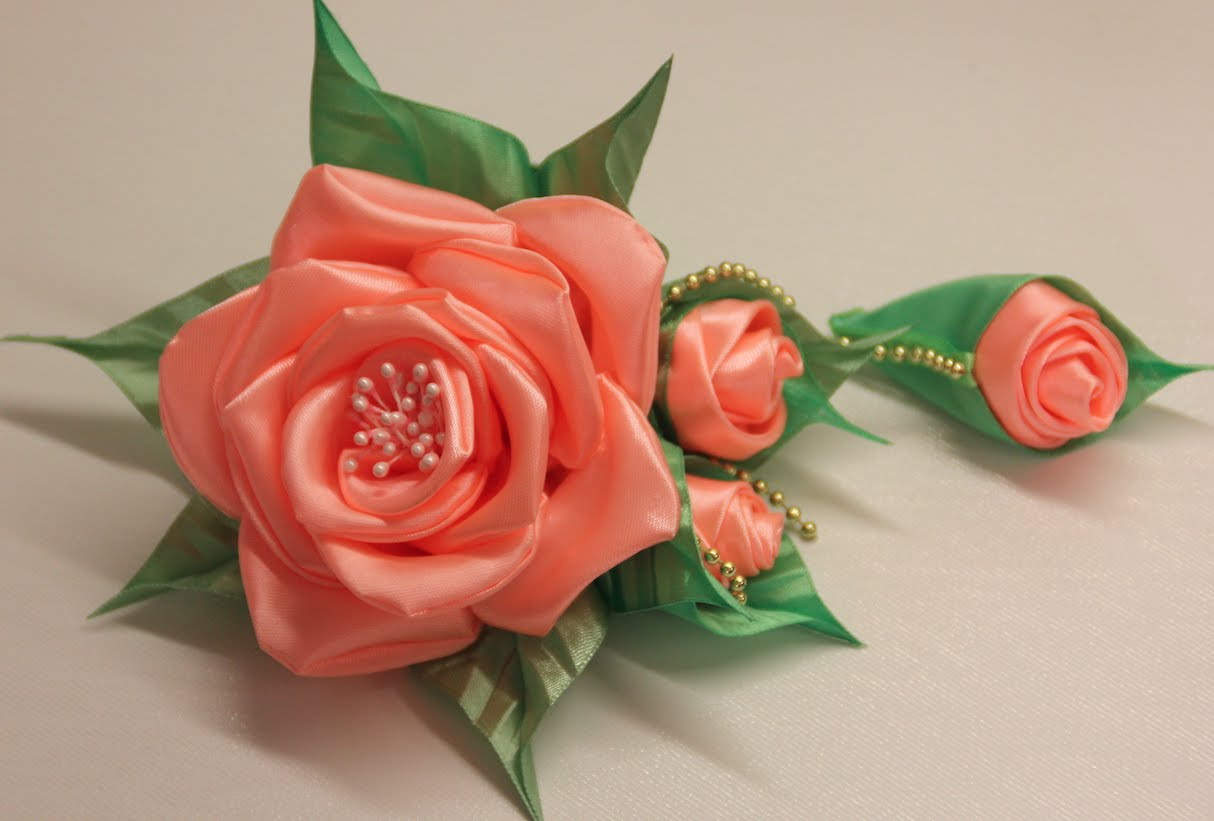
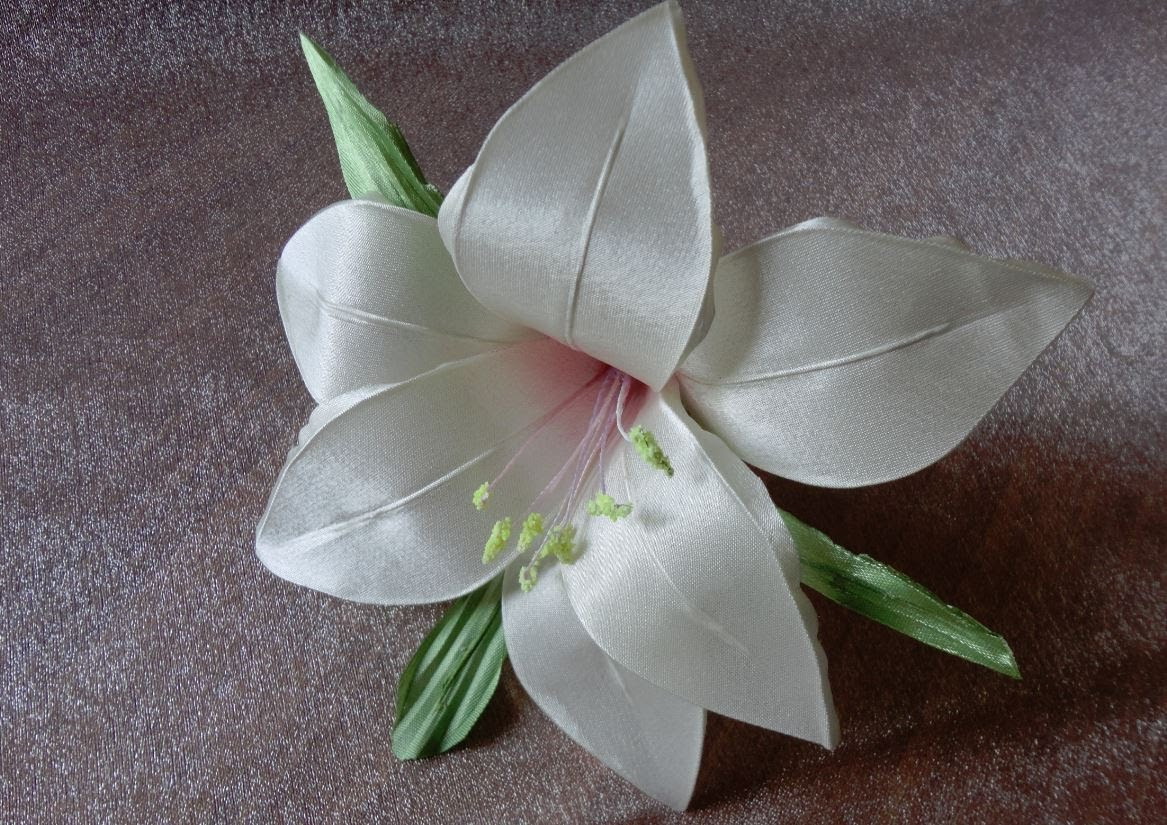
A master class is great for novice needlewomen, clearly illustrating how to make a flower out of wide-sized satin ribbons. The width of this material is 5-10 cm. Satin fabric is offered in a huge variety, so choose your favorite colors.
Beautiful flower
Satin ribbons
Master Class
The master class consists of such simple steps.:
- Making the base. The first thing to do is to make a petal pattern. To do this, take the sheet paper and draw on it a petal of the right size. To make the edges of the petal even, fold the sheet in half and cut off 2 layers of paper at once in the form of a drop.
: Simple Master Classes for Creating a Beautiful Bud")
: Simple Master Classes for Creating a Beautiful Bud")
: Simple Master Classes for Creating a Beautiful Bud")
: Simple Master Classes for Creating a Beautiful Bud")
- Preparation of petals. Cut the material into pieces of the required size in the form of squares or rectangles. Circle the prepared paper pattern on each piece and cut out the petals. The output should be about 30 pieces of petals.
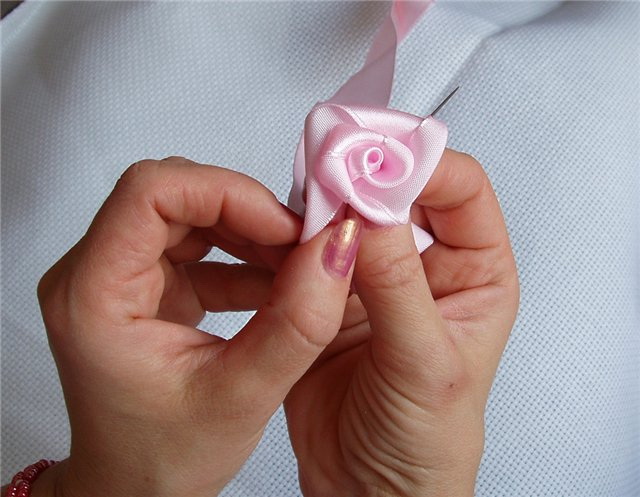
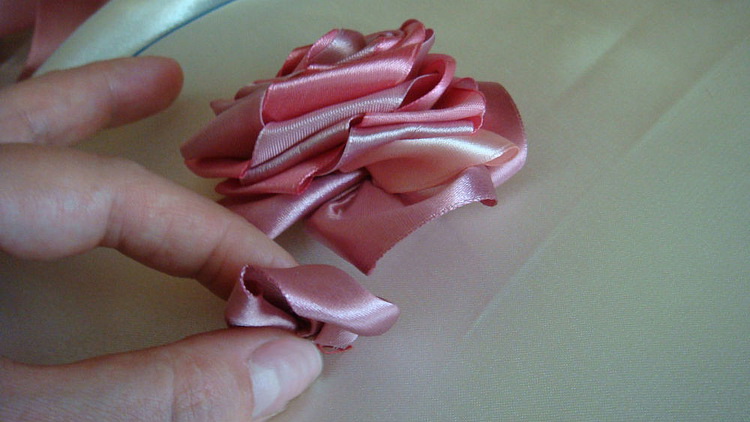
- Petal formation. Slightly fold the petal in half, light a candle and bring the blank to the fire. The material begins to wrap itself in front of your eyes: you need to achieve the effect of a twisted petal. So do with all the blanks.
- Bud formation. When the petals are formed, proceed to the manufacture of the product itself. At this stage, choose one of the two proposed torsion methods. The first implies an assembly with a needle: just put all the petals on the thread and tighten it at the base.The second method is suitable if you plan to make a stalk: a foil ball is glued to the stick, and petals are attached to it using hot melt.
: Simple Master Classes for Creating a Beautiful Bud")
: Simple Master Classes for Creating a Beautiful Bud")
: Simple Master Classes for Creating a Beautiful Bud")
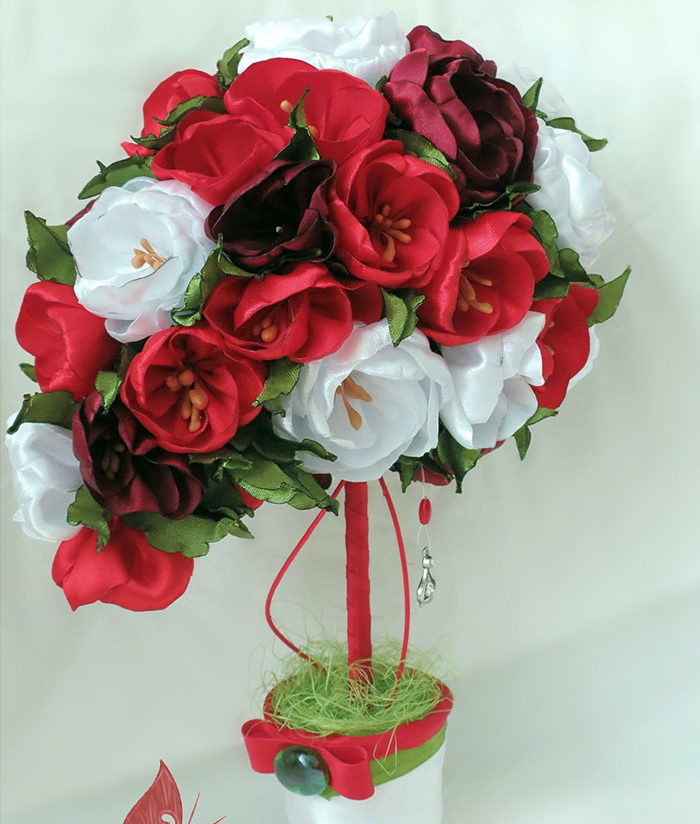
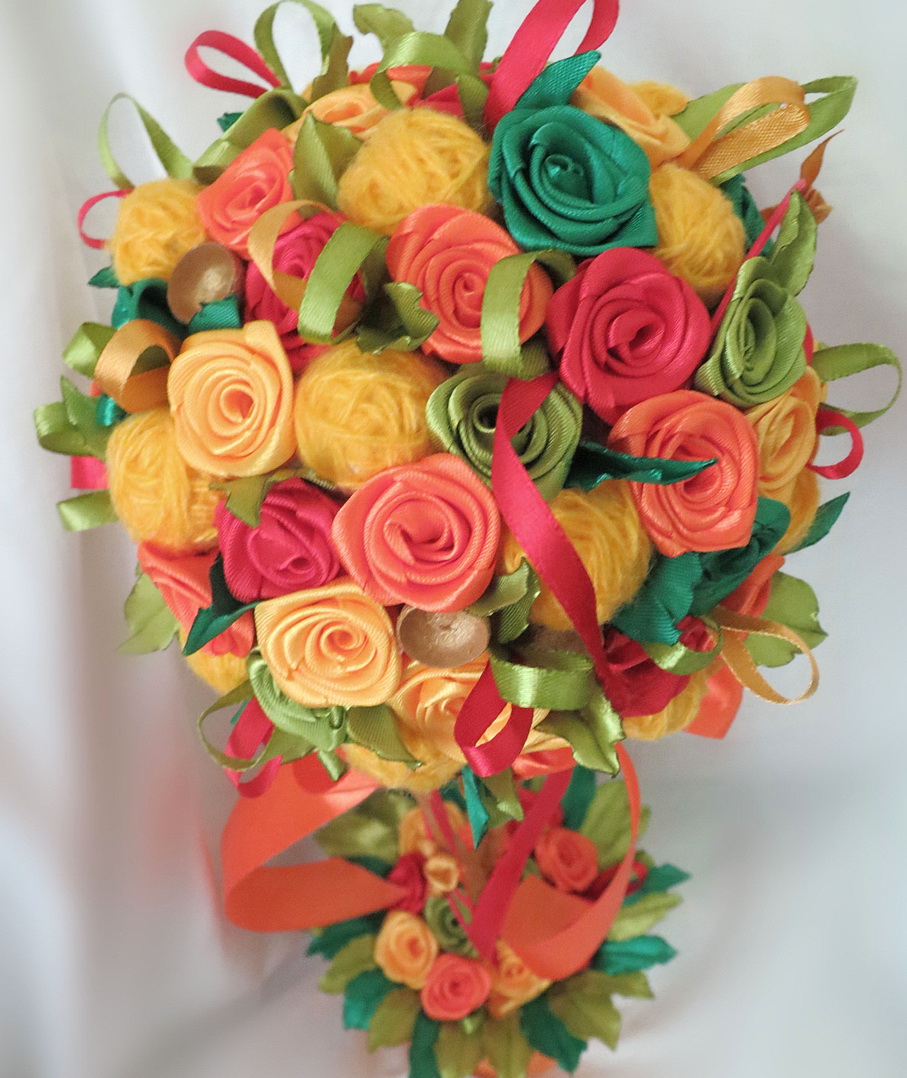
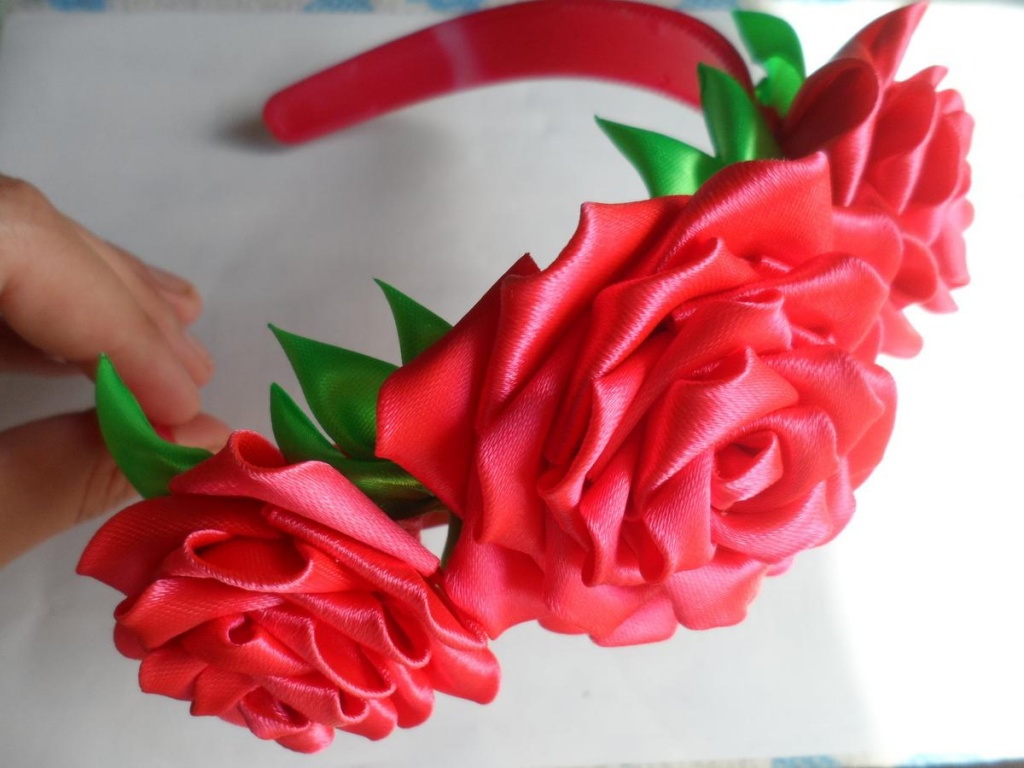
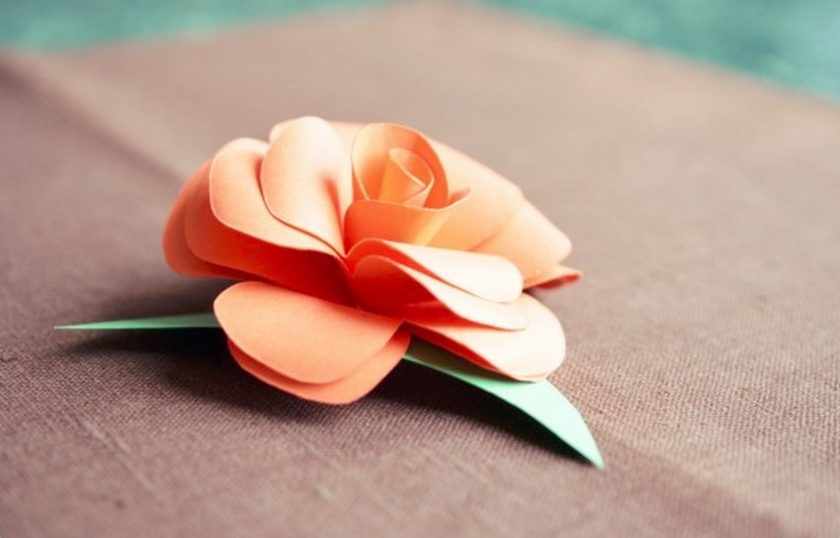
The finished gorgeous rosebud made with step-by-step instructions can be used in different ways. The rose will be an excellent gift for mom on March 8, she can also decorate your home interior. Attaching a pin to the bud, it will make an excellent brooch on the jacket.
return to menu ↑Stylish interior flower from paper tape
A good option for needlework for beginners and children is to make a bud out of paper. We will highlight 2 nuances: you can buy it in the store of creativity, ready or do it yourself. To do this, take a sheet of colored thick paper and cut it into strips of the desired size.
Handicraft from paper material
Buds made of paper, fit appropriately almost everywhere: the bouquet looks perfect in a vase on the kitchen, at the hallwayas well as in living room on the cabinet The work will require a standard set of materials used in the class work at school. To independently make a flower out of paper, prepare the following materials:
- sheets of colored paper of several shades;
- scissors;
- bamboo sticks;
- PVA glue or hot glue with chopsticks.
From paper tape
Master Class
The choice of glue depends on the type of paper used: if you choose thick paper by type cardboard - it is better to take hot melt glue, it fastens petals more reliably. If usual school paper is used, PVA glue will do. For registration of the stalk will require corrugated paper green shade.
A good handicraft option for beginners and children.
The process of making carnations or roses from paper is so fascinating that you can not notice how time flies. Especially fun to twist the product with the children, and the choice of color inspires the baby most. First, cut the paper into 3 cm wide strips - this is the most optimal size for blanks.
Further work will go faster if you prepare the stem in advance. To do this, cut a piece of corrugated green paper and stick it over the bamboo stick. Then take the paper tape, sticking its tip to the stem, start winding the flower in a spiral.
Buds made of paper, fit appropriately almost everywhere
In this way, it is possible to wind about 10 parts in 1 hour, which is already a full-fledged interior bouquet. The craft will be a good option for a gift composition, as well as impress the child with its beauty and ease of manufacture. Flowers of pastel paper in combination with contrasting shades look beautiful.
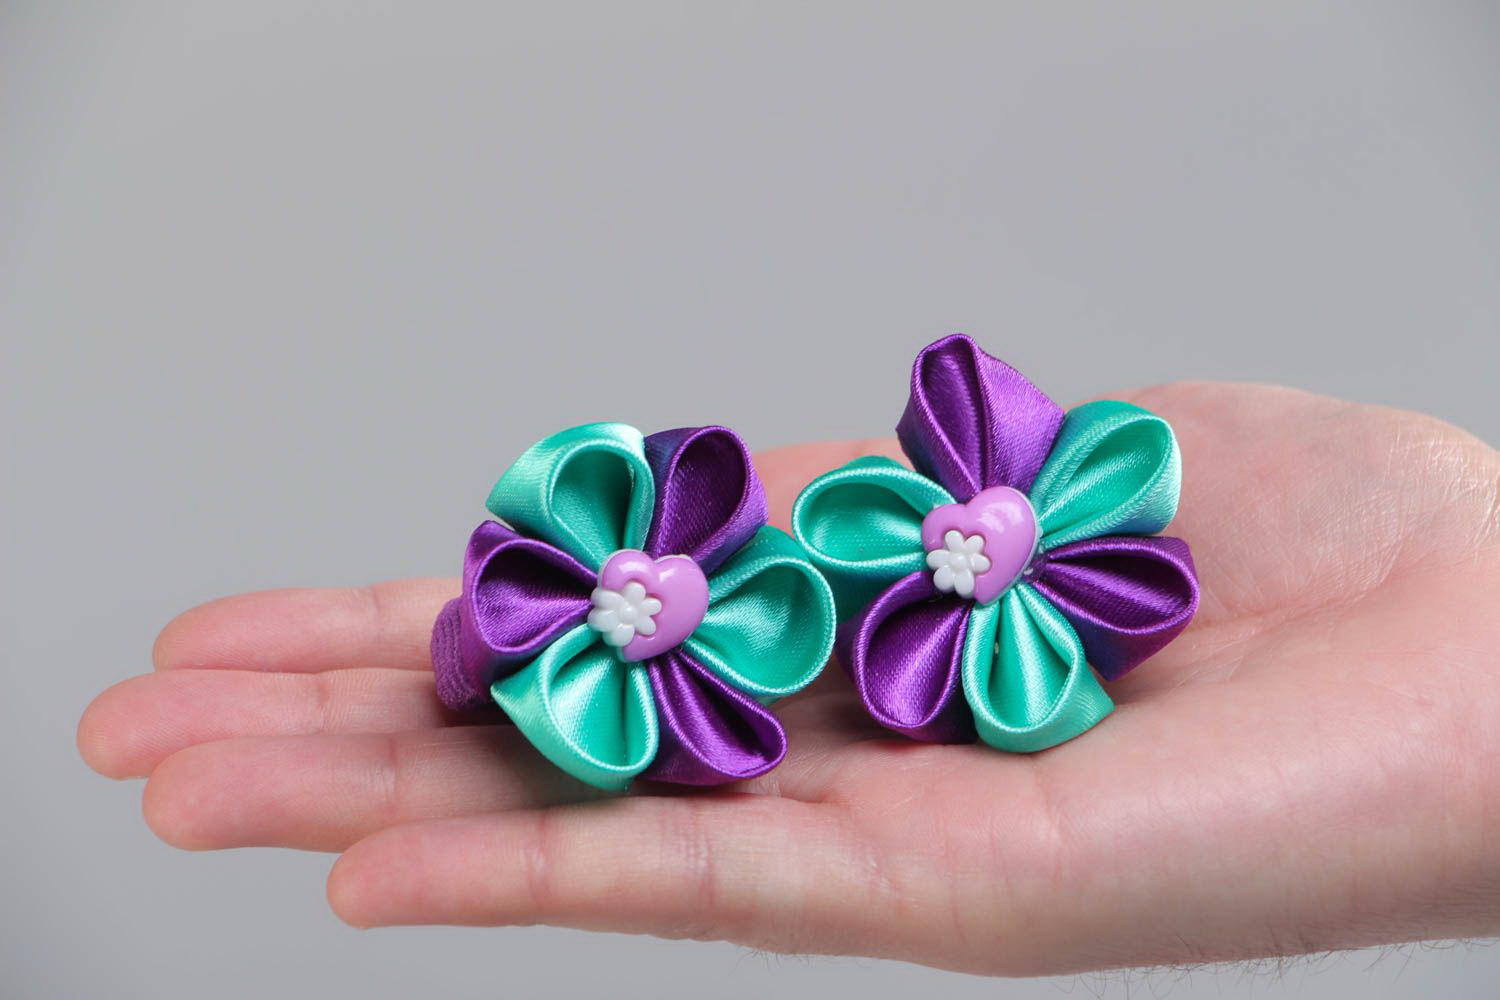
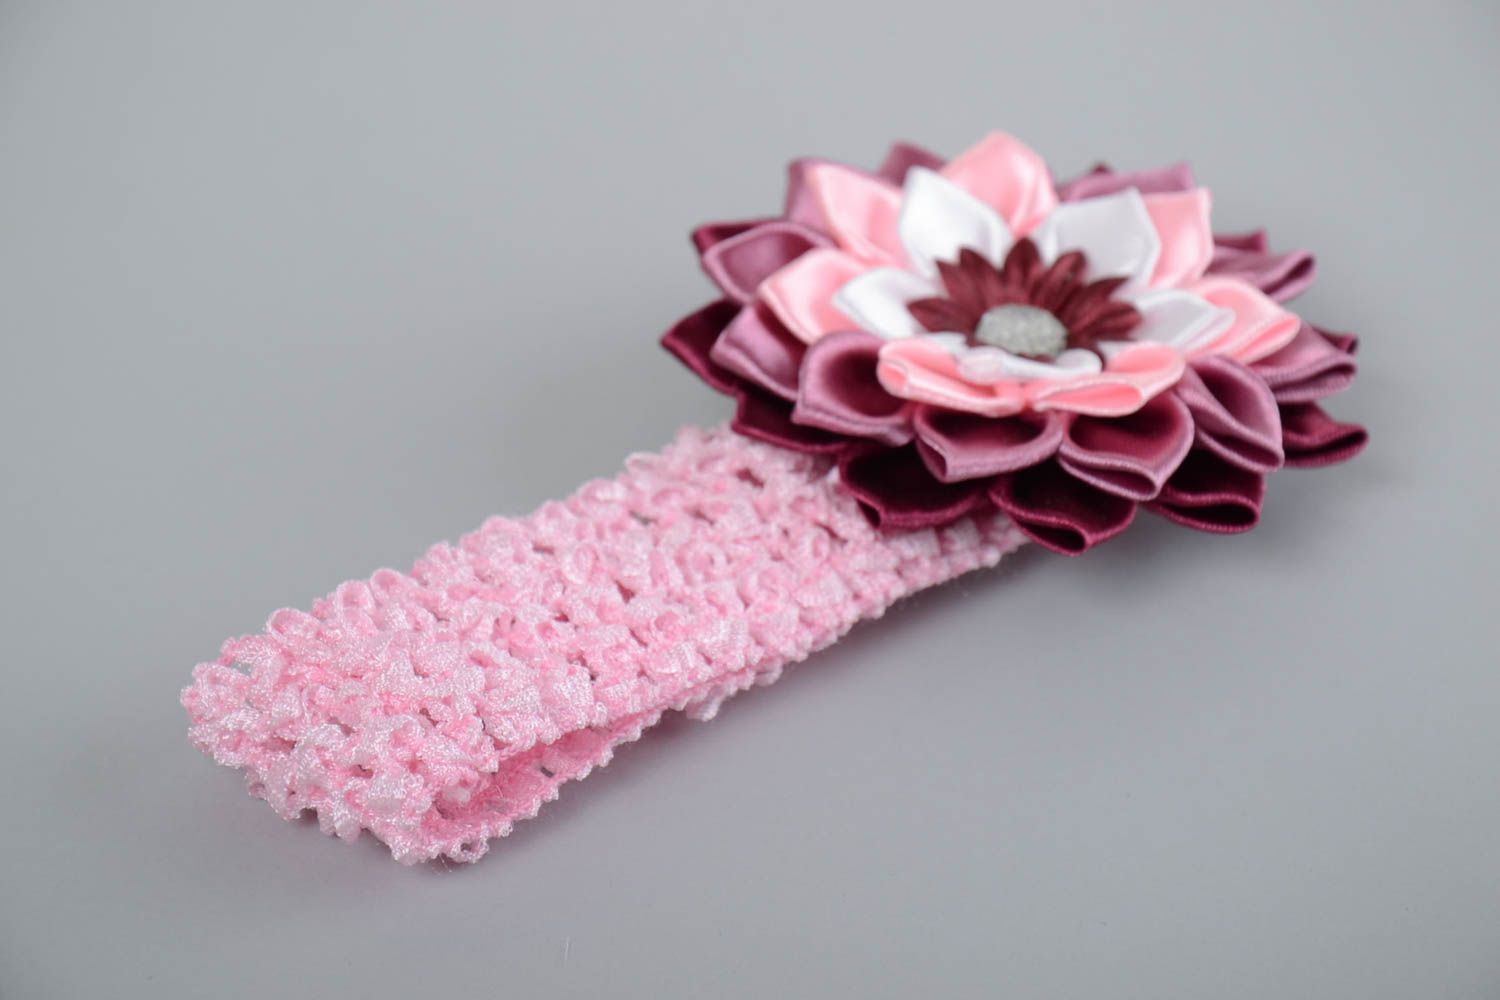
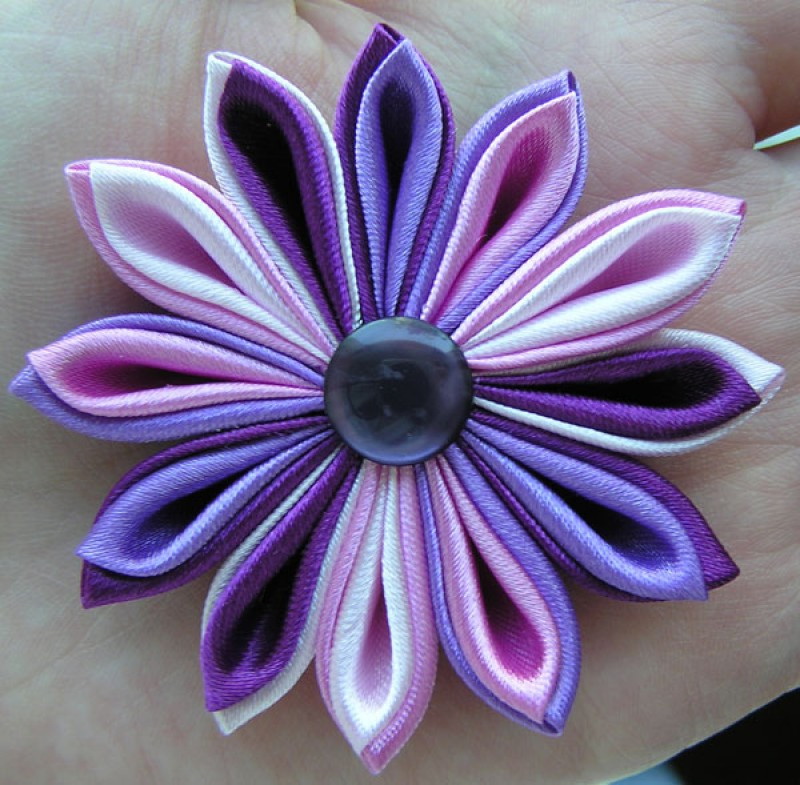
return to menu ↑Kanzashi flower
In order to better understand the kanzashi technique, it is proposed to consider at once two versions of making a flower: the first will be designed for beginners and involves the use of a thread with a needle. Second master class based on the use of a separate petal shaping technique by folding. Having studied these two options, choose the most convenient for you and start creating a stylish and delicate bud.
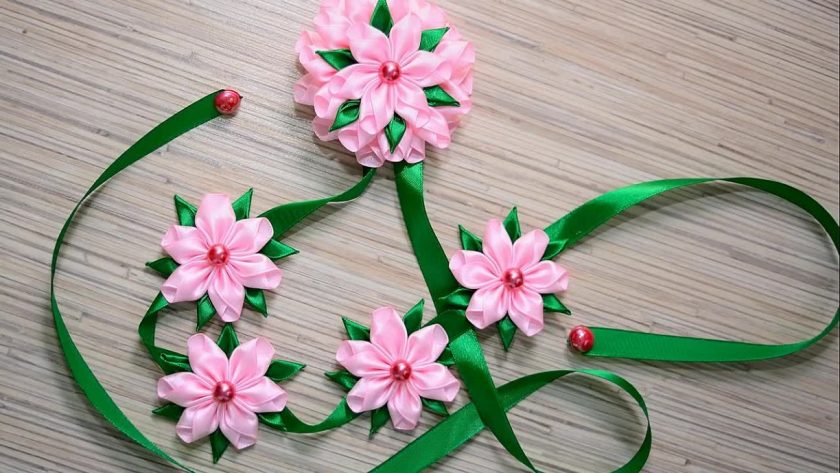
Kanzashi technique
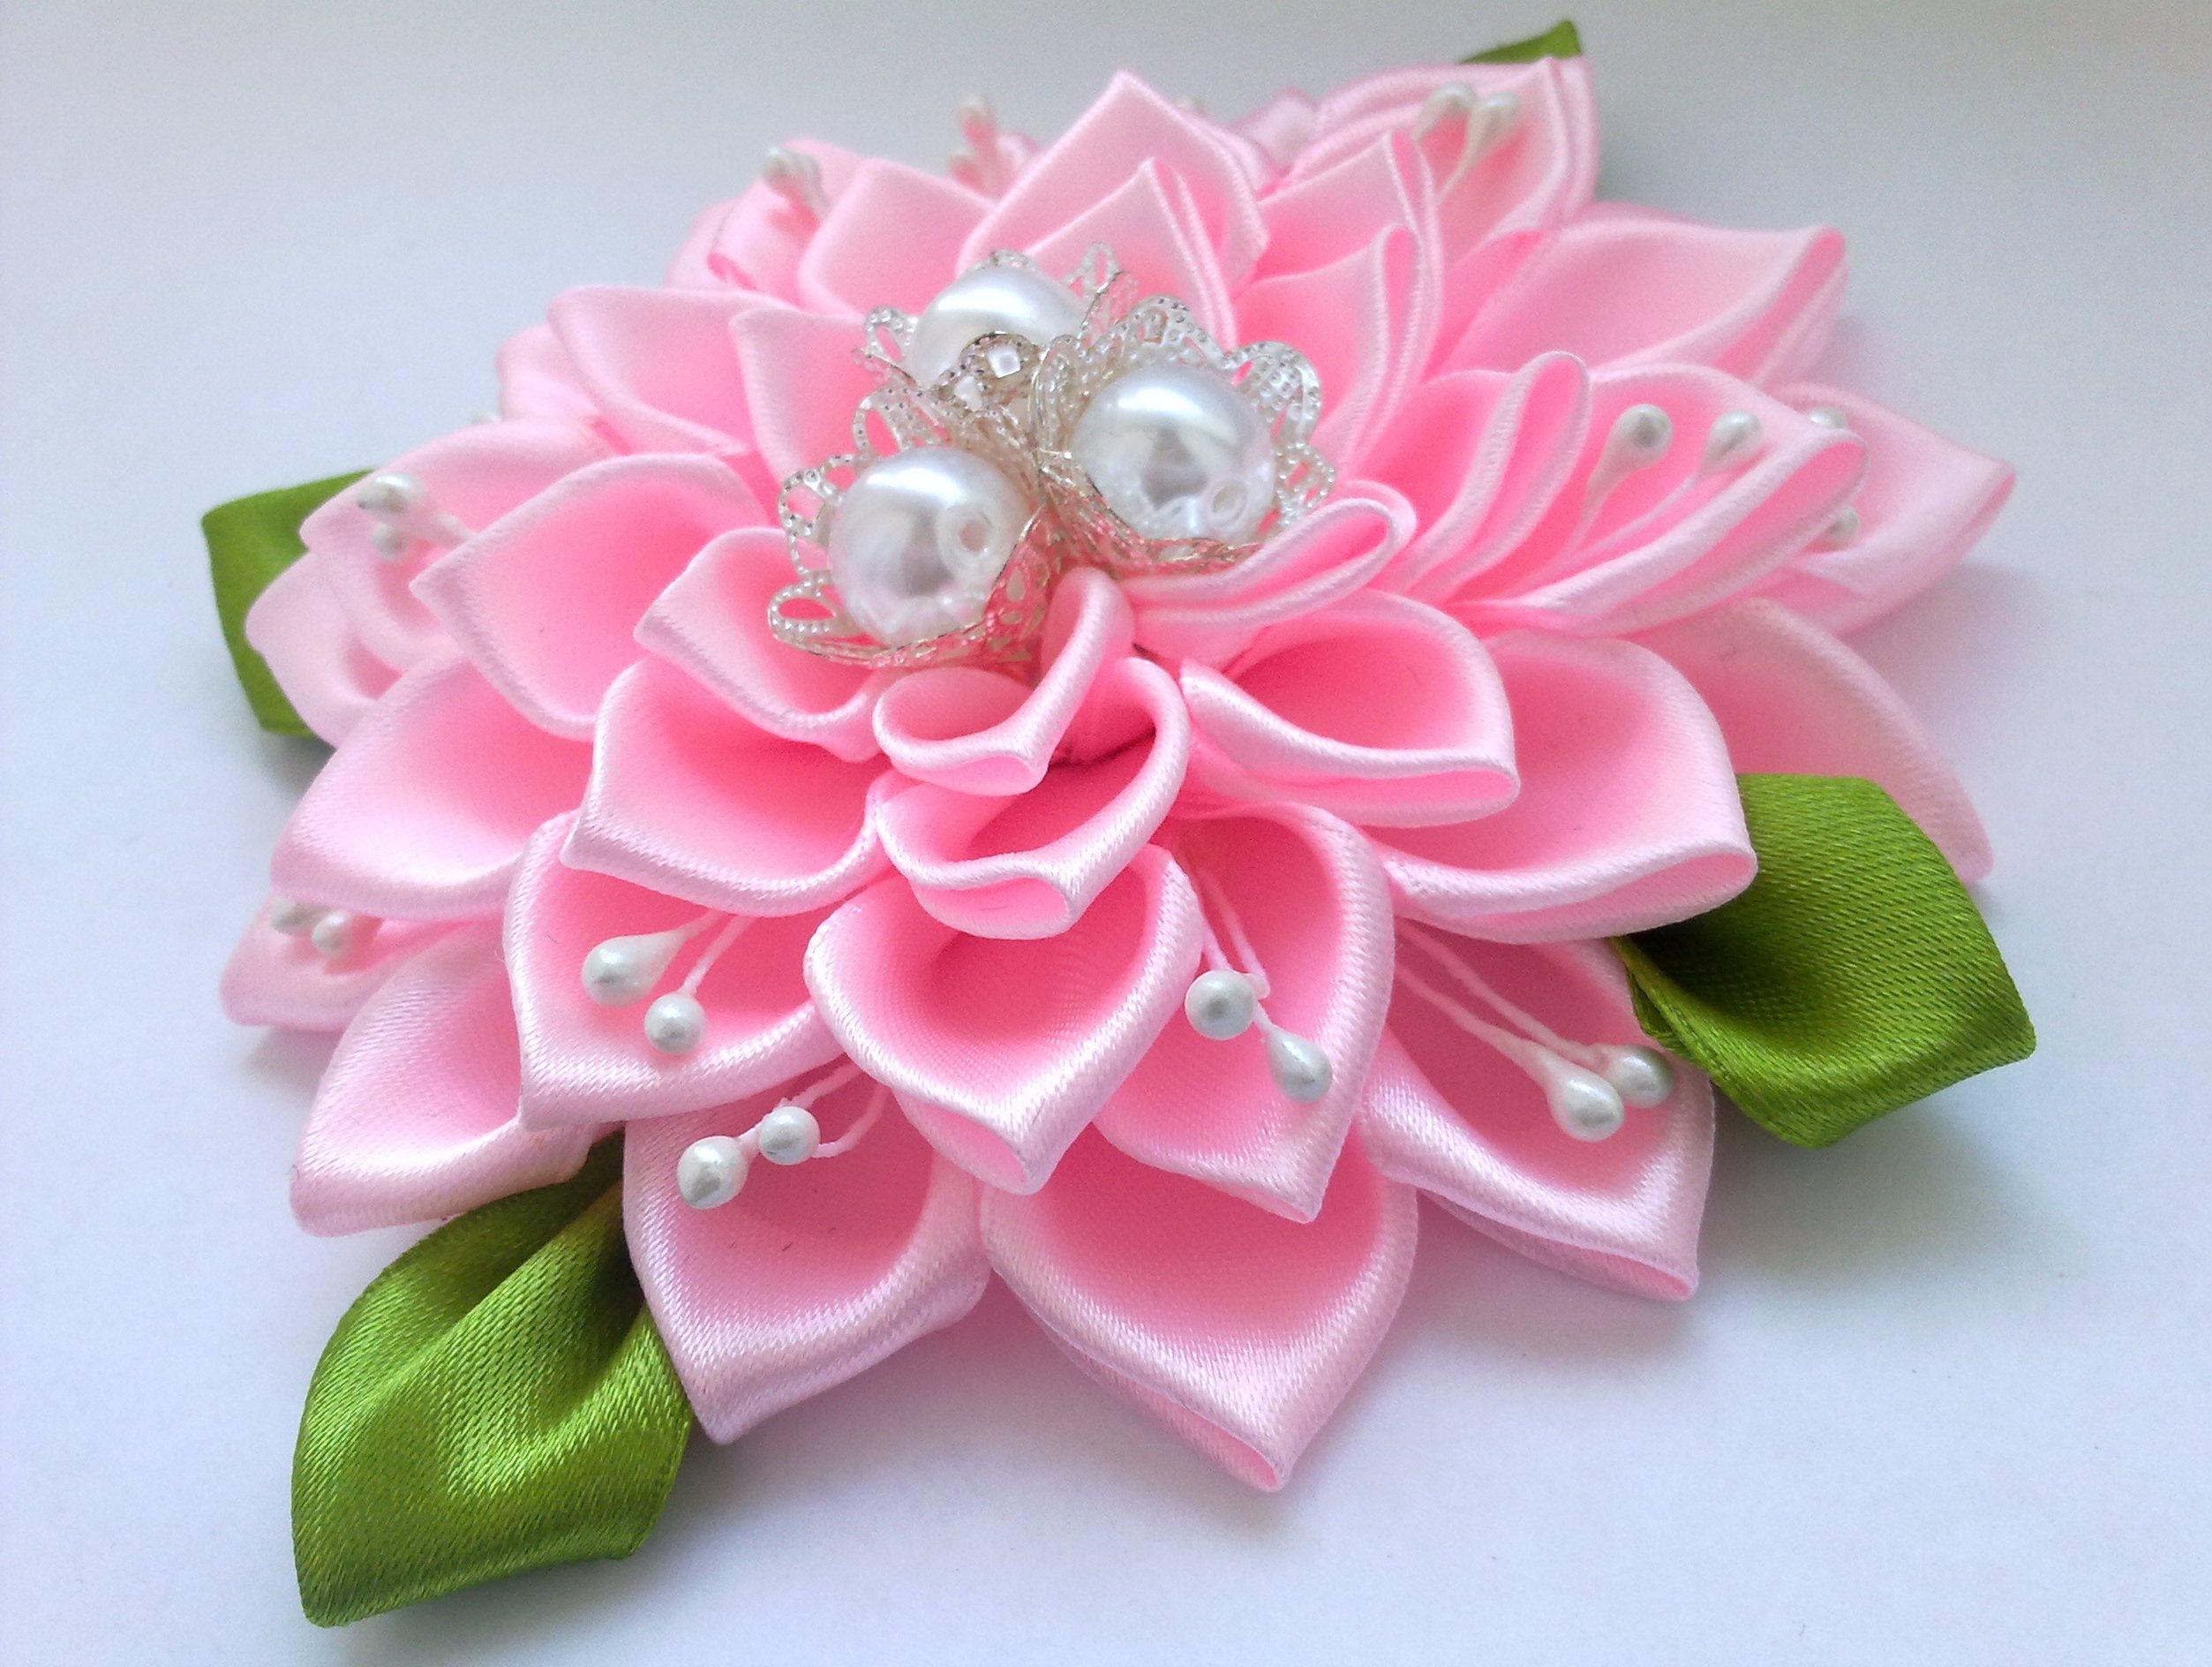
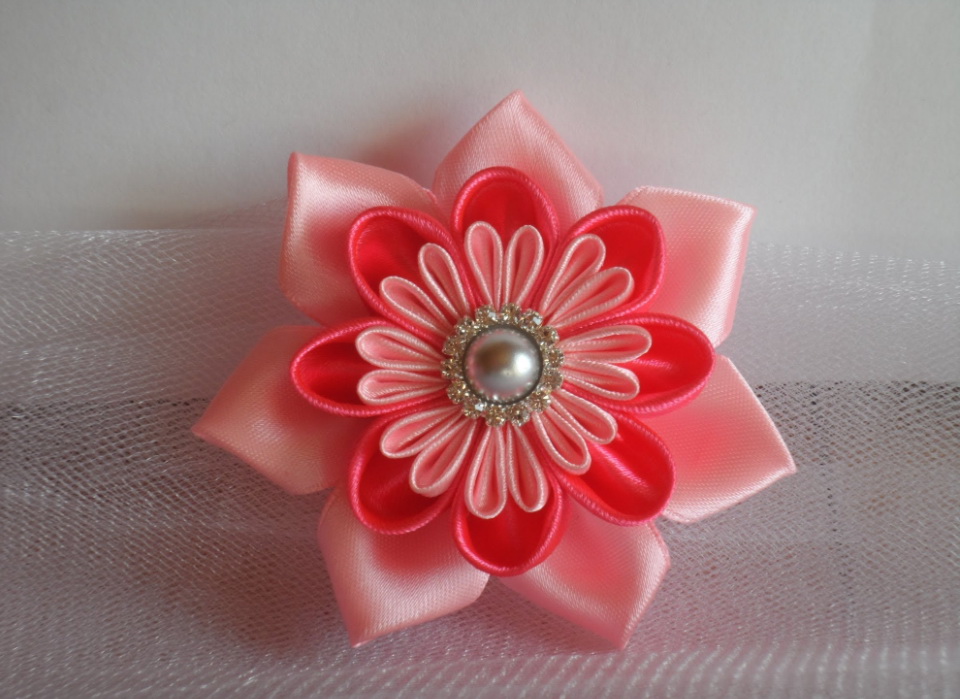
Pink kanzashi flower
The first workshop will help do it yourself create original colorto, resembling delicate chrysanthemum. It will be a good addition to the hair tie, rim or hairpin. Production consists of simple steps that do not require preliminary preparation of individual petals.

Pink flower
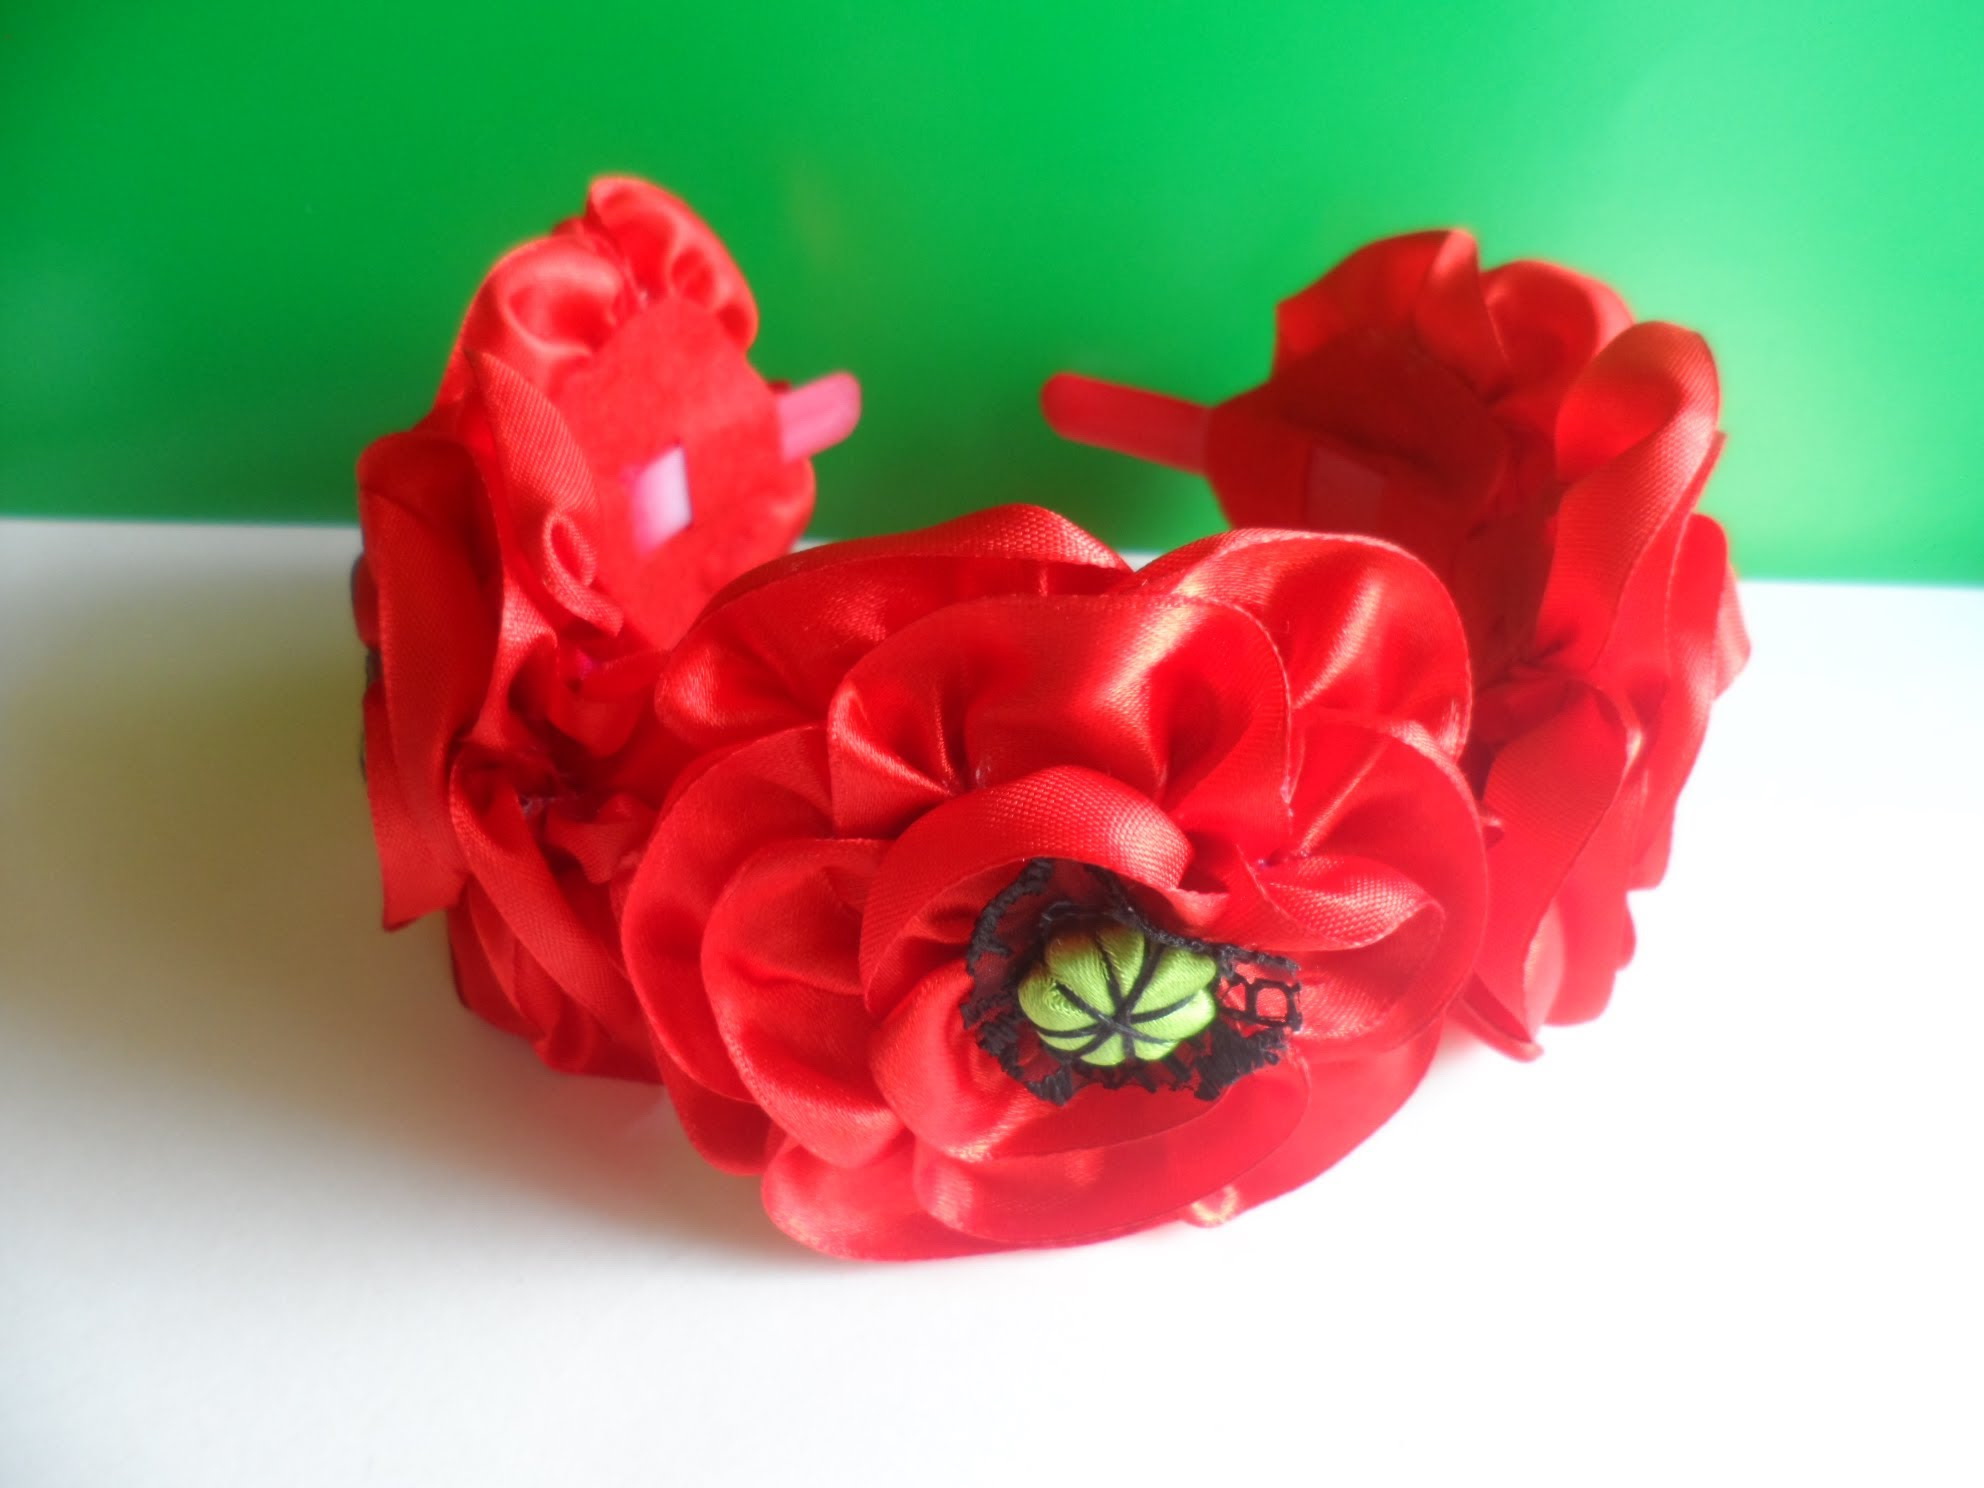
To make a kanzashi flower, prepare a satin pink ribbon 2.5 cm wide, its length should be 1 m. You also need scissors, a thread with a light-colored needle, a lighter, a circle of felt, hot glue and a small bead or rhinestones.
Kanzashi flower
Master Class
The work consists of several stages:
- Training. Cut strips from a common skein of material, their edges should be smooth. To do this, take a lighter and singe working edge.
- Formation of the first petal.Take the material inside out and wrap at a right angle. Lower the material down again, wrap the free short edge on the front part. This is how the first petal is formed, which is fastened with a needle with a thread at the base.

Delicate and elegant flower
- Making a pink kanzashi flower. Next, the strip must be raised up and down. After that, turn the material to the right and bend it inwards on the left side. A visible triangle has formed - it is a flower petal, it also needs to be strung on a thread.
- Final processing. When all the petals are formed and strung on a thread, the finished bud is straightened. End and start of work must be sealed with hot glue. Glue the selected bead to the center of the jewelry.
Manufacturing consists of simple steps.
Delicate and elegant flower is fixed on a felt base so that in the future it can be used for other purposes. With the help of the product, not only accessories for hairstyles are successfully decorated, but brooches and belts. The kanzashi flower will be the appropriate supplement for grabbing curtains.
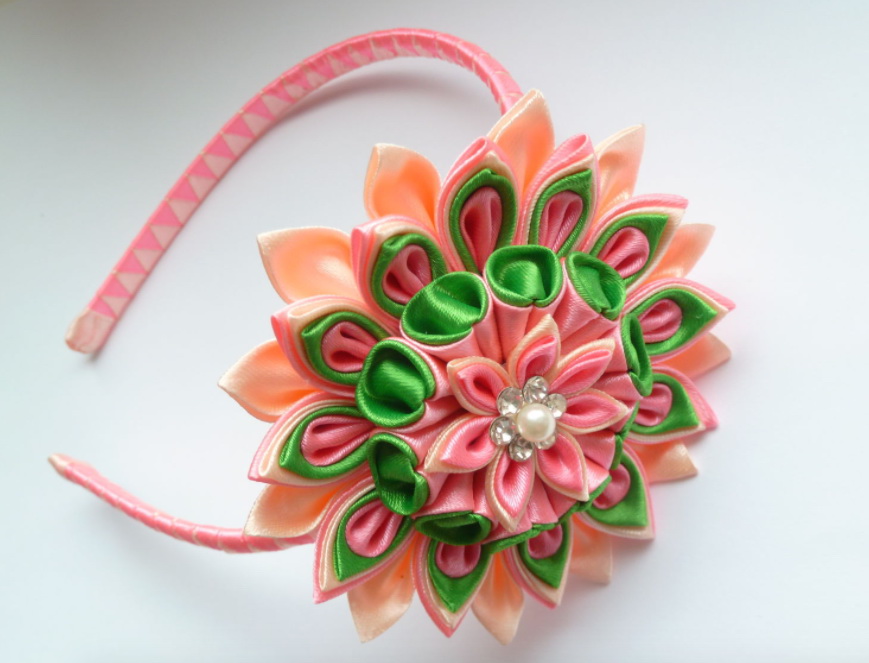
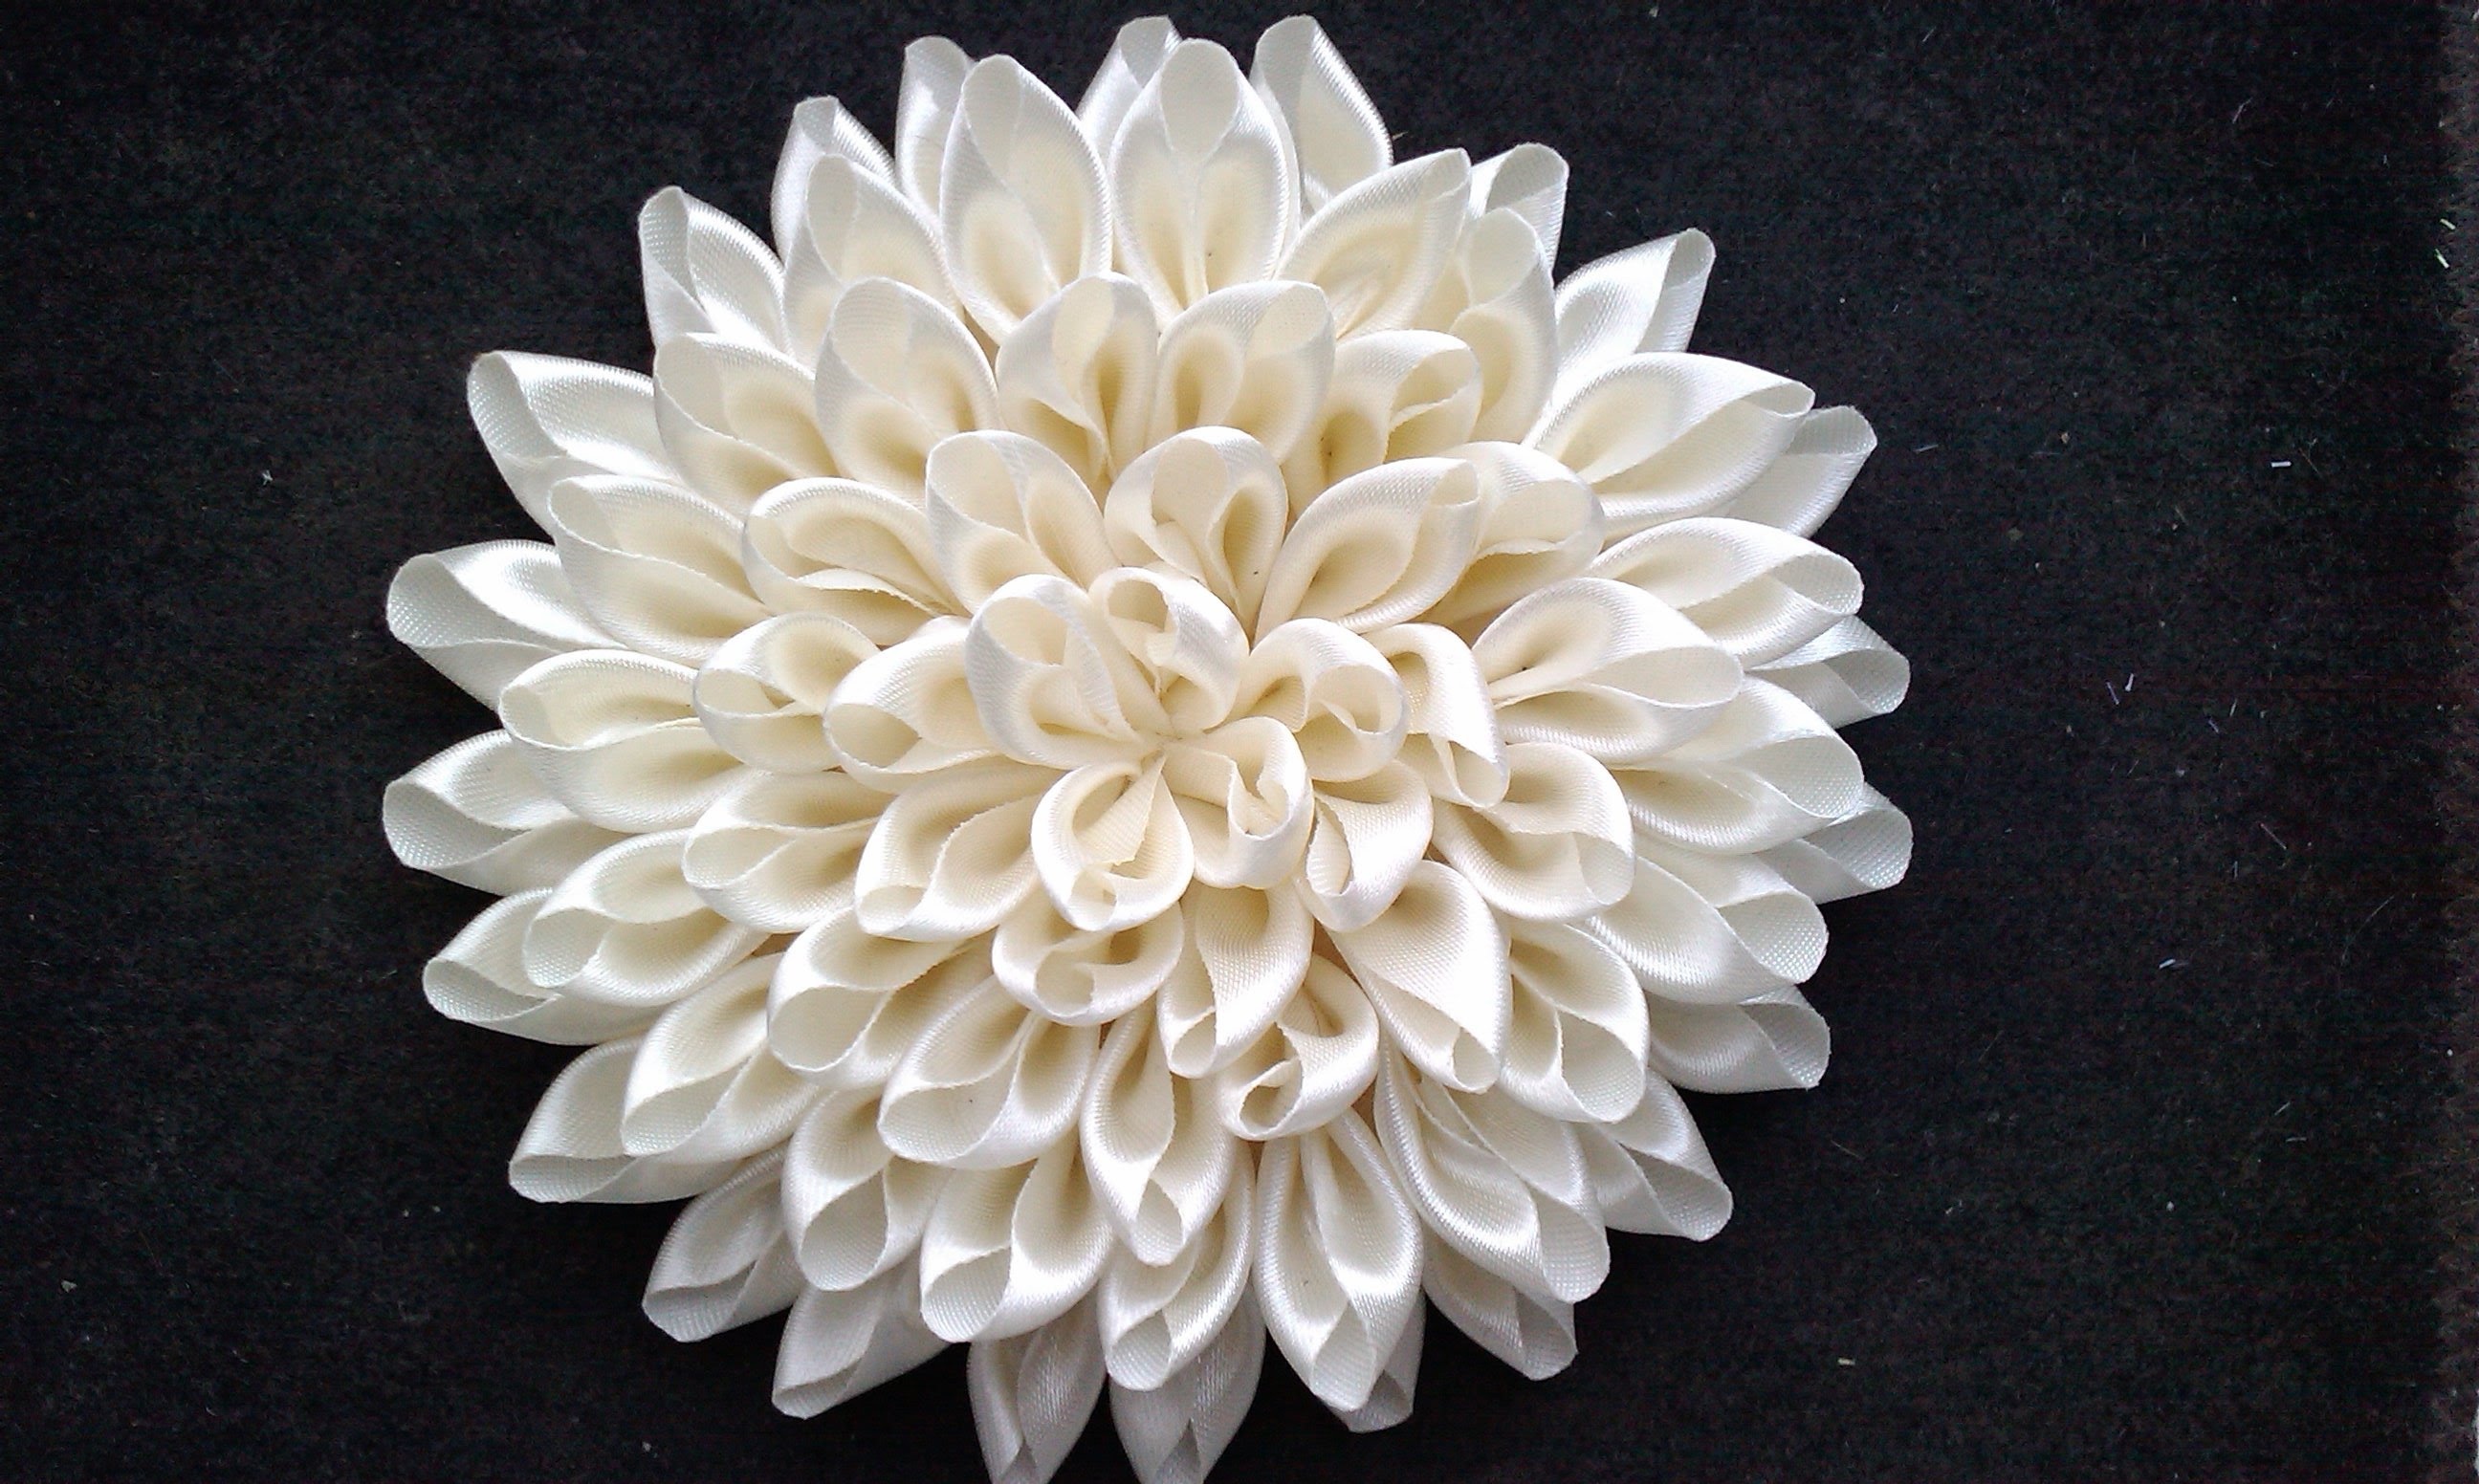
return to menu ↑Wide ribbon kanzashi flower
Above was already presented a master class of an elegant bud from a wide satin ribbon, but it was based on cutting each petal separately. Technique involves folding several times, followed by firing edges. The finished flower is tender and also used to decorate the interior or hairstyles.

Option from wide material
To make an elegant and simple kanzashi bud, we need:
- 7 lengths of atlas 5x5 cm;
- scissors;
- lighter;
- thread with a needle;
- glue gun.
Also get a half bead: it’s better to have a contrasting color. For convenience of work in the process of scorching the edge, it is recommended to use long medical tweezers with curled ends.
Delicate flower used to decorate the interior or hairstyles
When all materials are ready, we proceed to the creative process: take each segment and process it with a lighter from all sides. This is necessary so that it does not dissolve in the future. Step-by-step master class is described below.
| Stage | Description |
|---|---|
| Petal formation | Square fold diagonally three times to make a small triangle. The free edges of the triangle bend back. The tips must be trimmed with scissors to form a corner. |
| Fixing | The finished petal will not hold if it is not soldered. To do this, take a cigarette lighter and gently singe the cut corner. The edges stick together and stick together to form a sturdy petal. |
| Re-pruning | Turn the petal the other side, and where there were no bends, just cut the corner. It is also necessary to solder it with a cigarette lighter. |
| Bud assembly | All the petals are strung on a thread with a needle and connected into a single flower, by tightening the thread. At the final stage, glue the prepared half bead into the center of the bud. |

Perfectly diversify home interior
A flower learns nice, and the simplicity of its production allows for a short time to make several buds at once. They perfectly diversify the home interior, if you place them on the curtains in children's room girls. Appropriate flowers will look in the design of the composition for a gift.
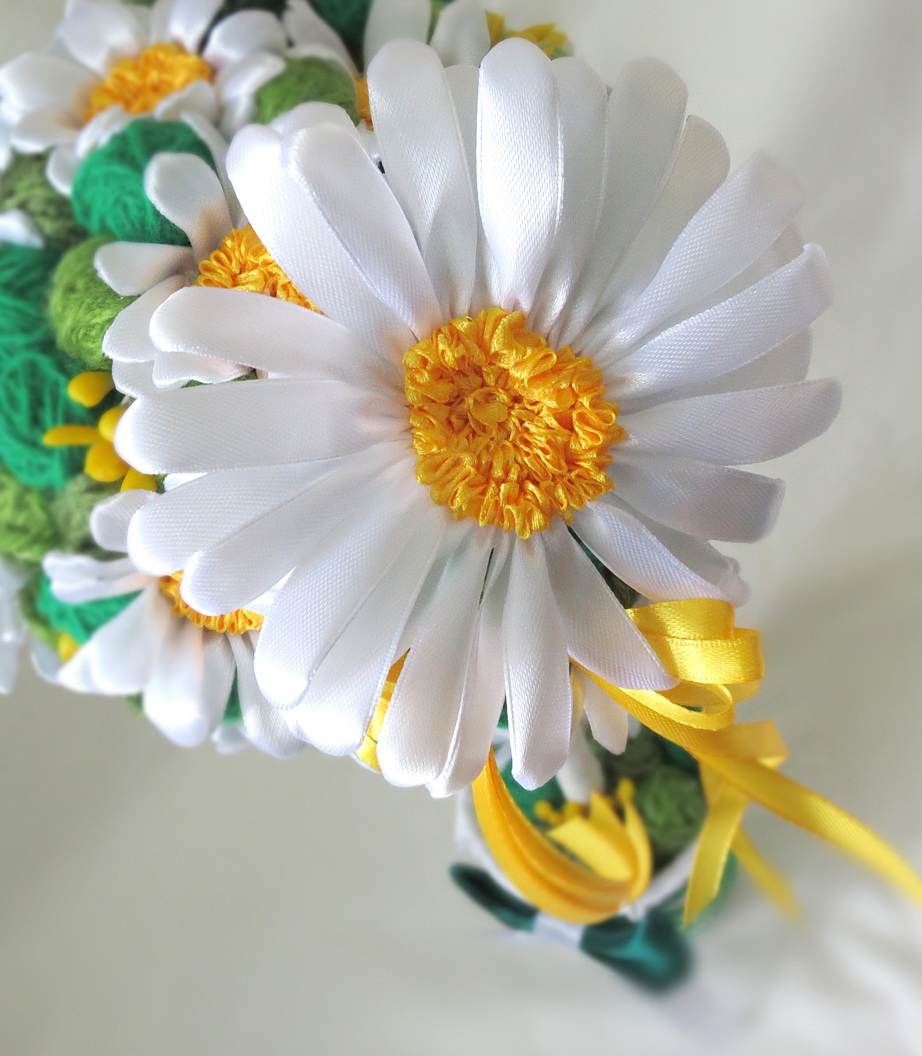
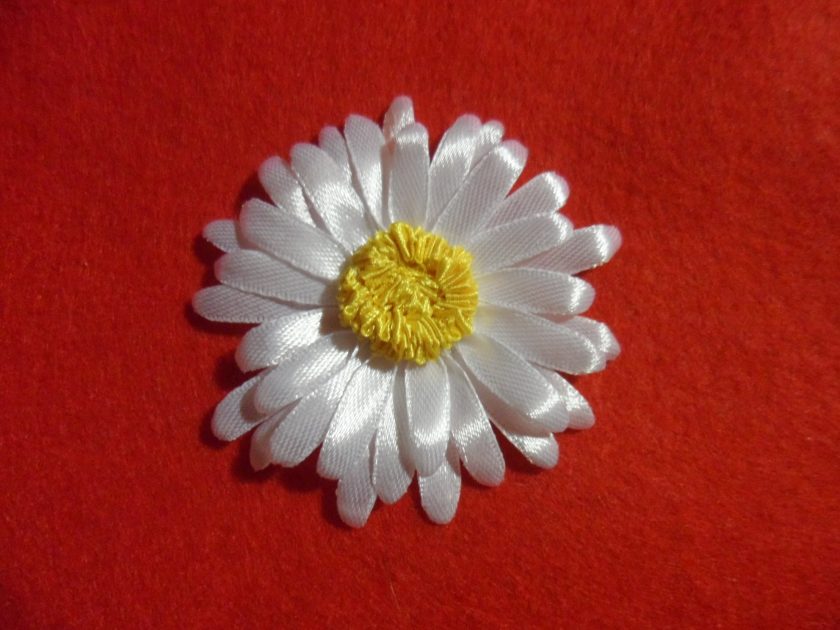
return to menu ↑Narrow ribbon chamomile
You can create beauty not only from wide satin ribbons, but from a smaller material.It will be about making an attractive chamomile bud from a narrow material. This option is well suited for brooches.
It should be immediately noted that several types of flowers can be made from narrow strips: with round and sharp petals. Round petals resemble the open chamomile buds, and spiky - aster. HHere will be described a master class with round petals, as it is suitable for working with their hands to novice needlewomen.

Chamomile from narrow material
Prepare the following materials for creativity:
- 4 pieces of blue tape with a width of 6 mm and a length of 15 cm and the same length of pink material;
- a felt circle or independently cut a base from felt;
- glue gun and thermopacks to it;
- tweezers for creativity with curved edges;
- beads or a group of beads for forming the core.
You can create beauty not only from wide satin ribbons, but from a smaller material
The work will be so simple and exciting that you can not notice how time flies. First you need to fold each segment in half - it will be easier to work with the material. Glue each pink piece to the middle of the felt base in the center so that you get a six-ray snowflake.
From narrow ribbon
Master Class
In the next step, fix the ends in the center with glue: it is important that each petal is folded in one direction. Next, take the blue ribbons and also glue them in the shape of a snowflake with the rays from the center. Thread the ends into the openings of the rose petals.
This option is well suited for brooches.
Glue the ends of the blue ribbons at the base in one direction, now the base is ready. The final moment will be the design of the middle. To do this, use the bead, carefully gluing it to the center - use the daisy made of blue and pink narrow ribbons as you wish.
return to menu ↑From packing tape
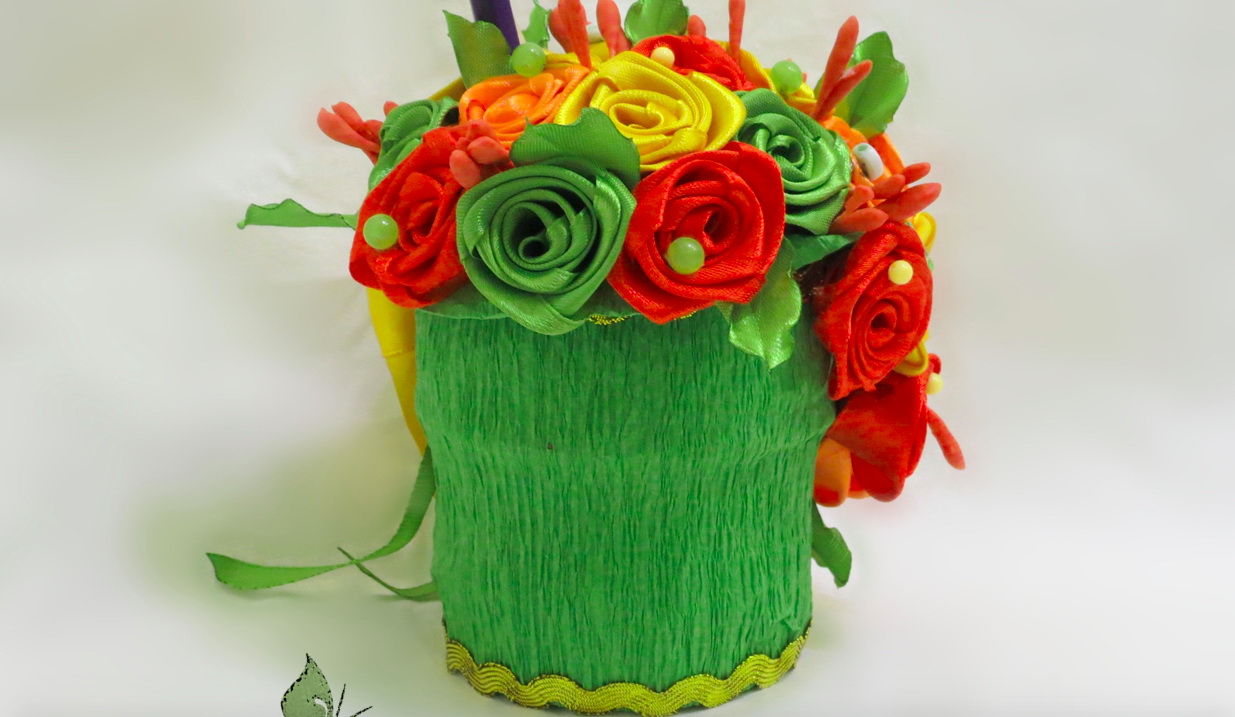
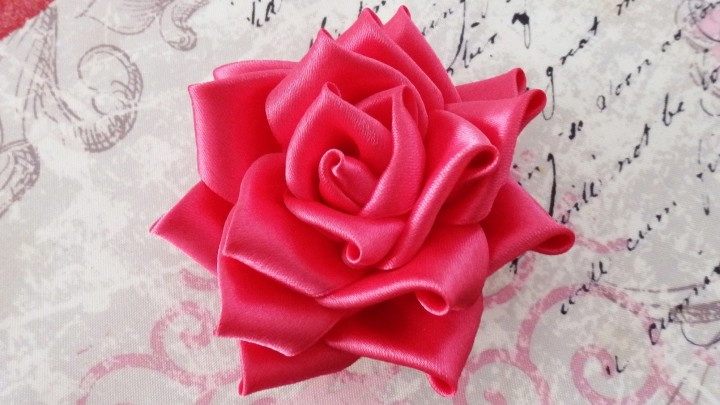
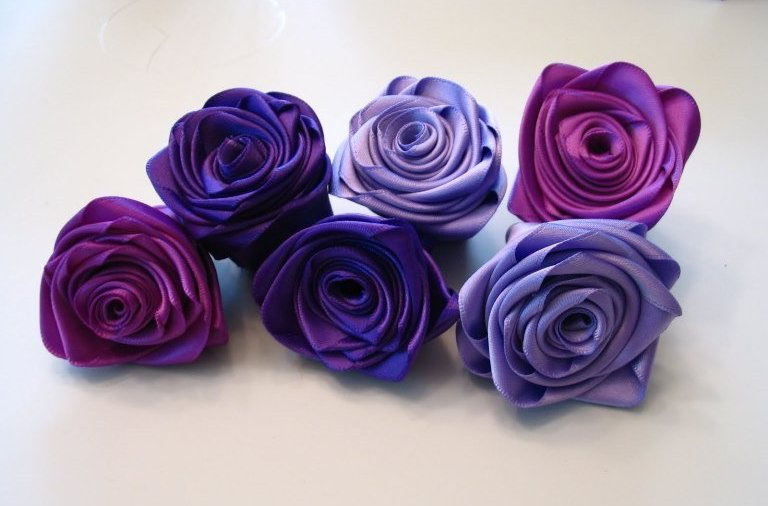
Everyone knows the bright and versatile material - packing tape. With its help, florists and designers create incredible compositions of real flowers, bouquets, as well as wrapping gifts using special base paper. From this material it is very easy to make an attractive rose with your own hands, which will become an element of the panel or decorate the interior.
Option of packing tape
All that is required for work can be found in the nearest florist shop. It is better to choose a bright ribbon, so that its edges are framed with a contrasting shade: then the finished rose will look elegant. Prepare a packing tape 5 cm wide, its length should be 70-100 cm, as well as scissors, a wire for the stem and a glue gun.
From packing tape
Master Class
Bright and versatile material
The master class consists of the following stages:
- Initial torsion. Take the edge and bend it toward you so that you get an isosceles triangle. The resulting tip should protrude slightly off the line. Next, start to twist the edge, forming the middle of the bud: on the other hand you get a tube, into which you can later insert the wire.
- The formation of the product. At the second stage, it is necessary to wind the billet so that the petals are obtained. To do this, bend the protruding edge inward so that the front part is at the top. Continue to twist the rose, and reaching the end of the bend, again roll the ribbon - inside out.
- The manufacture of the stem. After each bend, glue the flower for a secure fit. When the rose is ready, insert the prepared wire into the lower tube: if necessary, paint it green.
Beautiful and gentle product
The reward for the work will be a beautiful rose bud, which you can later present in a bouquet of fresh flowers or decorate them with a room.These roses are suitable for gift box design, if you combine them with the appropriate paper.
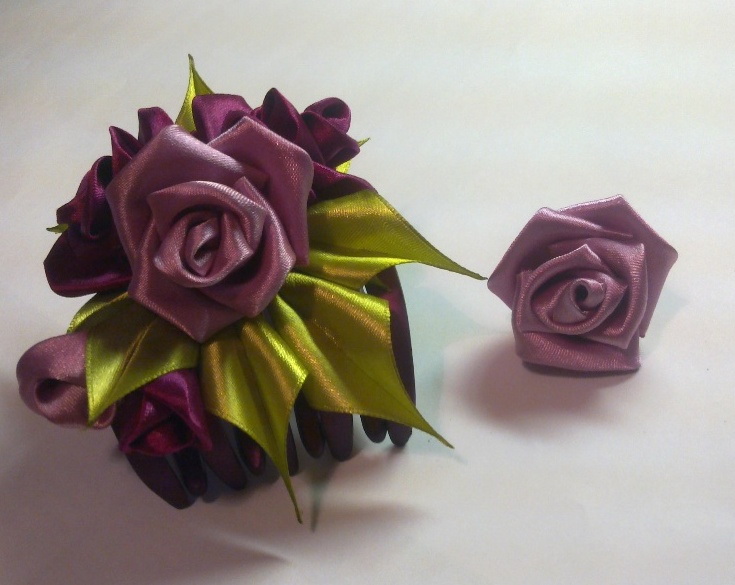
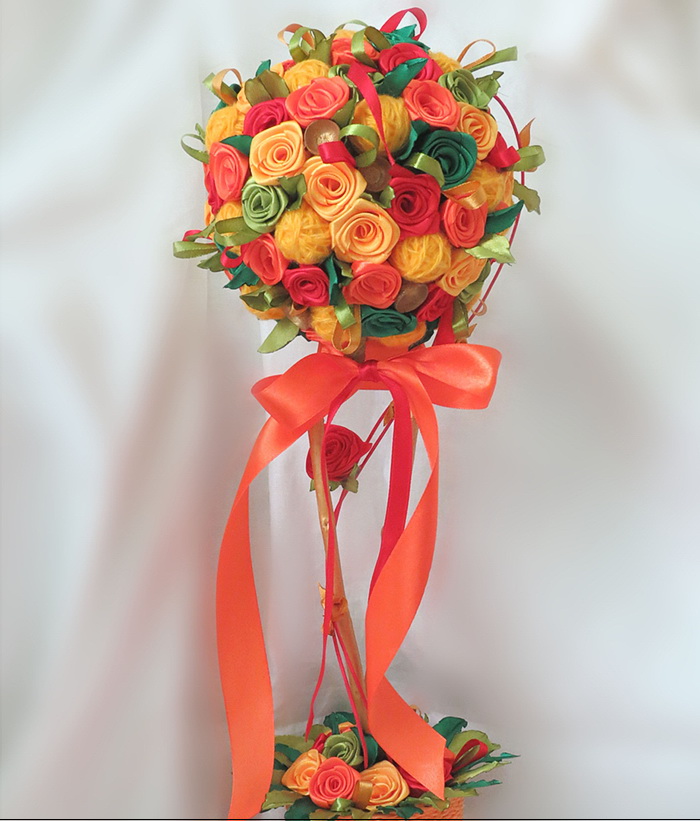
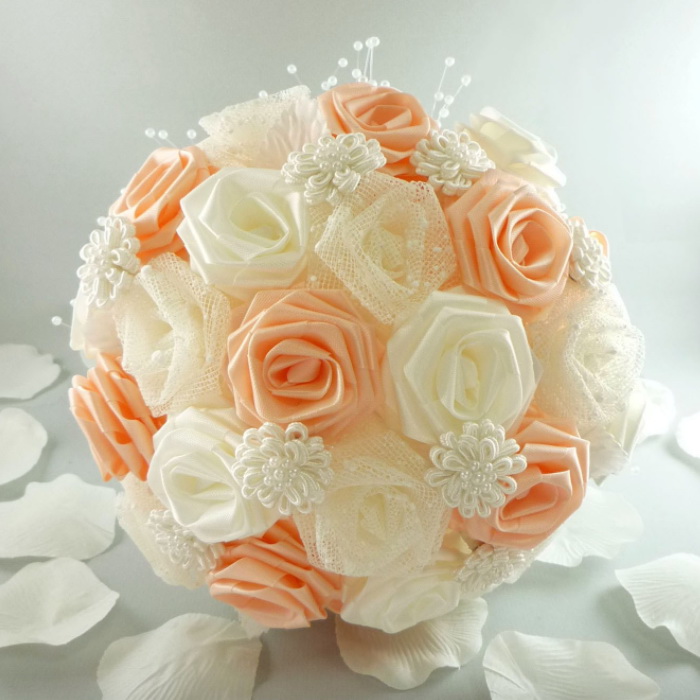
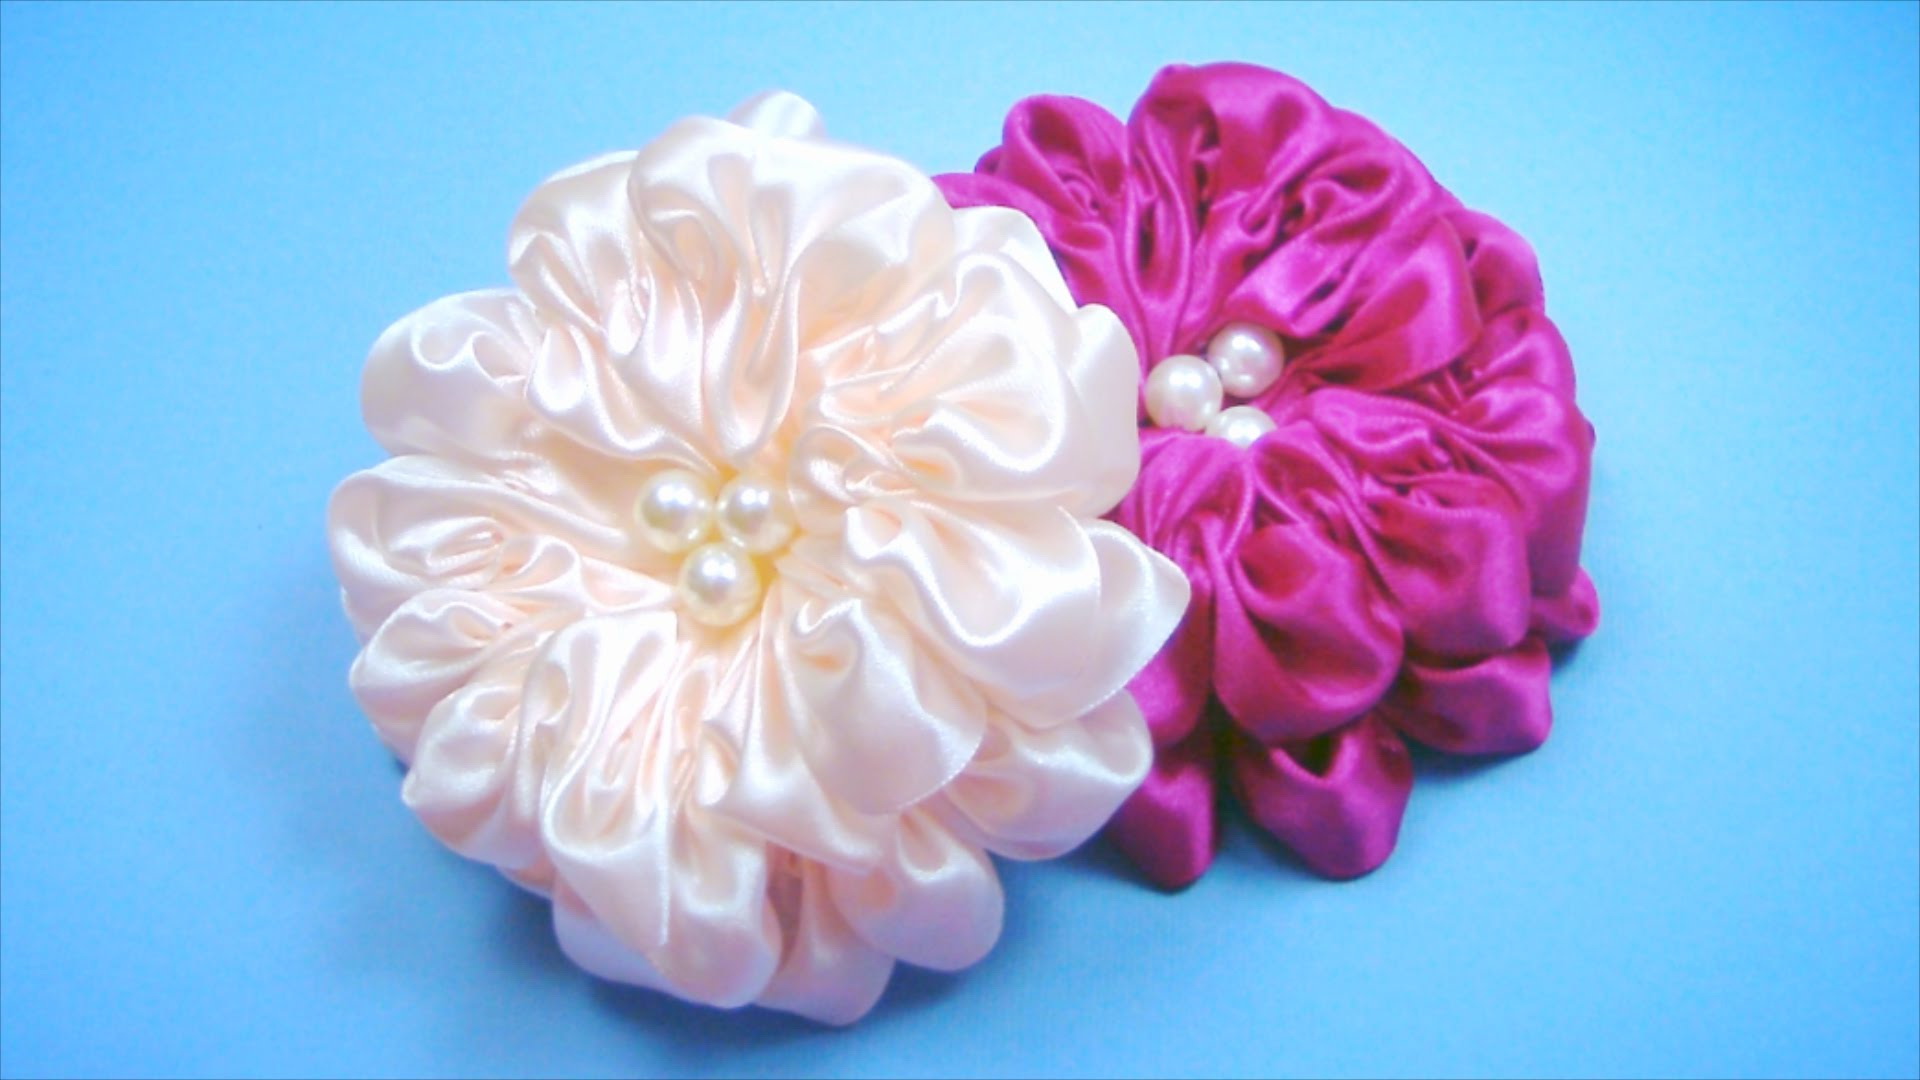
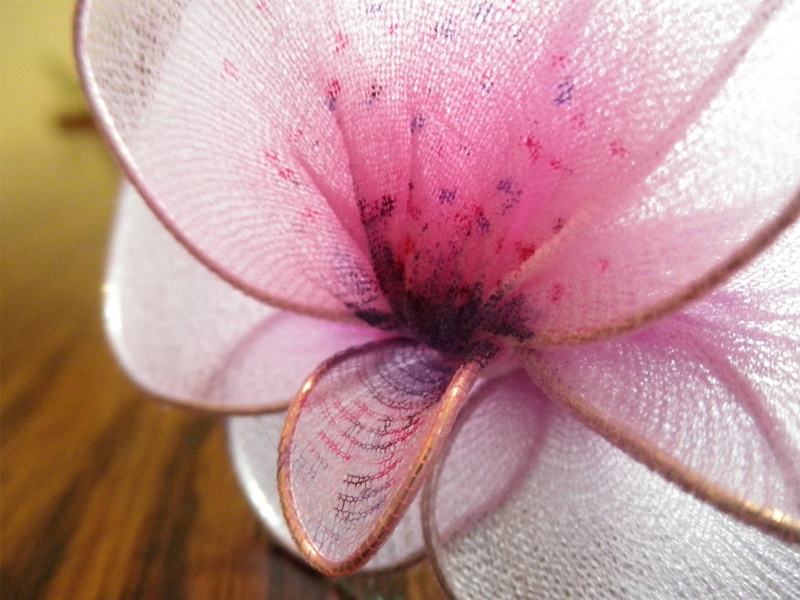
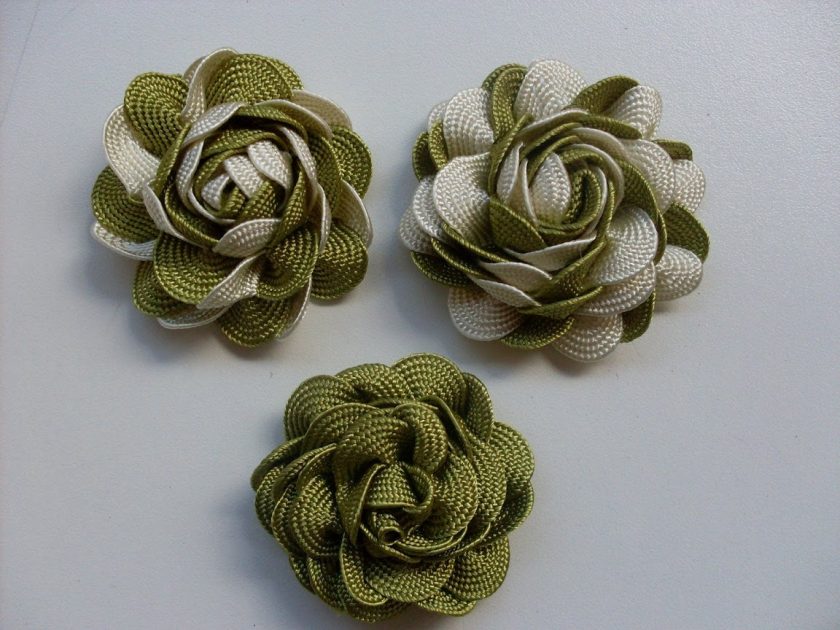
return to menu ↑Lush roses from nylon ribbons
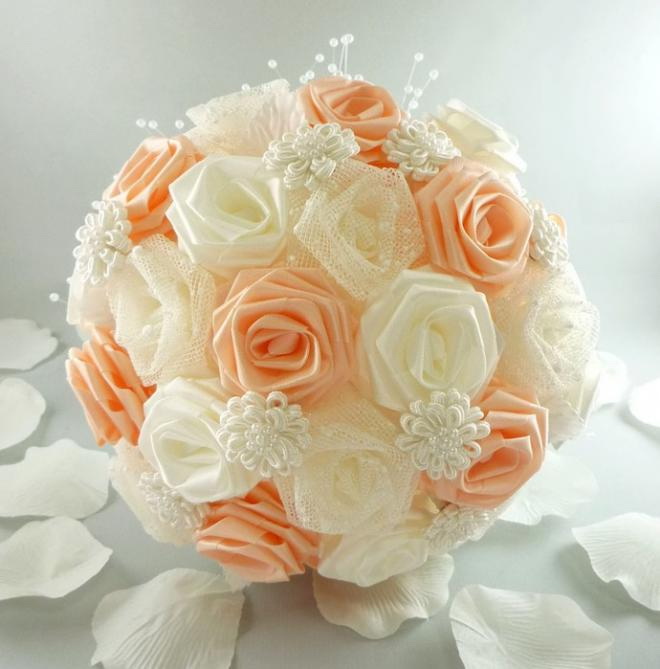
Artificial handmade flowers for a long period do not leave the fashion trends in the design of evening dresses, home interior. If previously the product was considered a sign of a person’s inability to purchase a finished item, today hand-made objects have gained value. With the help of an elegant small bud, you can easily decorate any composition.

Material that does not go out of fashion
Options for using organza rosebuds are varied, decorated with them.:
- wooden jewelry boxes;
- make out the frame under the photos;
- decorate topiary.
From nylon tape
Master Class
Homemade flowers look great on greeting cards, gift boxes. The master class does not contain complex stages, as the material is easy to process.
Organza is made of polyester and viscose, which adds plasticity and sheen to the material at the same time. The work will require the following materials:
- nylon tape or organza 2 cm wide, 130 cm long;
- wide satin ribbon 4 cm wide in dark green for leaves: instead of it you can use lining synthetic fabric;
- several stamens - they are sold in shops of creativity, floristics;
- circle of felt with a diameter of 3 cm;
- scissors;
- lighter;
- hot gun;
- thread with a needle.

You can easily decorate any composition.
A simple master class will surprise the quickness of making pink buds: they turn out to be tender and beautiful.
| Stage | Description |
|---|---|
| Training | The edges of the material must be immediately treated with a lighter to prevent the threads from opening. |
| Rose formation | Take the edge and bend the corner. It must be stitched with a regular stitch. Then fold the ribbon going in front of 2 cm, make a triangle, sew. This must be done with the rest of the tape. |
| Bud twist | Starting from one edge, gently twist the material in one direction, periodically fixing it at the base with glue |
| Making leaves | Cut the wide ribbon into squares of 4 cm. Fold each square diagonally three times, scorch the edges and turn out the leaf. |
Create beauty with your own hands
At the end of the work, fix the leaves at the base of the bud, and also attach a felt circle. To place the stamens in the center of the rose, they need to be glued inside with hot glue. A little effort, time and the rose is ready: now it will definitely lift your spirits.
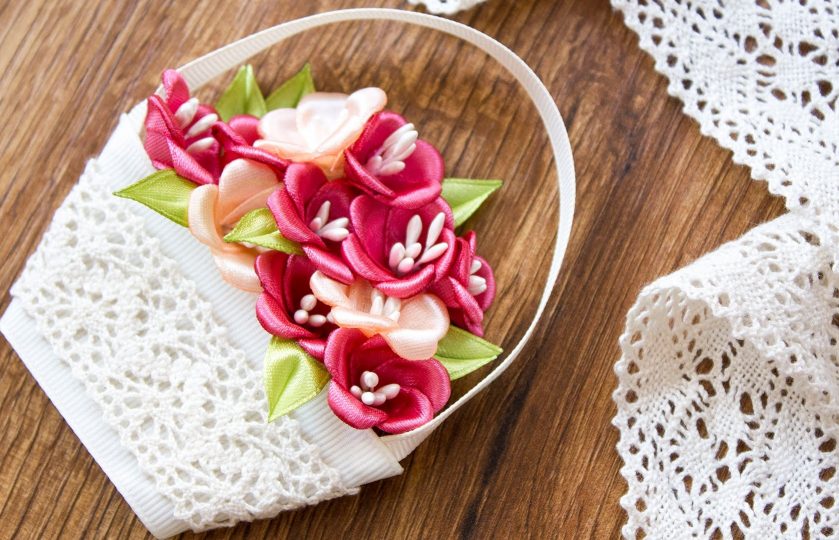
return to menu ↑Of lace ribbon
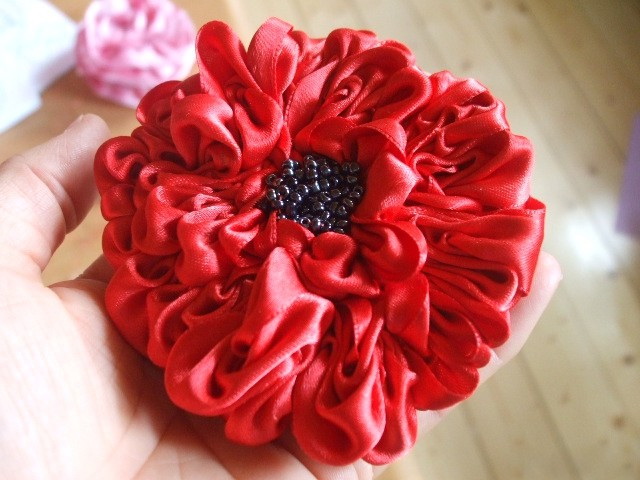
A memorable fabric souvenir will be a lush red flower that can be quickly made from lace. This accessory will complement the elastic band or hairpin. With the help of a lace bud, you can harmoniously decorate the curtains in the living room, and for its manufacture you will need basic sewing skills.

Elegant flower
I want to have only the most beautiful things in my house. Therefore, people tend to diversify the interior with homemade objects that emphasize the individuality of style. To make a magnificent lace aster, prepare:
- 2 meters of lace of the color that best suits the interior of the room;
- Felt circle with a diameter of 5 cm, in color, coinciding with a shade of lace;
- Thread with a needle.

Using lace
If the bud will later be used for hair decoration, select the appropriate base. Clips, rubber bands, hairpins can be purchased in the departments of creativity. When materials are prepared, proceed to the procedure:
- Thread the needle in a double thread, fixing the knot at its end.The thread must be the same color as the lace.
- Lace usually has 2 edges: decorative and regular. Sew a plain edge with a stitch “forward needle”.
- As soon as the edge is sewn, try to pull it off a bit: the flower itself begins to form before your eyes.
- Take a felt circle, sew to it the picked up bud, evenly distributing it on a soft basis.
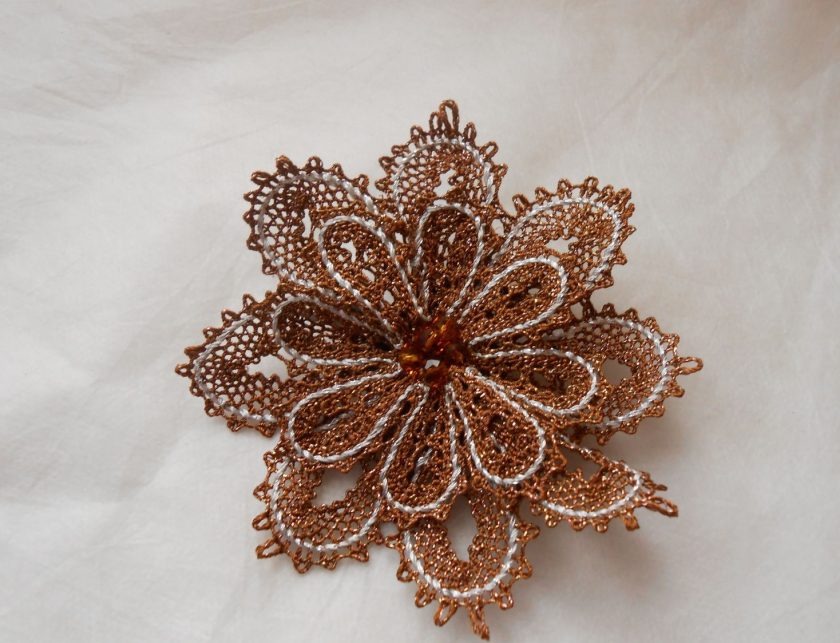
This accessory will complement the elastic band or hairpin.
Astra is ready and it took no more than 10 minutes. The master class does not use glue, so work can be carried out with the child, additionally having taught him the basics of sewing.
Of lace ribbon
Master Class
It will be interesting to you:
How to make flowers from corrugated paper with your own hands? 125 Photos and 5 simple workshops
return to menu ↑
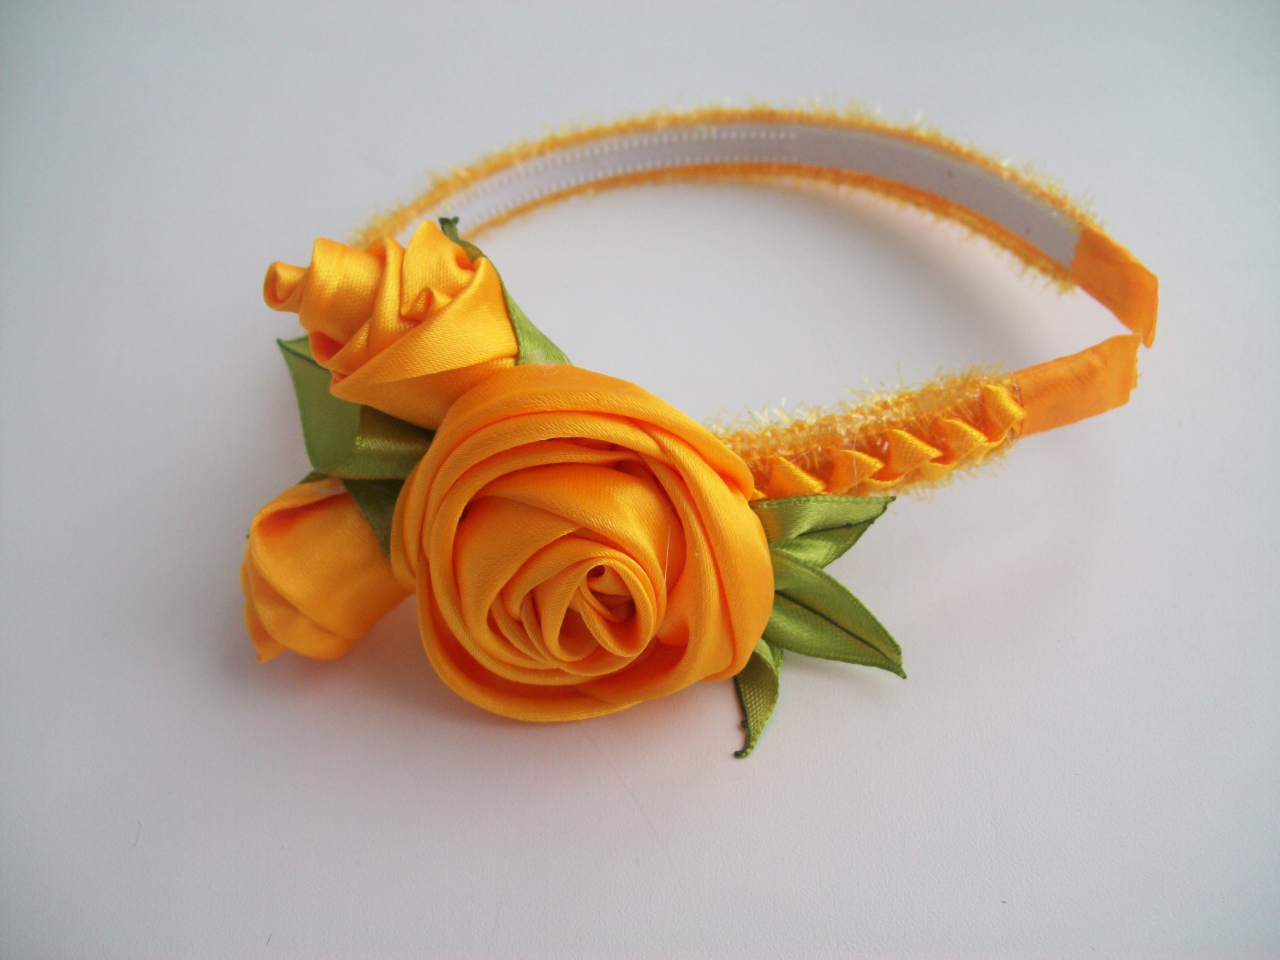
How to make a rep tape?
In the apparel industry, the rep ribbon is often used as a finishing material for clothing. The band itself has an interesting texture, so its use makes the finished products rigid and dense. Rep material today is represented by a wide variety of shades.
From rep tape
In the shops of creativity can be found monochrome ribbon or printed patterns. For future work, you can choose both color and monophonic type: if the flower is presented to a child, select the material with the image. Prepare a 1.5 meter wide material with a width of 2.5 cm, a felt base, tongs, a candle, scissors, a glue gun, small beads and a ruler.
From rep tape
Master Class

Often used as a finishing material for clothing.
Next, the procedure for creating an elegant bud looks like this:
- collect the edge of the petal with an accordion, process it over the candle using tweezers;
- make 16 petals for a bud;
- glue 9 petals on the felt base, placing them with the wide side down;
- take the second smaller felt base, glue 7 more petals on it;
- glue 2 layers of petals together to form a flower;
- in the center of the bud, apply a little glue and pour the beads.
Excess beads must be shaken off the product, turning it over. Trim the center with tweezers. When the glue cools, the product will be ready and can be used as desired.
Rep material today is represented by a wide variety of colors.
There are a lot of options for the final design: half beads can be stuck onto the petals, and beads can be replaced with glossy rhinestones. Anything you wish fantasy - you can translate into products with their own hands. The person who will receive the flower in present, surprised by its beauty, elegance.
return to menu ↑From tape
Zigzag braid today is used for finishing processing of women's dresses and blouses. It is also widely used to decorate costumes in folk style. The cost of this material is affordable, so if there are no skills in needlework, try to make a ribbon bud: two options will be presented at once.

Using tape
Chamomile zigzag braid
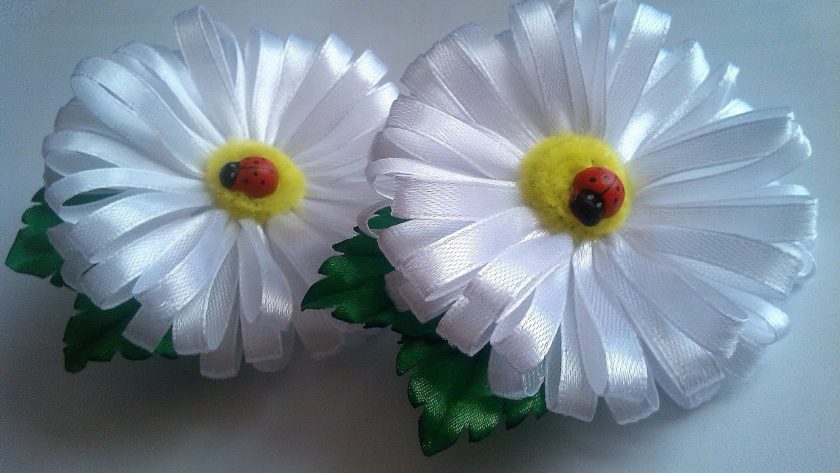
For the manufacture of beautiful chamomile from the specified material will require 20 cm of tape favorite color. If you want to reliably convey the texture of chamomile - take a white shade, and prepare a yellow bead or cabochon for the middle. The procedure is so simple that it does not take 10 minutes of time, so chamomile is easy to make during the break:
- Connect the ends of the cut ribbon and sew them together so that the edges are firmly fixed.
- Begin to sew the ribbon along its entire length, and at the same time, make a stitch only on the downward part of the zigzag.
- When the whole webbing is stitched, gently pull the thread and the flower will come together.
- It only remains to make a middle point: for this, sew a bead in the center or glue a cabochon.

Material has an affordable price.
Such a daisy will be a good addition to a hairpin for a little girl. The flower can be used for a country-style interior in the kitchen, fixing it in the door of the curtain.
Ribbon Flower
Master Class
Miniature rose from finishing tape
EAnother simple method to create a rose is to make a bud using a zigzag braid.. In this work, you will need several shades of material at once, it is better to take contrasting ones. A good combination is white and red, but if there was only a single-color tape at home, feel free to take it.
- Fold the braid in the form of an accordion: for this, twist the zigzag between each other. Sew the tape along the entire length with threads manually or with a sewing machine.
- Take any end of the braid and start twisting the bud. Make sure that the petals are tight to each other.
- Sew the second edge to the bottom of the product to avoid disheveled threads. It can also be glued with a glue gun.
- All petals must be straightened to give the rose splendor. Then take a thick cloth of green color and cut a circle out of it. Its diameter should match the size of the rose. Glue the flower on the base, secure with a barrette or rubber band as desired.
Zigzag braid is often used for finishing processing of women's dresses and blouses
Adding leaves to roses feltYou can get a good jewelry on the headband for the girl. It is appropriate to decorate bracelets and textile beads with such flowers, as well as to make brooches and hairpins.
return to menu ↑Polypropylene tape
In most workshops of this material methods of creating roses, daisies and chrysanthemums were considered. Separately, I want to touch on the topic of cornflowers - these are beautiful wild flowers of a blue hue, striking their magnificence and simplicity at the same time. It is possible to make cornflowers from polypropylene tape, which today is used as packaging material.

Polypropylene tape
To work prepare:
- blue polypropylene tape;
- scissors;
- lighter;
- glue gun;
- wire for the stem;
- green polypropylene tape;
- stamens for the decor of the core.
You also need a green cardboard, from which you need to pre-cut a round base for fixing the petals. Polypropylene material is characterized by increased strength, therefore it is more convenient to work with it than with the textile type. The flower is hard, but does not lose its attractiveness.

From this material can get a gorgeous wedding bouquet
Master Class
Kanzashi flower