Simple and voluminous DIY paper snowflakes: 75+ Photos with Step-by-step instructions. We decorate the house for the holiday (+ Reviews)
")
In this article I will tell you how to make snowflakes out of paper with your own hands that will decorate your house during the New Year holidays. A variety of options for beautiful decor with a detailed description. A little beautiful decor for your home.
Content of this article:
Highlights
Soon, each of us will be able to experience an unforgettable experience when you wake up, you see the first art works of “Santa Claus” - snowflakes. These beautiful patterns are the forerunners of what is time.
It's time to come up with the design of your apartment. And there is no such person who would not want to make a contribution to the creation of a unique New Year's interior, so that the housing fits even more with the coming tale.
To do this, it is not necessary to buy a lot of Christmas toys, garlands and other beautiful gizmos. After all, you can make unique products with your own hands, which will please you, remind you of the upcoming holiday.
We all remember the wonderful crafts from colored paper, cardboard. They loved us to do in childhood. I will tell you a secret: adults are children too, but nobody is told about this. Therefore, take your children, start decorating your house with snowflakes made with your own hands, and I will tell you how to do this.
It will be interesting to you:OVERVIEW: How stylish and beautiful to decorate the Christmas tree for the New 2018? What kind of toys you need to get? (175+ Photos)
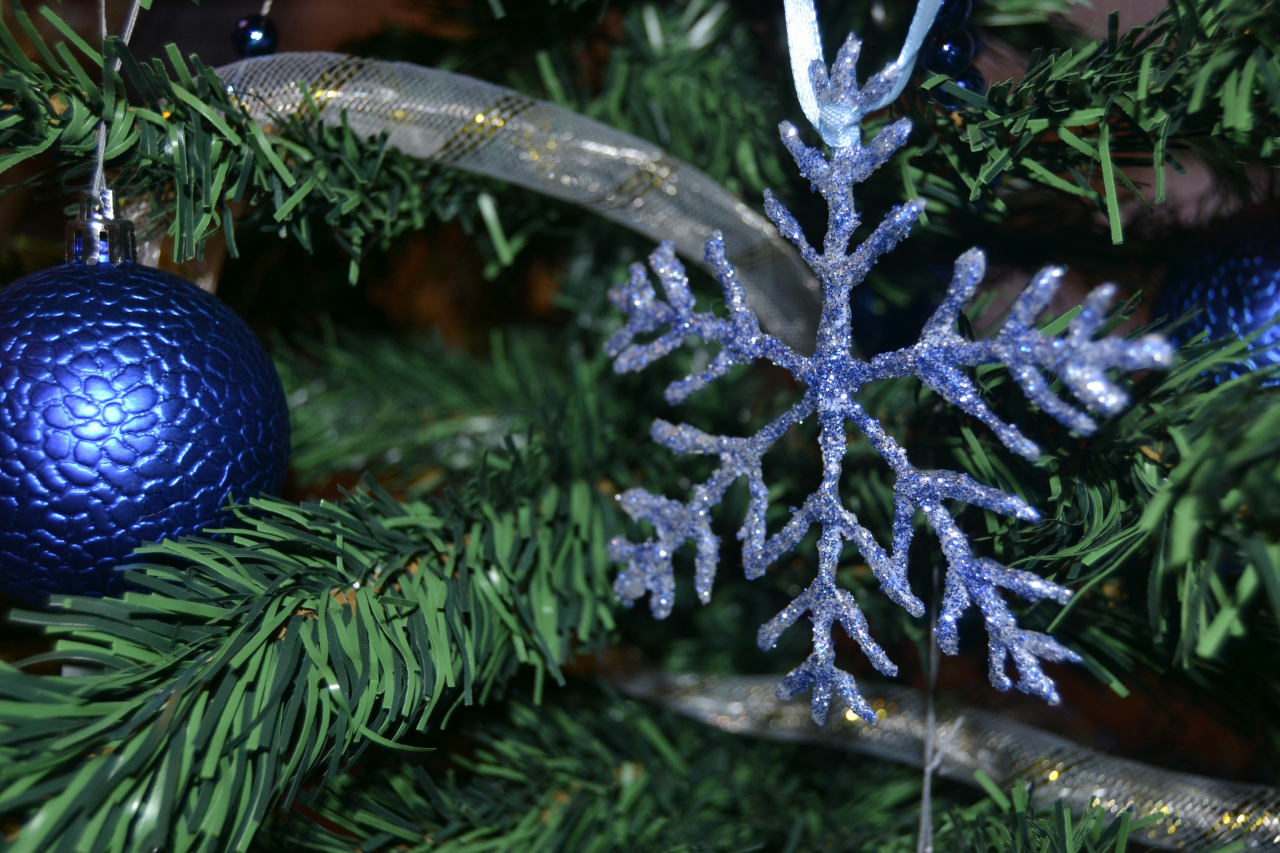
return to menu ↑ return to menu ↑Decorate the tree with snowflakes
Create your own mood
Snowflakes are light and weightless decorations that suit the forest beauty. Here you can not limit your imagination. You can make paper crafts with your own hands in any color, it is better to use bright shades, and of course, do not forget about the traditional white color. To do this, you will need several sheets of paper, colors of your choice, as well as scissors, a pencil, a protractor.
Unusual decorations for your guest
We all remember how in childhood, this occupation brought us a lot of pleasure. Today it will bring no less. How to make snowflakes know, probably, everything. However, today I will tell a little about new ways.
It will be interesting to you: REVIEW: How to make a DIY tree for the New Year with your own hands? We decorate the house before the holiday (185+ Photos)
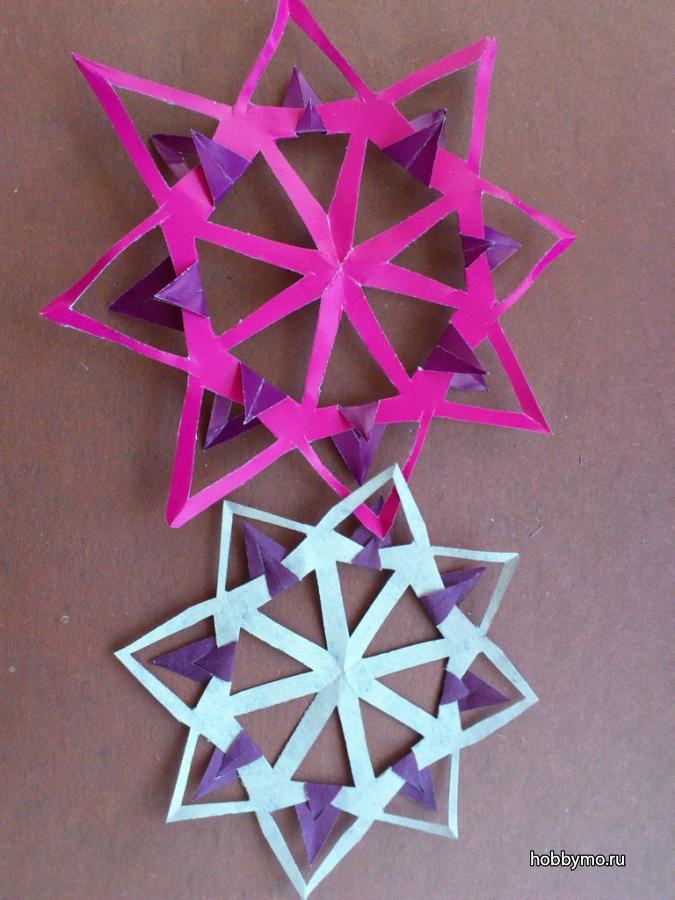
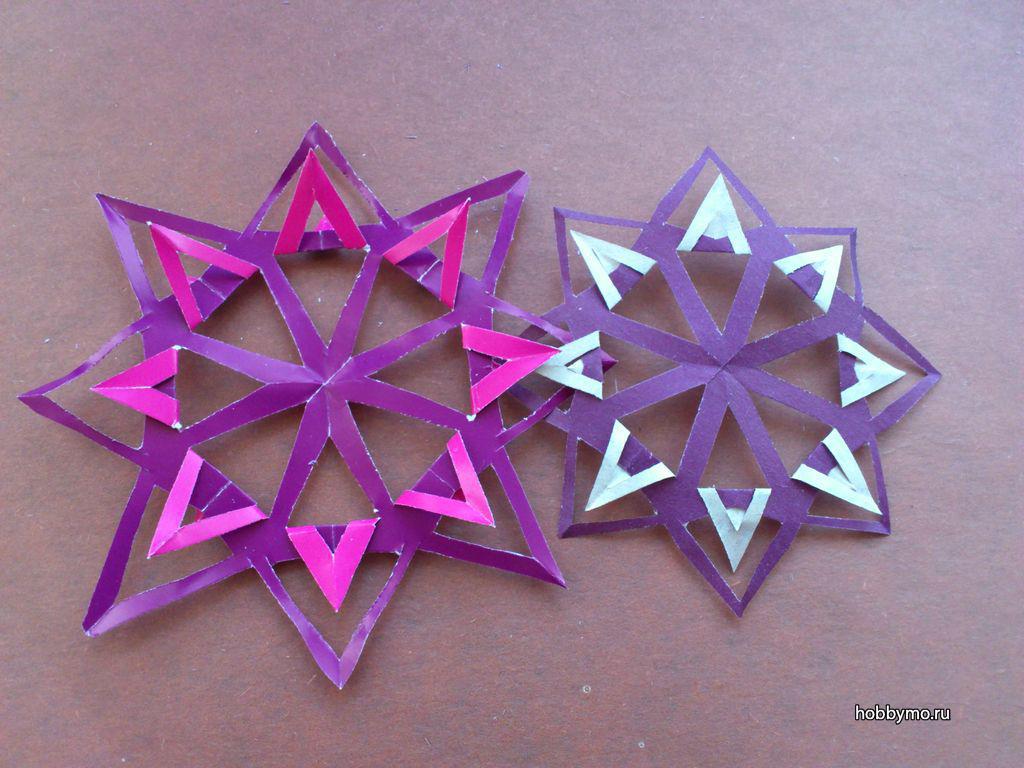
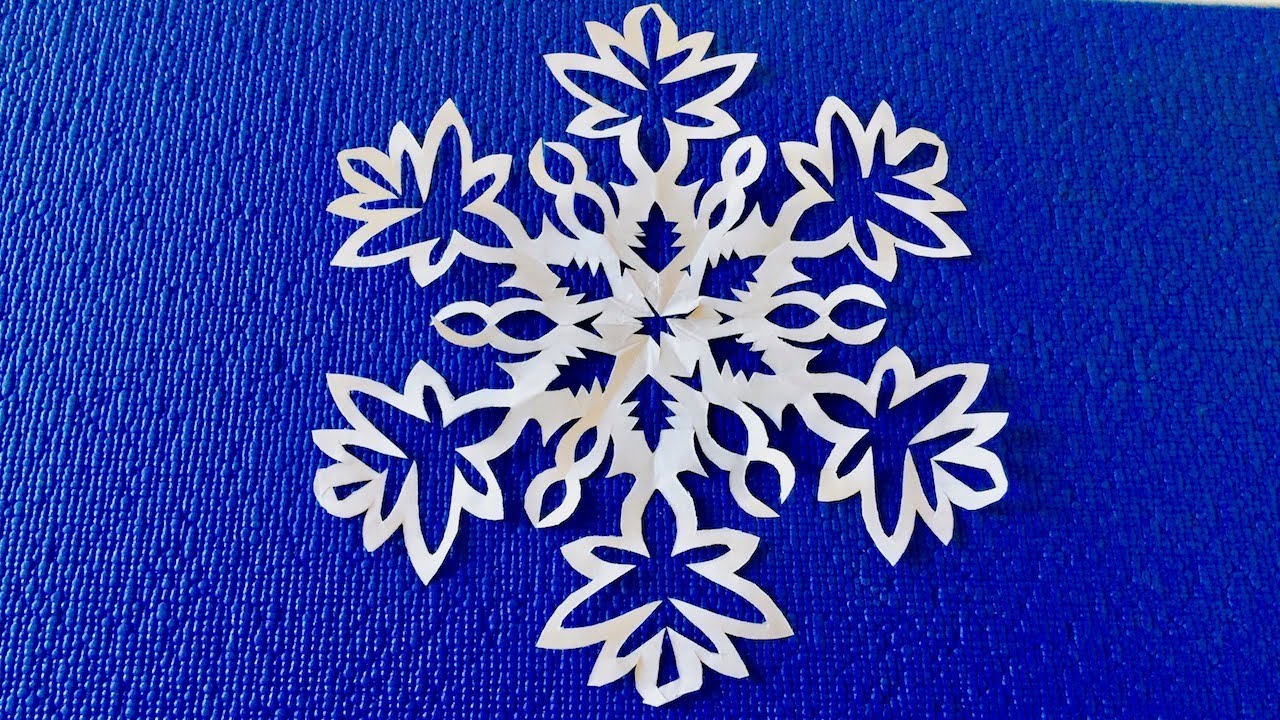
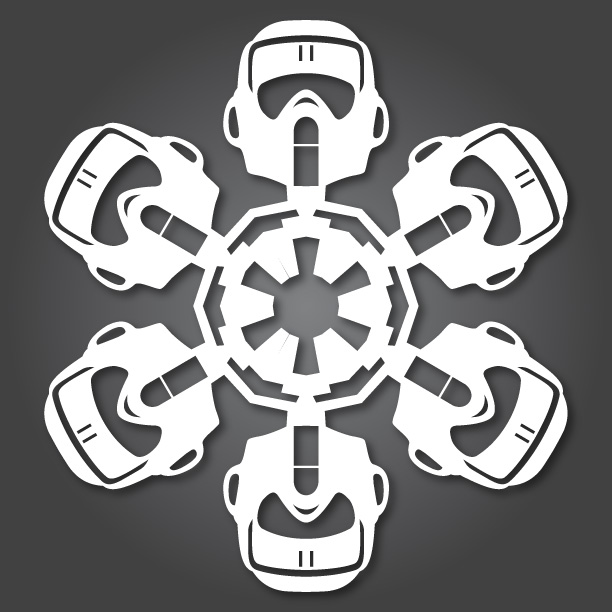
return to menu ↑Engineering kirigami
Hexagonal products are usually made, but you can experiment.With the help of a protractor, you need to draw a template that will cut our snowflake. At the bottom of the sheet, draw a flat line, select the middle on it. Then from it in three different directions we build corners, they should be equal to 60 and 120 degrees.
Bend the paper correctly
Take another sheet, it should be square. Bend it diagonally. Rolled up triangle, you need to put on the made pattern. Its lower part should lie on the line that we have drawn below, respectively, its sharp part will be directed upwards and the point should coincide with the central beam.
Cut to get six corners
Angles that are in contact with the bottom line, lift up, bend. So you did something like a tulip.

Cut along the contour of the pattern
To make it openwork, draw a pattern on a folded sheet or proceed to cut out immediately.

Cut the desired pattern
Turn the finished craftwork and fold aside some of its parts. Give it brightness can shine.
Bend inward parts of the snowflakes
Christmas tree toy is ready
Thus, you get a beautiful and airy. To decorate a Christmas tree, it is better to make them of different sizes and arrange them from the bottom up.
It will be interesting to you:OVERVIEW: Decoupage bottles for the New Year (170+ Photos). DIY jewelry. New ideas and workshops
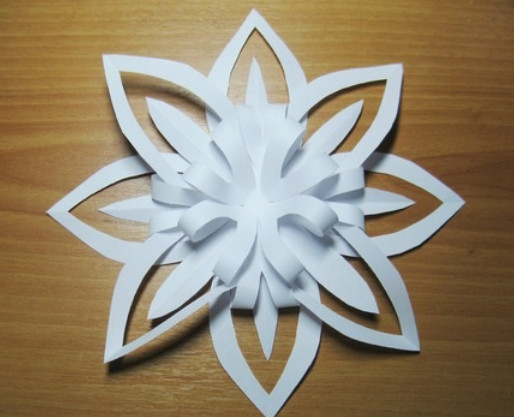
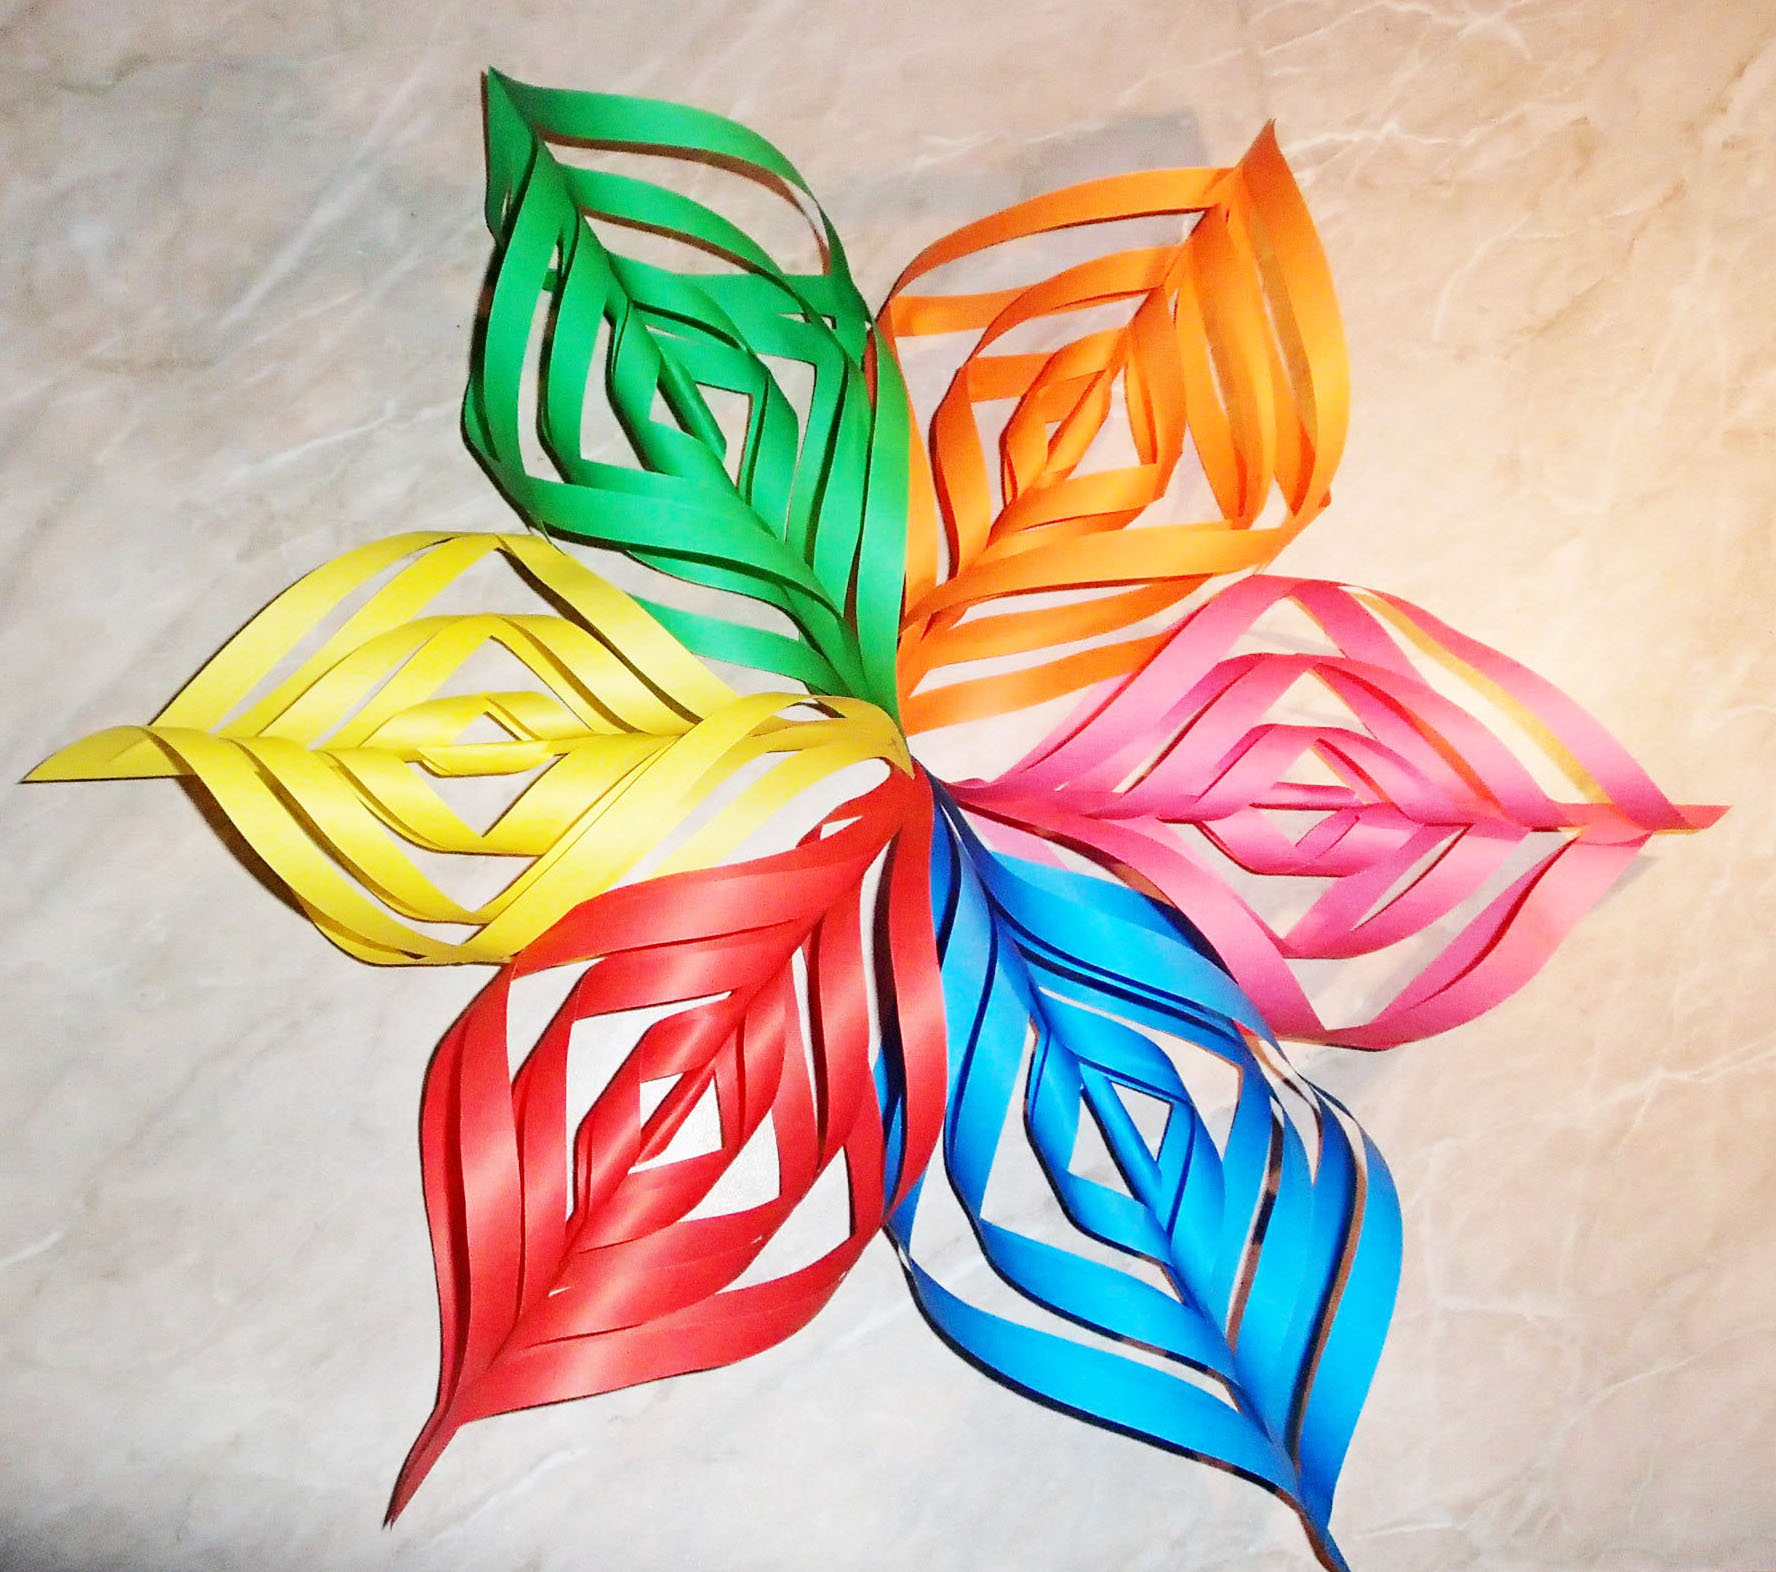
return to menu ↑ return to menu ↑Snowflake - flower for chandelier
Choosing a size for a chandelier is easy. So that they do not look intrusive, it is better to make them small sizes. Of course, for this you will need a little patience, but the result is worth it. So, what options are best suited for the chandelier. Here is a master class on how to do them:
- take two identical sized sheets of paper;
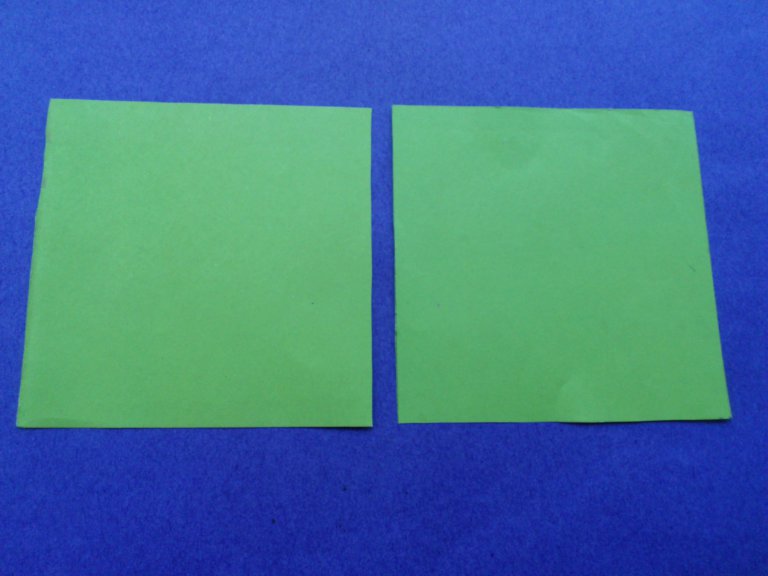
Choose the paper of the color you want
- bend them twice so that you have triangles;
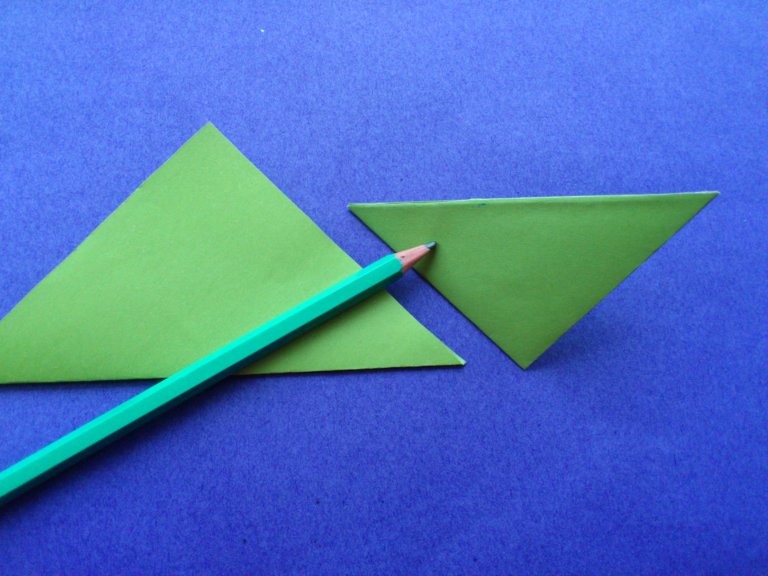
Bend as shown
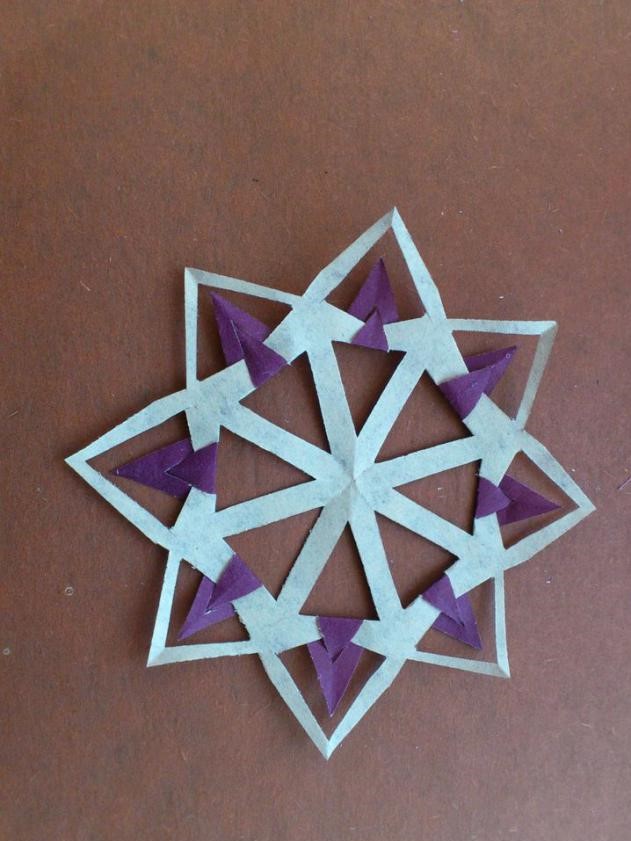
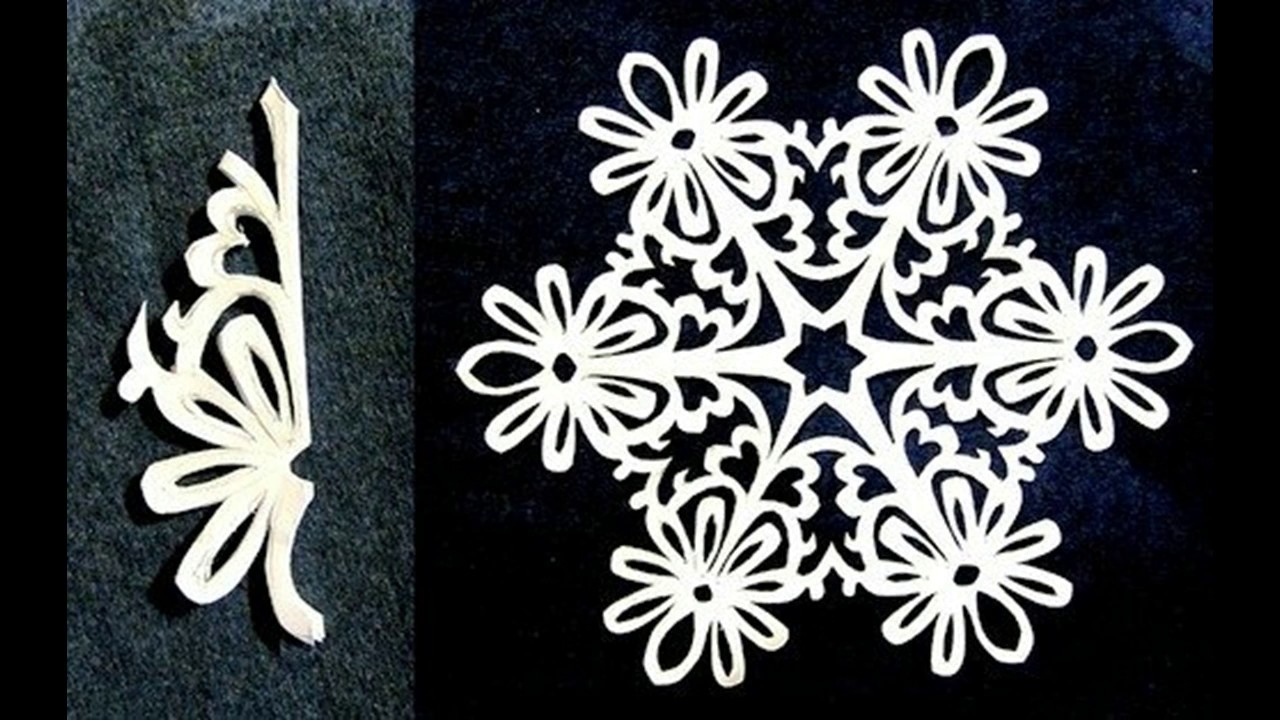
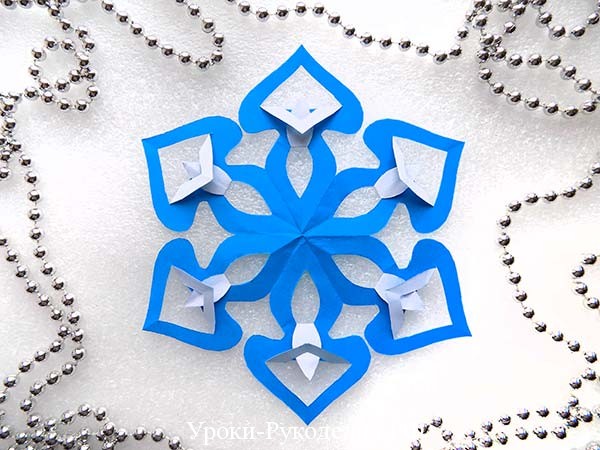
- then in both blanks you need to cut out the middle part in this way (). You need to do this in such a way that the remaining area is slightly larger than the one that you delete. Turn the folded triangle down with the sharp part, in which the angle is greater. Then a few millimeters from each edge. Cut off the part from one side and the other. Do not cut a few cm to the more obtuse angle of the triangle. So you will separate the middle part;
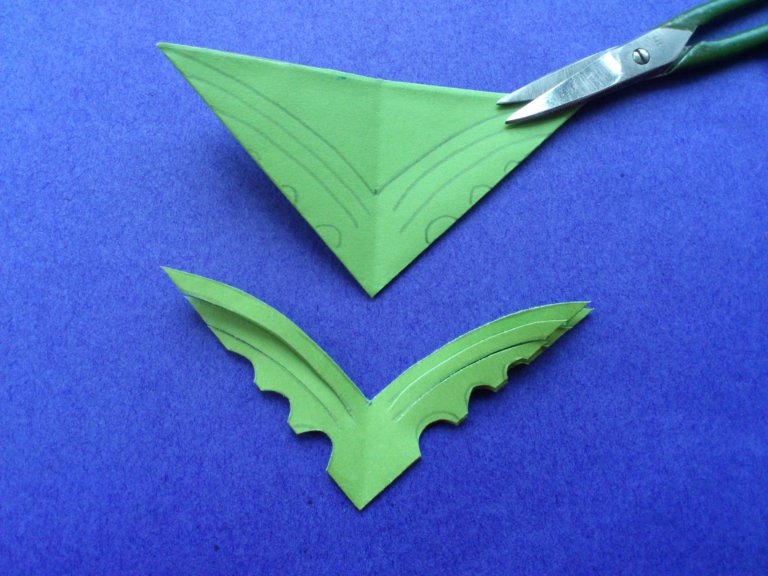
Draw and cut as shown
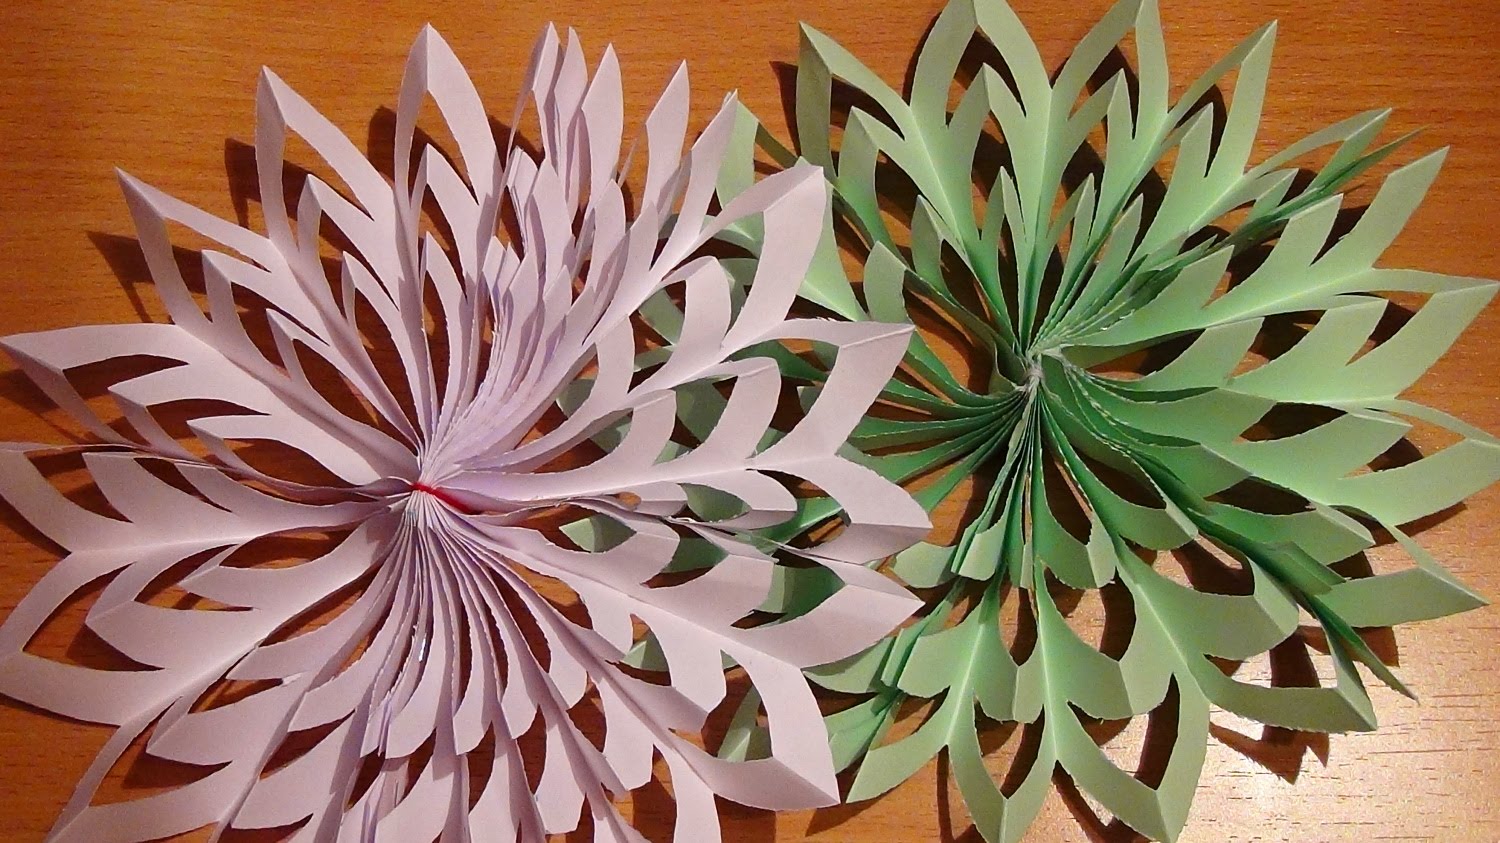
- then both sides of these sections need to be cut 2 more times. And the rays should not be interconnected in the center. You will have something like a flower;
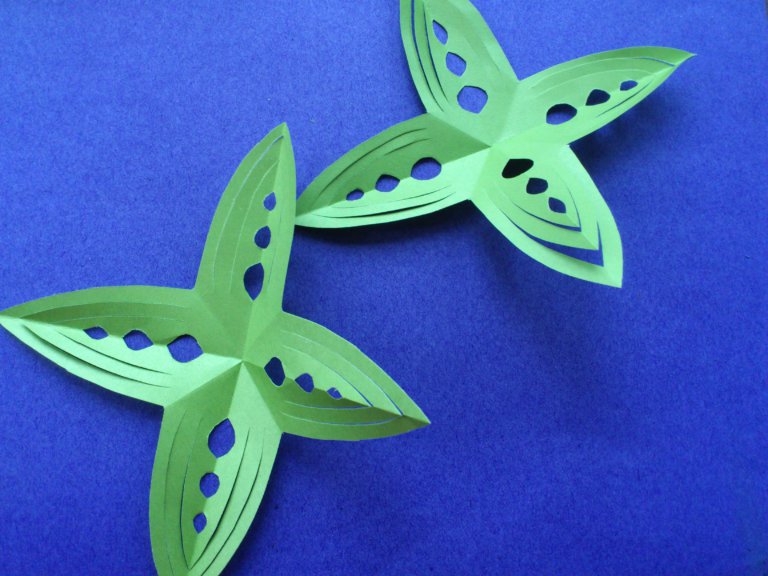
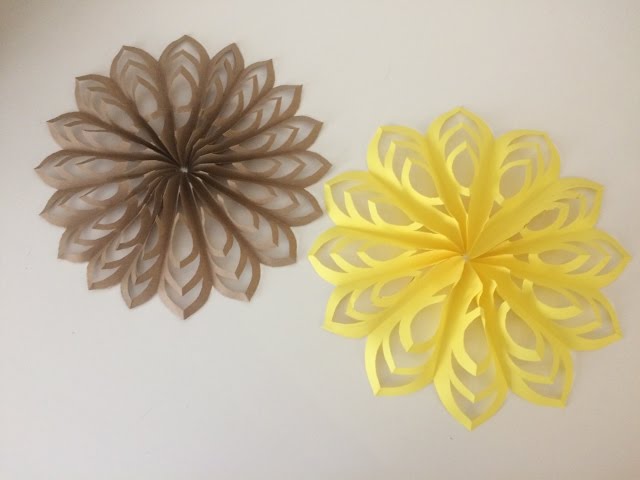
We receive preparations in the form of flowers
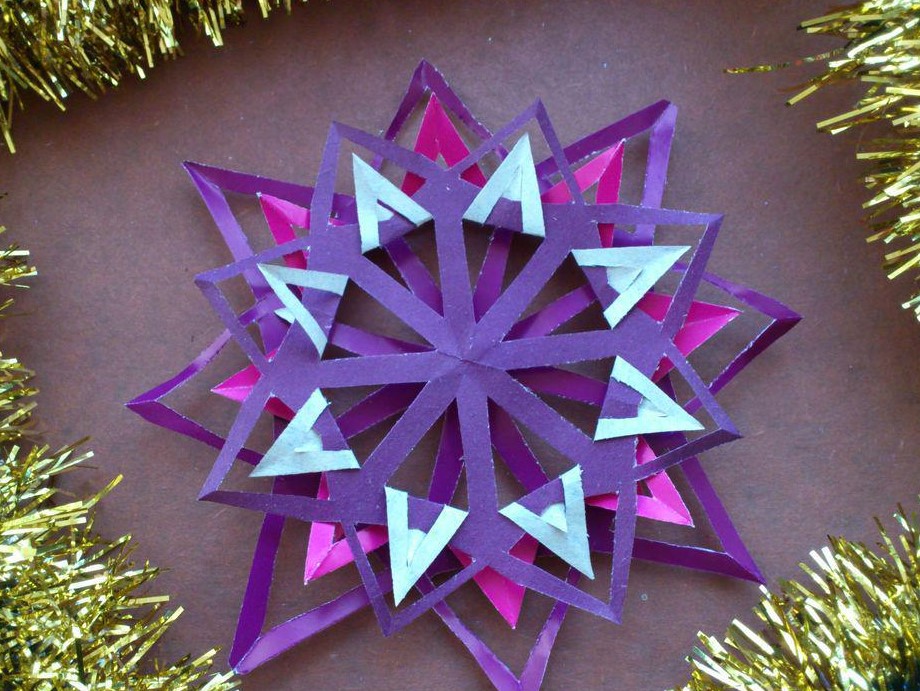
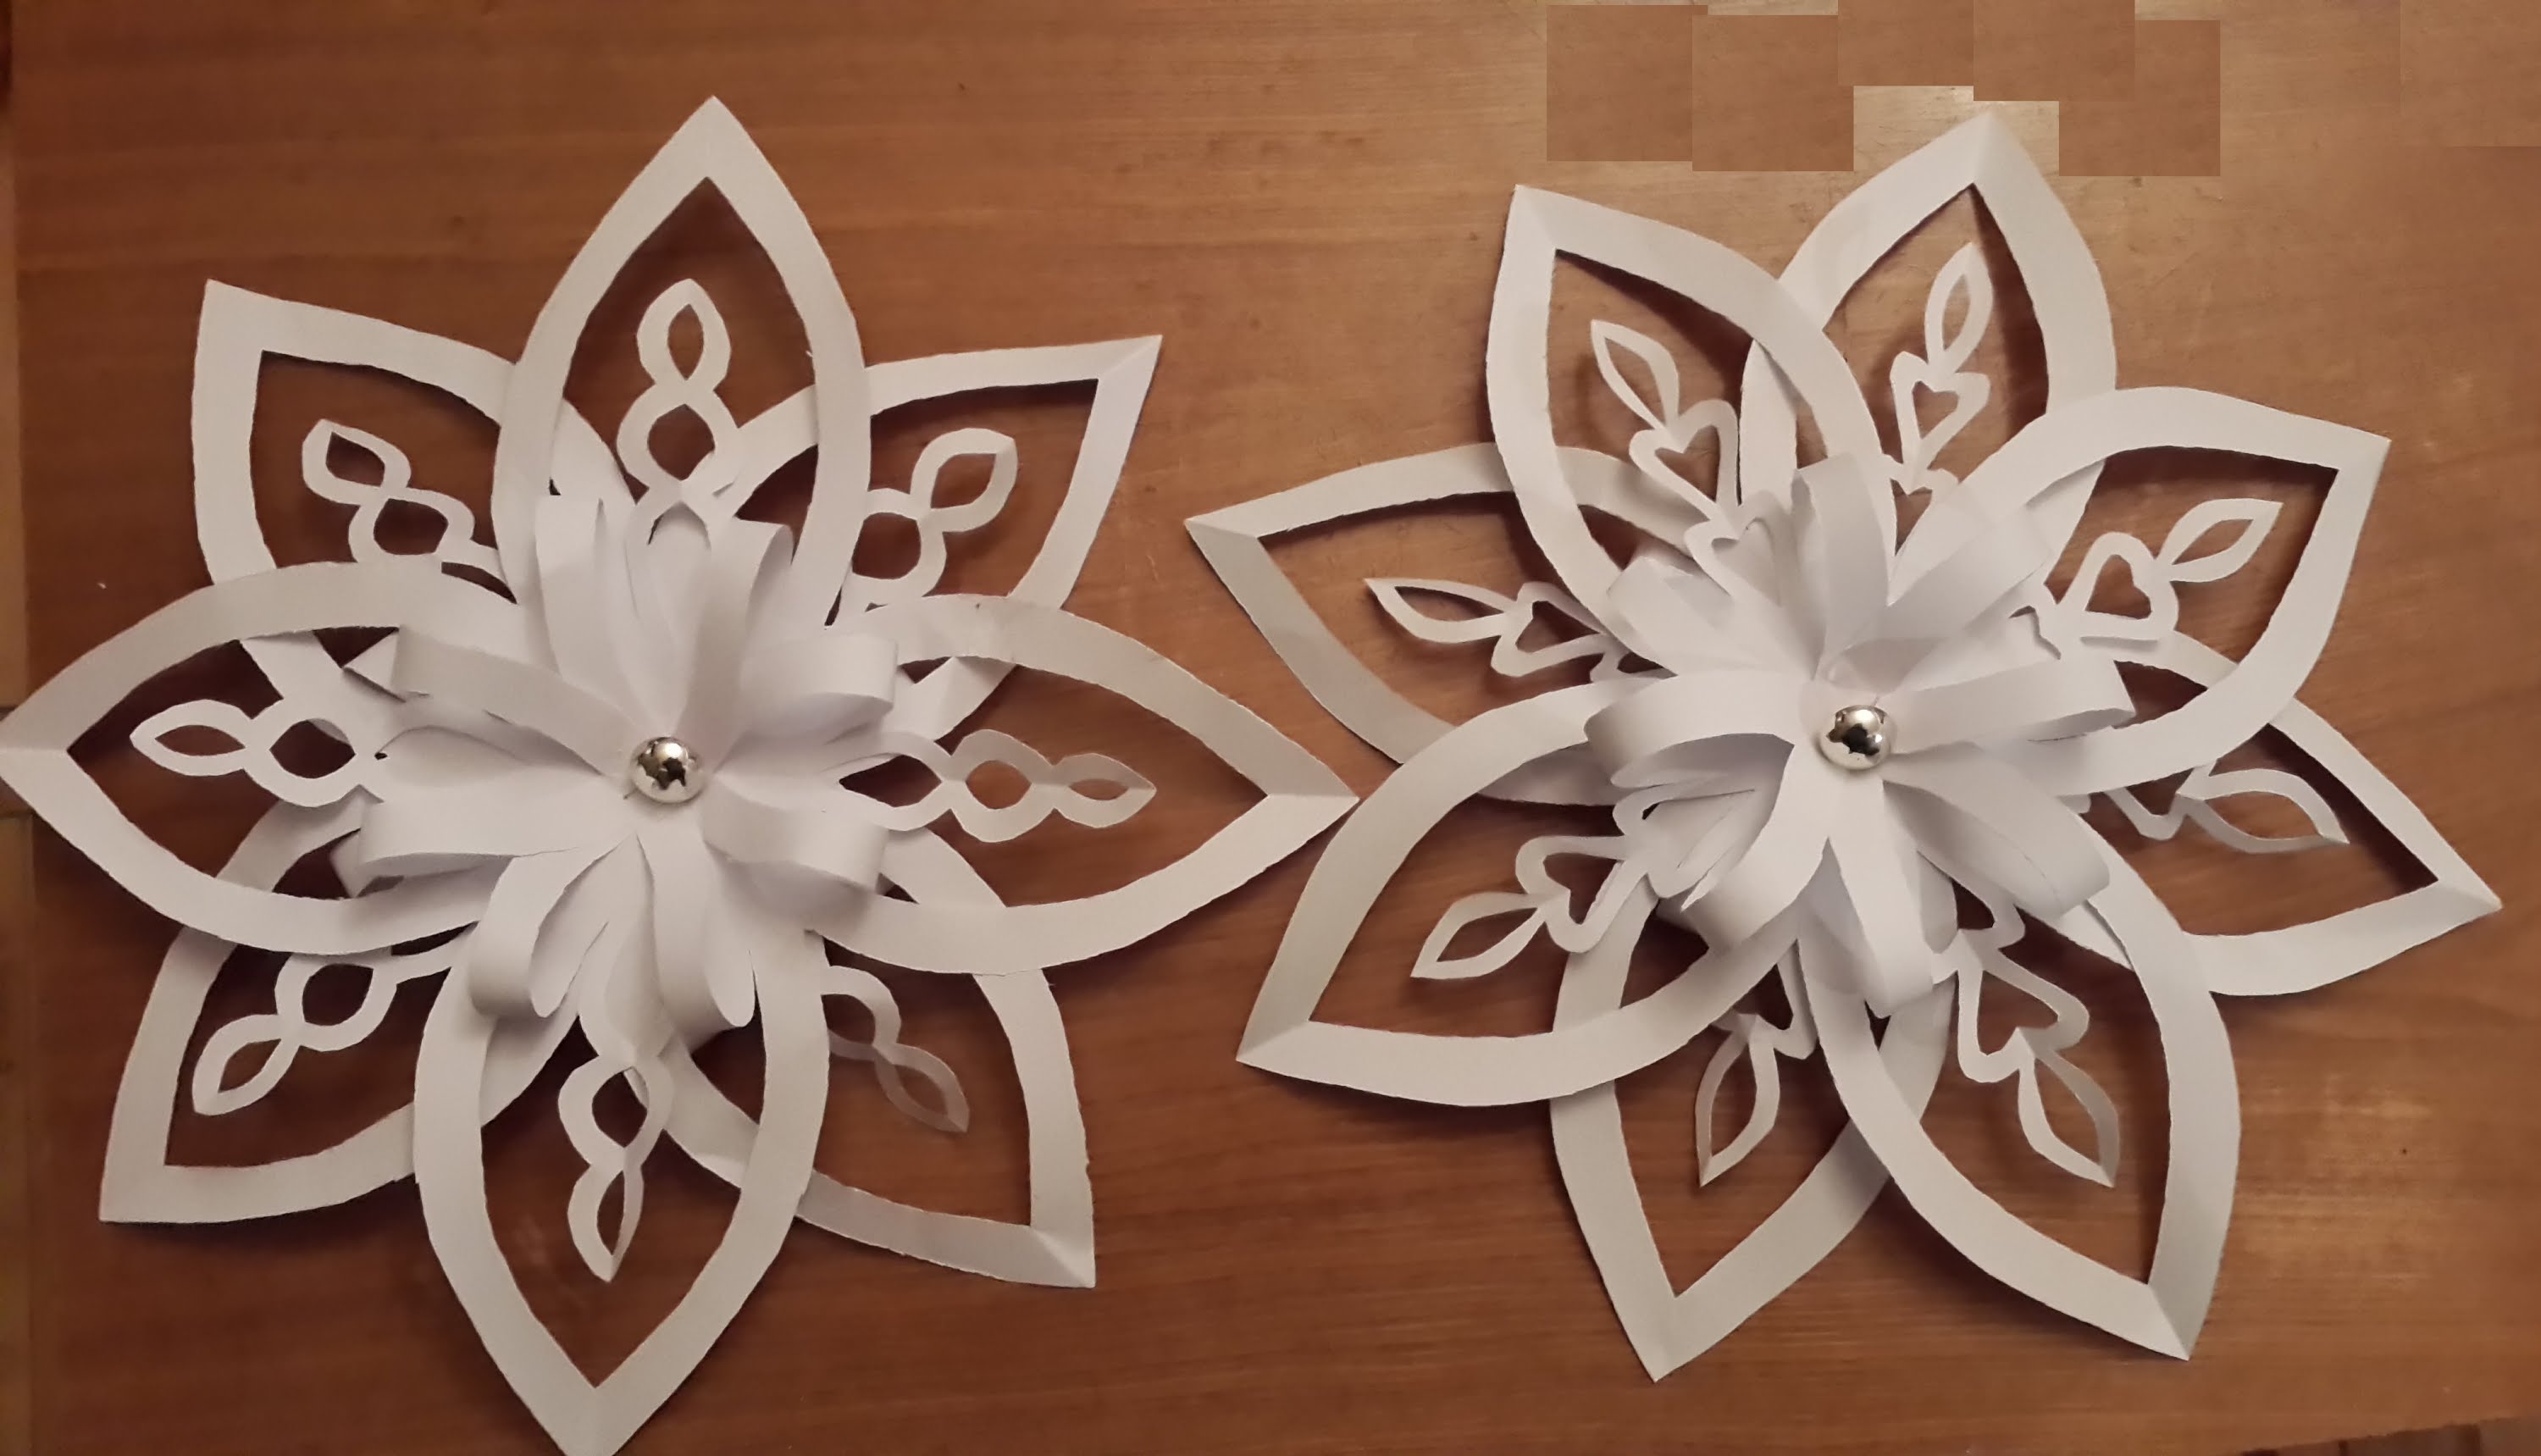
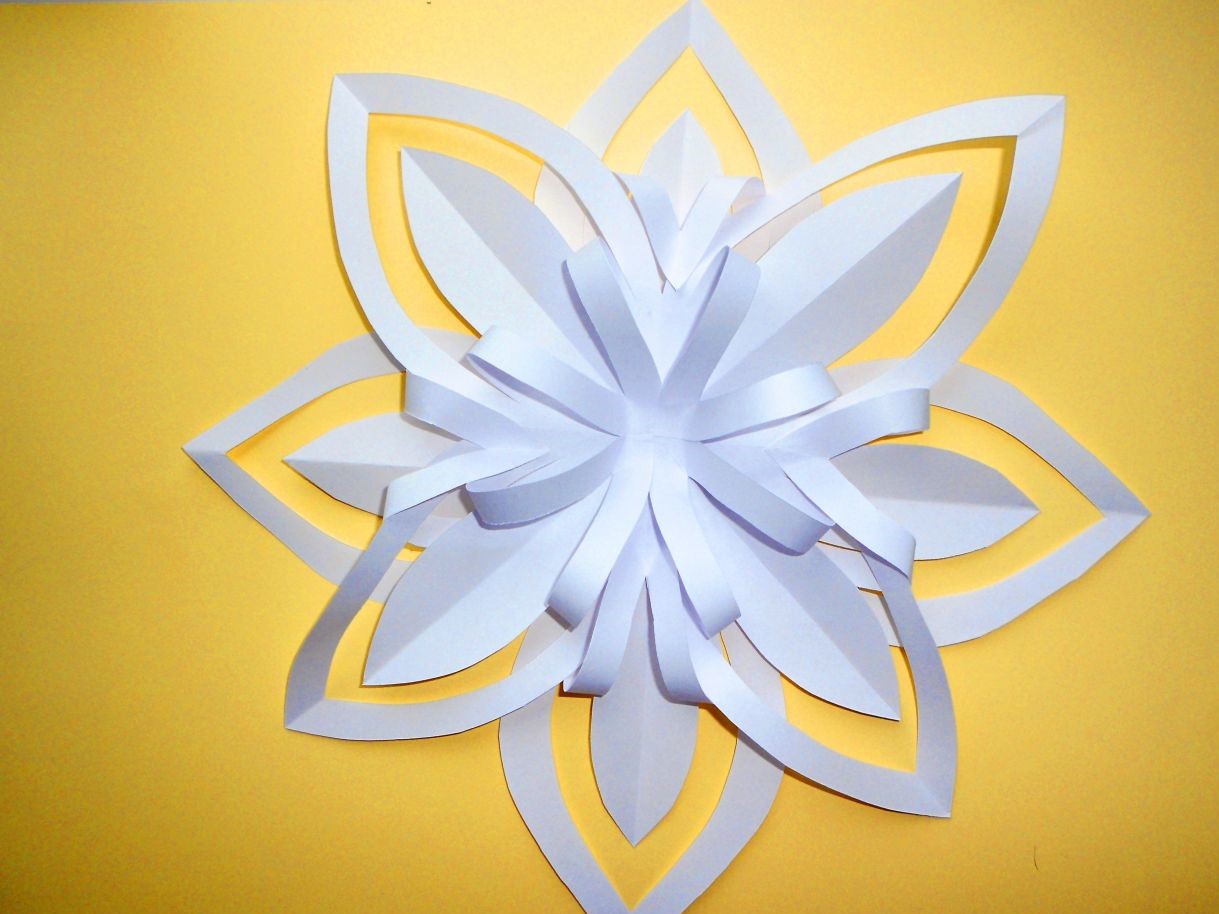
- tuck the middle strips of the flower inside and stick it to the center. The first part is ready for you. To make the second one, you need to put a different flower down this blank, but so that its long petals are located between the already existing ones. Also, move the middle parts to the center first and glue.
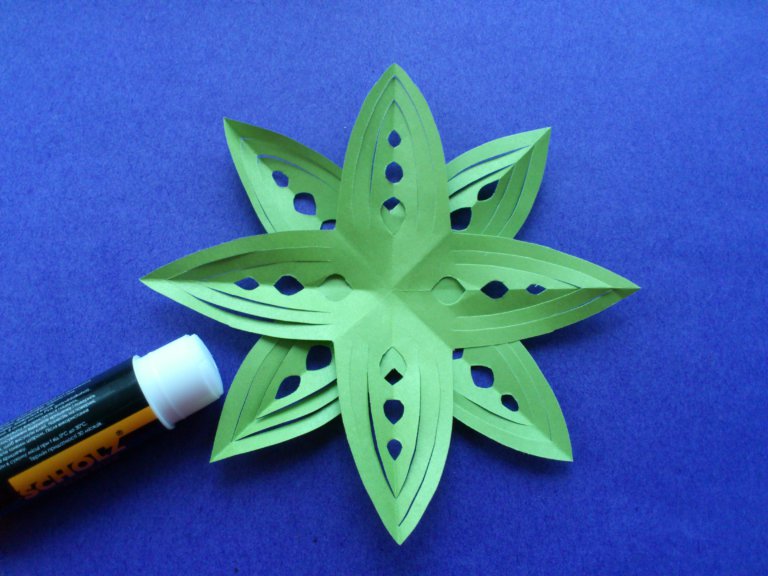
We glue two blanks
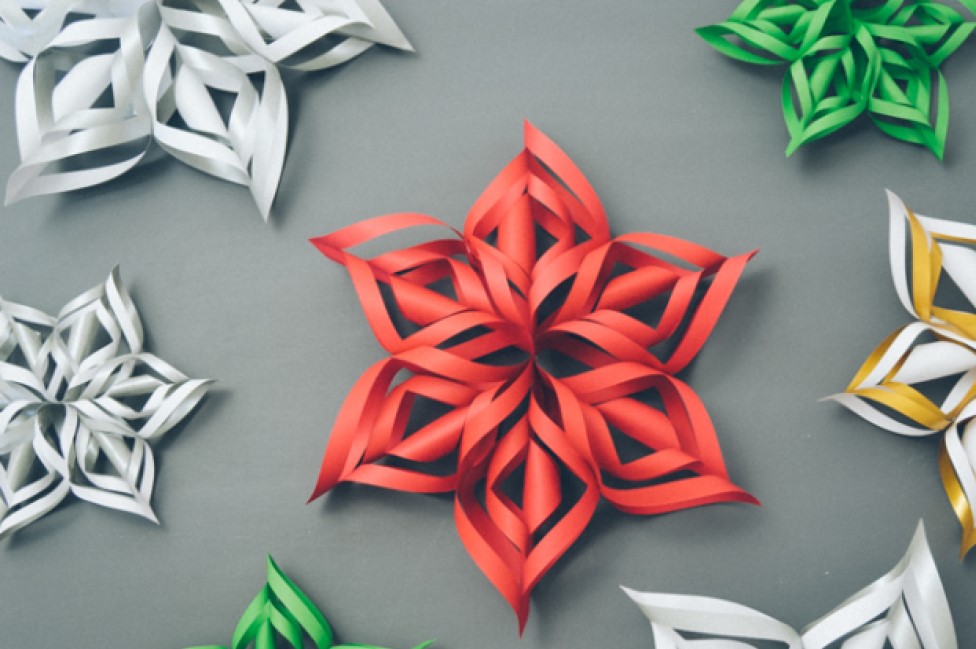
So you will have a very beautiful, volumetric and unusual snowflake that will decorate your chandelier. However, they need to be made more than twenty pieces and attached with a fishing line to chandelier.
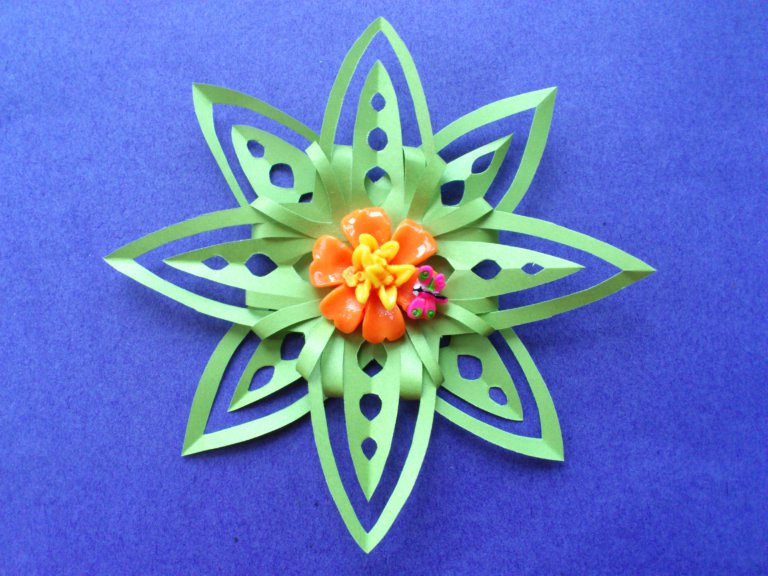
We get the finished work with their own hands
There is another way to make a volumetric snowflake for a chandelier. It is much lighter than the previous one, but the products are not inferior in their beauty to the first variant.
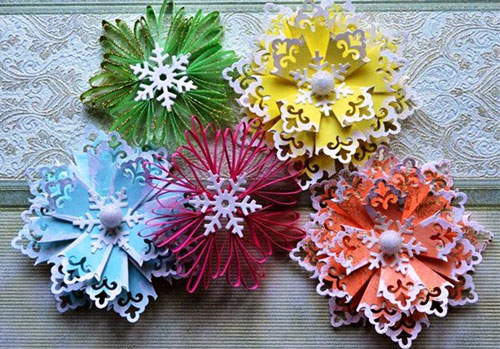
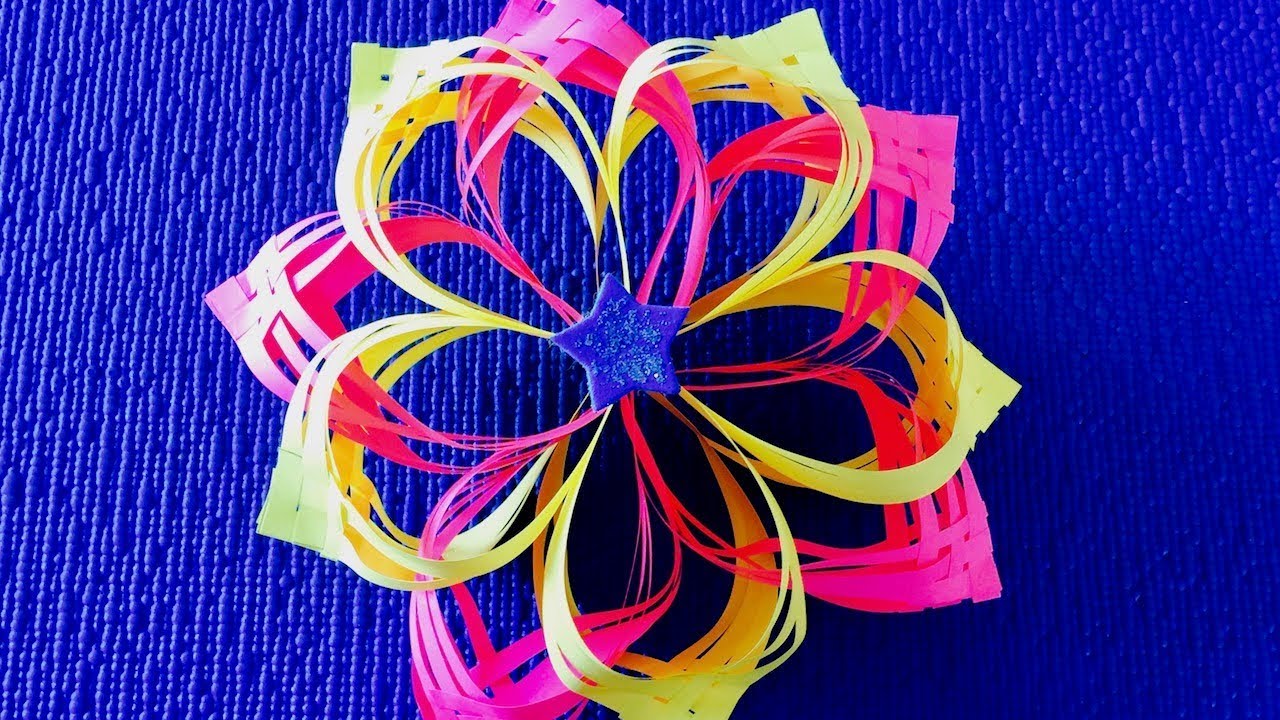
return to menu ↑Snowflake - flower (simple version)
To do you need:
- glue;
- small stapler;
- scissors;
- beads;
- thick paper;
- cardboard.
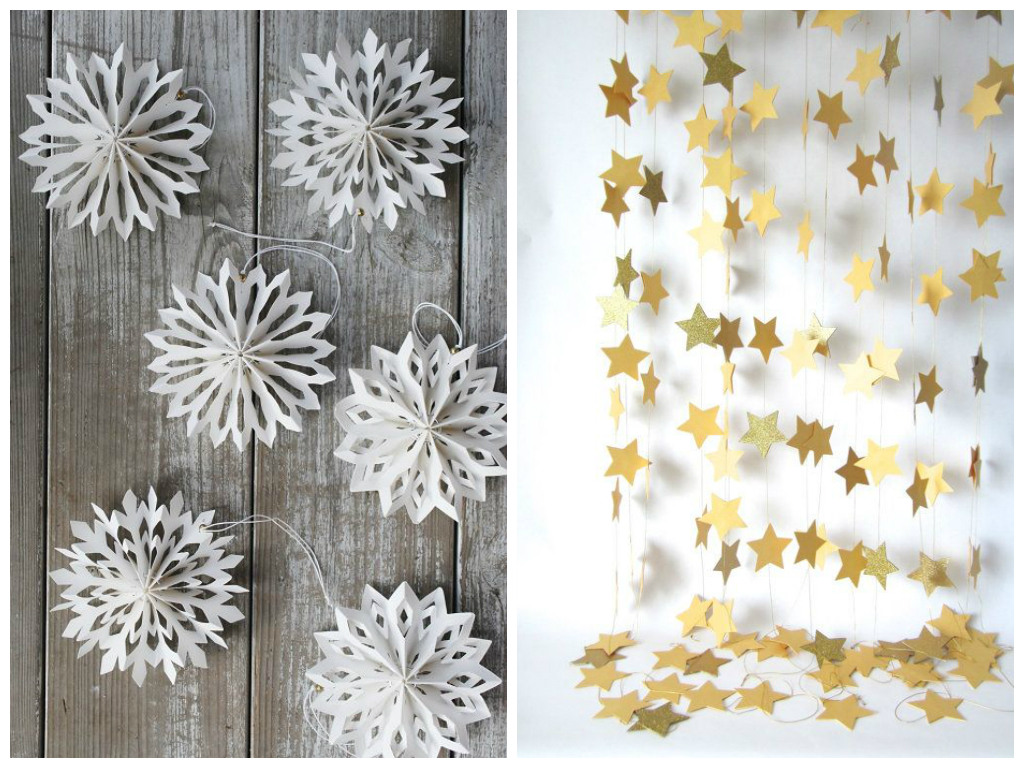
For the manufacture of this option, it is better to choose a dense multi-colored paper. The choice of color is completely up to you, one silver with different shades of blue, green is better suited for the Christmas decoration of the chandelier. We make a product:
- cut the thick paper into strips of the same width;
- roll each of them into an envelope (which our grandmothers used to buy when we bought seeds), cut off the excess with scissors. They should make you the same small size;
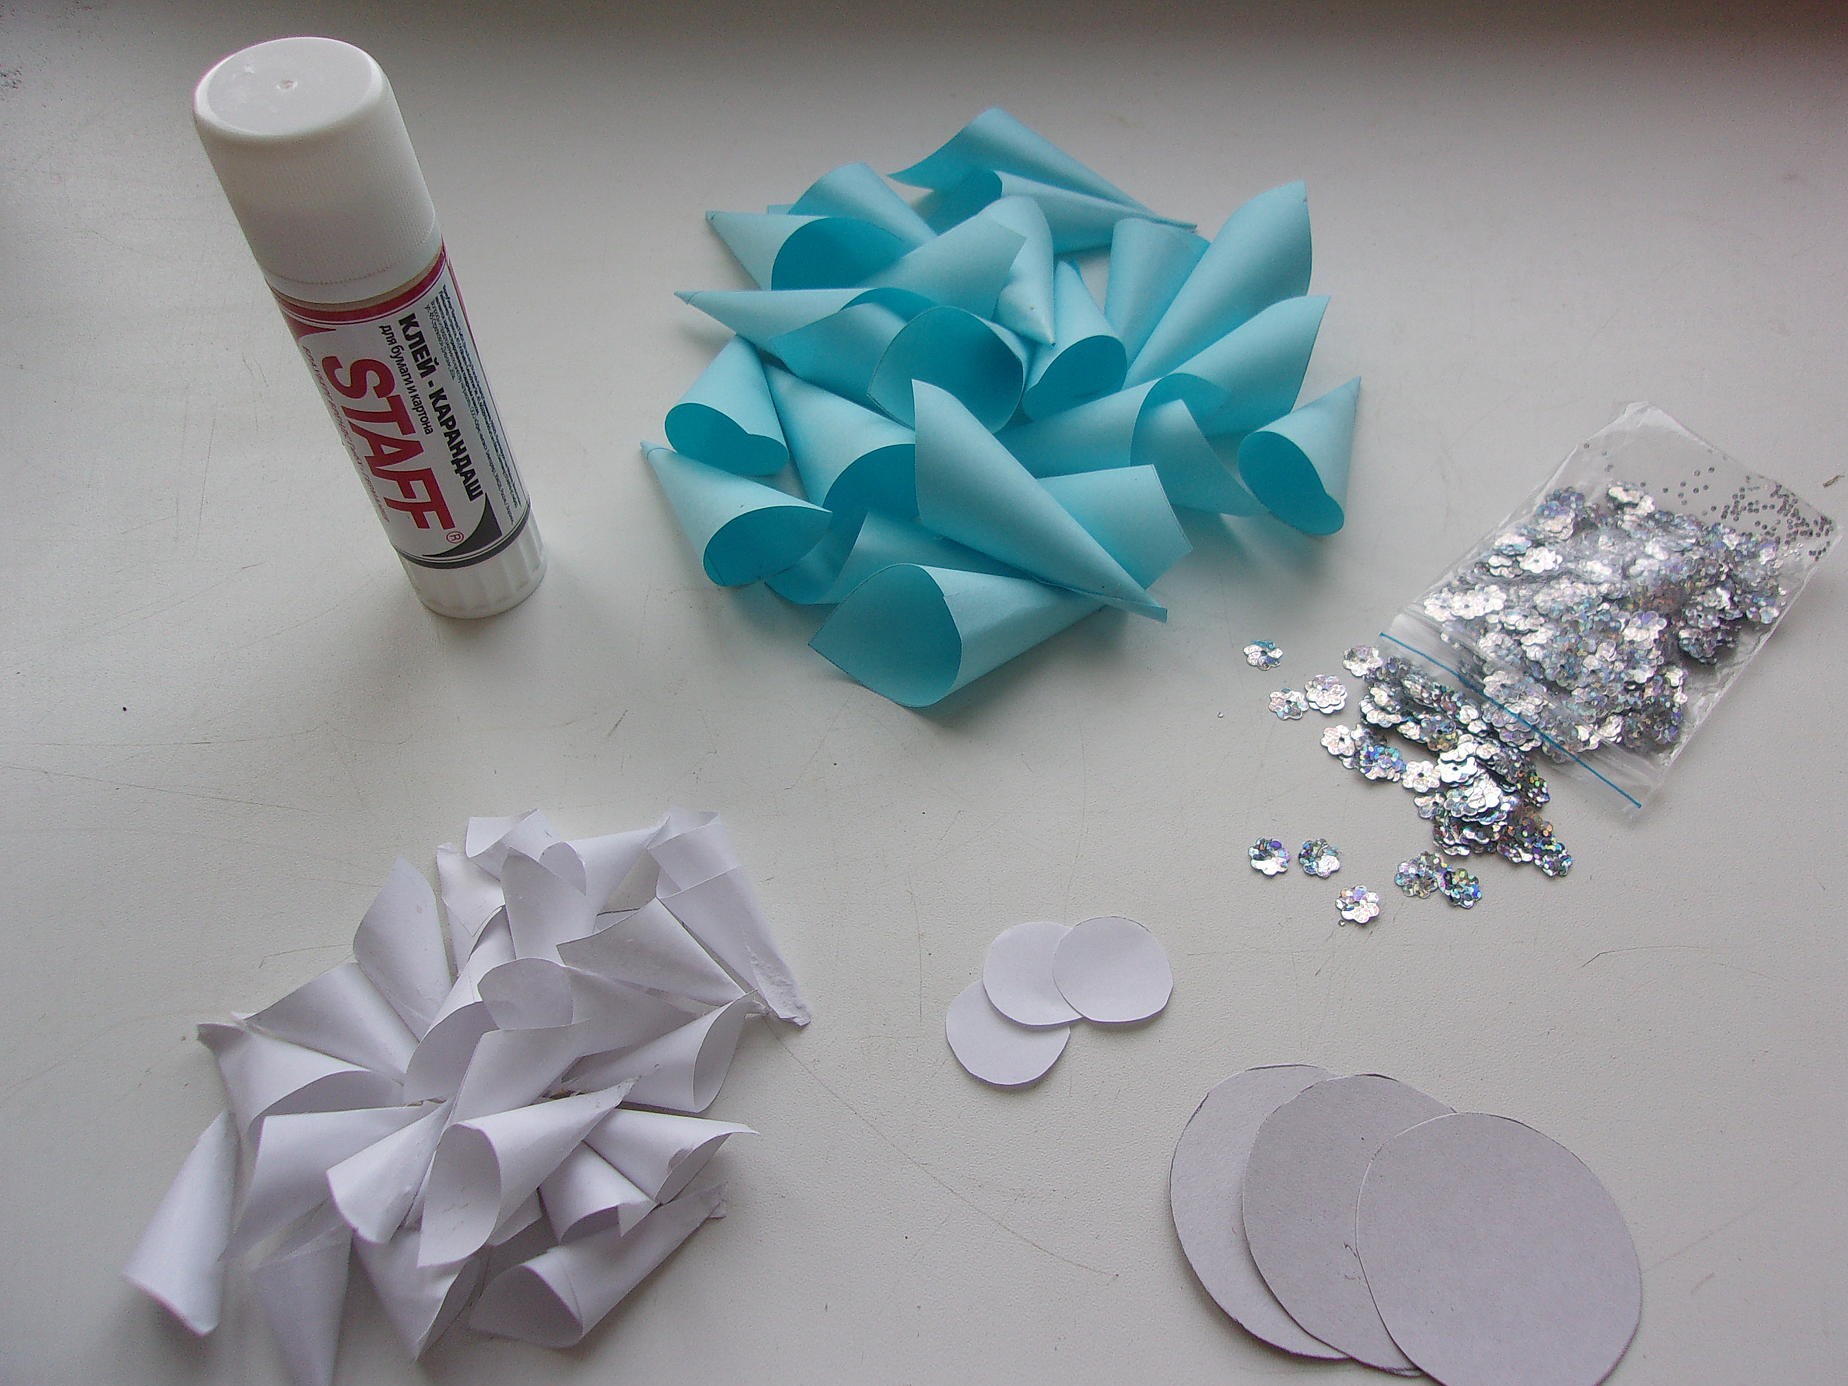
We prepare the necessary blanks
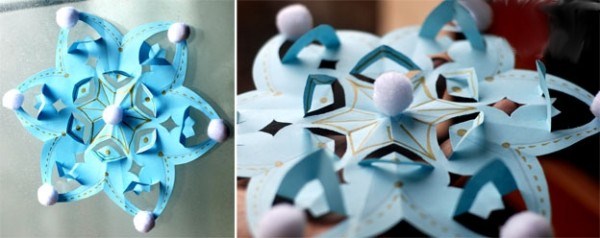
- the upper part of our envelope, you need to fasten with a stapler;
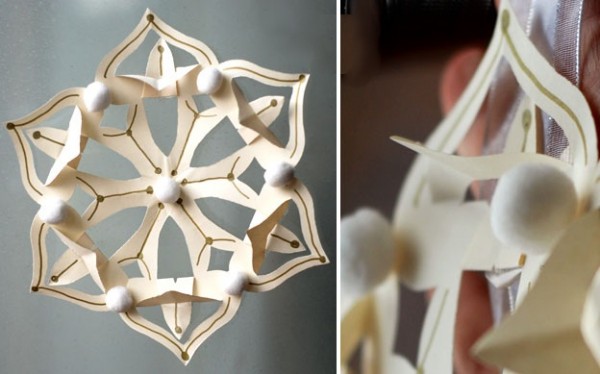
- make a circle, glue the resulting envelopes to it with the help of glue. For a paper snowflake, seven envelopes are enough;
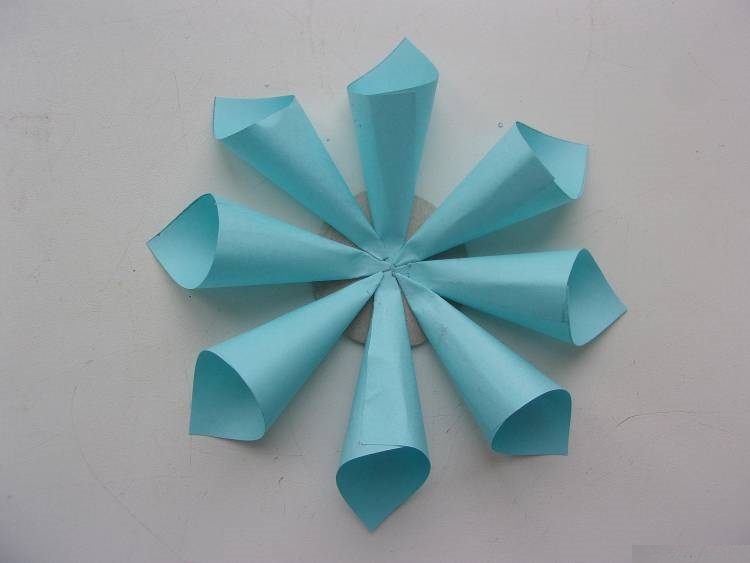
Sticking envelopes to the circle
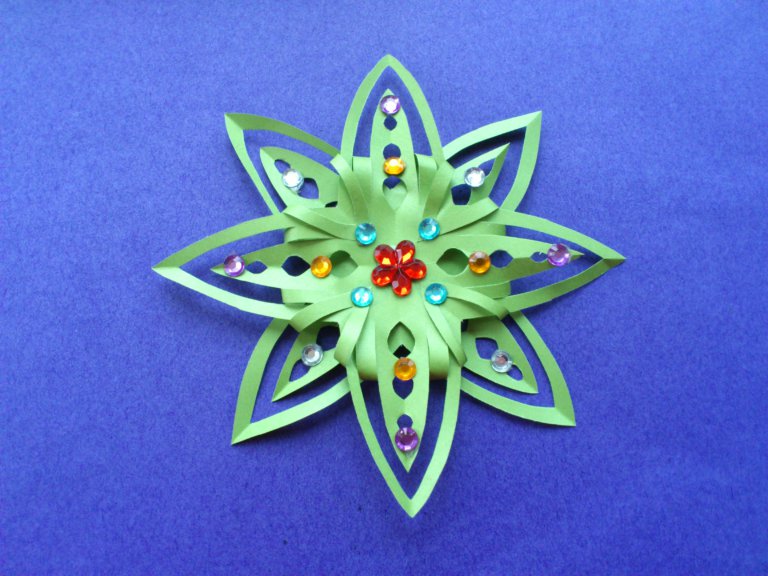
- To decorate the middle and cover the joint, you can use beads or other decorations. They also need to stick;
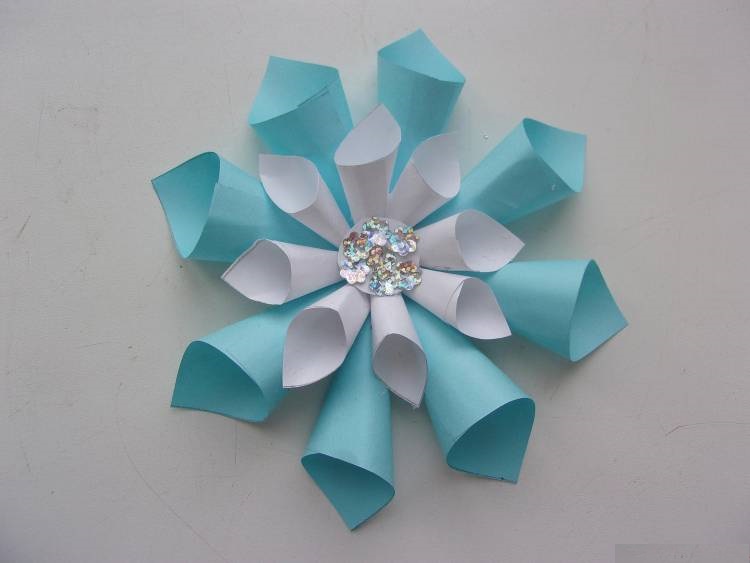
We decorate the middle of snowflakes
- at the top of the hole for fishing line.

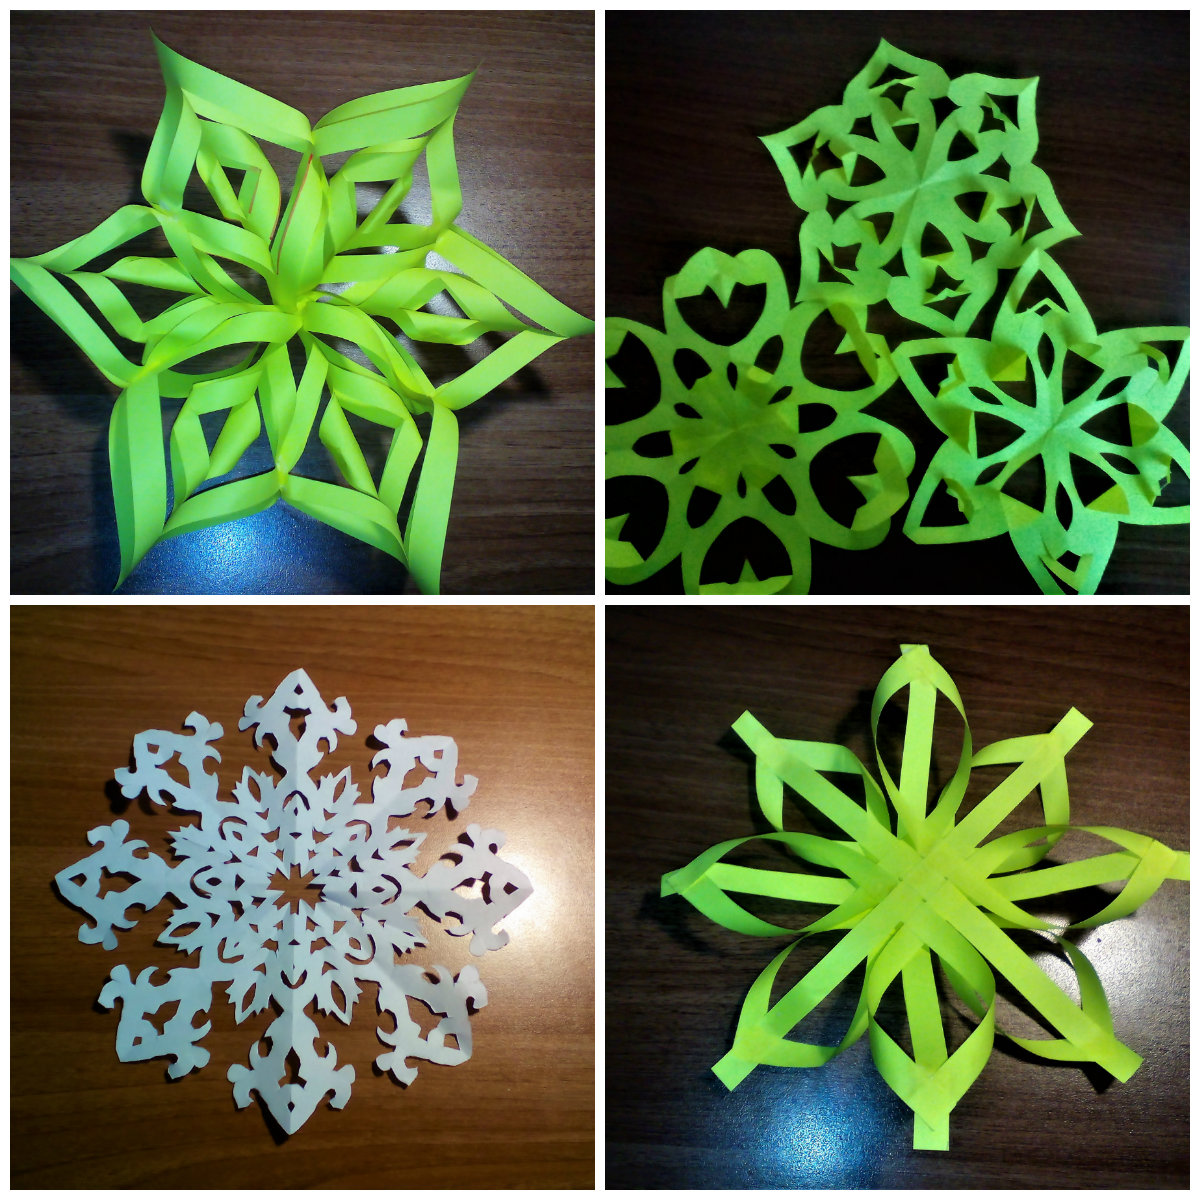
As a result, we have a lot of beauty for decoration
It will be interesting to you:REVIEW: How to make candles with your own hands at home? Interesting workshops (155+ Photos)
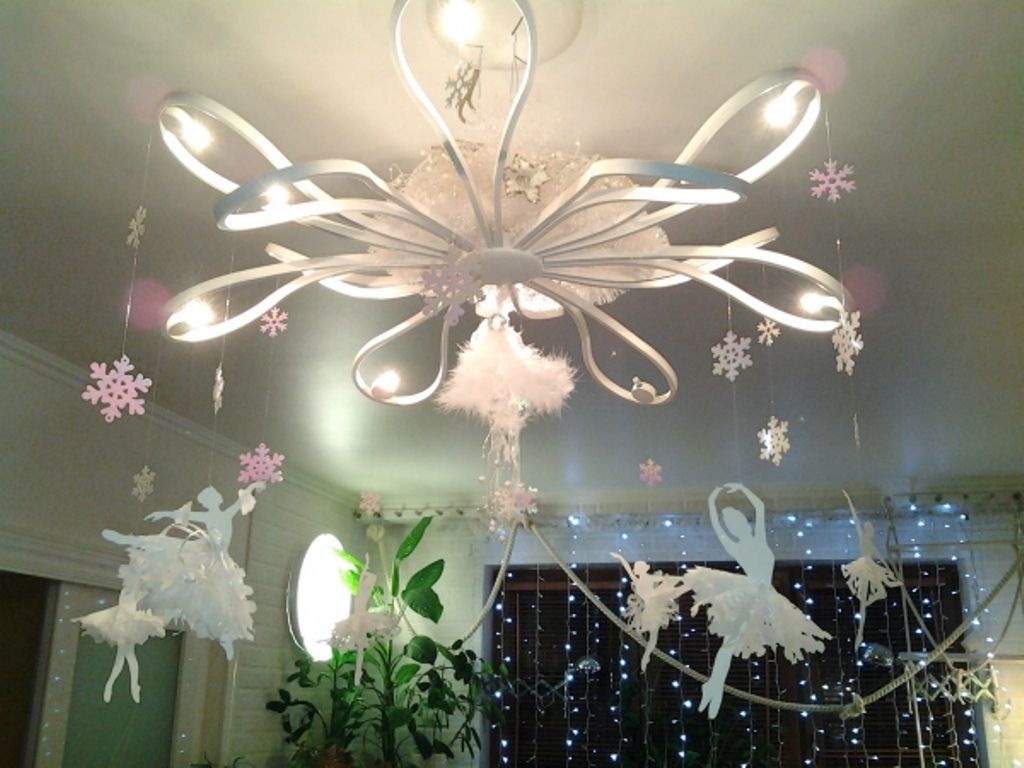
return to menu ↑ return to menu ↑Make a real snowfall in the house
Dozens of snowflakes located throughout the apartment will help to give New Year's mood. Include your favorite movie and start making products. You can use any paper that you make with your own hands to decorate the house.
Simple decoration for the New Year
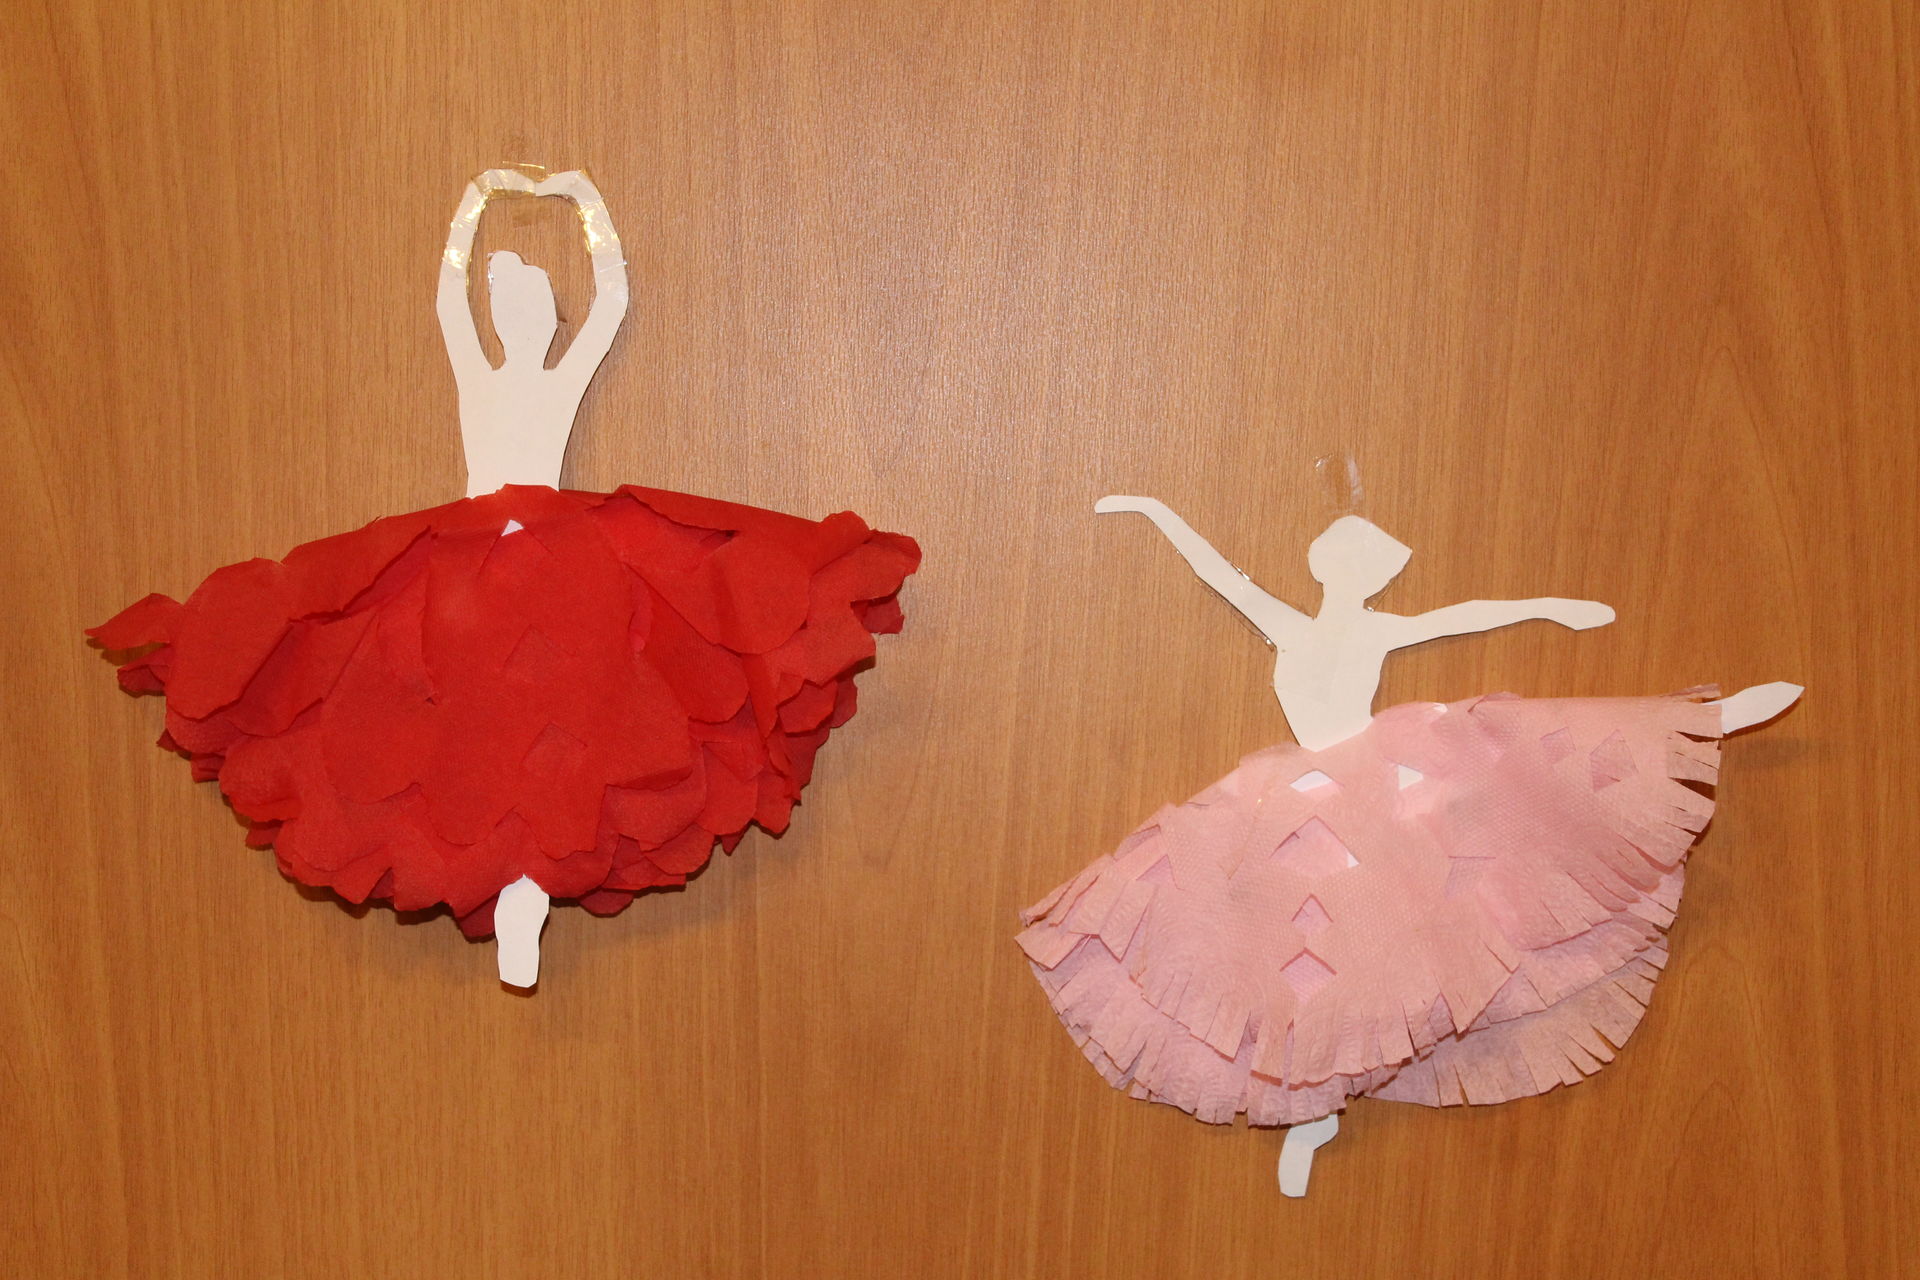
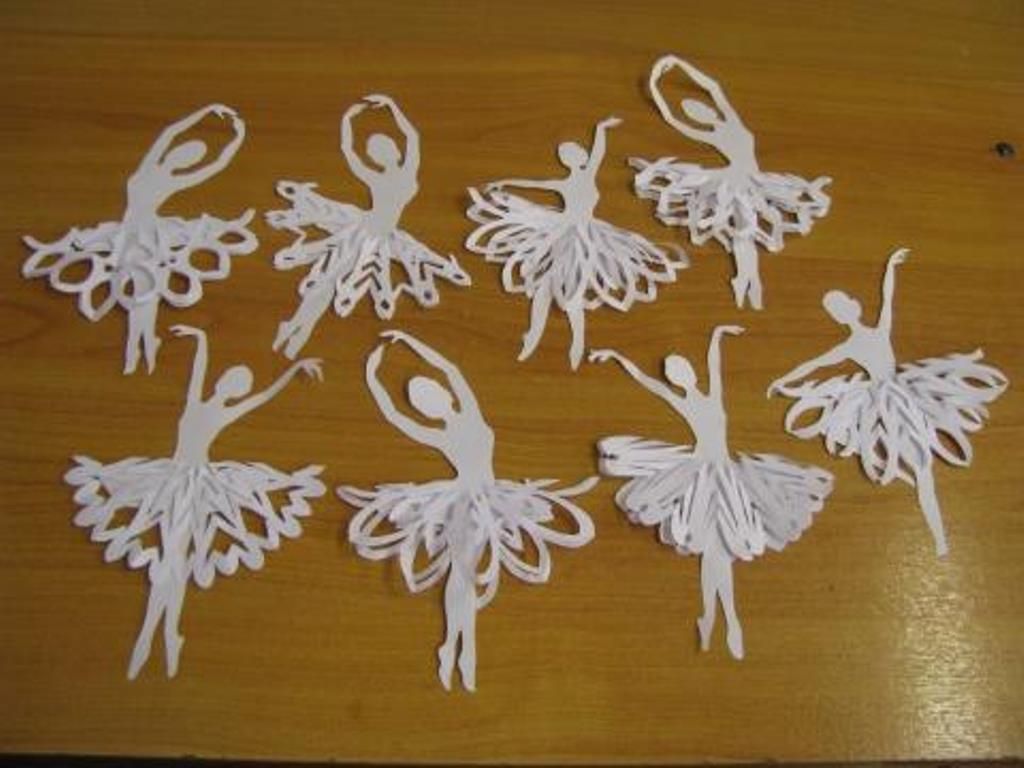
Master class how to make a snowflake-ballerina
Now we are a little away from the standard shapes, manufacturing methods. Let's make a snowflake-ballerina. It will look beautiful in the nursery. To make it necessary:
- pencil;
- paper;
- scissors.
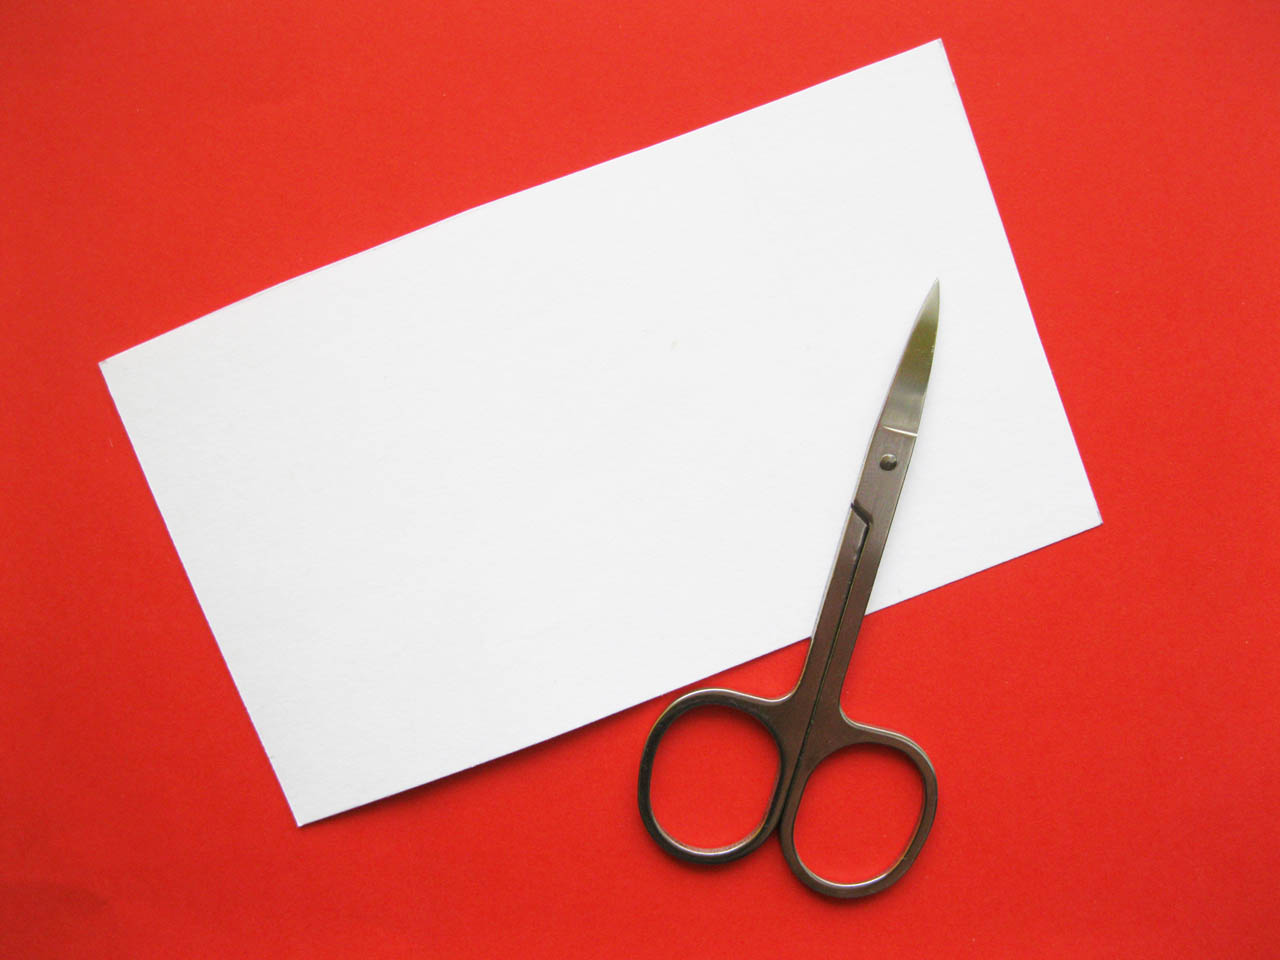
The necessary materials to create a masterpiece
- need to take two sheets of paper, A4;
- if you draw well, the ballerina can be portrayed by yourself. If not, you can take pictures from the Internet. Find an image, attach a sheet of paper to the monitor or laptop screen, and circle around it with a pencil. You can use any pictures of ballerinas. They can be with their arms raised, spread apart, be in a jump or making their dance elements;
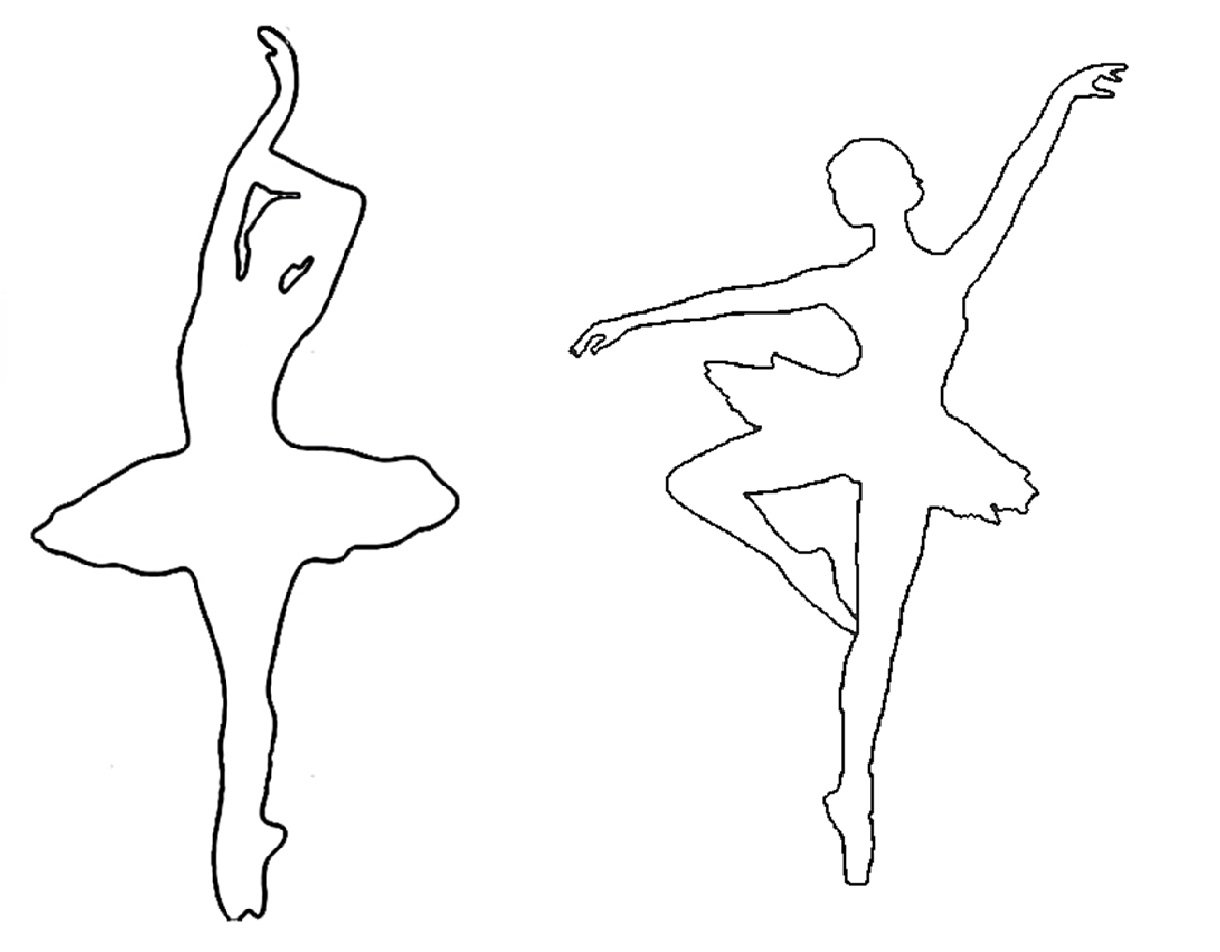
Print or draw on the template
- neatly cut out, we get a beautiful, elegant doll, which will become the basis of our needlework;
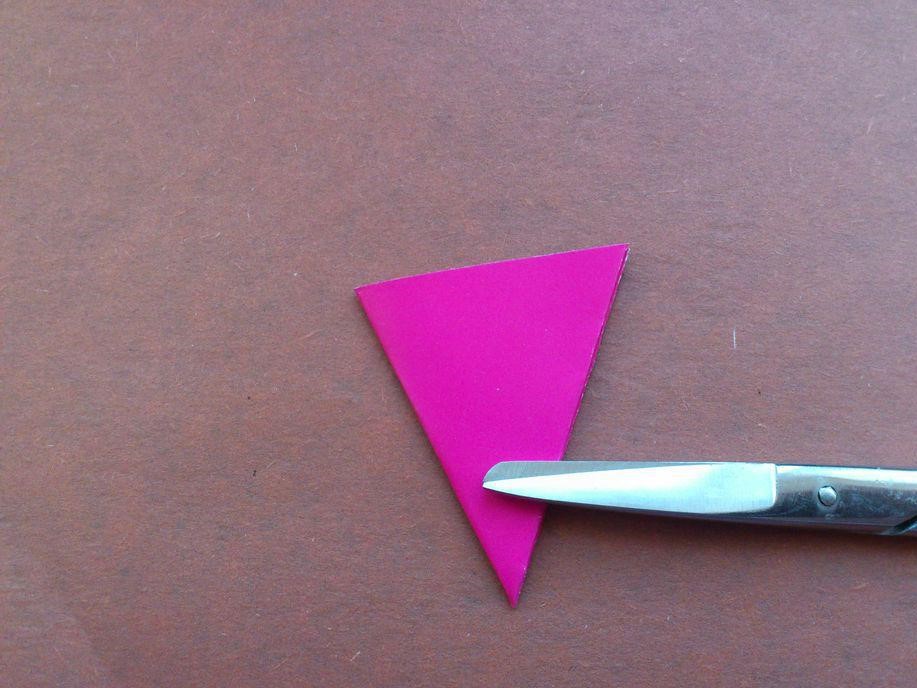
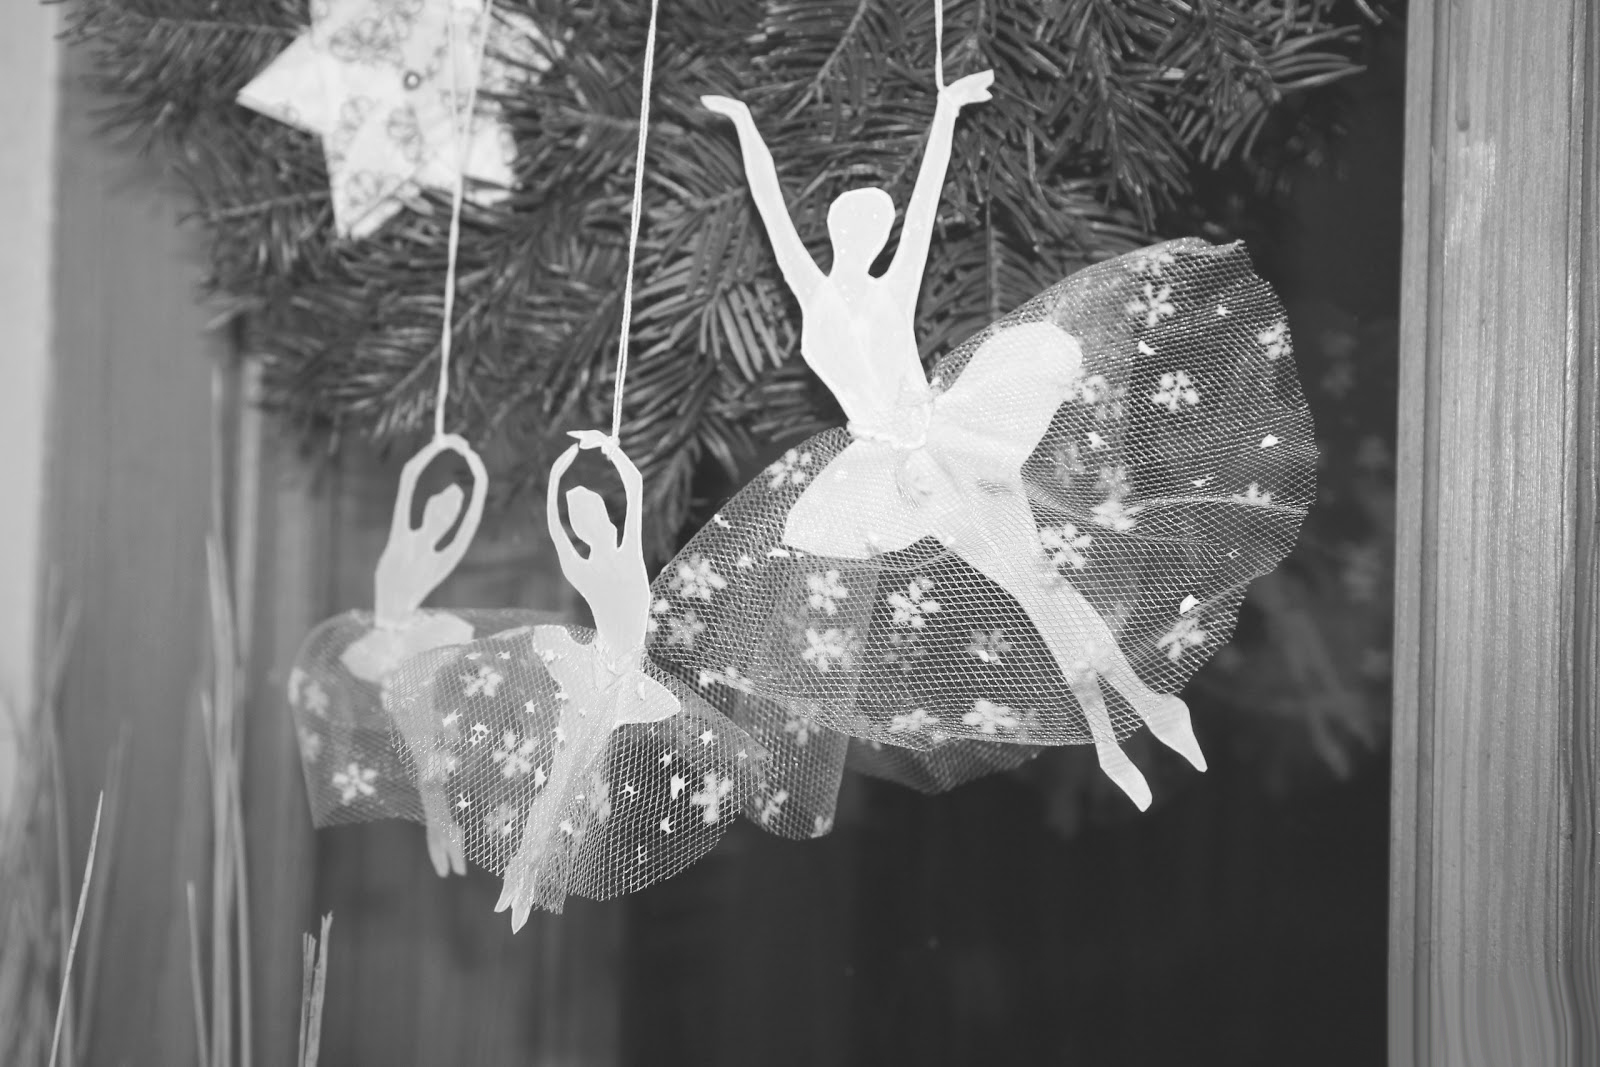
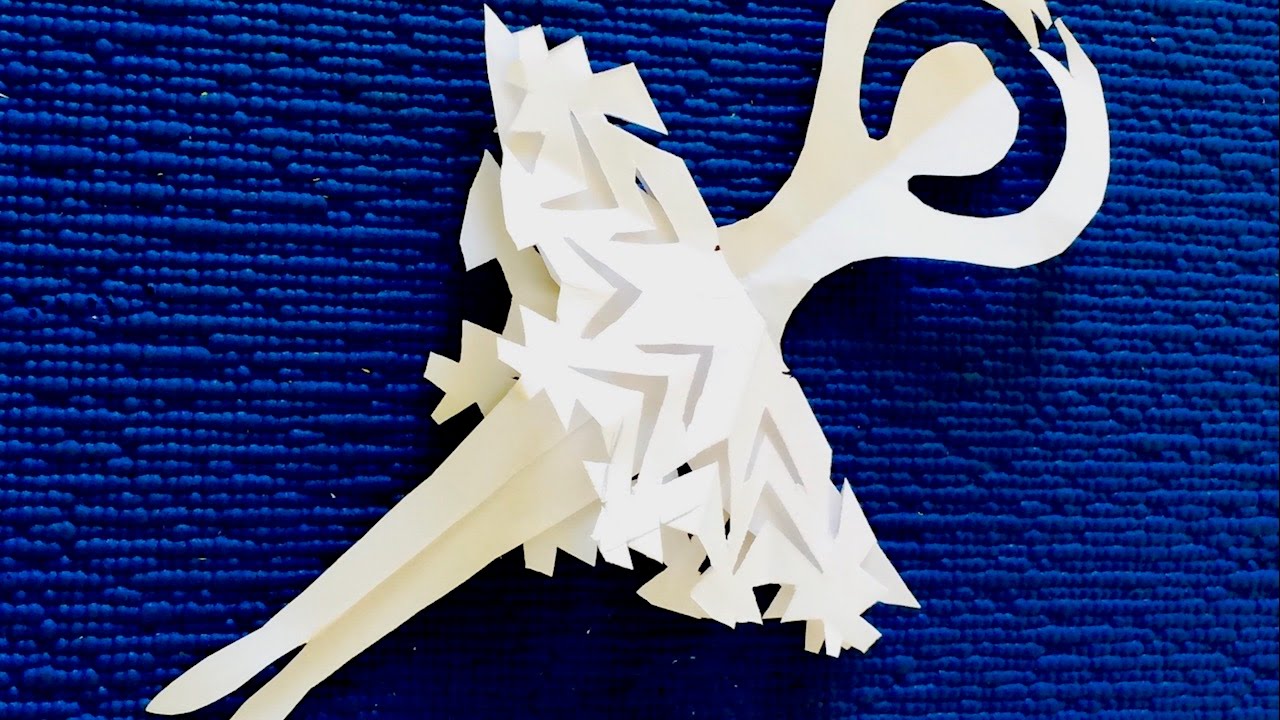
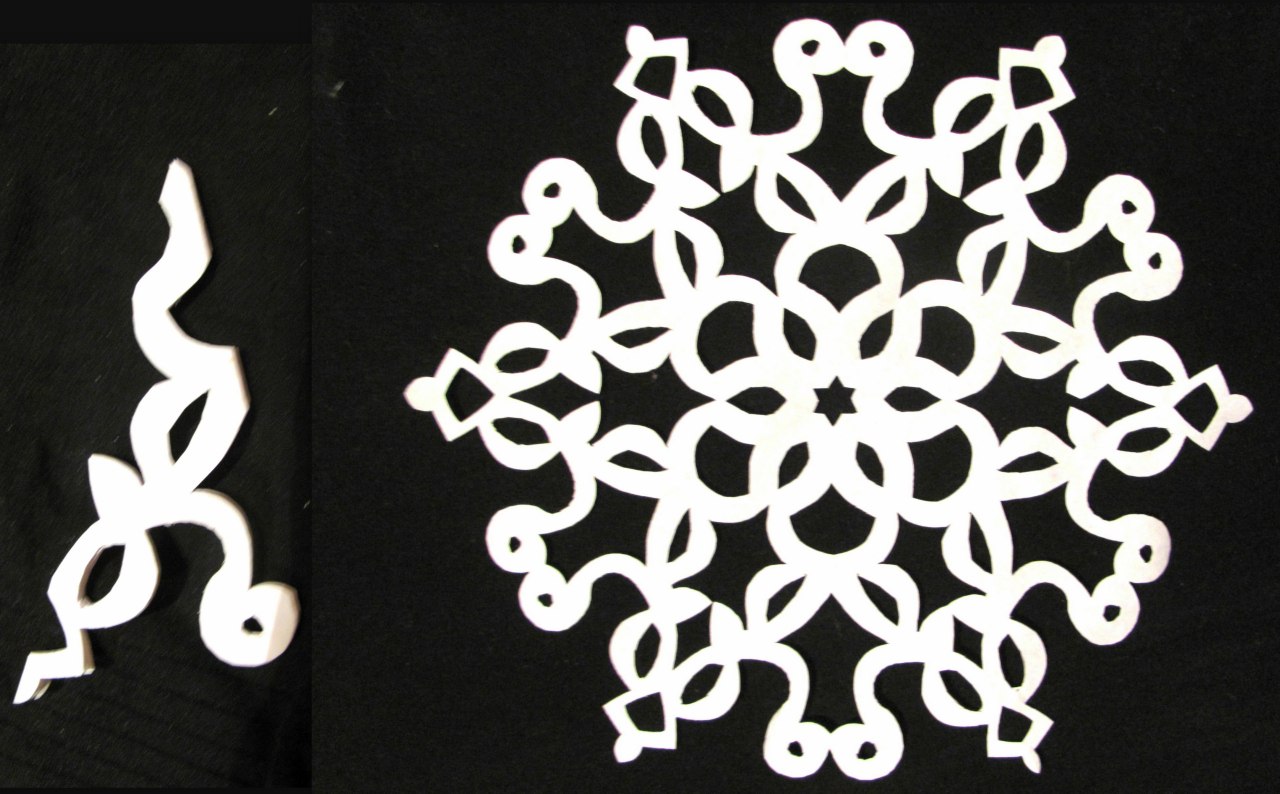
- proceed to the manufacture of the skirt. To do this, take the second sheet of paper, bend it so that you get a triangle. Cut off the excess;
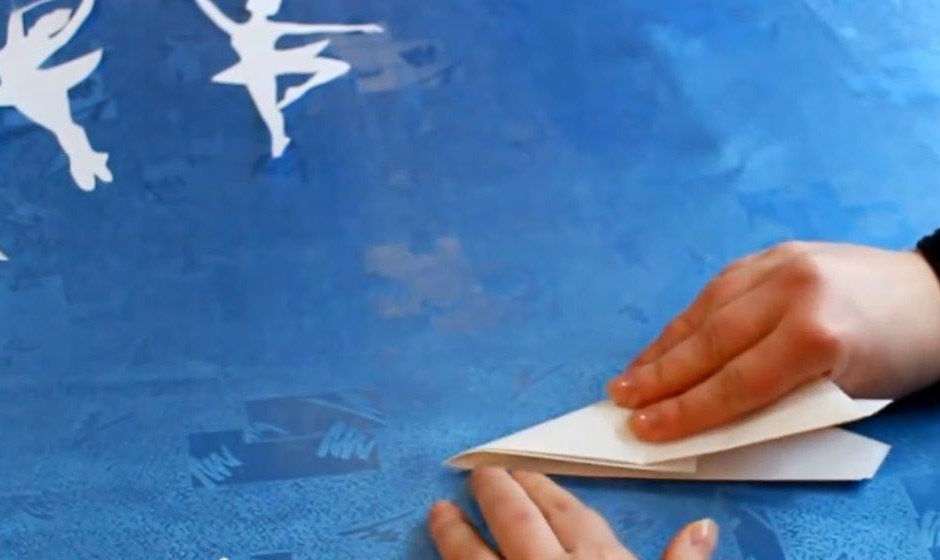
Making a blank skirt
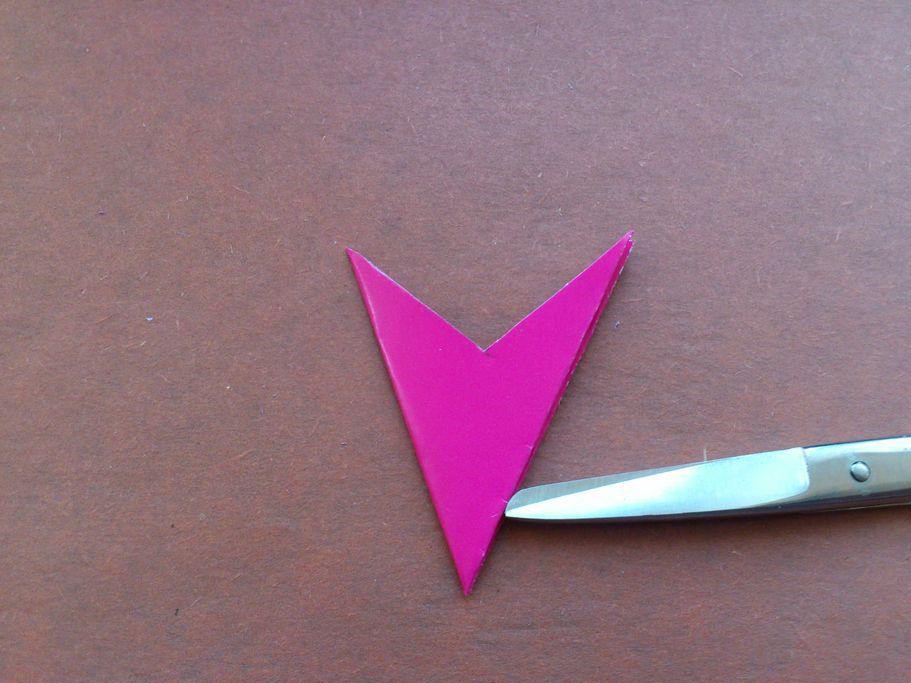
- fold the triangle three times and cut the part that is redundant;
- To make the skirt beautiful, it is better to cut the patterns, draw a pattern on the triangle and only then cut off the unnecessary parts;
Cut the workpiece by drawing
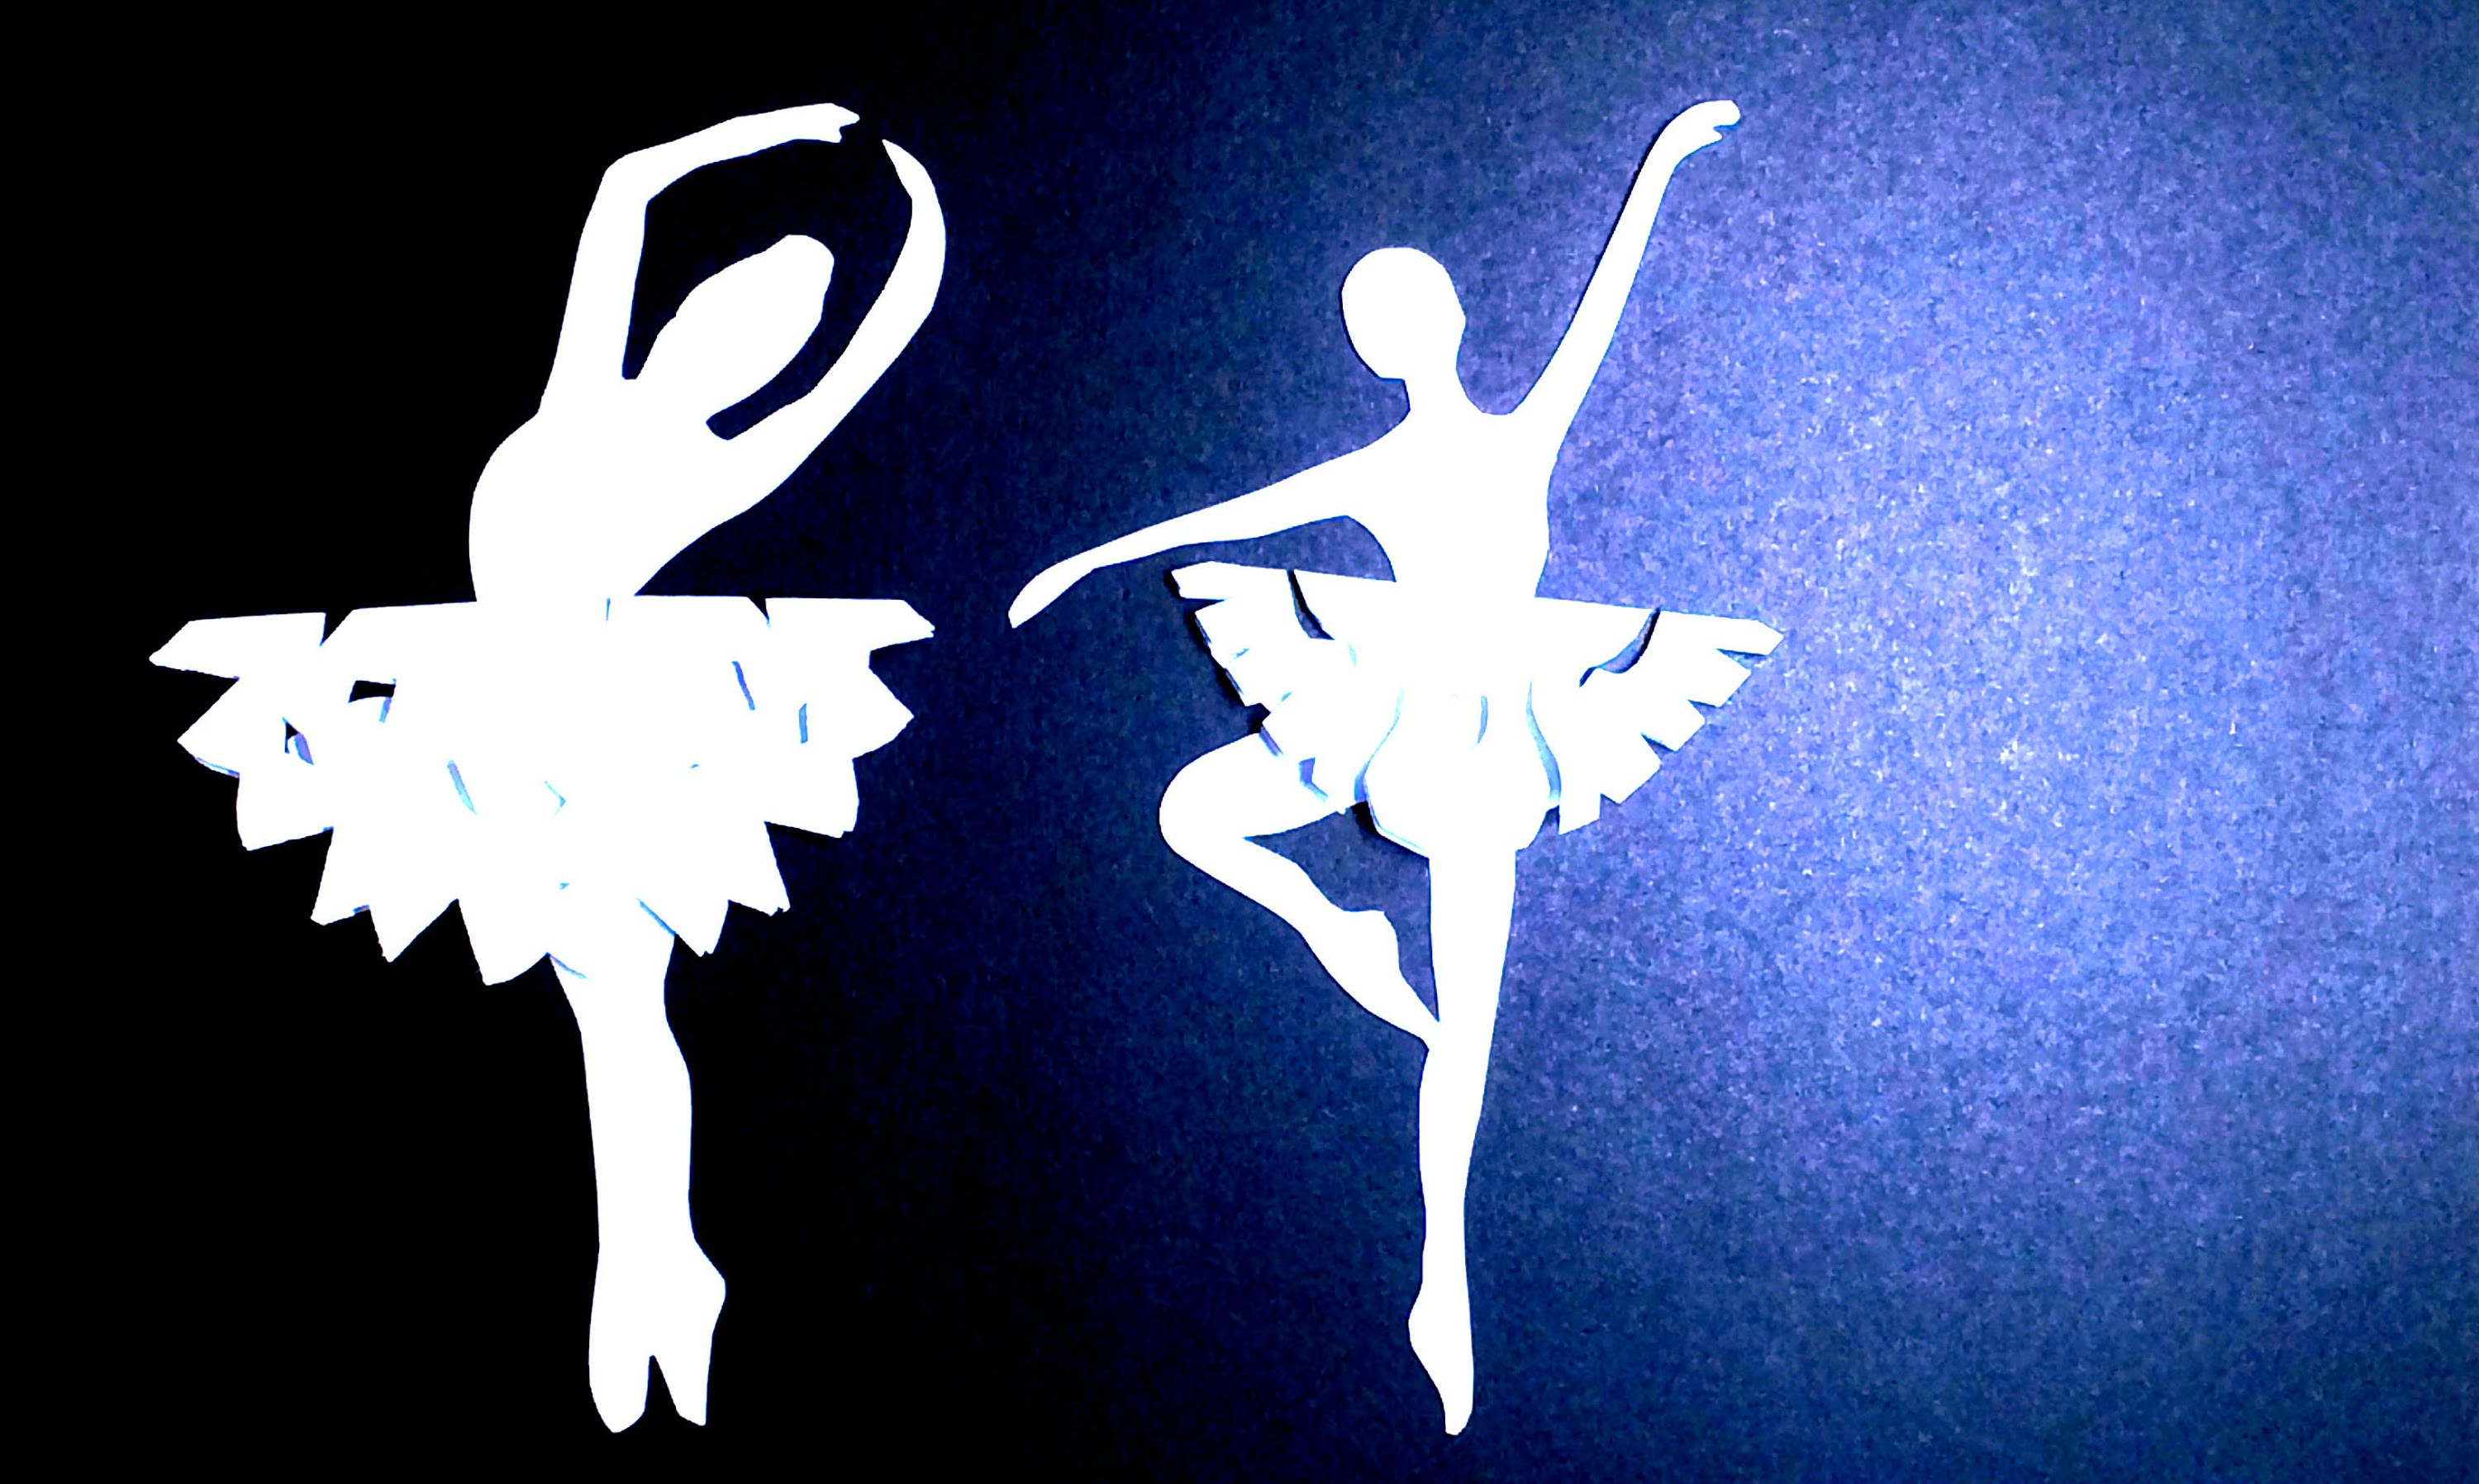
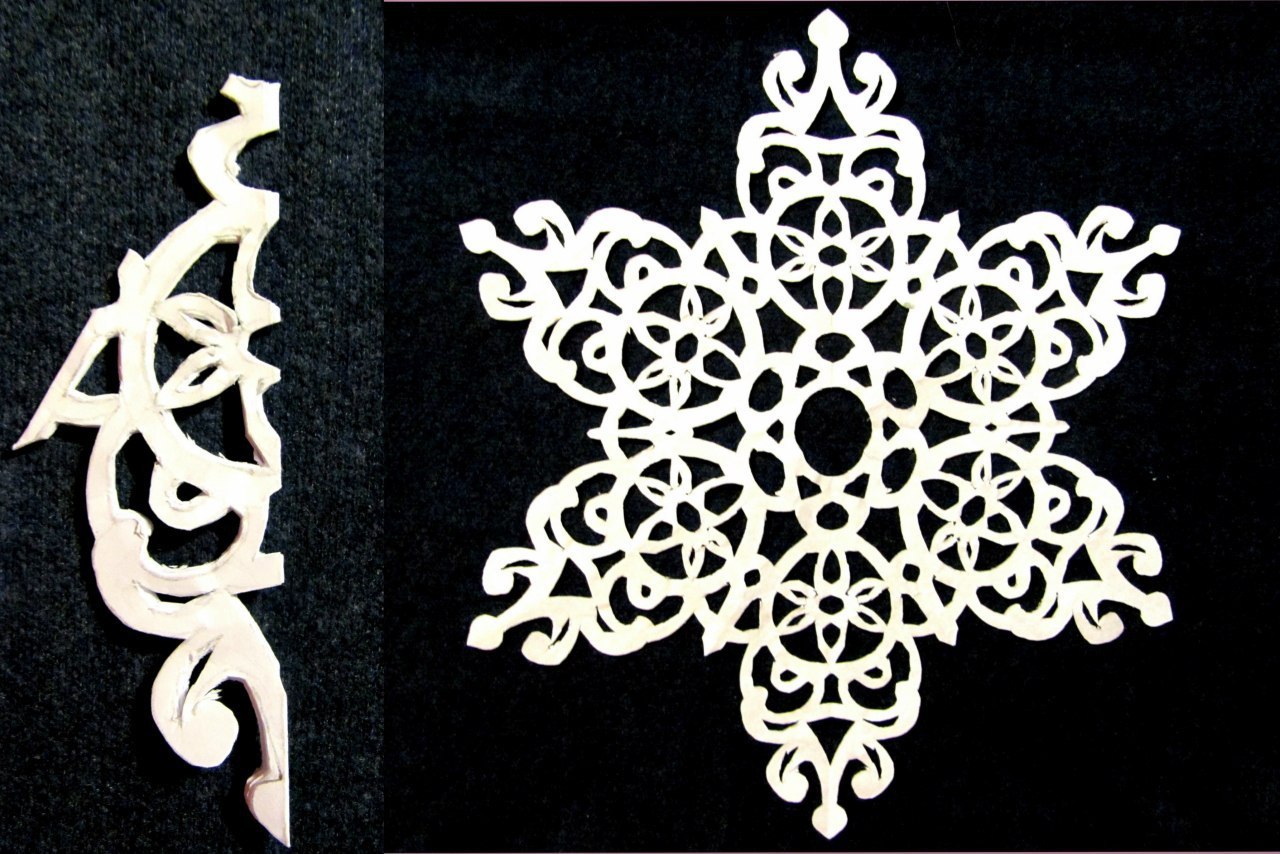
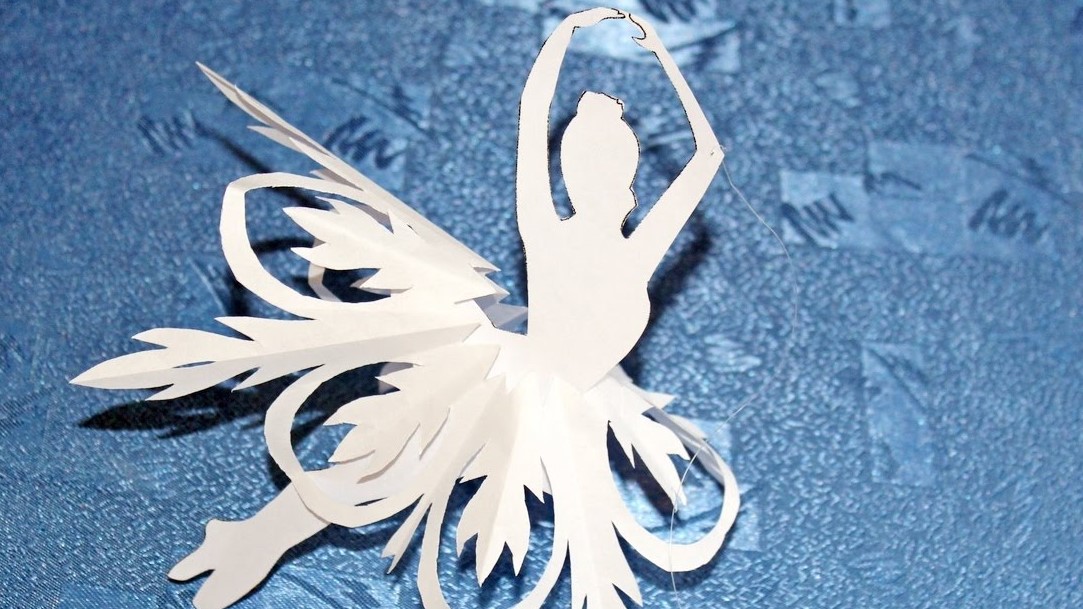
We get beautiful snowflakes ballerinas
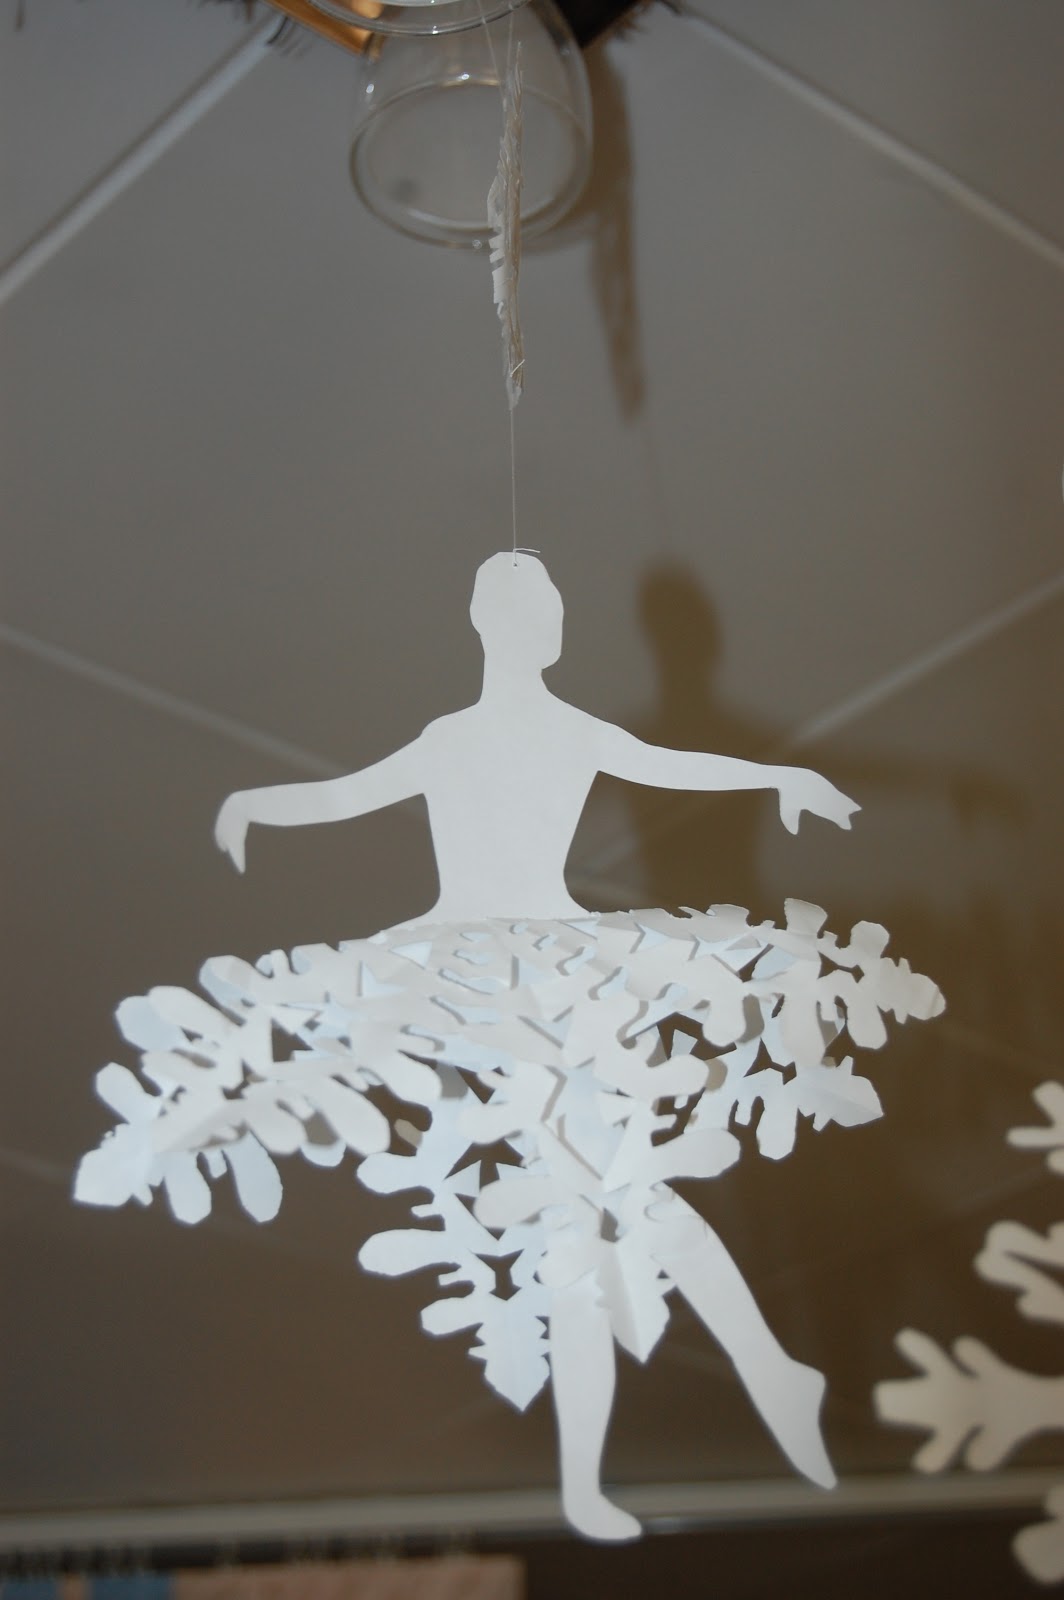
The ballerina can be placed both on the wall and on the Christmas tree. To do this, in its upper part make a small hole with a needle, thread. If it is placed on the wall, then the stack (skirt) lift up from the side that will be adjacent to the surface. If desired, the ballerina can decorate, giving her individuality.
Decorate any place in the house
It will be interesting to you:REVIEW: How to make Beautiful Candlesticks do it yourself for the New Year (95+ Photos): Original ideas for master classes
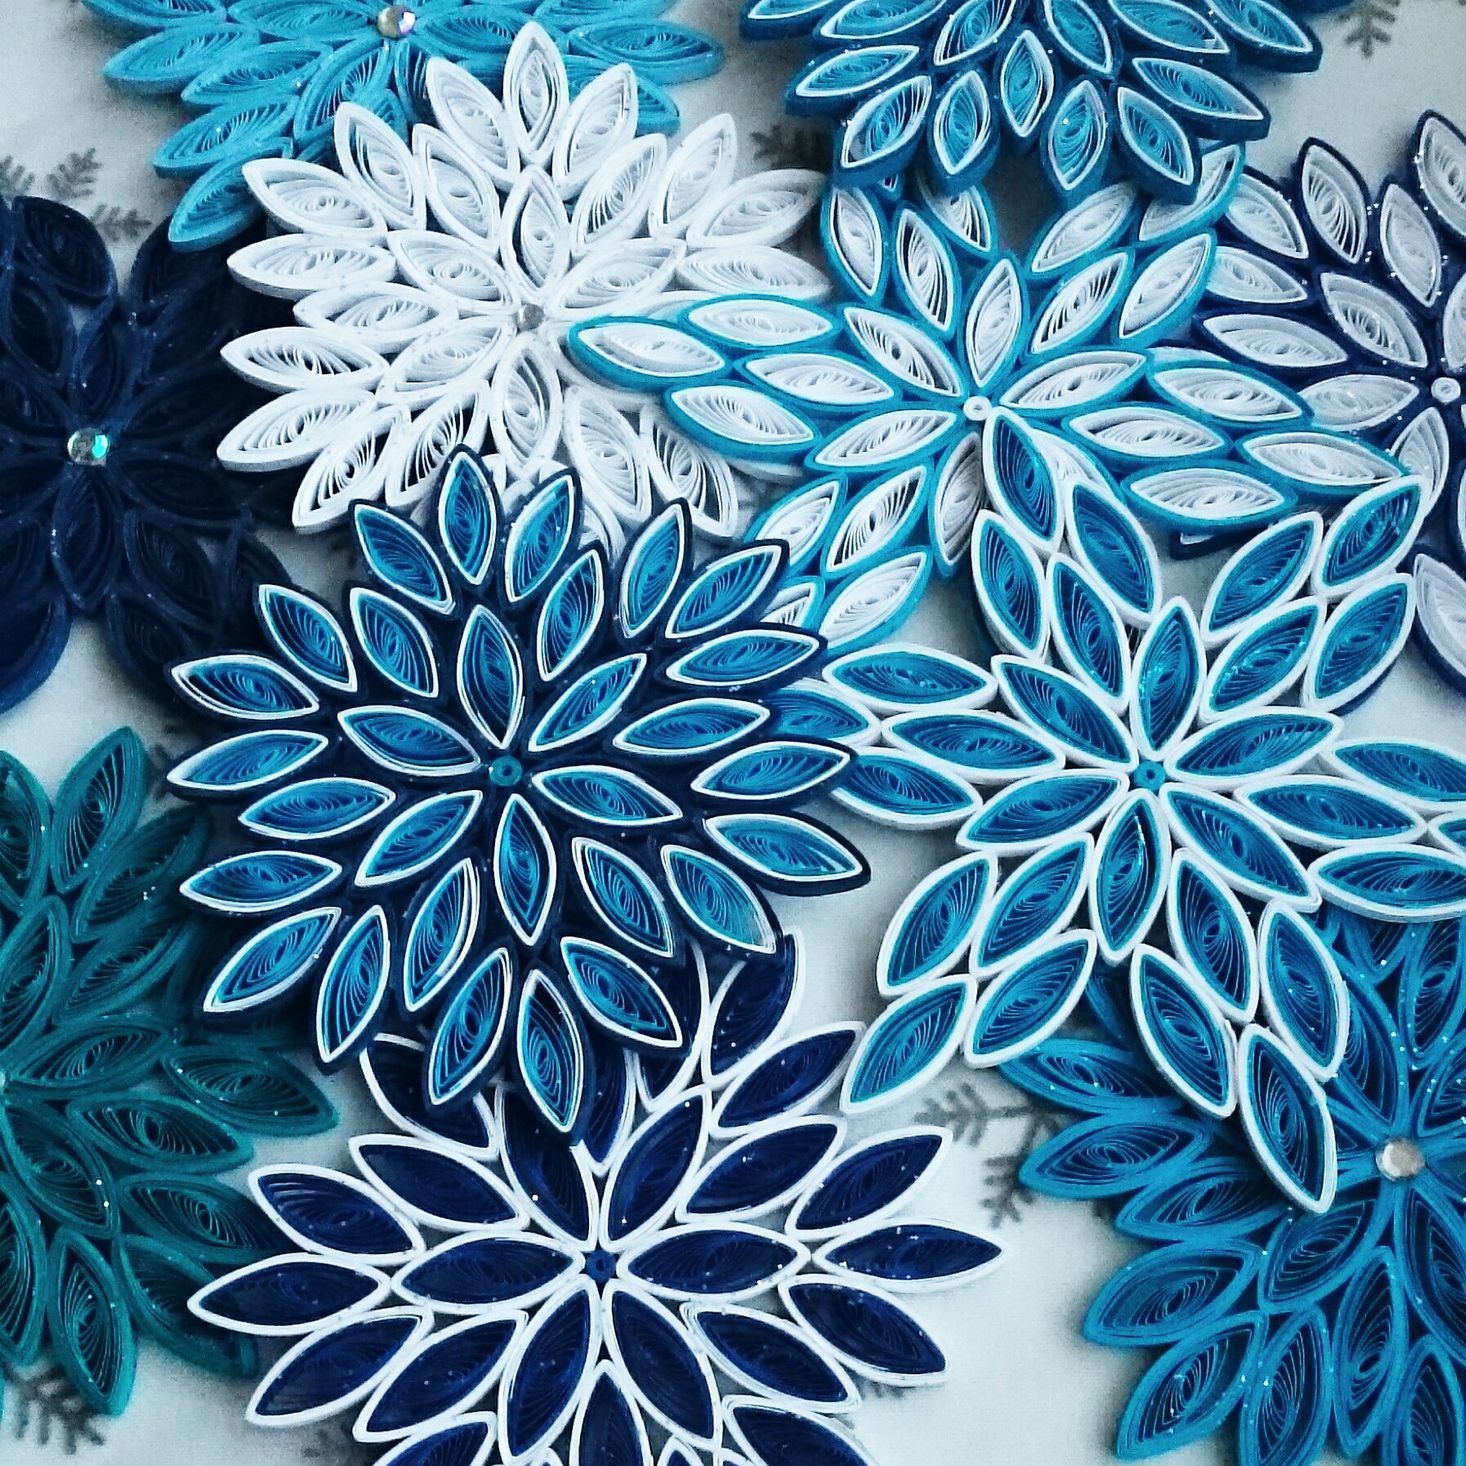
return to menu ↑ return to menu ↑Simplified Quilling
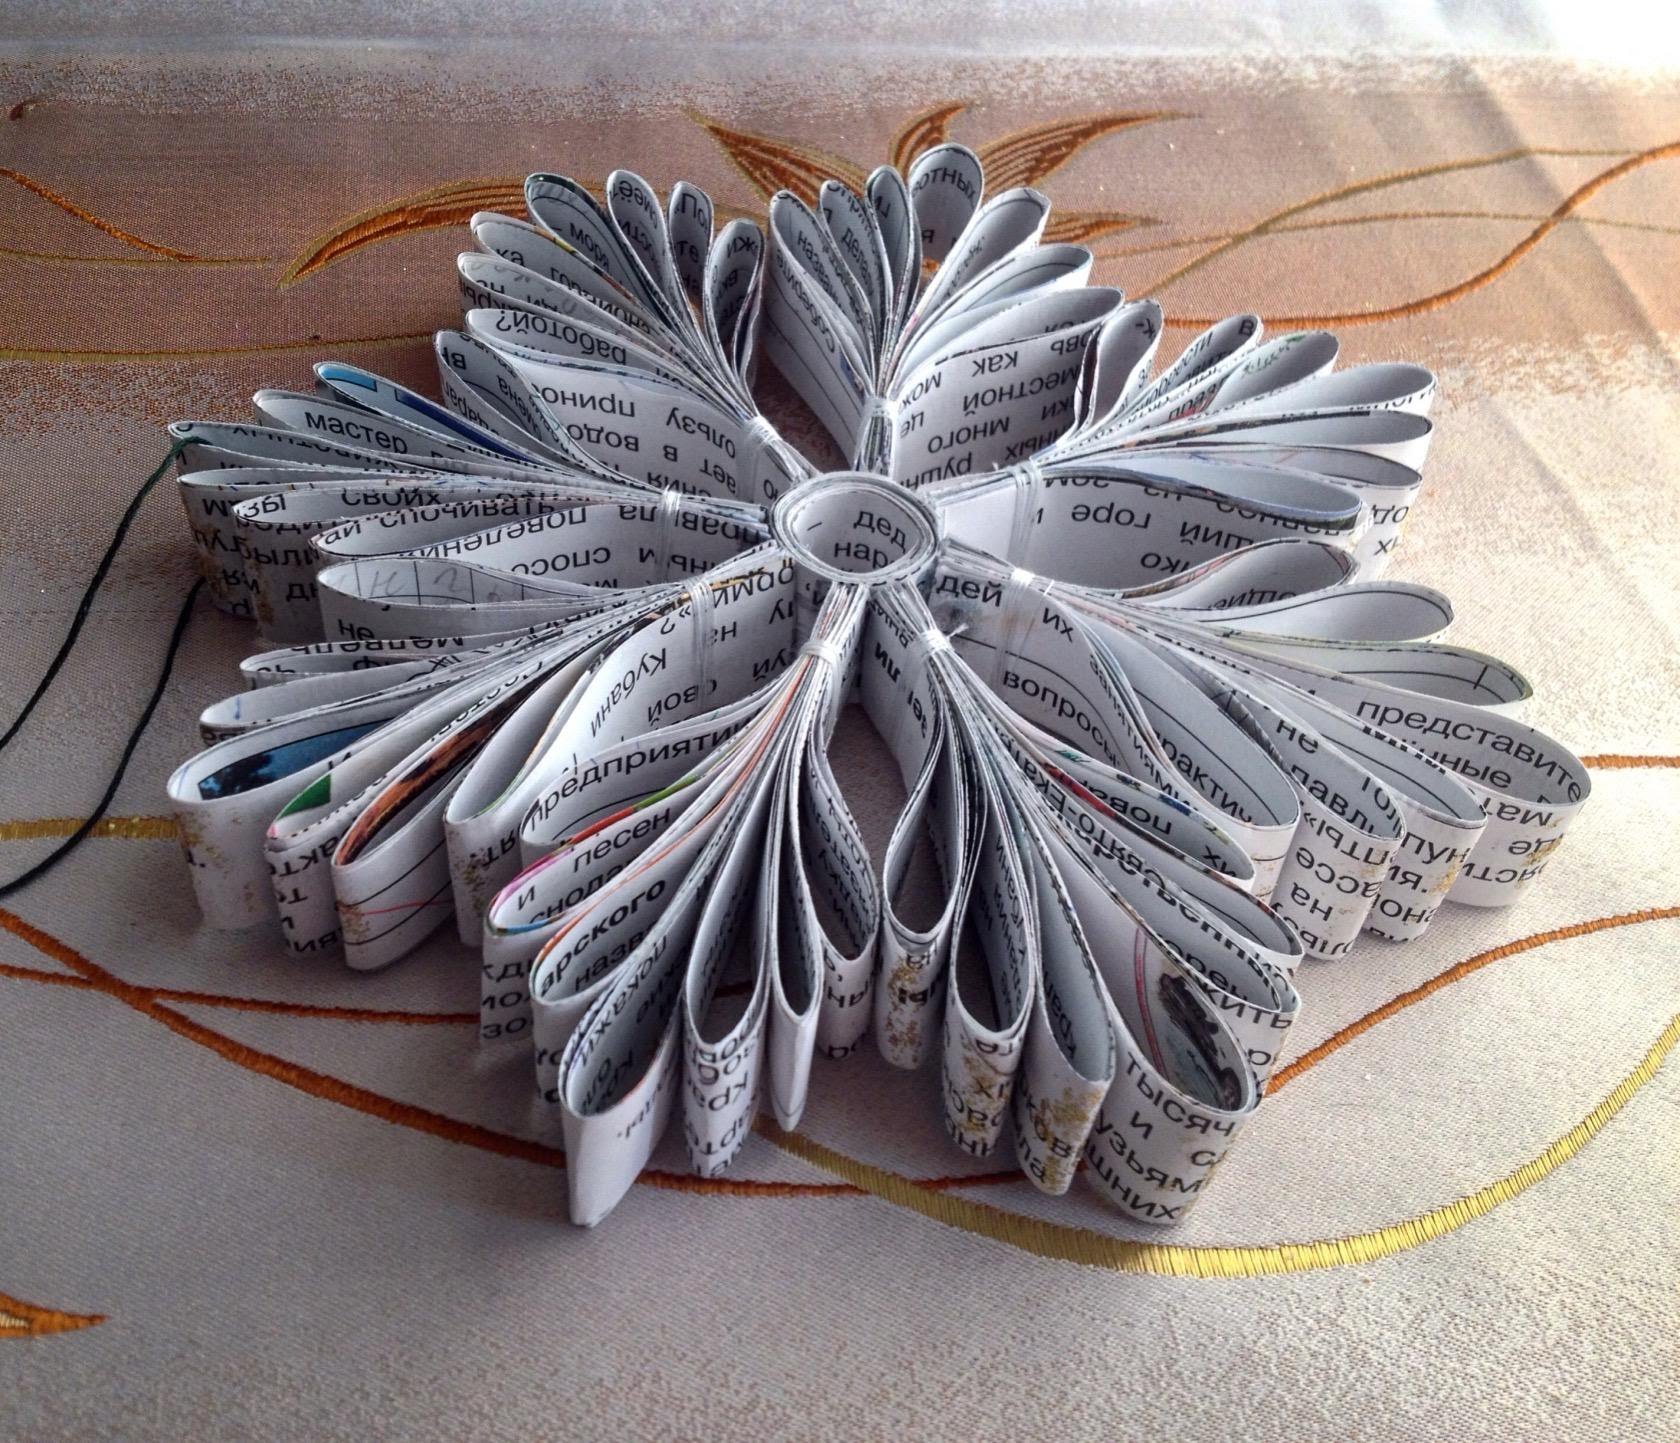
Quilling technology is the most popular. However, making this method requires patience, time, but the result is worth it.
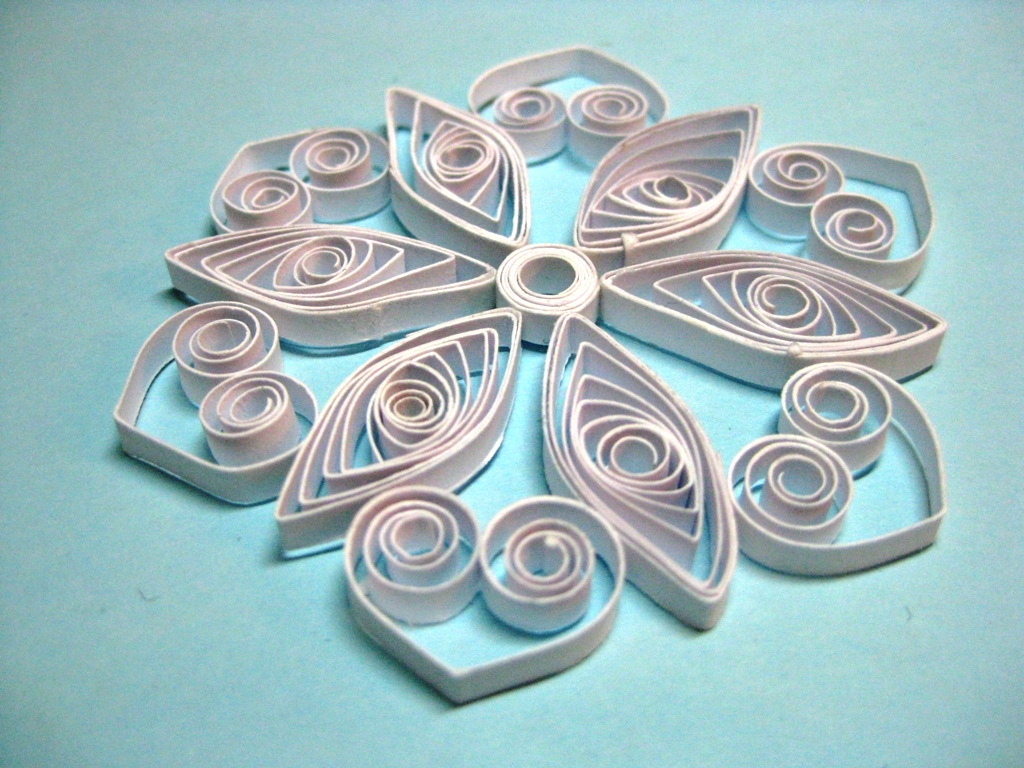
Unusual work in the technique of quilling
For the manufacture of our crafts will need:
- soft paper, even an old newspaper will do;
- unnecessary book;
- scissors;
- glue;
- sparkles.
We proceed to the manufacture of:
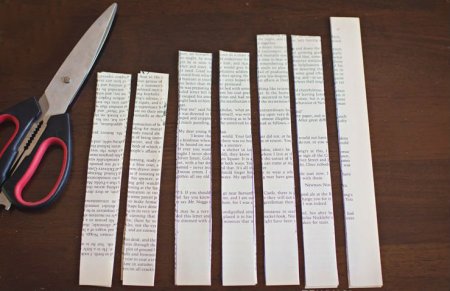
Cut out the strips as shown.
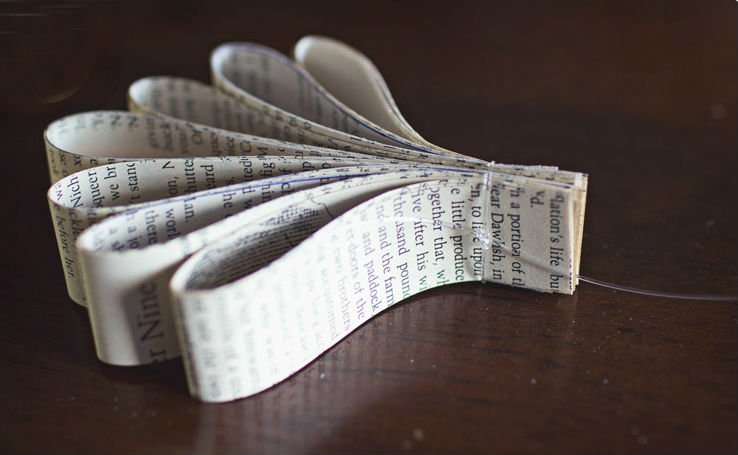
Tying petals with fishing line
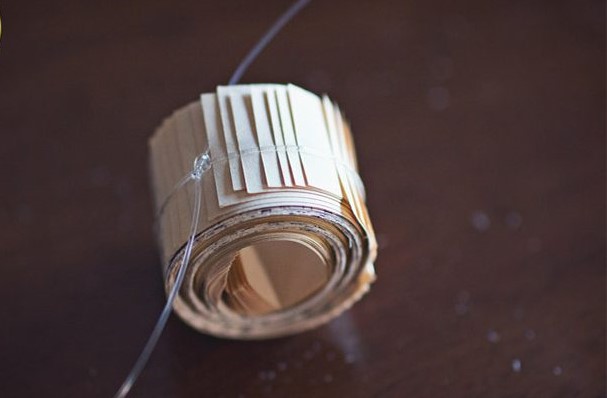
Twist the ring-based
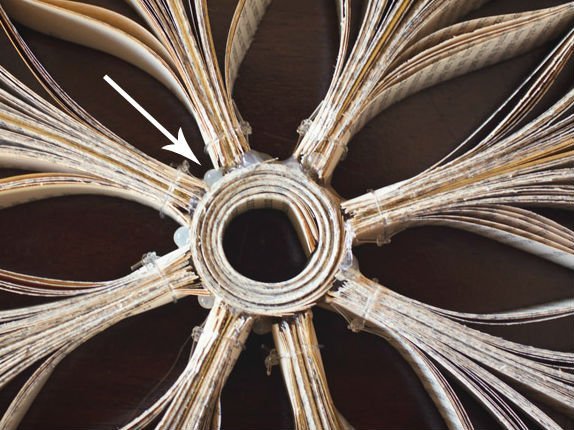
Fastened to the warp ready petals
Sprinkle the finished work with glitter to hold it, put it on the glue. Thus, you get beautiful snowflakes to decorate the house in the New Year holidays. It is suitable for chandeliers, Christmas trees.
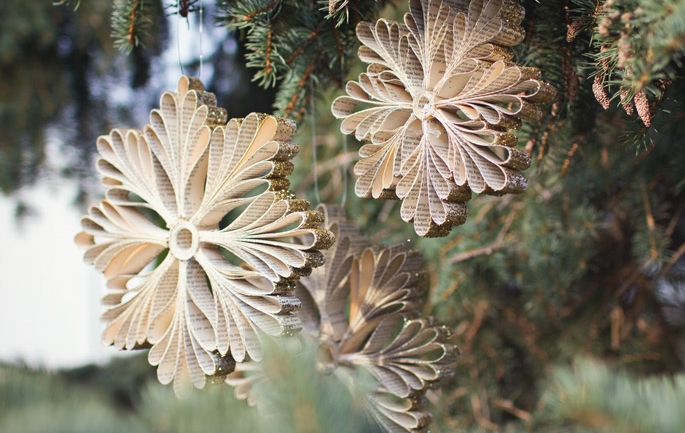
We hang the finished product on the Christmas tree
It will be interesting to you:REVIEW: Crafts from spruce cones (large, painted) for the New Year (175+ Photos) Beautiful crafts for the holiday!
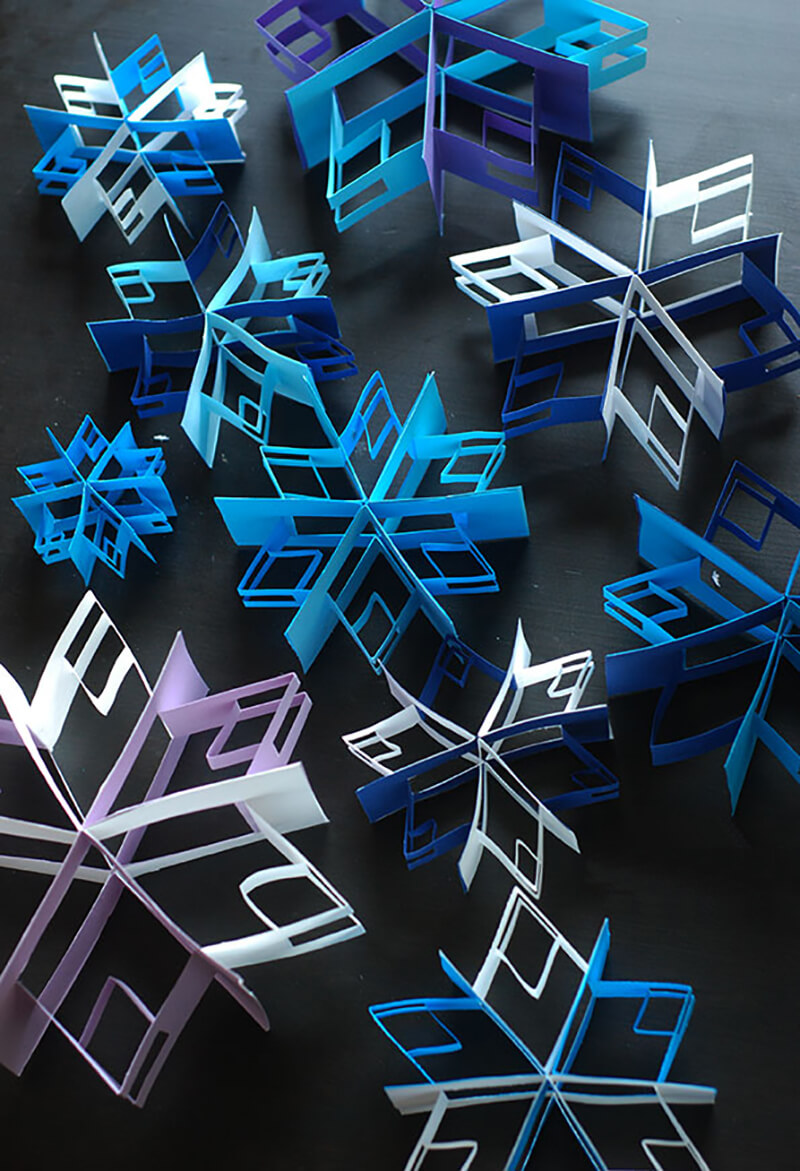
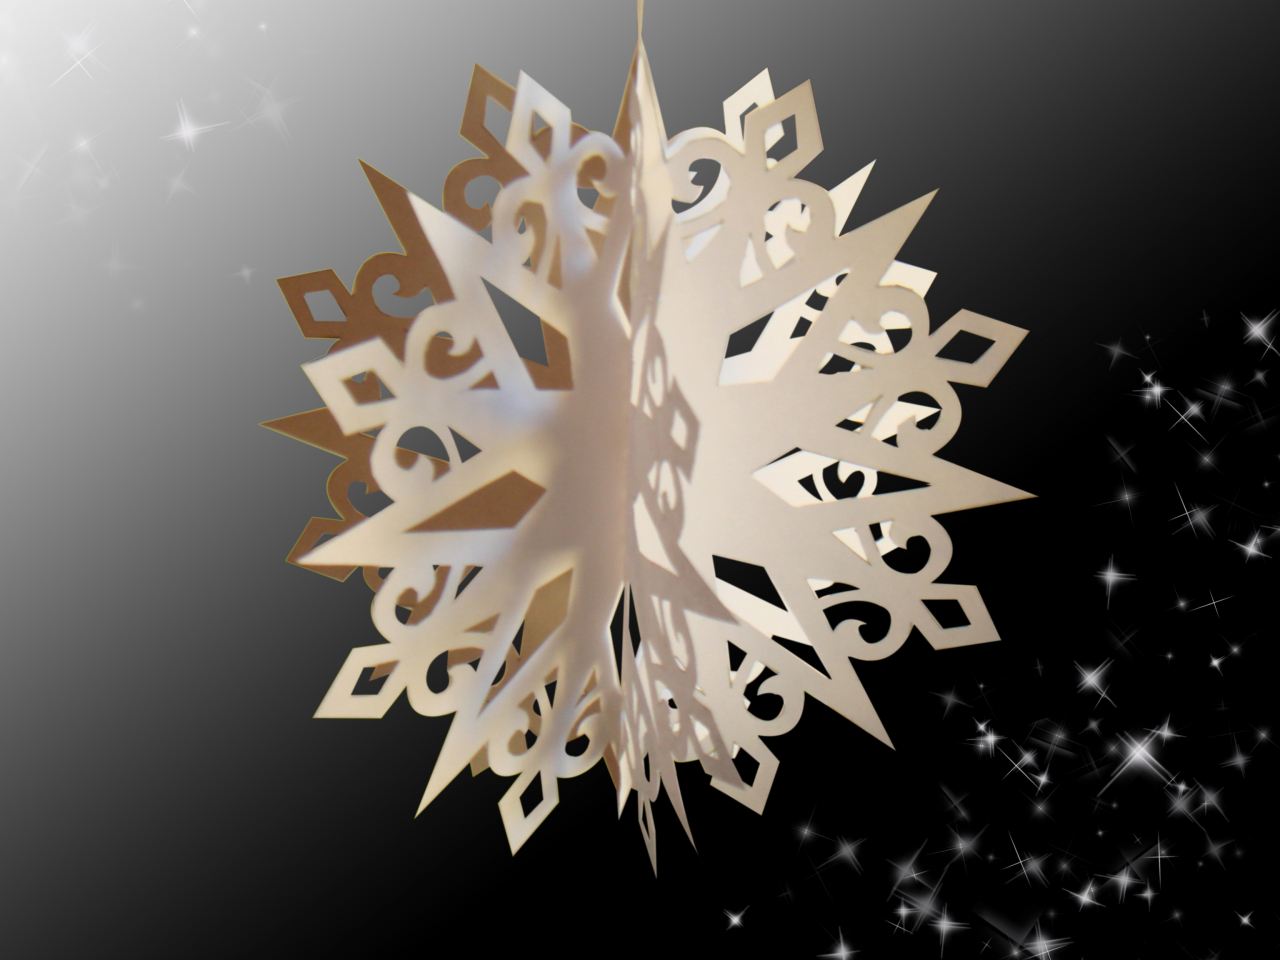
return to menu ↑ return to menu ↑3D surround
A few minutes of your time, a little imagination and you will get beautiful snowflakes to decorate your home. They are ideal for decorating chandeliers, cornices.
To make a 3D cook: scissors, stationery knife, ruler, tape, stapler. So, step by step production:
- for making need to take thick paper. You can also use not traditionally white sheets, and take the multi-colored;
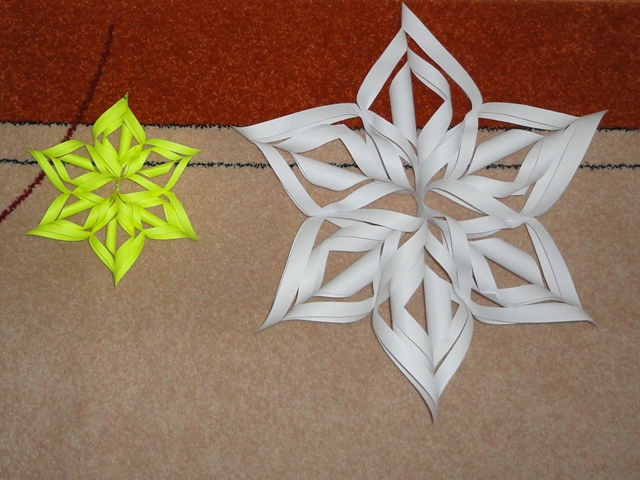
- 6 squares of equal size must be cut out of paper;

Cut six squares
- attention, they should not touch (1 cm between them);
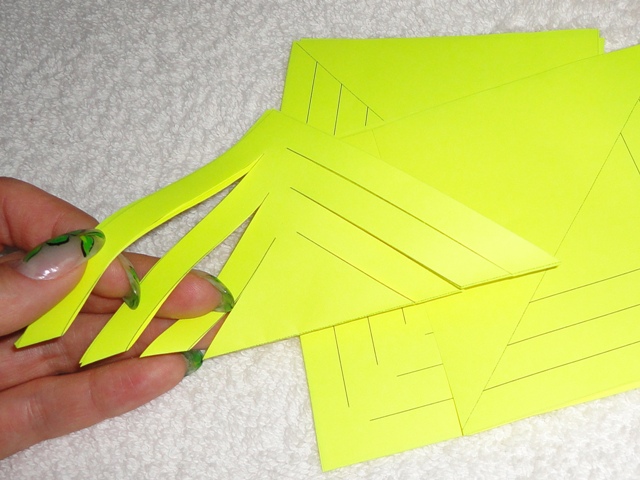
Cut six squares
- open the workpiece so that the cuts are vertical. Then the inner edges need to be twisted into a tube, glued together;
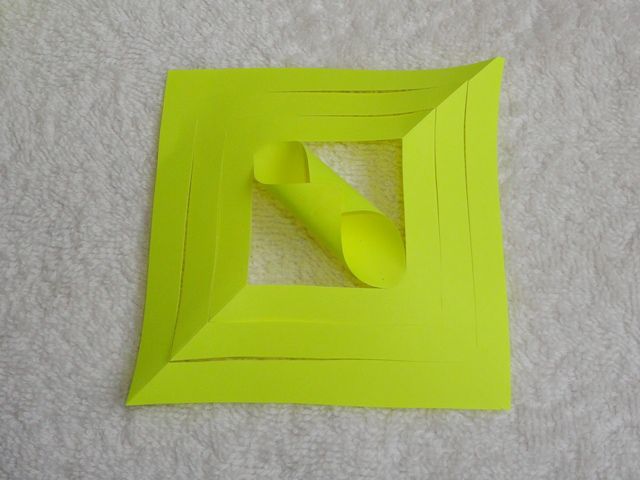
Glue the first cut
- we turn a leaf, we connect the following strips by means of glue. After that, turn over the sheet again, connect the third row. Thus, we have something like a flashlight;
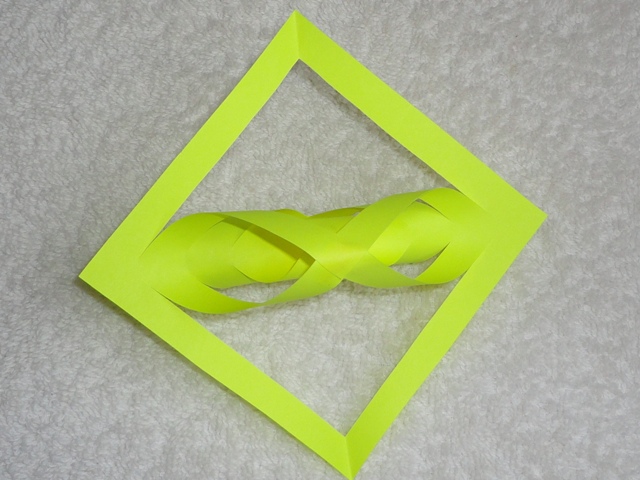
Glue all the cuts alternately
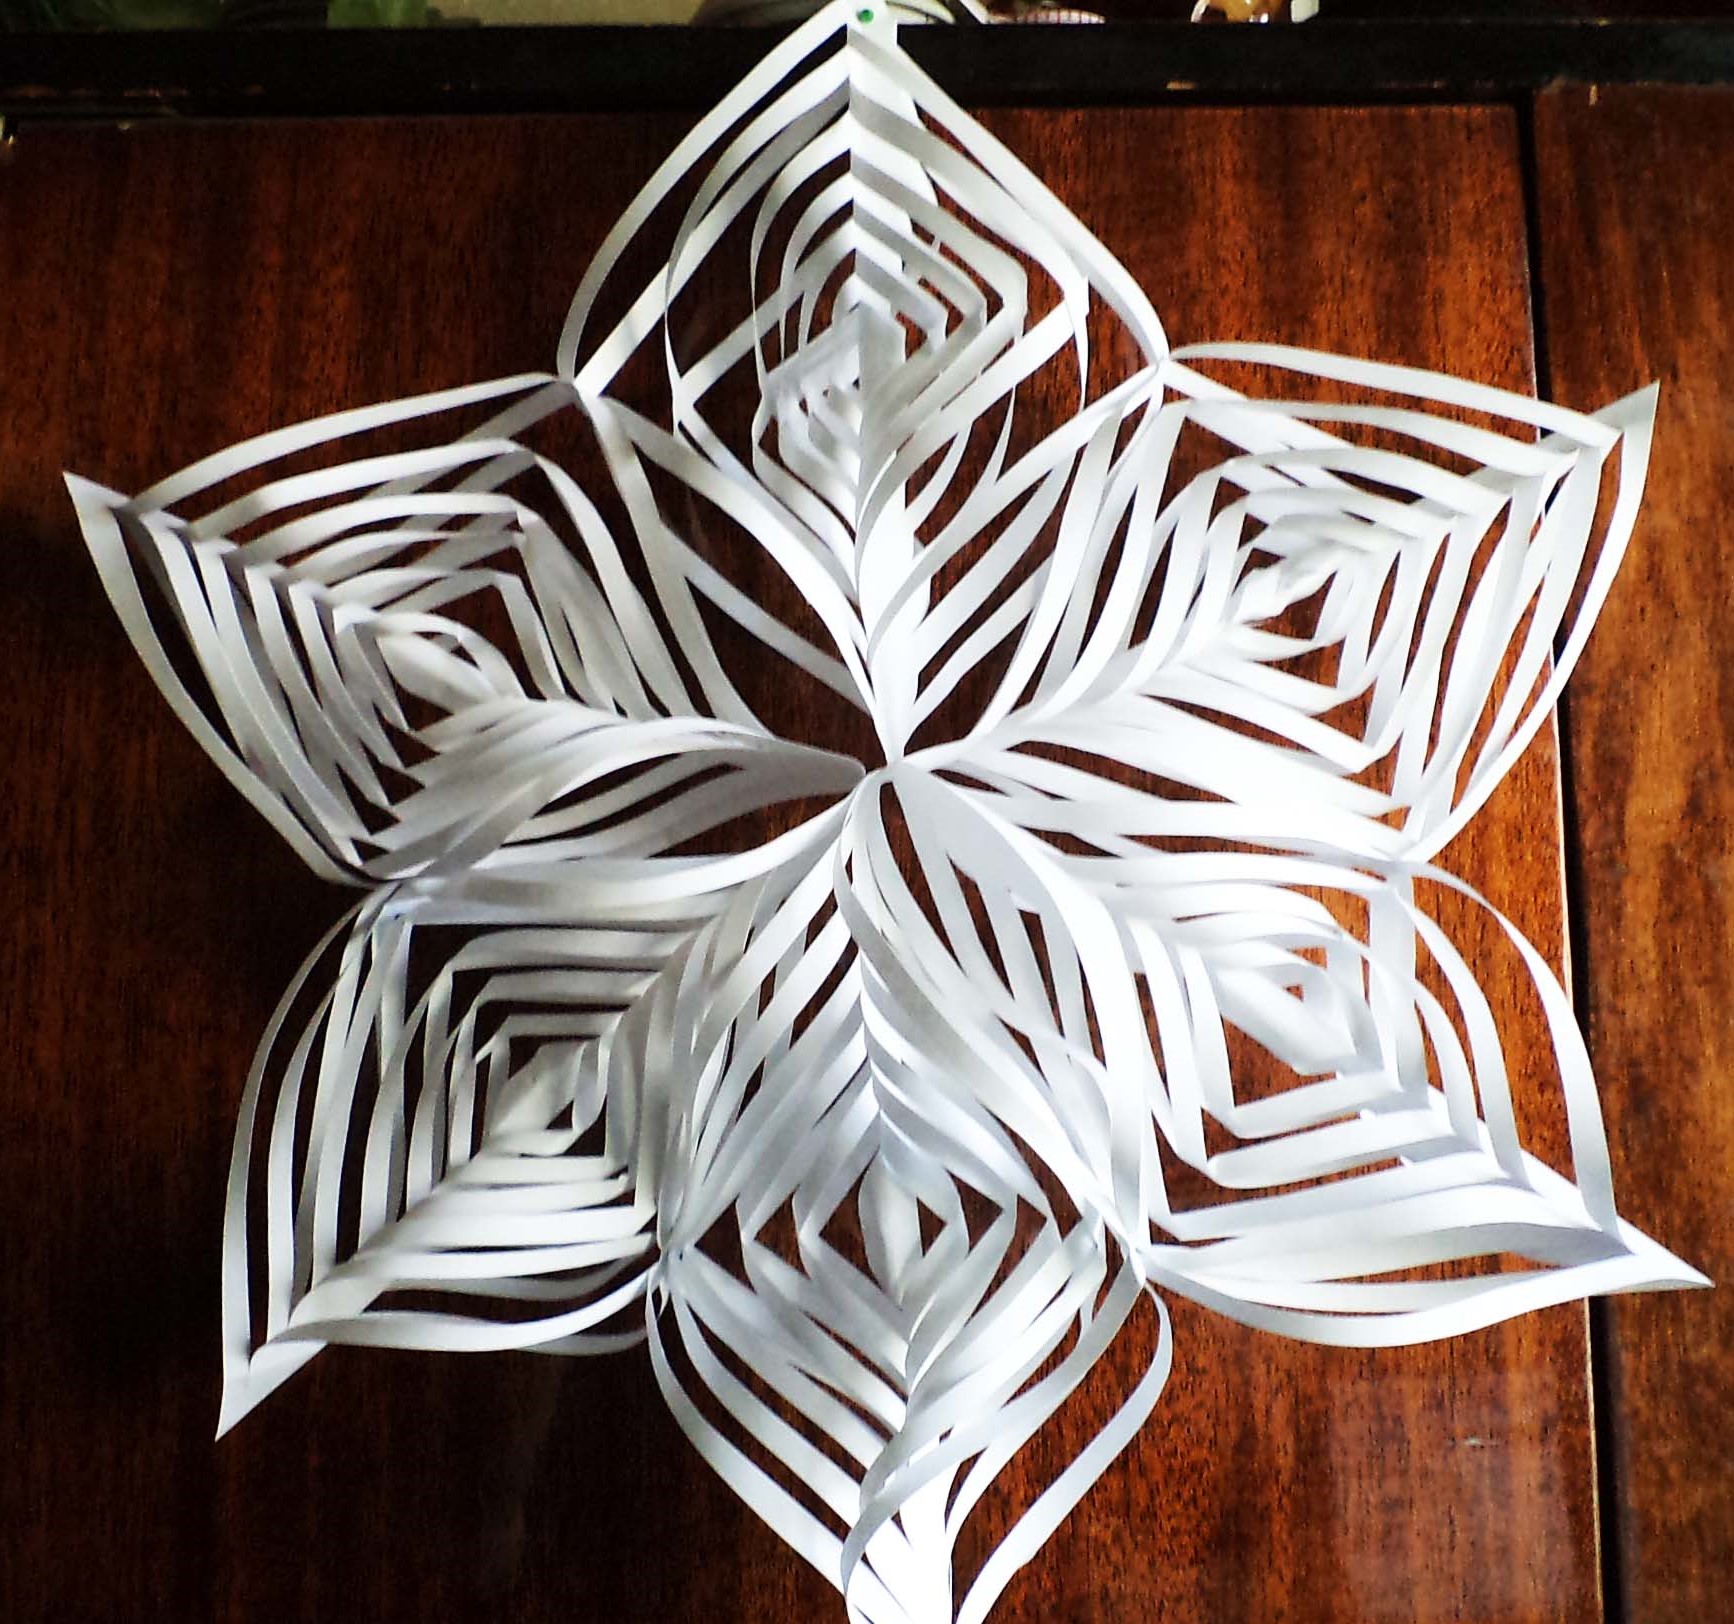
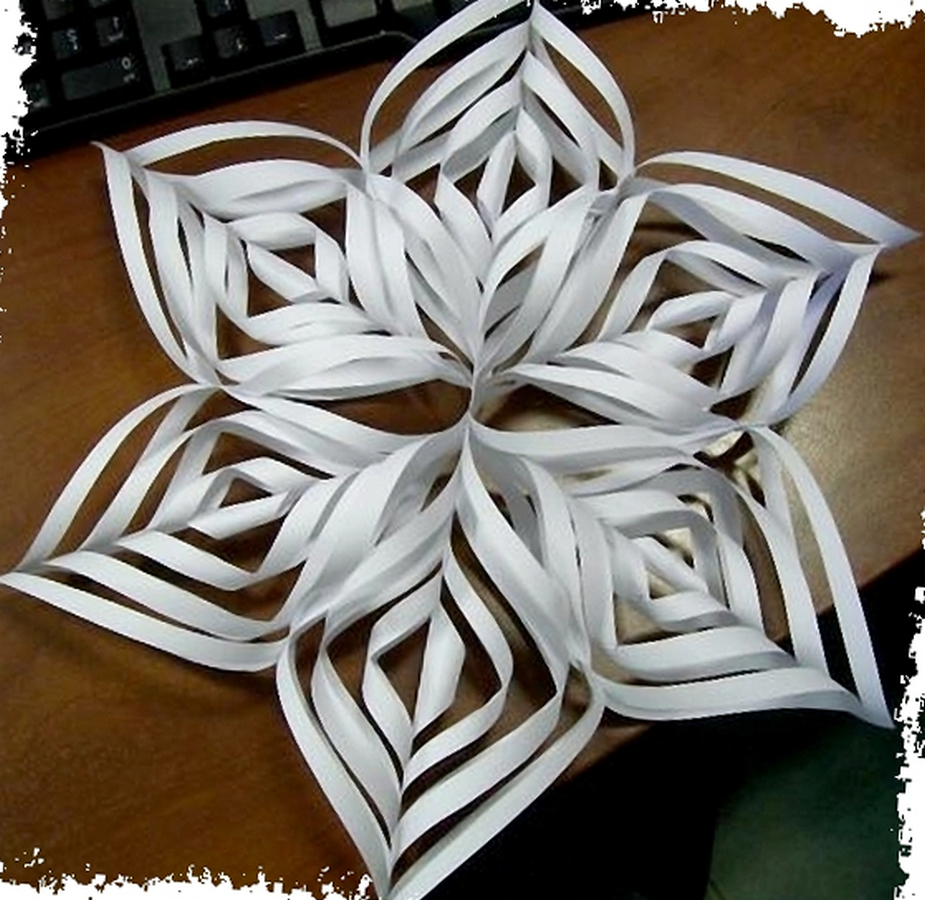
- the same work needs to be done with all the blanks. After receiving six identical snowflakes, they need to be stapled together. Its middle part and sides are glued together so that one turns out to be a beautiful volumetric one.
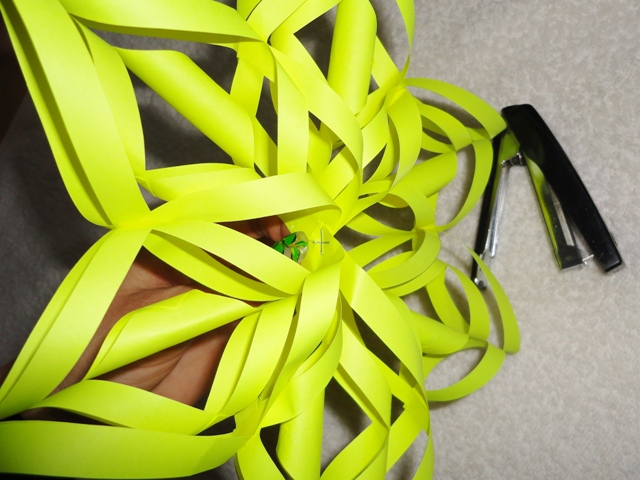
We fasten ready-made lanterns with a stapler.
Making it even brighter
Make it brighter to help color paper or paint. For example, you can take to paint each of the bands in a different color. Just do not need to use bright shades, so as not to turn ugly. It is better to choose blue, pink, gold, yellow.

Make each element colored.
New Year's paper decor
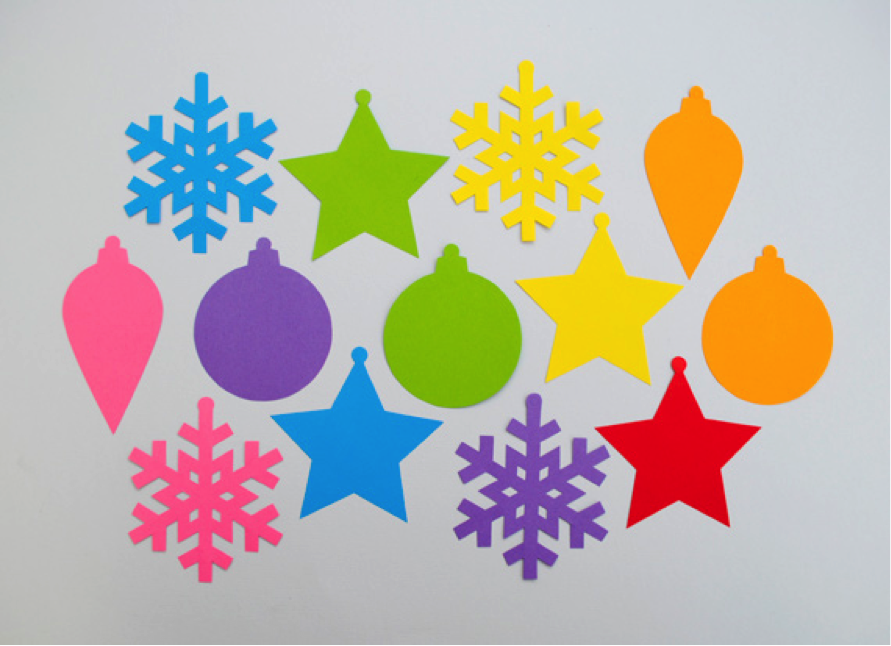
Christmas tree, window - these are standard options, where we used to place decorations. But if you show a little imagination, you can decorate your house in a different way. Excellent options for decoration will be: a chandelier, a window sill, a dining table, walls.
Very nice look crafts on New Year the table. To decorate it enough, cut out standard products from colored paper, put them on the table, and fix them on top with glass or another transparent material.
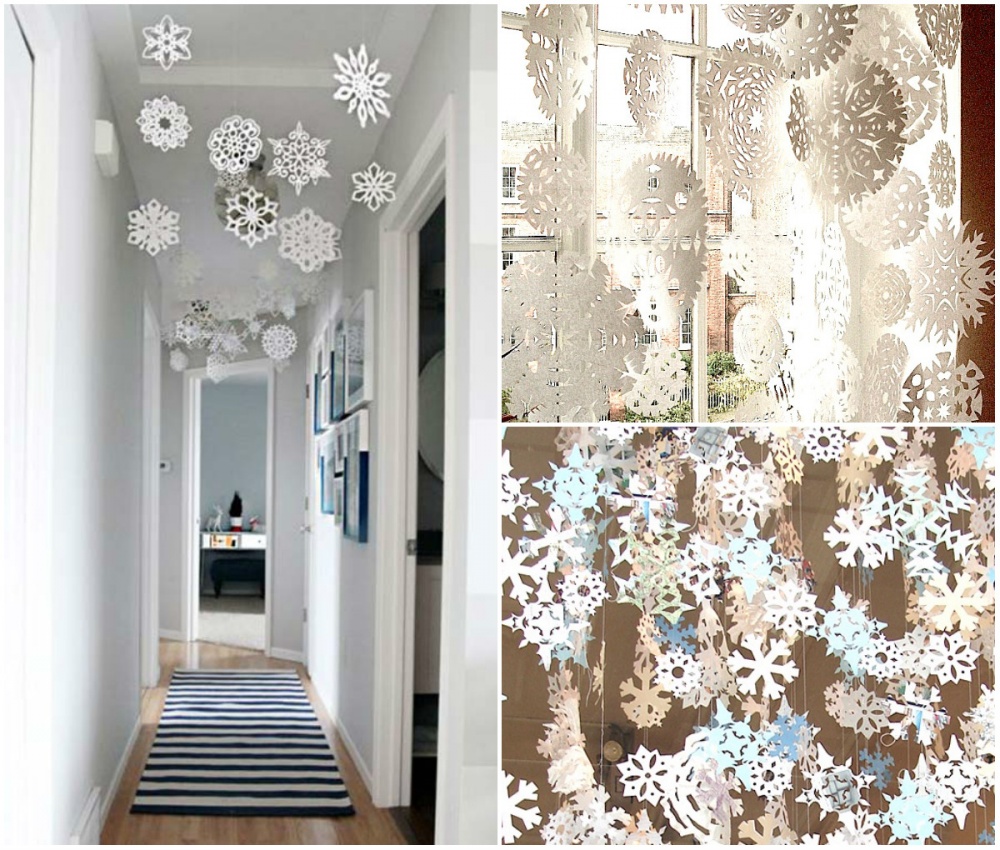
Decorate every corner of the house
If you do not get enough light into the windows, then this option is not for you. But if on the contrary, crafts can be glued to the window, but for this, do not limit yourself to making only standard versions. Show imagination, make with the help of paper different landscapes, pictures. For example, a house in the woods, surrounded by lots of snow.
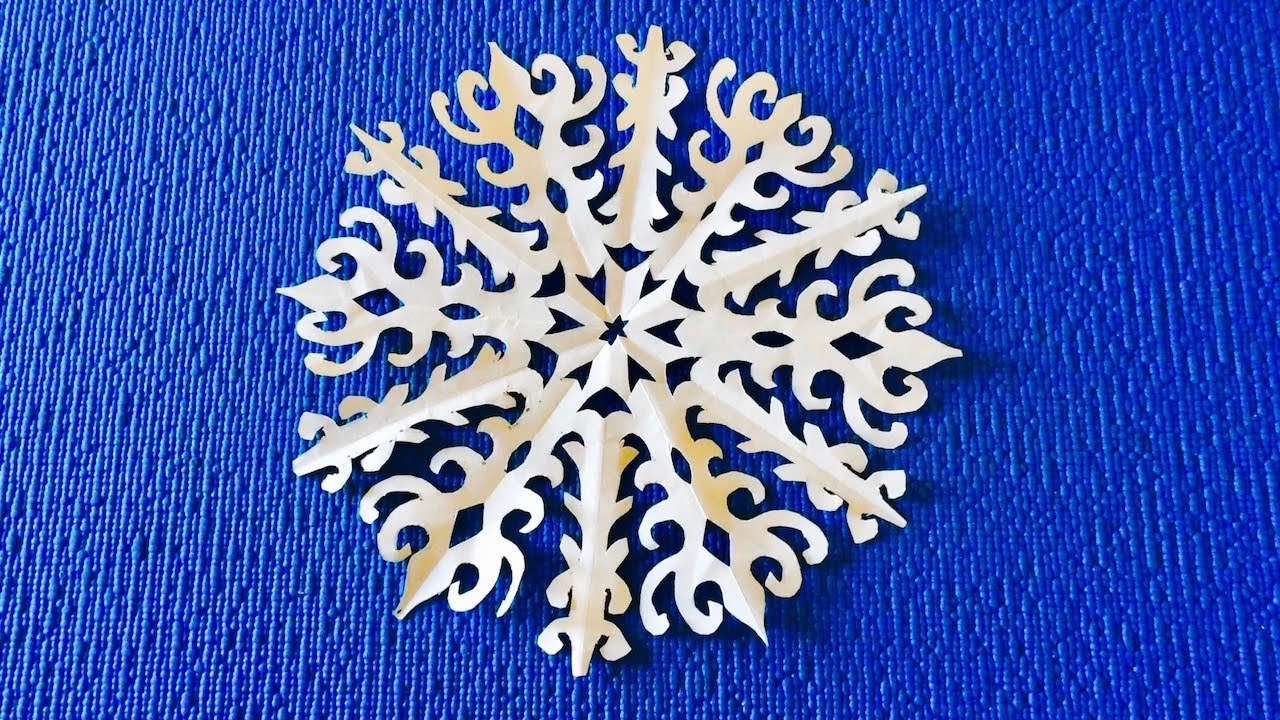
return to menu ↑VIDEO: Beautiful snowflake kirigami for decor
Making a snowflake together
Snowflake in Kirigami technique


After reading the article, I immediately wanted to make a snowflake out of paper. I always thought that it was so troublesome and long. And for that you just need to be able to do all that. Found old newspapers and started to cut. In the end, I just could not believe my eyes and hands. I had a very beautiful snowflake, which is not a shame to hang in the apartment. After a positive experience, be sure to do a few more. Thanks for the master class for beginners like me.